Introduction
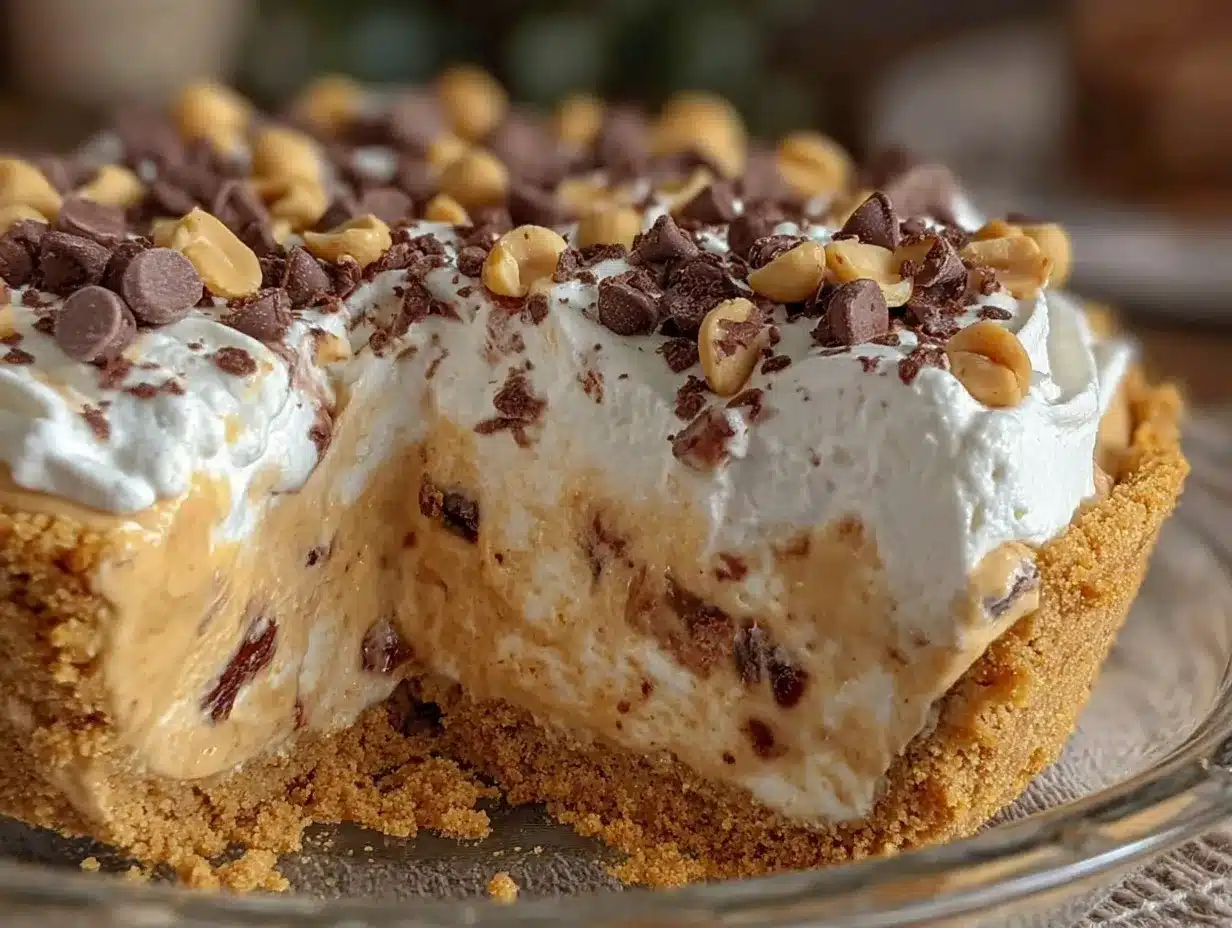
I remember the night I first made this creamy no-bake loaded peanut butter pie like it was yesterday. It was one of those evenings where I was just too wiped out to crank up the oven, but honestly, I still craved something indulgent. I had a jar of peanut butter sitting on the counter and thought, “Why not just throw something together?” I was half-expecting a flop, but, surprise—this pie turned out unbelievably smooth, rich, and packed with texture. The peanut butter flavor was bold but balanced, not overly sweet, and the topping? Just the right amount of crunch and creaminess. It quickly became my go-to when I want a dessert that feels like a hug but comes together without a fuss. And the best part? It doesn’t even need baking, which means I can whip it up in minutes and still impress anyone who walks through the door. Honestly, this pie stuck around in my rotation because it feels like comfort food without the chaos.
Why You’ll Love This Recipe
- Quick & Easy: Comes together in under 20 minutes, perfect for busy weeknights or unexpected guests.
- Simple Ingredients: Pantry staples like creamy peanut butter, cream cheese, and whipped topping—no need for specialty items.
- Perfect for Any Occasion: Whether it’s a casual family dinner, a potluck, or a laid-back weekend treat, this pie fits right in.
- Crowd-Pleaser: Kids and adults alike always ask for seconds (and thirds).
- Unbelievably Delicious: The creamy filling melds with a crunchy, buttery crust and a loaded topping of chocolate and peanuts for texture.
- Unique Twist: Unlike other peanut butter pies, this one blends a touch of cream cheese for tang and depth, plus a no-bake crust that stays perfectly crisp.
This recipe isn’t just another dessert; it’s the kind that makes you close your eyes after the first bite and savor that perfect peanut butter moment. It’s comfort food with a cool, effortless vibe that feels just right—no stress, no oven, just pure satisfaction.
What Ingredients You Will Need
This recipe uses simple, wholesome ingredients to deliver bold flavor and satisfying texture without the fuss. Most of these are pantry staples, and you can easily swap a few if needed.
- For the Crust:
- 1 ½ cups graham cracker crumbs (about 12 full crackers, crushed finely)
- 6 tablespoons unsalted butter, melted (I like using Land O’Lakes for a rich flavor)
- 2 tablespoons granulated sugar (balances the saltiness)
- For the Filling:
- 1 cup creamy peanut butter (Jif or Skippy work great for smoothness)
- 8 ounces cream cheese, softened (room temperature for easiest mixing)
- 1 cup powdered sugar, sifted (helps avoid lumps)
- 1 teaspoon pure vanilla extract
- 1 ½ cups heavy whipping cream, cold (for that perfectly fluffy texture)
- For the Topping:
- ½ cup chopped roasted peanuts (unsalted or lightly salted depending on your preference)
- ¼ cup mini chocolate chips (semi-sweet or milk chocolate, your call)
- Optional: drizzle of melted chocolate or peanut butter for garnish
Ingredient Tips: If you want a gluten-free version, swap graham cracker crumbs for gluten-free cookies or almond flour. For dairy-free, try coconut cream instead of heavy whipping cream and a dairy-free cream cheese alternative. The key is keeping the peanut butter the star of the show.
Equipment Needed
- 9-inch pie pan (glass or ceramic works best for no-bake pies)
- Mixing bowls (medium and large)
- Electric mixer or stand mixer (to whip the cream and blend filling smoothly)
- Measuring cups and spoons
- Spatula (for folding and scraping sides)
- Food processor or plastic bag and rolling pin (to crush graham crackers, unless you buy pre-crumbled)
If you don’t have an electric mixer, a whisk and some arm strength can do the job, but the texture won’t be as fluffy. I once made this by hand when my mixer broke, and it took a bit longer but still worked fine. For budget-friendly, you can find affordable hand mixers that make this process quick and easy.
Preparation Method
- Prepare the crust (10 minutes): Crush graham crackers finely using a food processor or place them in a sealed plastic bag and crush with a rolling pin. In a medium bowl, combine the crumbs, melted butter, and sugar. Stir until the mixture looks like wet sand. Press evenly into the bottom and up the sides of your pie pan. Use the bottom of a glass to press firmly. Place crust in the fridge to chill and set while you make the filling.
- Make the filling (15 minutes): In a large bowl, beat the softened cream cheese and peanut butter together until smooth and creamy with an electric mixer on medium speed. Add the powdered sugar and vanilla extract and mix until combined. In a separate chilled bowl, whip the heavy cream until stiff peaks form (this usually takes about 3-5 minutes). Gently fold the whipped cream into the peanut butter mixture in three additions, being careful not to deflate the cream. The filling should be light, fluffy, and spreadable.
- Assemble the pie (5 minutes): Remove the crust from the fridge and spread the filling evenly over it. Smooth the top with a spatula. Sprinkle the chopped peanuts and mini chocolate chips generously over the pie. Add an optional drizzle of melted chocolate or peanut butter if you like it extra loaded.
- Chill (at least 4 hours or overnight): Cover the pie with plastic wrap and place in the fridge. This step is key for the filling to set properly. The crust will stay crisp and the filling will slice cleanly. If you’re in a hurry, 2 hours is a bare minimum, but patience really pays off here.
Pro tip: If the filling feels too soft after chilling, let it sit at room temperature for 10 minutes before serving to soften slightly for perfect slices. And if you overmix the whipped cream, the filling can turn dense—so fold gently!
Cooking Tips & Techniques
One of the tricks to this creamy no-bake loaded peanut butter pie is folding the whipped cream gently into the peanut butter-cream cheese base. You want to keep as much air as possible to get that light, fluffy texture that melts in your mouth.
Also, make sure your cream cheese is truly softened to room temperature before mixing. Cold cream cheese can cause lumps and make it harder to blend smoothly. I learned this the hard way on my second attempt, and trust me, the smoother the base, the creamier the pie.
When pressing the crust into the pan, don’t skimp on packing it firmly. A loose crust will crumble apart when sliced. Using the bottom of a glass or measuring cup to press down evenly works wonders.
Finally, chilling time isn’t just a suggestion—it’s crucial. The pie needs a few hours to firm up; otherwise, your slices won’t hold shape and will be a mess. I’ve tried serving it right away out of impatience, and it was a gooey disaster.
Variations & Adaptations
- Chocolate Peanut Butter Pie: Add ½ cup melted semi-sweet chocolate into the filling before folding in the whipped cream for a richer version.
- Low-Sugar Version: Use powdered erythritol or a sugar substitute in place of powdered sugar and opt for natural peanut butter with no added sugar.
- Nut-Free: Swap peanut butter for sunflower seed butter and use a nut-free crust alternative like crushed vanilla wafers.
- Seasonal Twist: Mix in chopped fresh strawberries or raspberries into the filling for a fruity surprise.
- Dairy-Free: Use coconut cream to whip instead of heavy cream and a vegan cream cheese alternative.
I once tried this pie with a graham cracker and crushed pretzel crust combo for a salty-sweet punch—worked surprisingly well and added extra crunch.
Serving & Storage Suggestions
This pie is best served chilled straight from the fridge. Slice with a sharp, warm knife (run it under hot water and dry it well) for the cleanest cuts. It pairs beautifully with a cup of black coffee or a cold glass of milk to balance the rich peanut butter taste.
Store leftovers covered in the fridge for up to 4 days. The flavors actually deepen as it sits, but the crust might soften slightly over time. To keep the crust crisp, you can store the crust separately and assemble just before serving if you plan to make it ahead.
For freezing, wrap the pie tightly in plastic wrap and aluminum foil. Thaw overnight in the fridge before serving. Reheating isn’t recommended as the texture changes, but letting it sit a bit at room temperature helps soften the filling for easier slicing.
Nutritional Information & Benefits
Each slice (based on 8 slices) averages around 450 calories, with 30 grams of fat, 35 grams of carbohydrates, and 8 grams of protein. This pie delivers a good dose of energy and satisfying fats from peanut butter and cream cheese.
Peanut butter brings heart-healthy monounsaturated fats and protein, while the cream cheese adds calcium and richness. If you choose natural peanut butter, you avoid added sugars and preservatives. This recipe is gluten-friendly if you use gluten-free graham crackers.
Be mindful of peanuts as a common allergen. For those watching sugar intake, swapping powdered sugar with a low-carb sweetener can make this dessert a better fit for low-sugar lifestyles.
Conclusion
This creamy no-bake loaded peanut butter pie has become one of those recipes I turn to when I want a dessert that’s easy, satisfying, and just a little bit special. It’s flexible enough to suit your tastes, quick enough to whip up after a long day, and delicious enough to make you smile with every bite.
Feel free to play around with toppings or mix-ins—it’s a recipe that welcomes your personal touch. I love how it brings together creamy, crunchy, and sweet elements in one slice, making it a little celebration on a plate.
Give it a try, tweak it your way, and don’t be shy to share how you make it yours. I’d love to hear your stories and see your versions!
FAQs
Can I make this pie ahead of time?
Absolutely! This pie tastes even better after chilling overnight. Just be sure to cover it tightly and keep it refrigerated.
What can I use instead of graham cracker crumbs?
You can substitute crushed digestive biscuits, vanilla wafers, or gluten-free cookies if you prefer or have dietary needs.
Is it possible to freeze the pie?
Yes, wrap it well and freeze for up to 2 months. Thaw in the fridge overnight before serving for best results.
How do I prevent the crust from getting soggy?
Press the crust firmly and chill it before adding the filling. You can also brush a thin layer of melted chocolate on the crust before filling as a moisture barrier.
Can I use crunchy peanut butter instead of creamy?
You can, but the filling will have a different texture—slightly chunkier and less smooth. If you love that crunch, go for it!
Pin This Recipe!
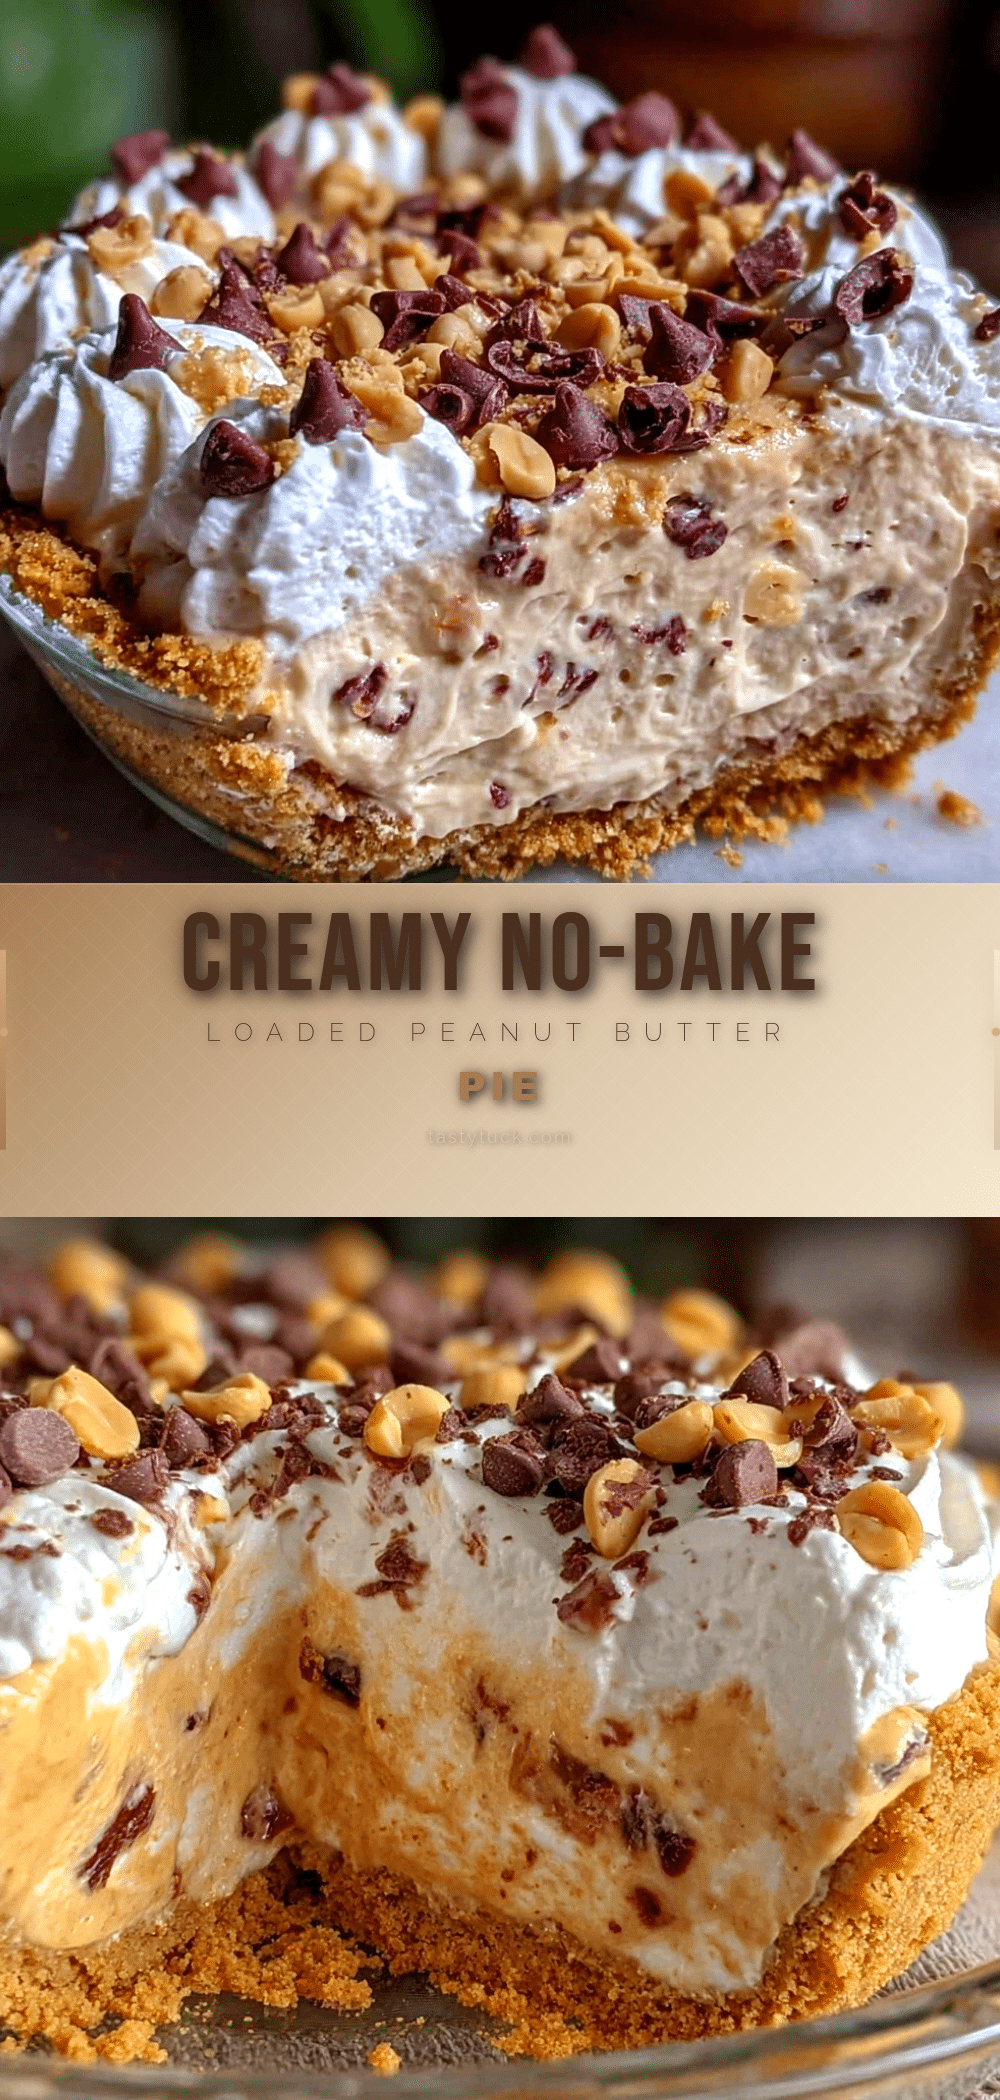
Creamy No-Bake Loaded Peanut Butter Pie
A rich, smooth, and indulgent no-bake peanut butter pie with a crunchy crust and loaded topping, perfect for quick and easy dessert cravings.
- Prep Time: 15 minutes
- Cook Time: 0 minutes
- Total Time: 4 hours 15 minutes
- Yield: 8 servings 1x
- Category: Dessert
- Cuisine: American
Ingredients
- 1 ½ cups graham cracker crumbs (about 12 full crackers, crushed finely)
- 6 tablespoons unsalted butter, melted
- 2 tablespoons granulated sugar
- 1 cup creamy peanut butter
- 8 ounces cream cheese, softened
- 1 cup powdered sugar, sifted
- 1 teaspoon pure vanilla extract
- 1 ½ cups heavy whipping cream, cold
- ½ cup chopped roasted peanuts
- ¼ cup mini chocolate chips
- Optional: drizzle of melted chocolate or peanut butter for garnish
Instructions
- Prepare the crust (10 minutes): Crush graham crackers finely using a food processor or place them in a sealed plastic bag and crush with a rolling pin. In a medium bowl, combine the crumbs, melted butter, and sugar. Stir until the mixture looks like wet sand. Press evenly into the bottom and up the sides of your pie pan. Use the bottom of a glass to press firmly. Place crust in the fridge to chill and set while you make the filling.
- Make the filling (15 minutes): In a large bowl, beat the softened cream cheese and peanut butter together until smooth and creamy with an electric mixer on medium speed. Add the powdered sugar and vanilla extract and mix until combined. In a separate chilled bowl, whip the heavy cream until stiff peaks form (about 3-5 minutes). Gently fold the whipped cream into the peanut butter mixture in three additions, being careful not to deflate the cream. The filling should be light, fluffy, and spreadab…
- Assemble the pie (5 minutes): Remove the crust from the fridge and spread the filling evenly over it. Smooth the top with a spatula. Sprinkle the chopped peanuts and mini chocolate chips generously over the pie. Add an optional drizzle of melted chocolate or peanut butter if desired.
- Chill (at least 4 hours or overnight): Cover the pie with plastic wrap and place in the fridge. This step is key for the filling to set properly. The crust will stay crisp and the filling will slice cleanly. If in a hurry, 2 hours is the bare minimum.
Notes
For gluten-free, substitute graham cracker crumbs with gluten-free cookies or almond flour. For dairy-free, use coconut cream instead of heavy cream and a dairy-free cream cheese alternative. Press crust firmly to avoid crumbling. Chill pie at least 4 hours for best slicing. Use a warm knife for clean cuts. Overmixing whipped cream can make filling dense; fold gently.
Nutrition
- Serving Size: 1 slice (1/8 of pie)
- Calories: 450
- Fat: 30
- Carbohydrates: 35
- Protein: 8
Keywords: peanut butter pie, no-bake pie, creamy dessert, easy dessert, peanut butter dessert, no oven dessert, quick pie, loaded peanut butter pie