The first time I whipped up these Refreshing Red White and Blue Layered Jello Cups, it was a spur-of-the-moment rescue during a chaotic Fourth of July cookout. You know how it goes—grill running late, kids running wild, and dessert nowhere in sight. I grabbed the ingredients from my pantry, honestly half expecting a flop, but was surprised when these vibrant jello cups stole the show.
There’s something about the crisp chill of jello on a hot summer day that just resets your mood. The layers, bold and bright, remind me of those long summer evenings filled with laughter and fireworks lighting the sky. I ended up making these jello cups three times that week—once for a neighborhood potluck, another for a casual family gathering, and even just because—I couldn’t get enough.
What stuck with me was how easy they were to make and how they managed to look so festive without any fancy fuss. Plus, the nostalgic flavors brought back memories of simpler times, when a sweet, colorful treat was all you needed to brighten the day. This recipe became my go-to when I needed something quick, fun, and crowd-friendly, especially since it pairs so well with many summer classics.
So, if you’re after something that’s as refreshing as it is patriotic, with that perfect balance of fruity sweetness and creamy smoothness, these layered jello cups might just become your new favorite. I promise, they’re way easier than they look—and you don’t have to be a dessert pro to pull them off.
Why You’ll Love This Recipe
Having made these Refreshing Red White and Blue Layered Jello Cups over and over, I can honestly say they check all the boxes for a fuss-free, festive dessert. Here’s why this recipe stands out:
- Quick & Easy: You can have these gorgeous layered cups ready in under 3 hours, with most of that time just chilling. Perfect for those busy summer days when you want something impressive but simple.
- Simple Ingredients: No weird or hard-to-find items here—just classic jello flavors and a creamy middle. If you’ve got a box of strawberry, blueberry, and vanilla pudding, you’re halfway there.
- Perfect for Summer Celebrations: Whether it’s the Fourth of July, Memorial Day, or just a casual backyard gathering, these cups feel like they belong at the table.
- Crowd-Pleaser: Kids love the bright colors and fun layers, and adults appreciate the light, refreshing taste that’s not overly sweet.
- Unbelievably Delicious: The combo of fruity jello with a creamy white layer gives you a texture and flavor experience that’s both nostalgic and exciting.
This isn’t just your average layered jello. The secret is in the creamy white layer—a smooth blend of whipped topping and cream cheese that balances the fruity flavors perfectly. It’s a little twist I picked up after trial and error, and honestly, it changed the game.
Plus, having tried various patriotic desserts before, like the perfect cast iron loaded apple pie skillet and individual flag cupcakes, I can say these jello cups hold their own for both visual appeal and taste without the fuss of baking or decorating.
What Ingredients You Will Need
This recipe uses simple, wholesome ingredients to deliver bold flavor and satisfying texture without the fuss. Most of these are pantry staples or easy to find in any grocery store, making it accessible and convenient.
- Jello Layers:
- 1 box (3 oz / 85 g) strawberry-flavored gelatin
- 1 box (3 oz / 85 g) blueberry or berry-flavored gelatin (blue or mixed berry works)
- Creamy White Layer:
- 1 package (8 oz / 226 g) cream cheese, softened (I prefer Philadelphia for smoothness)
- 1 cup (240 ml) heavy whipping cream, cold
- ½ cup (60 g) powdered sugar
- 1 teaspoon vanilla extract
- Additional Ingredients:
- 2 cups (480 ml) boiling water (for dissolving gelatin)
- 2 cups (480 ml) cold water (for diluting gelatin)
- Optional: Fresh berries (blueberries, strawberries) for garnish
For a slightly lighter version, you can swap heavy cream with whipped topping, but I love the richness the cream adds here—it gives the white layer a velvety texture that contrasts beautifully with the jello.
If you’re feeling adventurous, frozen berries can be added to each jello layer right before it sets, giving extra bursts of flavor and texture. Just make sure they’re thawed and patted dry to avoid watering down your layers.
Equipment Needed
- Clear plastic or glass cups (8-12 oz / 240-350 ml capacity) – these showcase the layers beautifully
- Mixing bowls – at least two, one for jello and one for creamy layer
- Electric hand mixer or stand mixer – for whipping cream and blending cream cheese smoothly
- Measuring cups and spoons – for precise liquid and sugar amounts
- Whisk – handy for dissolving gelatin powders
- Spatula – for folding ingredients gently
- Refrigerator space – for chilling and setting the layers (you’ll want a flat surface to keep cups steady)
If you don’t have individual cups, a clear glass trifle bowl or a layered glass dish can work; just adjust the volume accordingly. I’ve found that using a good electric mixer makes the white layer much smoother and easier to spread, but you can whisk by hand if you’re up for a little workout.
For budget-friendly options, disposable clear cups work great and make cleanup a breeze—perfect for outdoor parties or picnics.
Preparation Method
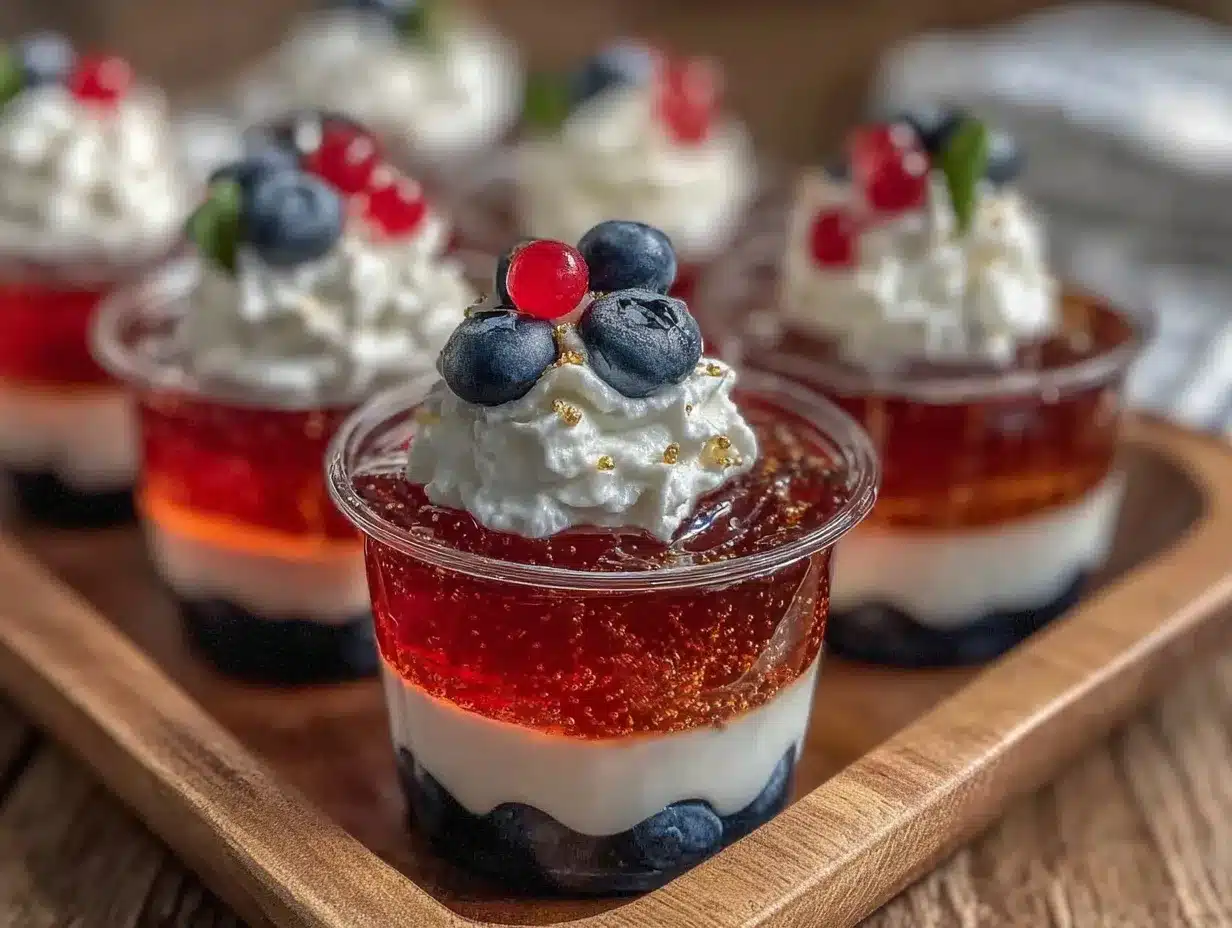
- Prepare the Red Jello Layer: In a medium bowl, dissolve one box of strawberry gelatin powder in 1 cup (240 ml) boiling water. Stir for about 2 minutes until completely dissolved.
- Add 1 cup (240 ml) cold water to the dissolved gelatin and stir gently.
- Pour the red jello mixture evenly into your clear cups—fill each cup about one-third full (roughly 3-4 oz / 90-120 ml).
- Place cups in the refrigerator and chill for 45 minutes to 1 hour, until the layer is firm but slightly tacky (this helps the next layer stick).
- Make the Creamy White Layer: While the red layer chills, beat softened cream cheese and powdered sugar in a mixing bowl until smooth and creamy (about 2-3 minutes).
- In a separate bowl, whip the heavy cream with vanilla extract until stiff peaks form.
- Gently fold the whipped cream into the cream cheese mixture until fully combined and fluffy.
- Once the red layer is set, spoon or pipe the creamy white layer over it, filling another third of each cup. Spread gently with a small spatula or back of a spoon to keep layers distinct.
- Return cups to the fridge and chill for another 45 minutes to 1 hour to let the white layer set.
- Prepare the Blue Jello Layer: Follow the same steps as the red layer using the blueberry gelatin: dissolve in 1 cup boiling water, stir well, add 1 cup cold water, and mix gently.
- Pour the blue gelatin over the set white layer carefully, filling cups to the top.
- Refrigerate for at least 2 hours, or until fully set.
- Optional Garnish: Just before serving, top each cup with fresh blueberries and sliced strawberries for an extra patriotic touch.
Quick tip: To prevent colors from bleeding, make sure each layer is fully set or at least tacky before adding the next. Patience pays off with clean, vibrant layers!
If you want to speed things up, chilling in the freezer for 15-20 minutes between layers helps but keep a close eye to avoid freezing the jello.
Cooking Tips & Techniques
One thing I learned early on is that temperature control makes or breaks these layered jello cups. Pouring a warm gelatin layer directly onto a cold creamy layer can cause mixing or uneven layers. Waiting for the creamy layer to firm up or become tacky is key.
Also, whipping the cream to stiff peaks—not too soft—makes folding smoother and prevents the white layer from becoming runny. I’ve had batches where under-whipped cream led to a soggy middle, and trust me, it’s not pretty.
When dissolving gelatin, make sure to stir consistently for at least two minutes. Leftover granules can give you a grainy texture, which is a bummer in an otherwise smooth dessert.
An easy multitasking tip: start the jello layers first, then whip up the creamy layer while the jello is chilling. This keeps the process moving without feeling drawn out.
If you want to add a little zing, a splash of lemon juice or a tiny pinch of salt in the creamy layer can brighten the flavors subtly. I usually skip it for the kids, but it’s a neat trick if you want a slightly grown-up twist.
Variations & Adaptations
These layered jello cups are pretty versatile. Here are some tweaks I’ve tried or thought about:
- Dietary Adjustments: For a lighter version, swap heavy cream with coconut milk whipped topping. For a vegetarian-friendly option, use agar-agar instead of gelatin.
- Flavor Swaps: Instead of strawberry and blueberry, try raspberry and lemon gelatin for a bright twist. Or mix in fresh fruit chunks like mango or kiwi for a tropical vibe.
- Cooking Method: If you want an adult version, mix a little vodka or rum into the jello layers before chilling for festive adult treats. Just keep proportions moderate so it still sets properly.
- Texture Variation: Add crushed graham crackers or cookie crumbs between layers for a bit of crunch. I once layered with a bit of whipped cream and crushed no-bake Oreo dessert crumbs—insanely good.
One personal favorite is layering with a creamy lemon mousse instead of the cream cheese layer, giving a tart-sweet contrast that feels ultra-refreshing on hot days.
Serving & Storage Suggestions
These jello cups are best served chilled, straight from the fridge. The layers hold up beautifully and the coolness is just right to refresh after a sunny afternoon.
They’re perfect finger-food size for parties, picnics, or casual family dinners. Pair with light grilled meats or fresh salads to keep the meal feeling balanced and not too heavy.
If you’re storing leftovers, cover the cups tightly with plastic wrap or lids and refrigerate for up to 3 days. The flavors deepen a bit overnight, and the textures stay intact if kept cold.
For reheating, well, these are best cold! But if you want to soften them slightly, let the cups sit out for 15 minutes before serving. That gentle room temp helps the layers melt just enough to be extra creamy without losing shape.
Nutritional Information & Benefits
Each serving of these layered jello cups is relatively light, clocking in around 150-200 calories depending on portion size and ingredients used. The main components are gelatin (which provides some protein) and the creamy layer made from cream cheese and whipped cream.
Gelatin is known for its collagen content, which can support skin and joint health. The cream cheese adds calcium and a little protein, while whipped cream contributes fat that gives the dessert its luscious texture.
For those watching carbs or sugar, you can try sugar-free gelatin options and reduce powdered sugar in the creamy layer or substitute with natural sweeteners.
Keep in mind, this recipe contains dairy and gelatin, so it’s not suitable for vegans or people with dairy allergies unless you swap ingredients accordingly.
From a wellness perspective, I appreciate how this dessert feels indulgent without being overly rich or heavy—perfect for those summer days when you want a treat that refreshes rather than weighs you down.
Conclusion
Making these Refreshing Red White and Blue Layered Jello Cups has become a little ritual for me every summer—quick to whip up, colorful, fun, and downright delicious. They’re proof that simple ingredients and a bit of patience can turn into something visually stunning and tasty.
Feel free to tweak the flavors or layering technique to fit your style or occasion. Whether you’re prepping for a big holiday bash or just craving a sweet, light dessert, these jello cups deliver without drama.
I love how they bring a festive touch without any stress—kind of like the perfect summer dessert companion. If you try them out, I’d love to hear how you make them your own or what moments you pair them with. Happy layering!
Frequently Asked Questions
Can I make these jello cups ahead of time?
Absolutely! They can be made up to 2 days in advance and kept covered in the fridge. Just add fresh fruit garnish right before serving.
What if I don’t have cream cheese? Can I use something else?
You can substitute with mascarpone or even Greek yogurt for a tangier, lighter white layer, but the texture will be slightly different.
How do I prevent the layers from mixing together?
Make sure each layer is fully set or at least tacky before adding the next. Pour gently and chill on a flat surface to keep layers neat.
Can I use other gelatin flavors?
Yes, feel free to experiment with any red and blue gelatin flavors you like, such as raspberry or blue raspberry, to suit your taste.
Is there a vegan alternative to gelatin for this recipe?
Yes, agar-agar powder can be used as a plant-based gelatin substitute, but it requires different preparation, so follow package instructions carefully.
Pin This Recipe!
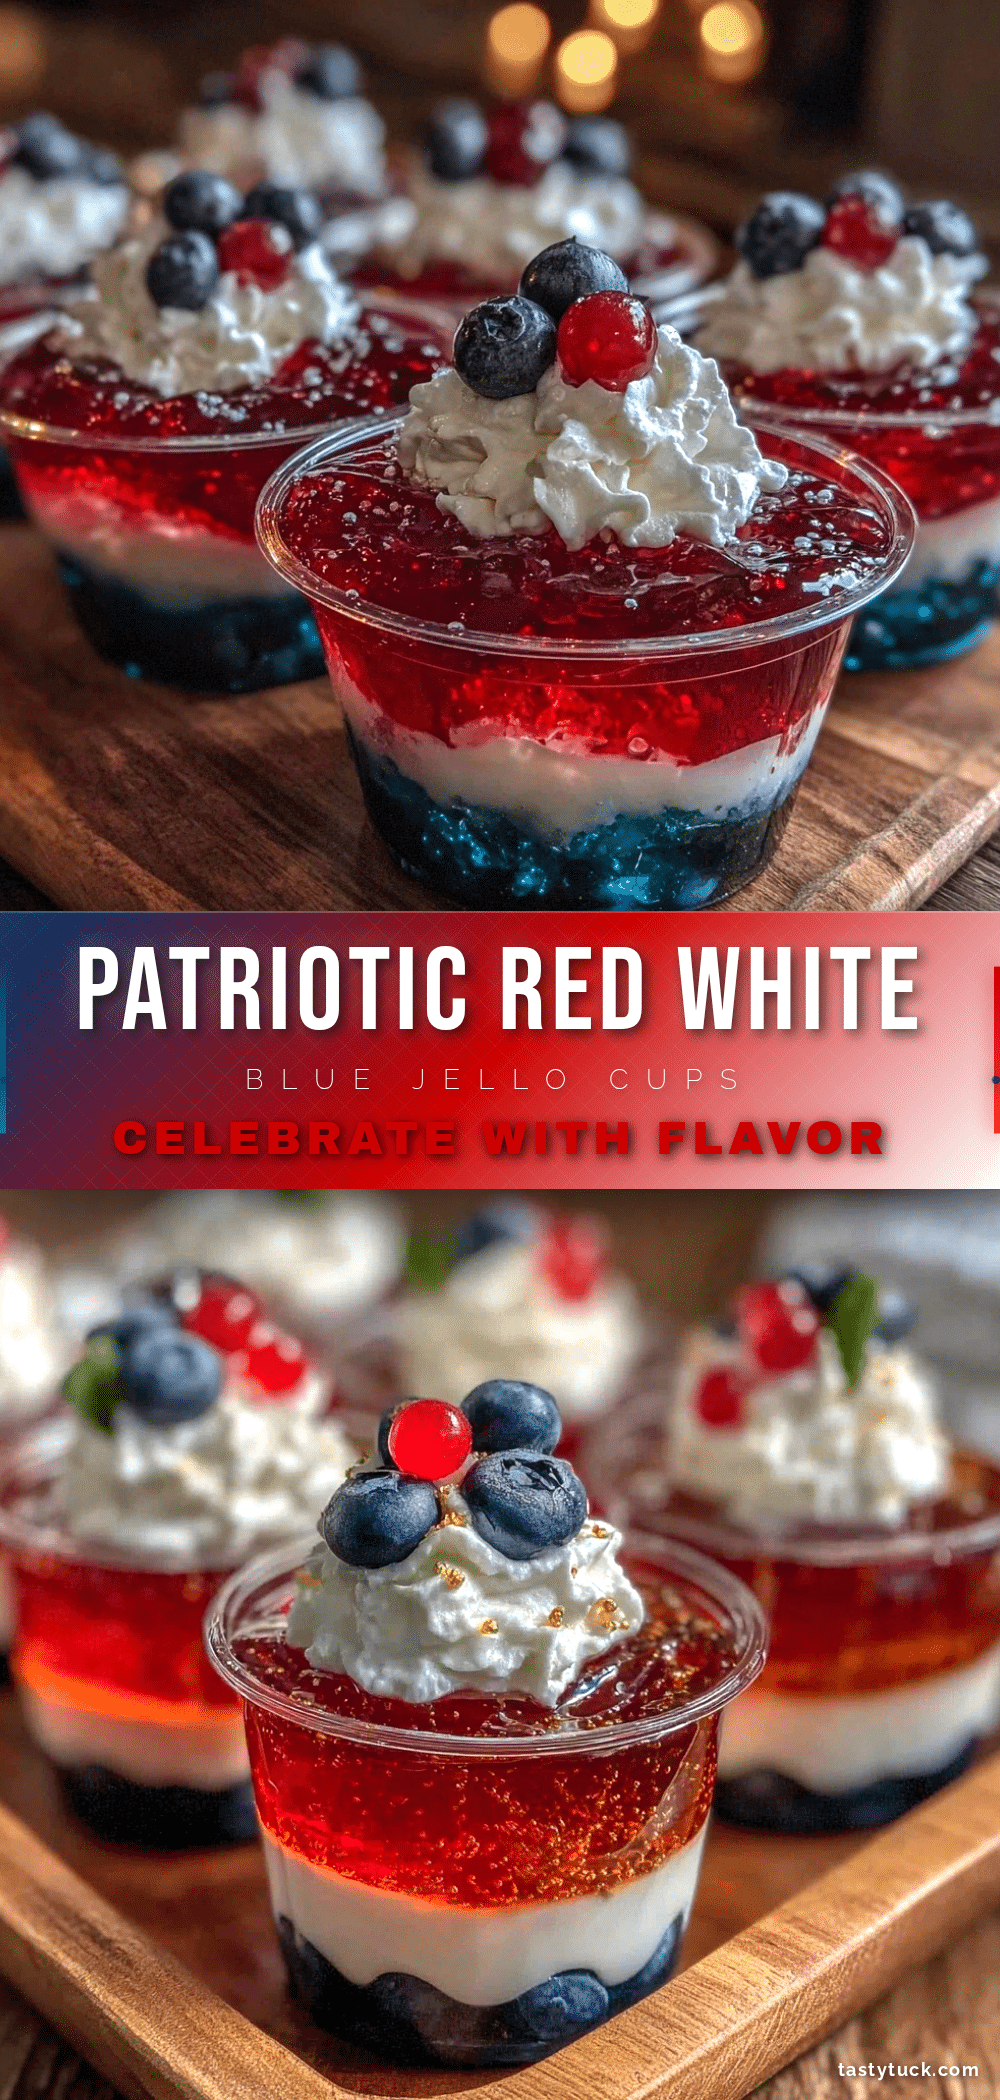
Refreshing Red White and Blue Layered Jello Cups

A quick and easy 4-layer patriotic dessert featuring vibrant jello layers and a creamy white middle, perfect for summer celebrations and Fourth of July gatherings.
- Prep Time: 20 minutes
- Cook Time: 3 hours
- Total Time: 3 hours 20 minutes
- Yield: 8 servings 1x
- Category: Dessert
- Cuisine: American
Ingredients
- 1 box (3 oz / 85 g) strawberry-flavored gelatin
- 1 box (3 oz / 85 g) blueberry or berry-flavored gelatin (blue or mixed berry works)
- 1 package (8 oz / 226 g) cream cheese, softened
- 1 cup (240 ml) heavy whipping cream, cold
- ½ cup (60 g) powdered sugar
- 1 teaspoon vanilla extract
- 2 cups (480 ml) boiling water (for dissolving gelatin)
- 2 cups (480 ml) cold water (for diluting gelatin)
- Optional: Fresh berries (blueberries, strawberries) for garnish
Instructions
- Prepare the Red Jello Layer: In a medium bowl, dissolve one box of strawberry gelatin powder in 1 cup (240 ml) boiling water. Stir for about 2 minutes until completely dissolved.
- Add 1 cup (240 ml) cold water to the dissolved gelatin and stir gently.
- Pour the red jello mixture evenly into your clear cups—fill each cup about one-third full (roughly 3-4 oz / 90-120 ml).
- Place cups in the refrigerator and chill for 45 minutes to 1 hour, until the layer is firm but slightly tacky.
- Make the Creamy White Layer: Beat softened cream cheese and powdered sugar in a mixing bowl until smooth and creamy (about 2-3 minutes).
- In a separate bowl, whip the heavy cream with vanilla extract until stiff peaks form.
- Gently fold the whipped cream into the cream cheese mixture until fully combined and fluffy.
- Once the red layer is set, spoon or pipe the creamy white layer over it, filling another third of each cup. Spread gently with a small spatula or back of a spoon to keep layers distinct.
- Return cups to the fridge and chill for another 45 minutes to 1 hour to let the white layer set.
- Prepare the Blue Jello Layer: Dissolve the blueberry gelatin in 1 cup boiling water, stir well, add 1 cup cold water, and mix gently.
- Pour the blue gelatin over the set white layer carefully, filling cups to the top.
- Refrigerate for at least 2 hours, or until fully set.
- Optional Garnish: Just before serving, top each cup with fresh blueberries and sliced strawberries.
Notes
Ensure each layer is fully set or at least tacky before adding the next to prevent colors from bleeding. Whip cream to stiff peaks for best texture. You can speed up chilling by placing cups in the freezer for 15-20 minutes but watch closely to avoid freezing. For a lighter version, swap heavy cream with whipped topping. Agar-agar can be used as a vegan gelatin substitute with different preparation.
Nutrition
- Serving Size: One layered jello cu
- Calories: 175
- Sugar: 14
- Sodium: 120
- Fat: 12
- Saturated Fat: 7
- Carbohydrates: 15
- Protein: 3
Keywords: layered jello cups, patriotic dessert, Fourth of July dessert, red white and blue jello, easy summer dessert, no bake dessert


