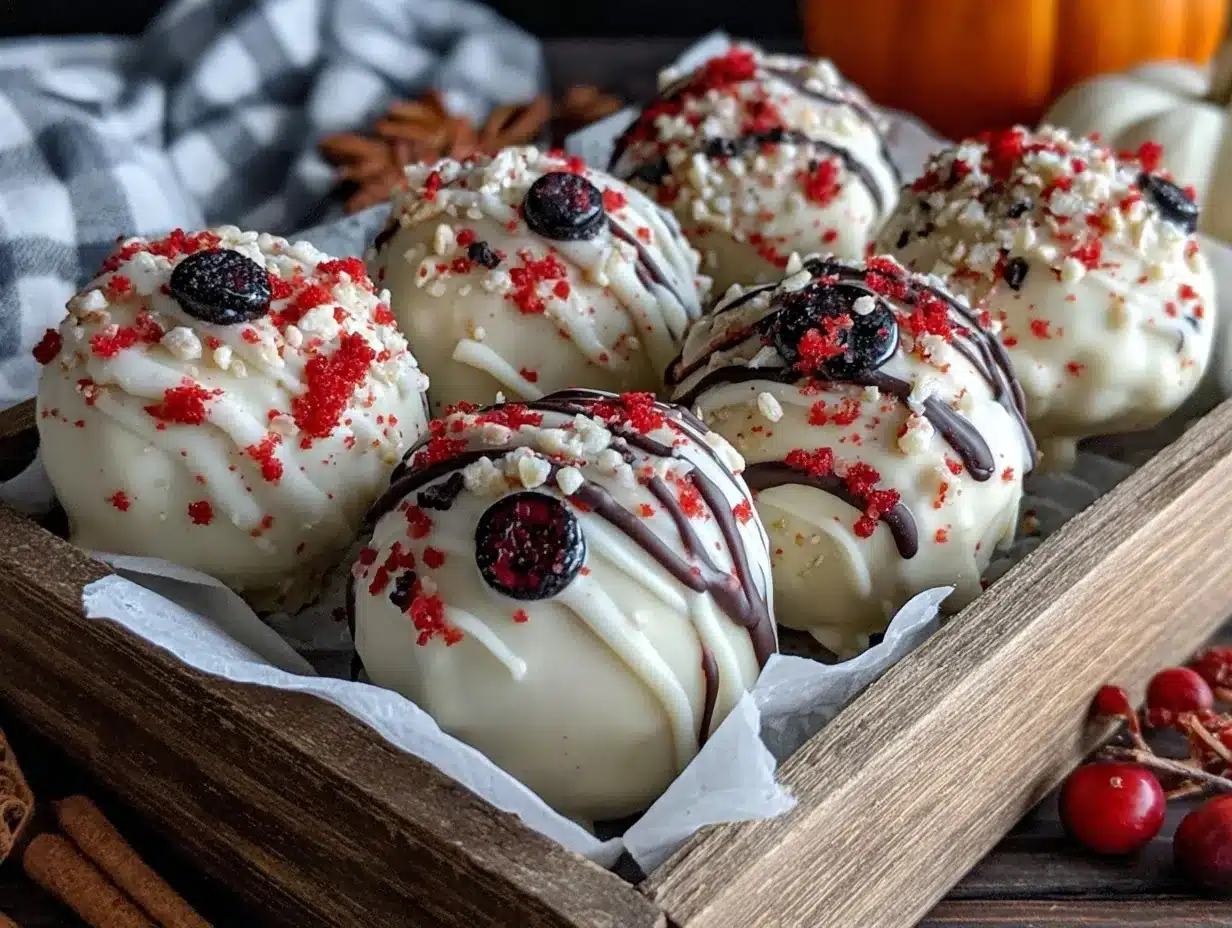
“Did you hear that? It sounded like a tiny pop just as the white chocolate started to harden,” I muttered to myself in the quiet kitchen, half amused and half relieved. Halloween was creeping up fast, and my go-to spooky treat was about to make its yearly debut — the eyeball cake pops with white chocolate coating. Honestly, the first time I tried these, I was skeptical. How could a simple cake pop become a showstopper? But, as I dipped the last one into the glossy white coating and carefully painted on the eerie red veins, I realized this was something special.
It wasn’t just about the spooky look. The creamy cake inside, combined with that silky white chocolate coat, brought this Halloween treat to a whole new level. I remember sneaking a bite before the guests arrived, and that moment sealed the deal — these eyeball cake pops weren’t just for show; they tasted fantastic too. The crackle of the chocolate, the moist cake crumb, and the playful decoration made this recipe stick with me every October.
There’s a quiet joy in making something both creepy and delicious, don’t you think? These eyeball cake pops with white chocolate coating bring a little fun and a little thrill to any Halloween party or cozy night in. And if you’ve ever been tempted by spooky treats but shied away from complicated recipes, well, this one’s got your back. It’s straightforward, a little messy (in the best way), and guaranteed to get a few double takes. So, let’s get to it — I promise it’s easier than it looks.
Why You’ll Love This Recipe
After tinkering with cake pop recipes for years, this version of perfect eyeball cake pops with white chocolate coating really stands out. It’s not just a fun Halloween craft; it’s a recipe I trust to deliver every time. Here’s why this treat has become a seasonal favorite:
- Quick & Easy: You can whip these up in under an hour, perfect when you’re juggling last-minute Halloween plans or a busy schedule.
- Simple Ingredients: No need for specialty stores—most of what you need is probably already in your pantry or fridge.
- Perfect for Halloween Parties: These eyeball cake pops are a hit at any spooky gathering, whether it’s a kids’ party or a grown-up bash.
- Crowd-Pleaser: The creepy look always draws attention, and the taste wins over even the pickiest eaters.
- Unbelievably Delicious: The white chocolate coating adds a smooth, sweet crunch that complements the moist cake perfectly.
What sets this recipe apart is the technique used for the white chocolate coating. By tempering the chocolate just right and letting it harden with a satisfying snap, you get that picture-perfect finish that’s not too thick or brittle. Plus, the hand-painted red “veins” give each eyeball a realistic, slightly spooky vibe that’s just the right amount of eerie without being over the top.
Honestly, after making these a few times, I’ve found myself tweaking other desserts, like the easy one-bowl loaded strawberry cake mix recipe, for Halloween-themed treats too. This recipe is the kind you’ll come back to every year because it hits that sweet spot between festive fun and tasty indulgence.
What Ingredients You Will Need
For these eyeball cake pops, we keep things straightforward with ingredients that build on classic flavors and textures. The components come together to create a moist, flavorful cake base, a smooth coating, and the fun details that bring the eyeballs to life.
- For the Cake Pops:
- Yellow or vanilla cake mix (one box, about 15.25 oz / 432 g) — I prefer Betty Crocker for consistent results
- Eggs (2 large, room temperature)
- Water (1 cup / 240 ml)
- Vegetable oil (1/3 cup / 80 ml)
- Vanilla extract (1 teaspoon) — adds extra depth
- White chocolate chips or melting wafers (12 oz / 340 g) — use a good-quality brand like Ghirardelli for smooth melting
- Red gel food coloring — for the bloodshot veins
- Black edible marker or black decorating gel — to draw the pupils
- Optional: candy eyeballs (for an alternative decoration if you prefer less painting)
- For Binding the Cake Pops:
- Cream cheese frosting (about 1/2 cup / 120 g) — store-bought or homemade works fine
- For Decoration:
- Thin wooden lollipop sticks or cake pop sticks
- Optional sprinkles or edible glitter to add an eerie sparkle
Most of these ingredients are pantry staples or easy to find at any grocery store. If you want to make this recipe gluten-free, you can swap the cake mix for a gluten-free vanilla blend, and almond or coconut flour works well for homemade cakes. For a dairy-free twist, try coconut-based cream cheese frosting and a dairy-free white chocolate alternative.
Equipment Needed
- Mixing bowls (medium and large) — a must-have for blending cake and frosting
- Electric mixer or stand mixer — helps get the cake batter smooth and the frosting creamy
- Baking pan (9×13 inches / 23×33 cm) — to bake the cake before crumbling
- Cooling rack — essential for letting the cake cool fully before crumbling
- Large spoon or spatula — for mixing and folding ingredients
- Baking sheet lined with parchment paper or wax paper — for placing shaped cake pops before chilling
- Microwave-safe bowl or double boiler — to melt the white chocolate coating gently
- Small paintbrush or toothpick — perfect for painting the red veins on the eyeballs
If you don’t have a stand mixer, a hand mixer will do just fine. For melting chocolate, a microwave-safe bowl is my go-to for quick batches, but a double boiler provides more control over temperature. Wooden lollipop sticks can be found easily online or at craft stores, but if you’re out, sturdy wooden skewers also work in a pinch.
Preparation Method
- Prepare the Cake: Preheat your oven to 350°F (175°C). Mix the cake batter according to the package instructions using your mixer — typically combining the cake mix, eggs, water, vegetable oil, and vanilla extract. Pour the batter into your greased 9×13-inch pan and bake for 30-35 minutes or until a toothpick inserted in the center comes out clean. Let the cake cool completely on a cooling rack; this can take about 45 minutes.
- Crumble the Cake: Once cooled, crumble the cake into a large bowl using your hands or a fork. Make sure there are no large chunks for smooth cake pops.
- Add Frosting: Stir in the cream cheese frosting gradually — start with about half a cup and add more if needed. Mix well until the cake mixture is moist enough to hold its shape when rolled into a ball. This usually takes about 3-5 minutes of mixing by hand.
- Shape the Cake Pops: Roll the mixture into 1-inch (2.5 cm) balls. Place them on a parchment-lined baking sheet. Insert a lollipop stick halfway into each ball. Refrigerate the cake pops for at least 30 minutes to firm up.
- Melt the White Chocolate: Using a microwave or double boiler, gently melt the white chocolate chips or wafers. Stir frequently to avoid burning. The chocolate should be smooth and pourable but not too hot.
- Dip the Cake Pops: Holding the stick, dip each cake pop into the melted white chocolate. Tap off excess chocolate gently and place the dipped pop back onto the parchment paper. The coating should be thick enough to cover the cake ball completely. Let the coating set for about 15 minutes at room temperature or chill briefly in the fridge.
- Add Eyeball Details: Use the black edible marker or decorating gel to draw a pupil in the center of each cake pop. Then, with a small paintbrush or toothpick, paint thin red lines radiating from the pupil to mimic bloodshot veins using red gel food coloring diluted with a drop of water. Let dry completely.
- Final Touches: Optionally, sprinkle some edible glitter or tiny candy sprinkles around for a creepy, sparkling effect. Store the finished cake pops upright in a foam block or a tall glass to keep their shape.
If your white chocolate starts to harden too fast while dipping, just warm it slightly again. And if the cake pops crack or crumble while shaping, adding a little more frosting usually fixes the texture. The key is patience — letting the cake cool fully and the coating set well makes all the difference.
Cooking Tips & Techniques
One thing I learned the hard way is that the cake must be completely cool before crumbling; warm cake leads to soggy, mushy pops that won’t hold together. Also, when mixing the frosting in, add it bit by bit — too much frosting, and the pops get overly sweet and dense.
Melting white chocolate can be tricky. I recommend heating in short bursts (15-20 seconds), stirring often. If it overheats, it can seize up or become grainy. A double boiler is a safer bet if you’re nervous about melting chocolate in the microwave.
When dipping, don’t rush. Let the excess chocolate drip off naturally before placing the pop down. This helps form a smooth, even coating. And for painting those creepy red veins, thin layers of gel food coloring work best. Too thick, and it looks more like a red blob than an eyeball!
Timing-wise, chilling the cake pops after shaping and between dipping steps is crucial. It firms everything up and prevents cracking. Multitasking helps here — while the cake cools, prep your frosting or melt the coating so you’re ready when the cake is set.
Variations & Adaptations
- Flavor Variations: Swap the vanilla cake for chocolate or red velvet for a darker, richer eyeball. You can also add a drop of peppermint or orange extract to the frosting for a seasonal twist.
- Coating Alternatives: Use colored candy melts instead of white chocolate for different spooky effects — green or purple make fun alien eyeballs!
- Dietary Adaptations: Use gluten-free cake mix and dairy-free frosting to accommodate allergies. Coconut-based white chocolate chips are great for lactose intolerance.
- Decoration Tweaks: Instead of painting veins, try edible candy eyes for a simpler look. Or add tiny edible glitter to the white chocolate for a shimmering effect that catches the light perfectly.
- Cooking Method Adjustments: For a no-bake version, crush store-bought cookies instead of baking cake, then mix with frosting and shape as usual. This shortcut works well if you’re tight on time.
One personal favorite variation was using a no-bake loaded chocolate delight recipe base in place of cake for a fudgier, decadent eyeball treat. It definitely turns heads!
Serving & Storage Suggestions
These eyeball cake pops are best served at room temperature. The white chocolate coating has that perfect snap, and the cake inside stays moist and tender. Arrange them on a Halloween-themed platter or stick them upright in a foam block covered with black fabric for dramatic effect.
Pairing the pops with a warm drink like hot cocoa or a spiced apple cider really rounds out the spooky vibe. They also make a quirky addition to a Halloween dessert table alongside classics like pumpkin pie or the cast iron loaded apple pie skillet.
For storage, keep the cake pops in an airtight container in the fridge for up to 5 days. Before serving, bring them to room temperature to soften the cake inside. If you want to store longer, freeze them wrapped individually in plastic wrap and place in a freezer bag for up to 2 months. Thaw overnight in the fridge before serving.
Over time, the flavor melds nicely, and the white chocolate coating remains stable if kept cool and dry. Just avoid humid environments, or the coating can get sticky.
Nutritional Information & Benefits
Each eyeball cake pop clocks in at about 150-180 calories depending on size and frosting amount. They’re a treat, so best enjoyed in moderation! The white chocolate coating adds sweetness and a bit of fat, while the cake provides carbs and some protein from eggs.
Using quality ingredients like whole eggs and real vanilla extract gives you a richer, more natural flavor without artificial nasties. You can lighten the recipe by substituting a sugar-free cake mix or using a low-fat cream cheese frosting. For gluten-free eaters, the recipe adapts well with certified gluten-free cake mixes.
From a wellness perspective, making these at home means you control the ingredients, avoiding preservatives and excessive additives common in store-bought Halloween sweets. Plus, they’re a fun way to get creative in the kitchen without complicated prep or hard-to-find ingredients.
Conclusion
So, if you’re looking for a Halloween treat that’s spooky, fun, and surprisingly easy, these perfect eyeball cake pops with white chocolate coating hit the mark. They’re a little messy, a lot tasty, and offer a playful way to celebrate the season with friends or family.
Feel free to make them your own — tweak the flavors, get creative with decorations, or try the no-bake cookie base if you want to skip the oven. This recipe has become my Halloween standby for a reason: it’s just the right mix of creepy and comforting.
Try them out, share your results, and maybe add your twist. And if you ever want a crowd-pleasing dessert that’s a little less spooky but just as delicious, check out the easy one-bowl loaded strawberry cake mix or the no-bake loaded chocolate delight. Happy haunting in the kitchen!
FAQs
Can I make eyeball cake pops without a cake mix?
Absolutely! You can bake your favorite homemade vanilla or chocolate cake and crumble it just like with the mix. Just make sure it’s fully cooled and not too moist for shaping.
How do I prevent the white chocolate coating from cracking?
Chill the cake pops before dipping and avoid applying a thick layer of chocolate. Let the coating set at room temperature or in the fridge gently. Sudden temperature changes can cause cracking.
What can I use if I don’t have lollipop sticks?
Wooden skewers or sturdy toothpicks can work in a pinch, but they’re less stable for holding the cake pops upright. For display, a foam block helps keep them steady.
Can I prepare these cake pops a day ahead?
Yes, make them a day ahead and store in an airtight container in the fridge. Bring them to room temperature before serving for best texture and flavor.
Is it okay to use candy melts instead of white chocolate?
Definitely! Candy melts are easier to handle and come in many colors, but white chocolate gives a richer flavor. Choose based on your preference and the look you want.
Pin This Recipe!

Perfect Eyeball Cake Pops Recipe Easy Halloween White Chocolate Treats

These spooky eyeball cake pops feature a moist vanilla cake center coated in smooth white chocolate with hand-painted red veins, perfect for Halloween parties and festive fun.
- Prep Time: 20 minutes
- Cook Time: 35 minutes
- Total Time: 1 hour 40 minutes
- Yield: 24 cake pops 1x
- Category: Dessert
- Cuisine: American
Ingredients
- 1 box yellow or vanilla cake mix (about 15.25 oz / 432 g)
- 2 large eggs, room temperature
- 1 cup water (240 ml)
- 1/3 cup vegetable oil (80 ml)
- 1 teaspoon vanilla extract
- 12 oz white chocolate chips or melting wafers (340 g)
- Red gel food coloring
- Black edible marker or black decorating gel
- About 1/2 cup cream cheese frosting (120 g), store-bought or homemade
- Thin wooden lollipop sticks or cake pop sticks
- Optional: candy eyeballs
- Optional: sprinkles or edible glitter
Instructions
- Preheat oven to 350°F (175°C). Mix cake batter according to package instructions combining cake mix, eggs, water, vegetable oil, and vanilla extract.
- Pour batter into greased 9×13-inch pan and bake for 30-35 minutes or until a toothpick inserted in the center comes out clean.
- Let cake cool completely on a cooling rack, about 45 minutes.
- Crumble cooled cake into a large bowl, ensuring no large chunks remain.
- Gradually stir in cream cheese frosting until mixture is moist enough to hold shape when rolled into balls, about 3-5 minutes mixing by hand.
- Roll mixture into 1-inch (2.5 cm) balls and place on parchment-lined baking sheet.
- Insert lollipop stick halfway into each ball and refrigerate for at least 30 minutes to firm up.
- Melt white chocolate chips or wafers gently using microwave or double boiler, stirring frequently.
- Dip each cake pop into melted white chocolate, tap off excess, and place back on parchment paper.
- Let coating set for about 15 minutes at room temperature or chill briefly in fridge.
- Use black edible marker or decorating gel to draw pupils in center of each cake pop.
- With a small paintbrush or toothpick, paint thin red lines radiating from pupil using diluted red gel food coloring to mimic bloodshot veins. Let dry completely.
- Optionally, sprinkle edible glitter or candy sprinkles for a sparkling effect.
- Store finished cake pops upright in foam block or tall glass to keep shape.
Notes
Ensure cake is completely cooled before crumbling to avoid soggy pops. Add frosting gradually to avoid overly sweet or dense pops. Melt white chocolate in short bursts and stir often to prevent seizing. Chill cake pops before dipping to prevent cracking. Use thin layers of red gel food coloring for veins to avoid blobs. Store in airtight container in fridge up to 5 days or freeze up to 2 months.
Nutrition
- Serving Size: 1 cake pop
- Calories: 165
- Sugar: 15
- Sodium: 110
- Fat: 9
- Saturated Fat: 5
- Carbohydrates: 20
- Fiber: 0.5
- Protein: 2
Keywords: Halloween, cake pops, eyeball cake pops, white chocolate, spooky treats, easy dessert, party snacks


