Last Fourth of July, I found myself scrambling for a dessert that would capture the spirit of the holiday but with zero fuss and maximum wow factor. You know how it goes—family buzzing around, kids impatient, and that moment when you realize the picnic desserts are a total miss. Honestly, that’s when the idea of this Perfect Cast Iron Loaded Apple Pie Skillet Patriotic came to life. It wasn’t planned; it was more of a last-minute inspiration with whatever I had on hand, and that skillet, well, it just made magic happen.
The smell of cinnamon, melting butter, and baked apples filling the air while the flag-themed berries peeked out—there was something so soothing about the sizzle and crackle from the cast iron, like it was quietly whispering “this will be good.” I remember watching the golden crust puff up, thinking, “Okay, this might actually be the easiest, most impressive dessert I’ve pulled off for a holiday.”
What stuck with me wasn’t just the taste but the way this recipe turned a chaotic day around. It’s the kind of dessert that feels homey but also special enough to share with friends or neighbors you want to impress without starting a baking marathon. It’s a little rustic, a little patriotic, and honestly, perfectly imperfect—just the way I like my summer celebrations.
Why You’ll Love This Recipe
- Quick & Easy: Comes together in under 45 minutes, making it perfect for busy holiday gatherings or impromptu celebrations.
- Simple Ingredients: Uses pantry staples and fresh seasonal produce—no complicated shopping lists or rare spices.
- Perfect for Patriotic Occasions: Whether it’s Independence Day, Memorial Day, or just a summer get-together, this skillet dessert brings that perfect red, white, and blue vibe.
- Crowd-Pleaser: Kids, adults, picky eaters alike rave about the melty, loaded apple filling and buttery crust combo.
- Unbelievably Delicious: Loaded with cinnamon-spiced apples, a flaky crust, and topped with fresh berries that add a juicy, tart contrast that’s downright addictive.
What sets this recipe apart is the cast iron skillet method that gives the pie a rustic, crispy edge and a perfectly caramelized bottom that you just can’t replicate in a regular pie pan. Plus, loading it up with fresh blueberries and strawberries isn’t just festive—it adds a fresh burst that balances the warmth of the spiced apples. After a few trials, I found that using cold butter and a touch of brown sugar in the crust really takes the flavor to another level without extra work. It’s not just another apple pie; it’s the one you make when you want to impress without stress.
And honestly, this recipe stuck with me because it’s that kind of comfort food that makes you pause and savor the moment—a little sweet, a little tart, and a whole lot of warmth. It’s the kind of dish you’ll want to make again and again when you want that cozy, festive feeling without the fuss.
What Ingredients You Will Need
This recipe uses simple, wholesome ingredients to deliver bold flavor and satisfying texture without the fuss. Most are pantry staples, with fresh fruit adding that seasonal pop of flavor and color.
- For the crust:
- All-purpose flour, 1 ½ cups (190 g), for a tender, flaky base
- Unsalted butter, ½ cup (115 g), cold and cubed (I prefer Kerrygold for its richness)
- Granulated sugar, 2 tablespoons (25 g), for subtle sweetness
- Brown sugar, 1 tablespoon (12 g), adds depth and warmth
- Cold water, 3-4 tablespoons (45-60 ml), to bring the dough together
- Salt, ¼ teaspoon, to balance flavors
- For the apple filling:
- Granny Smith apples, 4 medium (about 1 lb / 450 g), peeled, cored, and sliced thin (their tartness is perfect here)
- Ground cinnamon, 1 ½ teaspoons, for that classic apple pie warmth
- Ground nutmeg, ¼ teaspoon, for subtle spice
- Brown sugar, ¼ cup (50 g), to sweeten and caramelize
- Fresh lemon juice, 1 tablespoon (15 ml), to brighten the apples and prevent browning
- Unsalted butter, 2 tablespoons (28 g), melted, to coat the apples
- Vanilla extract, 1 teaspoon, for a hint of floral sweetness
- For the topping:
- Fresh strawberries, ½ cup (75 g), hulled and sliced, for that vibrant red
- Fresh blueberries, ½ cup (75 g), for a juicy burst of blue
- Powdered sugar, for dusting (optional)
- Vanilla ice cream or whipped cream, for serving (totally optional but highly recommended!)
You can swap all-purpose flour with a gluten-free blend if needed, though I find the texture works best with standard flour. If you want a dairy-free version, substitute butter with coconut oil or a vegan butter alternative—just keep it cold for that flaky crust. For a seasonal twist, swap the apples for pears in the fall or peaches in summer. The fresh berries on top really make the pie feel festive and fresh, so don’t skip them!
Equipment Needed
- 10-inch cast iron skillet (preferably well-seasoned) – this is the heart of the recipe for that crispy crust and even heat distribution
- Mixing bowls – one large for the dough, one medium for the apple filling
- Rolling pin – for rolling out the crust evenly; if you don’t have one, a sturdy bottle can work in a pinch
- Sharp knife or apple slicer – for prepping apples quickly
- Measuring cups and spoons – for accuracy
- Pastry brush – to brush melted butter over apples
- Oven mitts – cast iron gets hot, so heavy-duty mitts are a must
If you don’t have a cast iron skillet, you can use a heavy oven-safe skillet or even a pie dish, but the texture and crust won’t be quite the same. I’ve tried a nonstick skillet once, but it lacked the crisp bottom that cast iron delivers so well. Keeping your skillet well-seasoned avoids sticking and helps with cleanup. If you’re on a budget, you can find affordable cast iron skillets online or at thrift stores—they last forever if cared for right.
Preparation Method
- Make the crust dough: In a large bowl, whisk together 1 ½ cups (190 g) flour, 2 tablespoons (25 g) granulated sugar, 1 tablespoon (12 g) brown sugar, and ¼ teaspoon salt. Cut in the cold, cubed butter (½ cup / 115 g) using a pastry cutter or your fingers until the mixture resembles coarse crumbs (think pea-sized bits). Slowly add 3 to 4 tablespoons (45-60 ml) of cold water, one tablespoon at a time, mixing gently until the dough just comes together. Don’t overwork it—crumbly is fine. Wrap the dough in plastic and chill it in the fridge for at least 20 minutes. This step is key for a flaky crust.
- Prepare the apple filling: While the dough chills, toss the sliced apples (4 medium Granny Smiths) with 1 ½ teaspoons cinnamon, ¼ teaspoon nutmeg, ¼ cup (50 g) brown sugar, 1 tablespoon (15 ml) lemon juice, 2 tablespoons (28 g) melted butter, and 1 teaspoon vanilla extract in a medium bowl. Set aside to let the flavors meld. You’ll notice the apples start to soften slightly, which helps when baking.
- Preheat your oven: Set to 375°F (190°C). Place the cast iron skillet in the oven while it heats up—this helps get a crispy crust bottom once you add the pie.
- Roll out the dough: Lightly flour a clean surface and roll the chilled dough into a 12-inch (30 cm) circle, about ⅛ inch (3 mm) thick. It should be slightly larger than your skillet’s diameter.
- Assemble the pie: Carefully remove the hot skillet from the oven (use mitts!). Brush the bottom and sides lightly with butter to prevent sticking. Pour in the apple filling, spreading it evenly. Lay the dough over the apples, tucking the edges around the skillet’s rim. Use a sharp knife to cut a few slits in the dough to vent steam during baking.
- Bake: Place the skillet back in the oven and bake for 30-35 minutes, or until the crust is golden brown and the filling is bubbling. The smell at this point is incredible—if it starts to brown too quickly, tent with foil.
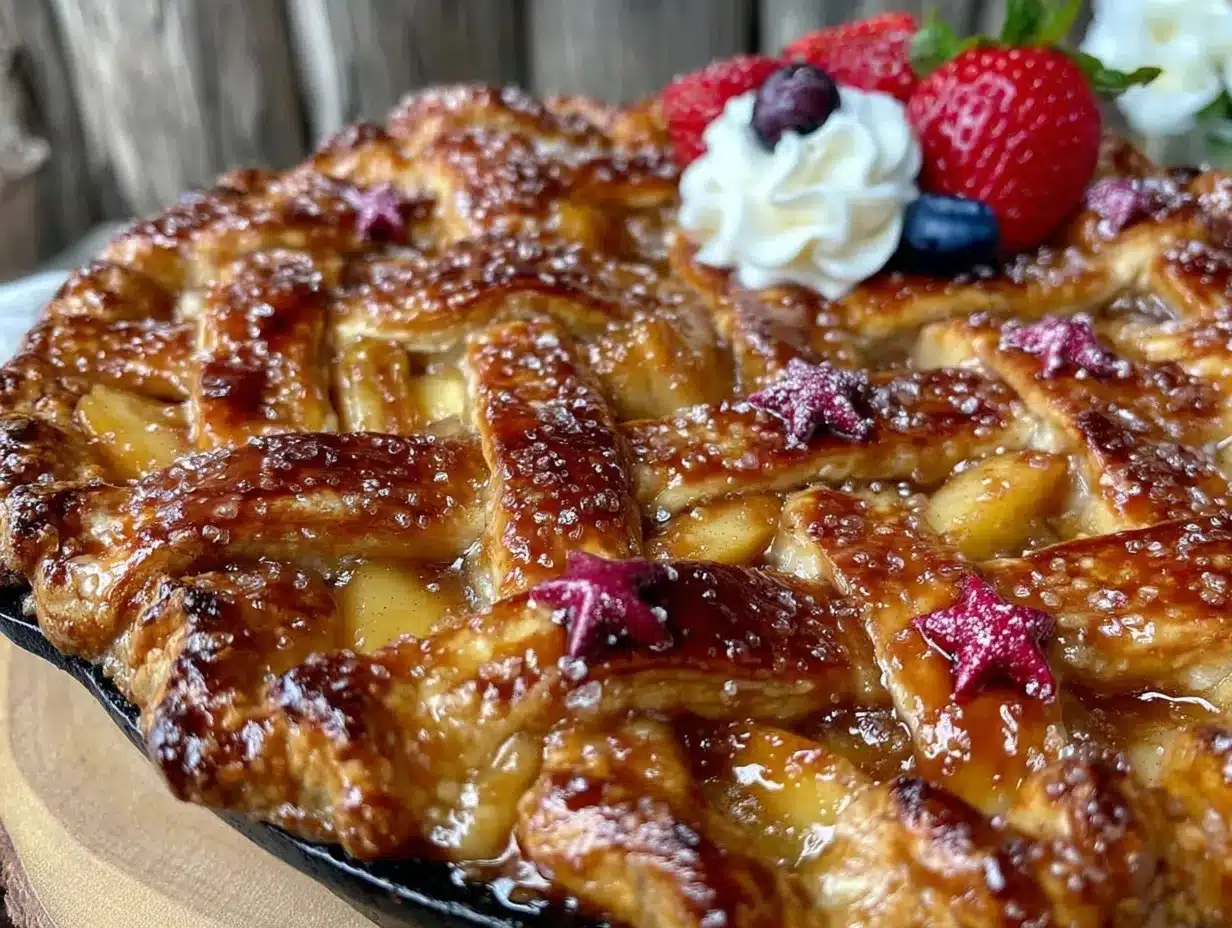
- Add the patriotic topping: Once baked, remove from oven and let cool slightly (about 10 minutes). Scatter the fresh sliced strawberries (½ cup / 75 g) and blueberries (½ cup / 75 g) on top in a flag pattern or a fun design. Dust lightly with powdered sugar if you like.
- Serve warm: This pie is best enjoyed warm with a scoop of vanilla ice cream or whipped cream. The contrast of the hot, spiced apples and cold cream is unbeatable.
Pro tip: If the crust edges brown too quickly, cover them with foil halfway through baking. Also, rolling the dough between two sheets of parchment paper makes it easier and less messy. And don’t rush the chilling step; it really makes a difference in texture!
Cooking Tips & Techniques
One thing I learned the hard way is that cold butter is non-negotiable for flaky crust. I once tried room-temp butter and ended up with a tough, dense base—no fun. Cutting butter into flour until it resembles coarse crumbs is crucial; if you see big chunks, that’s perfect.
Preheating the cast iron skillet is another game-changer. It gives that crispy, almost caramelized bottom crust you just can’t get otherwise. Just be careful pulling a screaming-hot skillet from the oven—treat it like it’s live wire!
Cinnamon and nutmeg ratios are personal, but I find a bit of nutmeg sneaks in a cozy warmth without overpowering the apples. Don’t skip the lemon juice; it keeps the apple slices bright and prevents them from turning mushy and brown.
When assembling, don’t pack the apples too tightly. They shrink as they cook and you want them to have space to bubble and caramelize. And if you want a prettier crust edge, try crimping or folding the dough in little pleats around the rim—it’s easier than it sounds and looks charming.
Finally, multitasking is key—while the dough chills, get your apples ready. This way, you’re not rushing and everything flows smoothly. Trust me, patience here pays off in texture and flavor.
Variations & Adaptations
- Dietary Swap: For gluten-free, use a 1-to-1 gluten-free flour blend for the crust—Bob’s Red Mill is my go-to. For dairy-free, swap butter with coconut oil or vegan butter alternatives, keeping them cold for that flaky effect.
- Seasonal Twist: In late summer, swap apples for sliced peaches or nectarines. A sprinkle of ground ginger adds a nice zing with stone fruits.
- Flavor Boost: Add a handful of chopped toasted pecans or walnuts to the apple filling for crunch. Or swirl in a tablespoon of bourbon or maple syrup for a deeper, richer flavor profile.
- Alternative Cooking Method: If you don’t have an oven-safe skillet, you can assemble in a pie dish and bake as usual, but you’ll lose the crispy skillet crust charm.
- Personal Favorite: One time, I threw in a few dollops of cream cheese beneath the apple filling for a tangy surprise. It was unexpected but delicious—worth trying if you like cream cheese desserts!
Serving & Storage Suggestions
This skillet apple pie is best served warm, fresh out of the oven, with a generous scoop of vanilla ice cream or a dollop of whipped cream. The cold cream melts into the warm filling, creating that irresistible creamy-sweet combo. If you want to get festive, arrange the fresh berries on top in a flag shape or scatter them liberally for a casual look.
Leftovers can be stored in the refrigerator for up to 3 days, covered tightly with foil or plastic wrap. When reheating, warm it gently in a 325°F (160°C) oven for 10-15 minutes to bring back the crispy crust texture. Avoid the microwave if you want to keep that crunch.
Flavor actually deepens after a day or two as the spices mingle further, so if you can wait, it tastes even better the next day. Just bring it back to warm before serving. This pie also freezes well—wrap tightly and freeze for up to 2 months. Thaw overnight in the fridge and reheat as above.
Nutritional Information & Benefits
Per serving (based on 8 servings): approximately 290 calories, 12 g fat, 42 g carbohydrates, 3 g protein, and 3 g fiber.
Apples provide a good dose of fiber, vitamin C, and antioxidants, while cinnamon has anti-inflammatory properties. Using fresh berries adds vitamin C and antioxidants, making this dessert a bit more wholesome than your average pie. The recipe can be adjusted for lower sugar or dairy-free diets, making it versatile for many dietary preferences.
While this dessert is definitely a treat, it feels a little lighter thanks to fresh fruit and the homemade crust, which doesn’t rely on processed ingredients or preservatives. It’s a dessert that satisfies cravings without the heaviness.
Conclusion
This Perfect Cast Iron Loaded Apple Pie Skillet Patriotic recipe is one I keep coming back to whenever I want a dessert that’s both show-stopping and approachable. It’s flexible, forgiving, and packs that nostalgic warmth with a fresh, festive twist. I’ve made it for everything from casual family dinners to holiday barbecues, and it never disappoints.
Feel free to tweak the spices, swap fruits, or jazz up the crust to make it your own. The joy of this recipe is in its simplicity and the way it brings people together around the table. Honestly, it’s become my go-to when I want a dessert that feels like a warm hug—and a little celebration all at once.
Give it a try and let me know how you make it yours. I love hearing about your adaptations and favorite twists!
FAQs
Can I use frozen apples or berries for this recipe?
Fresh apples work best for the filling to maintain texture, but if you must use frozen, thaw and drain them well to avoid excess moisture. Frozen berries can be used for the topping but add them after baking to keep their shape and color.
How do I keep the crust from getting soggy?
Preheating the cast iron skillet and brushing it with butter helps create a barrier that crisps the crust. Also, don’t overfill with apples, and make sure to vent the dough with slits to release steam.
Can I make the dough ahead of time?
Yes! You can prepare the crust dough up to 2 days in advance and keep it wrapped in the fridge. Bring it to room temperature before rolling out for easier handling.
What’s the best way to store leftover pie?
Cover tightly and refrigerate for up to 3 days. Reheat in the oven at 325°F (160°C) to bring back the crisp crust rather than microwaving, which can make it soggy.
Is this recipe suitable for people with nut allergies?
Absolutely! The base recipe contains no nuts; just avoid adding any nut toppings or substitutions to keep it safe.
Pin This Recipe!
Perfect Cast Iron Loaded Apple Pie Skillet Recipe Easy Patriotic Dessert

A quick and easy cast iron skillet apple pie loaded with cinnamon-spiced apples and topped with fresh patriotic berries, perfect for summer celebrations.
- Prep Time: 25 minutes
- Cook Time: 35 minutes
- Total Time: 60 minutes
- Yield: 8 servings 1x
- Category: Dessert
- Cuisine: American
Ingredients
- 1 ½ cups (190 g) all-purpose flour
- ½ cup (115 g) unsalted butter, cold and cubed
- 2 tablespoons (25 g) granulated sugar
- 1 tablespoon (12 g) brown sugar
- 3–4 tablespoons (45–60 ml) cold water
- ¼ teaspoon salt
- 4 medium Granny Smith apples (about 1 lb / 450 g), peeled, cored, and sliced thin
- 1 ½ teaspoons ground cinnamon
- ¼ teaspoon ground nutmeg
- ¼ cup (50 g) brown sugar
- 1 tablespoon (15 ml) fresh lemon juice
- 2 tablespoons (28 g) unsalted butter, melted
- 1 teaspoon vanilla extract
- ½ cup (75 g) fresh strawberries, hulled and sliced
- ½ cup (75 g) fresh blueberries
- Powdered sugar, for dusting (optional)
- Vanilla ice cream or whipped cream, for serving (optional)
Instructions
- In a large bowl, whisk together flour, granulated sugar, brown sugar, and salt. Cut in cold, cubed butter until mixture resembles coarse crumbs.
- Slowly add cold water, one tablespoon at a time, mixing gently until dough just comes together. Wrap dough in plastic and chill for at least 20 minutes.
- Toss sliced apples with cinnamon, nutmeg, brown sugar, lemon juice, melted butter, and vanilla extract in a medium bowl. Set aside.
- Preheat oven to 375°F (190°C). Place cast iron skillet in oven to heat.
- Lightly flour a surface and roll chilled dough into a 12-inch circle about ⅛ inch thick.
- Remove hot skillet from oven, brush bottom and sides with butter. Pour apple filling evenly into skillet.
- Lay dough over apples, tucking edges around skillet rim. Cut slits in dough to vent steam.
- Bake for 30-35 minutes until crust is golden and filling bubbles. Tent with foil if crust browns too quickly.
- Remove from oven and let cool about 10 minutes. Scatter strawberries and blueberries on top in a pattern.
- Dust with powdered sugar if desired and serve warm with vanilla ice cream or whipped cream.
Notes
Use cold butter for a flaky crust. Preheat the cast iron skillet for a crispy bottom. If crust edges brown too fast, cover with foil halfway through baking. Rolling dough between parchment paper makes it easier. Dough can be made up to 2 days ahead and chilled. For gluten-free, use a 1-to-1 gluten-free flour blend. For dairy-free, substitute butter with cold coconut oil or vegan butter.
Nutrition
- Serving Size: 1 slice (1/8 of pie)
- Calories: 290
- Fat: 12
- Carbohydrates: 42
- Fiber: 3
- Protein: 3
Keywords: apple pie, cast iron skillet, patriotic dessert, easy apple pie, summer dessert, Fourth of July dessert