The first time I made these bars, it was late September. I had a bag of apples that were getting soft, a block of cream cheese that needed using up, and a craving for something that tasted like a hug. I had been looking for a dessert that actually delivered on all its promises—the buttery crunch of a crisp, the tangy sweetness of cheesecake, and that salty-sweet thing that makes you close your eyes after the first bite. For a while, I just accepted that a bar dessert wasn’t going to taste like the real thing. You know how it goes—either the crust gets soggy or the cheesecake layer is too dense or the apple topping just slides off. I wanted something that held together, that you could pick up and eat with your fingers if you wanted to, without everything falling apart. So I started testing. I made a batch with too much butter, then one with not enough sugar, then one where I forgot the salt entirely. That last one was the real wake-up call. The salted caramel isn’t just decoration—it’s what makes the whole thing sing. After a few more tries, I landed on a version that felt right. The kind of bar that makes you want to pour yourself a cup of coffee and sit down. Honestly, it took a few tries to get the layers just right, but once I did, I knew I wasn’t going back to plain apple crisp ever again.
Why You’ll Love These Salted Caramel Apple Crisp Cheesecake Bars
Look, I’m not going to tell you these bars are healthy. But I will tell you they’re worth every single bite. And honestly, that’s what a good dessert should be, right?
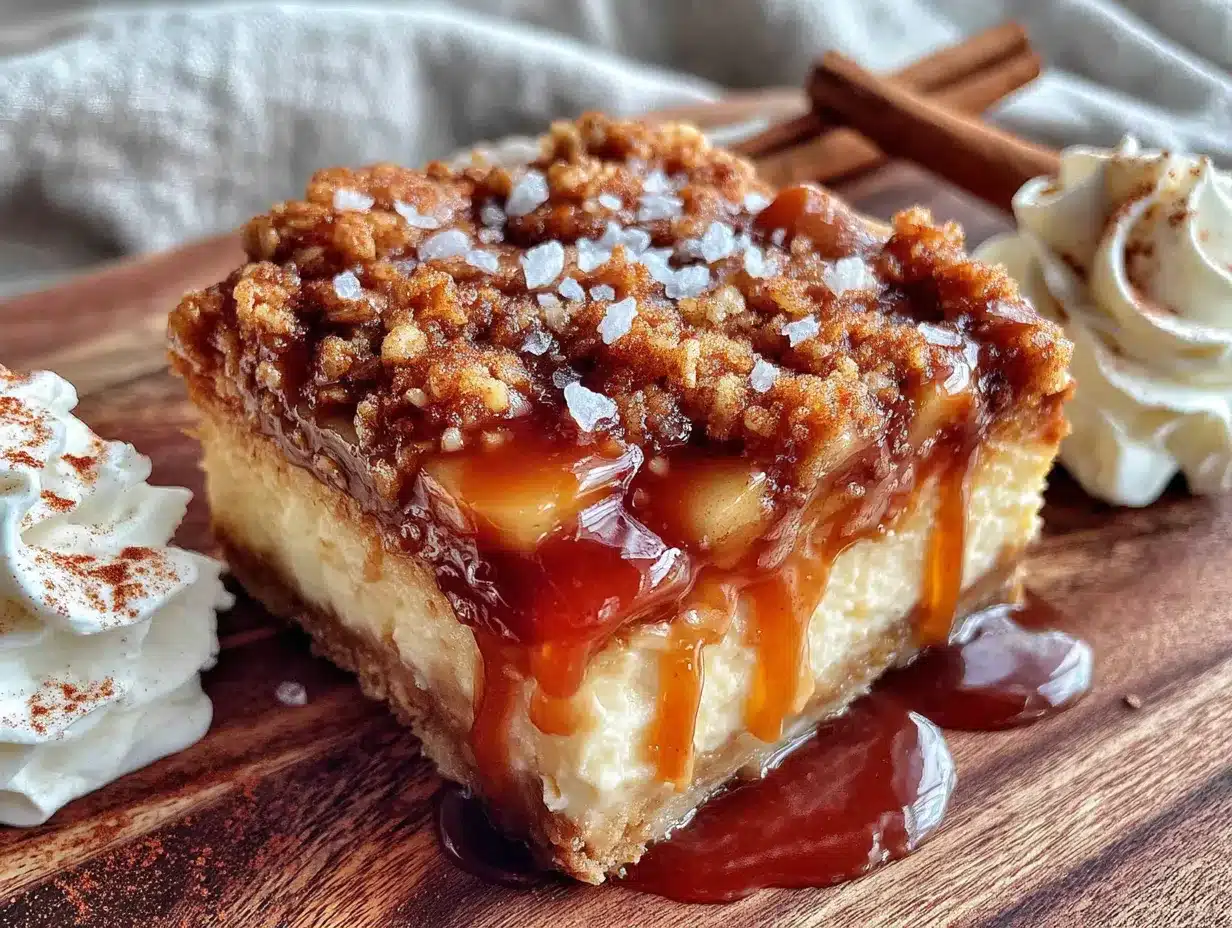
- Three layers, one perfect bite: You get a buttery shortbread crust, a creamy cheesecake filling, and a brown sugar oat topping all in one bar. It’s like a greatest hits album of fall desserts.
- No water bath required: I hate dealing with water baths for cheesecake. They always leak, they’re fussy, and honestly, who has time for that? These bars bake up perfectly without one.
- Make-ahead friendly: These actually taste better the next day. The flavors meld together, the caramel soaks into the apples just a little, and the crust stays firm. Perfect for holiday prep or just having dessert ready to go.
- Real apple flavor: We’re using fresh apples here, not canned filling. The apples cook down into a soft, jammy layer that’s honestly the best part.
- That salted caramel finish: A drizzle of homemade salted caramel on top takes these from good to “can I have the recipe?” good. It’s the kind of detail that makes people think you spent hours in the kitchen when you really didn’t.
What Ingredients You Will Need
This recipe uses pretty standard baking ingredients, but a few specific choices make a real difference. Here’s what you’ll need and why each one matters.
For the Crust
- 1 ½ cups all-purpose flour (190g) – Spoon and level it, don’t scoop. Too much flour makes the crust tough.
- ½ cup granulated sugar (100g) – Adds just enough sweetness to balance the tart apples.
- ½ cup unsalted butter, cold and cubed (113g, 1 stick) – Cold butter is key here. It creates that flaky, shortbread texture we’re after. I use Kerrygold when I can, but any good unsalted butter works.
- ¼ teaspoon salt – Don’t skip this. Salt makes the crust taste buttery, not just sweet.
For the Cheesecake Layer
- 16 oz cream cheese, softened (two 8-ounce blocks) – Full fat, please. Low-fat cream cheese has more water and can make the filling runny. Let it sit on the counter for at least an hour before you start.
- ½ cup granulated sugar (100g)
- 2 large eggs, room temperature – Cold eggs can seize up the cream cheese mixture and leave you with lumps. If you forgot to take them out, place them in a bowl of warm water for 5 minutes.
- 1 teaspoon vanilla extract – Pure vanilla, not imitation. It makes a difference here since the flavor is front and center.
- 2 tablespoons all-purpose flour (16g) – This helps stabilize the cheesecake so it doesn’t crack.
For the Apple Layer
- 3 cups peeled and diced apples (about 3 medium apples) – I like a mix of Granny Smith and Honeycrisp. The Granny Smith holds its shape and adds tartness, while the Honeycrisp breaks down a bit and adds sweetness. Fuji or Braeburn also work great.
- 3 tablespoons granulated sugar (36g)
- 1 tablespoon all-purpose flour (8g) – Helps thicken the apple juices as they bake.
- 1 teaspoon cinnamon – I use Saigon cinnamon when I can find it. It’s stronger and warmer than regular cinnamon.
- ¼ teaspoon nutmeg, freshly grated if possible – Pre-ground is fine, but fresh nutmeg really is better. It has a floral quality that ground nutmeg loses.
For the Crisp Topping
- ¾ cup old-fashioned rolled oats (70g) – Not quick oats. Quick oats get mushy and lose that nice texture. Old-fashioned oats hold their shape and give you that proper crisp.
- ½ cup all-purpose flour (60g)
- ½ cup packed brown sugar (100g, light or dark) – Dark brown sugar gives a deeper molasses flavor that I personally love with the apples.
- ½ cup unsalted butter, cold and cubed (113g, 1 stick)
- ½ teaspoon cinnamon
- ¼ teaspoon salt
For the Salted Caramel Drizzle
- ½ cup granulated sugar (100g)
- 3 tablespoons unsalted butter, cubed (42g)
- ¼ cup heavy cream (60ml)
- ½ teaspoon flaky sea salt (like Maldon) – Plus more for sprinkling on top. Regular table salt won’t give you the same texture or pop of flavor.
Equipment Needed
You don’t need a ton of fancy equipment for these bars, but a few things make the process much smoother.
- 9×13-inch baking pan – Metal pans work best here. Glass pans can cause the crust to brown unevenly. If you only have glass, reduce the oven temperature by 25°F.
- Parchment paper – Line the pan with a parchment sling (paper hanging over the long sides) so you can lift the bars out cleanly. Trust me, trying to cut these in the pan is a mess.
- Food processor or pastry cutter – For cutting the butter into the crust and topping. A food processor makes it quick, but a pastry cutter or even two forks work fine. I actually prefer using my hands for the topping—you get a better feel for the texture.
- Electric hand mixer or stand mixer – For the cheesecake filling. A whisk works too, but you’ll need some arm strength to get it smooth.
- Small saucepan – For the caramel. Light-colored metal is best so you can see the color change. I burned my first batch of caramel because I used a dark non-stick pan and couldn’t tell when it was done.
- Candy thermometer (optional but helpful) – For the caramel. You’re aiming for 350°F, which is the medium amber stage. If you don’t have one, watch for the color and smell—it should smell nutty and look like a warm penny.
Preparation Method
Let’s get into the actual making. I’ll walk you through each step with the little details that make a difference.
Step 1: Prep the Pan and Preheat
Preheat your oven to 350°F (175°C). Line a 9×13-inch baking pan with parchment paper, leaving about 2 inches of overhang on the long sides. This is your sling for lifting the bars out later. Lightly spray the parchment with non-stick spray.
Step 2: Make the Crust
In a food processor, combine 1½ cups flour, ½ cup sugar, and ¼ teaspoon salt. Pulse a few times to mix. Add the cold, cubed butter and pulse until the mixture looks like coarse sand with a few pea-sized butter pieces remaining. If you’re doing this by hand, use a pastry cutter or your fingertips to work the butter into the flour. Don’t overwork it—you want some little butter chunks for flakiness. Press the mixture evenly into the bottom of your prepared pan. Use the bottom of a measuring cup to really pack it down. Bake for 15-18 minutes, until the edges are just starting to turn golden. Set aside to cool slightly while you make the filling.
Step 3: Make the Cheesecake Filling
In a large bowl, beat the softened cream cheese with an electric mixer until smooth and creamy, about 2 minutes. Scrape down the bowl well. Add ½ cup sugar and beat until combined, another minute. Add the eggs one at a time, beating on low after each just until incorporated. Overmixing at this stage adds too much air and can cause cracks. Add the vanilla and 2 tablespoons flour, and mix on low until just combined. The mixture should be smooth and thick, like a very soft frosting. Pour this over the cooled crust and spread it evenly with an offset spatula.
Step 4: Prepare the Apples
In a medium bowl, toss the diced apples with 3 tablespoons sugar, 1 tablespoon flour, 1 teaspoon cinnamon, and ¼ teaspoon nutmeg. Let them sit for 5 minutes while you make the topping. This resting time lets the apples release some juice, which will help them cook down into that soft, jammy layer. Spoon the apples evenly over the cheesecake layer. Don’t worry if they’re piled up a bit—they’ll settle as they bake.
Step 5: Make the Crisp Topping
In the same food processor (no need to wash it), combine ¾ cup oats, ½ cup flour, ½ cup brown sugar, ½ teaspoon cinnamon, and ¼ teaspoon salt. Pulse to mix. Add the cold butter and pulse until the mixture forms clumps. You want some larger clumps (about the size of peas) and some smaller bits. If doing by hand, use a pastry cutter or your fingers. Sprinkle the topping evenly over the apples. Don’t press it down—you want it to stay loose and crumbly.
Step 6: Bake
Bake at 350°F for 45-50 minutes. The edges should be bubbly and the topping should be golden brown. The center might still jiggle slightly—that’s fine, it will set as it cools. If the topping is browning too quickly (after about 30 minutes), tent the pan loosely with foil. Let the bars cool completely in the pan on a wire rack, about 2 hours. Then refrigerate for at least 4 hours, preferably overnight. This is the hardest part, I know. But the bars need this time to set properly. Cutting them too early will give you a gooey mess.
Step 7: Make the Salted Caramel
While the bars are chilling, make the caramel. In a medium saucepan over medium heat, spread ½ cup sugar in an even layer. Let it melt without stirring. Swirl the pan occasionally once the edges start to turn golden. This takes about 5-7 minutes. When the sugar is a deep amber color (think the color of a penny), remove from heat and immediately whisk in the cubed butter. It will bubble up violently—that’s normal. Keep whisking until the butter is fully melted. Slowly pour in the heavy cream while whisking constantly. The mixture will steam and bubble again. Whisk until smooth. Stir in ½ teaspoon flaky sea salt. Let the caramel cool in the pan for 15 minutes, then transfer to a jar or bowl. It will thicken as it cools.
Step 8: Assemble and Serve
Once the bars are fully chilled and set, use the parchment sling to lift them out of the pan onto a cutting board. Use a sharp chef’s knife to cut into squares. I like 12 bars (3 rows by 4 rows), but you can do smaller ones for a crowd. Wipe the knife clean between cuts for neat edges. Drizzle the salted caramel over the bars just before serving. Sprinkle with a little extra flaky sea salt. Serve cold or at room temperature.
Cooking Tips & Techniques
I’ve made these bars more times than I care to count, and I’ve learned a few things along the way. Here are the tips that actually matter.
Room temperature ingredients are non-negotiable. I know it’s tempting to use cold cream cheese and eggs straight from the fridge, but it creates a lumpy cheesecake filling that never quite smooths out. Set everything out an hour before you start. If you forget, microwave the cream cheese in 10-second bursts until it’s soft to the touch, and place the eggs in a bowl of warm water for 5 minutes.
Don’t overmix the cheesecake. More air in the filling means more cracks. Mix just until everything comes together, then stop. A few tiny lumps are better than a cracked surface.
Let the crust cool before adding the cheesecake. I learned this one the hard way. Hot crust + cold cheesecake filling = a soggy, sad bottom layer. Give it at least 10 minutes to cool down.
Chill overnight for clean slices. I know you want to eat them right away. I get it. But if you cut into these bars while they’re even slightly warm, the cheesecake will squish out and the layers will slide apart. Overnight chilling gives you those beautiful, clean layers you see in photos.
Watch the caramel carefully. Caramel can go from perfect to burnt in about 30 seconds. Once it reaches that deep amber color, pull it off the heat immediately. If you see any smoke, you’ve gone too far. Start over—burnt caramel tastes bitter and there’s no saving it.
Variations & Adaptations
One of the best things about this recipe is how flexible it is. Here are some ways to make it your own.
Gluten-free version: Substitute the all-purpose flour in the crust and topping with a 1:1 gluten-free baking flour blend. I’ve used King Arthur Measure for Measure with great results. The texture is slightly more tender, but still holds together well.
Dairy-free adaptation: Use vegan butter (I like Miyoko’s) and dairy-free cream cheese (Kite Hill is my go-to). The texture won’t be quite as creamy, but it’s still delicious. Use full-fat coconut cream instead of heavy cream in the caramel.
Apple variations: Try different apple combinations. In the fall, I love using a mix of Jonagold and Empire apples. If you only have one type, go with Honeycrisp—they’re sweet enough that you can reduce the sugar in the apple layer by a tablespoon.
Spice it up: Add ¼ teaspoon cardamom to the apple mixture for a warm, floral note. Or try ⅛ teaspoon cloves for a deeper, more traditional flavor. A pinch of allspice works great too.
Pear version: Swap the apples for firm, ripe pears (like Bosc or Anjou). Pears are sweeter and softer, so reduce the sugar in the apple layer by a tablespoon and add an extra tablespoon of flour to absorb the extra juice.
No caramel? Skip the homemade caramel and use a good-quality store-bought one. I like Trader Joe’s Fleur de Sel Caramel Sauce in a pinch. It’s not quite as good as homemade, but it saves time.
Serving & Storage Suggestions
These bars are versatile enough for any occasion, from a casual weeknight treat to a holiday dessert table.
Serving temperature: I prefer these bars cold, straight from the fridge. The cheesecake is firm and creamy, and the caramel is thick and chewy. At room temperature, the cheesecake softens and the caramel gets runny—still delicious, but messier. Try both and see what you like.
Presentation ideas: For a pretty presentation, cut the bars into neat squares and arrange them on a platter. Drizzle the caramel in a zigzag pattern over the top, then sprinkle with a pinch of flaky sea salt. A dollop of whipped cream on the side is never a bad idea. For a fall-themed dessert board, arrange the bars alongside savory Cracker Barrel loaded fried apples for a sweet and savory combo.
Storage: Store the bars in an airtight container in the refrigerator for up to 5 days. Keep the caramel separate and drizzle it on just before serving, or the bars will get soggy. If you’ve already drizzled the caramel, they’ll keep for about 2 days before the topping starts to soften.
Freezing instructions: These freeze beautifully. Freeze the un-cut bars in the pan (wrap tightly in plastic wrap, then foil) for up to 3 months. Or freeze individual bars on a baking sheet, then transfer to a freezer bag. Thaw overnight in the refrigerator before serving. Make the caramel fresh when you’re ready to serve—frozen and thawed caramel can separate.
Flavor development: These bars actually taste better on day two. The flavors meld together, the apples soften a bit more, and the crust absorbs just a hint of moisture from the cheesecake. If you can, make them a day ahead.
Nutritional Information & Benefits
Let’s be real—this is a dessert, not a health food. But that doesn’t mean it’s without merit. Here’s a rough breakdown per bar (assuming 12 servings).
| Nutrient | Amount per Bar |
|---|---|
| Calories | ~480 |
| Total Fat | 28g |
| Saturated Fat | 17g |
| Cholesterol | 105mg |
| Sodium | 320mg |
| Total Carbohydrates | 52g |
| Dietary Fiber | 2g |
| Sugars | 36g |
| Protein | 7g |
On the plus side, the apples provide a decent amount of fiber and vitamin C. The oats in the topping add a little more fiber and some B vitamins. The cream cheese offers calcium and protein. And honestly? The mental health benefits of eating a really good dessert are real. Life is short. Eat the cheesecake bar.
Dietary considerations: This recipe contains gluten, dairy, and eggs. See the variations section for gluten-free and dairy-free adaptations. It is not suitable for a vegan diet without significant modifications.
Frequently Asked Questions
Can I use pre-made caramel sauce instead of making my own?
Absolutely. A good quality store-bought salted caramel sauce works great. Just warm it slightly before drizzling so it flows nicely. I’ve used Trader Joe’s and Stonewall Kitchen brands with good results.
Why did my cheesecake layer crack?
Cracks usually happen from overmixing or overbaking. Mix the filling just until combined, and don’t beat too much air into it. Also, make sure your cream cheese is fully softened so it blends smoothly. If the edges are pulling away from the pan, you’ve baked it a few minutes too long.
Can I use quick oats instead of old-fashioned oats?
You can, but the texture won’t be the same. Quick oats are more finely chopped and will absorb moisture faster, giving you a softer, less crunchy topping. If that’s all you have, go for it, but old-fashioned oats really are better here.
How do I get clean, neat slices?
Chill the bars completely—overnight is best. Use a sharp chef’s knife and wipe it clean with a damp paper towel between each cut. Cut in one smooth motion rather than sawing back and forth. If the caramel is sticky, dip the knife in hot water and dry it before cutting.
Can I make these bars in advance for a party?
Yes, and I actually recommend it. Make the bars up to two days ahead and keep them in the refrigerator. Make the caramel the day you plan to serve them. Drizzle the caramel over the bars just before serving so the topping stays crisp. This is honestly the best way to do it for a party—no last-minute stress.
Conclusion
These Salted Caramel Apple Crisp Cheesecake Bars are the kind of dessert that makes people close their eyes and sigh. They’re not the simplest thing you’ll ever make, but every layer is worth the effort. The buttery crust, the creamy cheesecake, the soft apples, the crunchy topping, and that final hit of salted caramel—it all comes together in one perfect bite.
I love that this recipe feels special enough for a holiday table but easy enough for a random Tuesday when you just need something sweet. It’s the kind of dessert that makes you feel like you’ve accomplished something, even if all you did was follow a recipe.
If you make these bars, I’d love to hear about it. Leave a comment below and tell me how they turned out. Did you use a different apple variety? Did you add extra caramel? Did you eat three in one sitting? (No judgment here.) And if you’re looking for more fall dessert inspiration, don’t miss my perfect cast iron loaded apple pie skillet recipe and this cozy cast iron loaded peach cobbler recipe for more easy, comforting desserts.
Go ahead, make these bars. Your kitchen will smell incredible, your friends will think you’re a genius, and you’ll have dessert sorted for days. You deserve it.
Pin This Recipe!
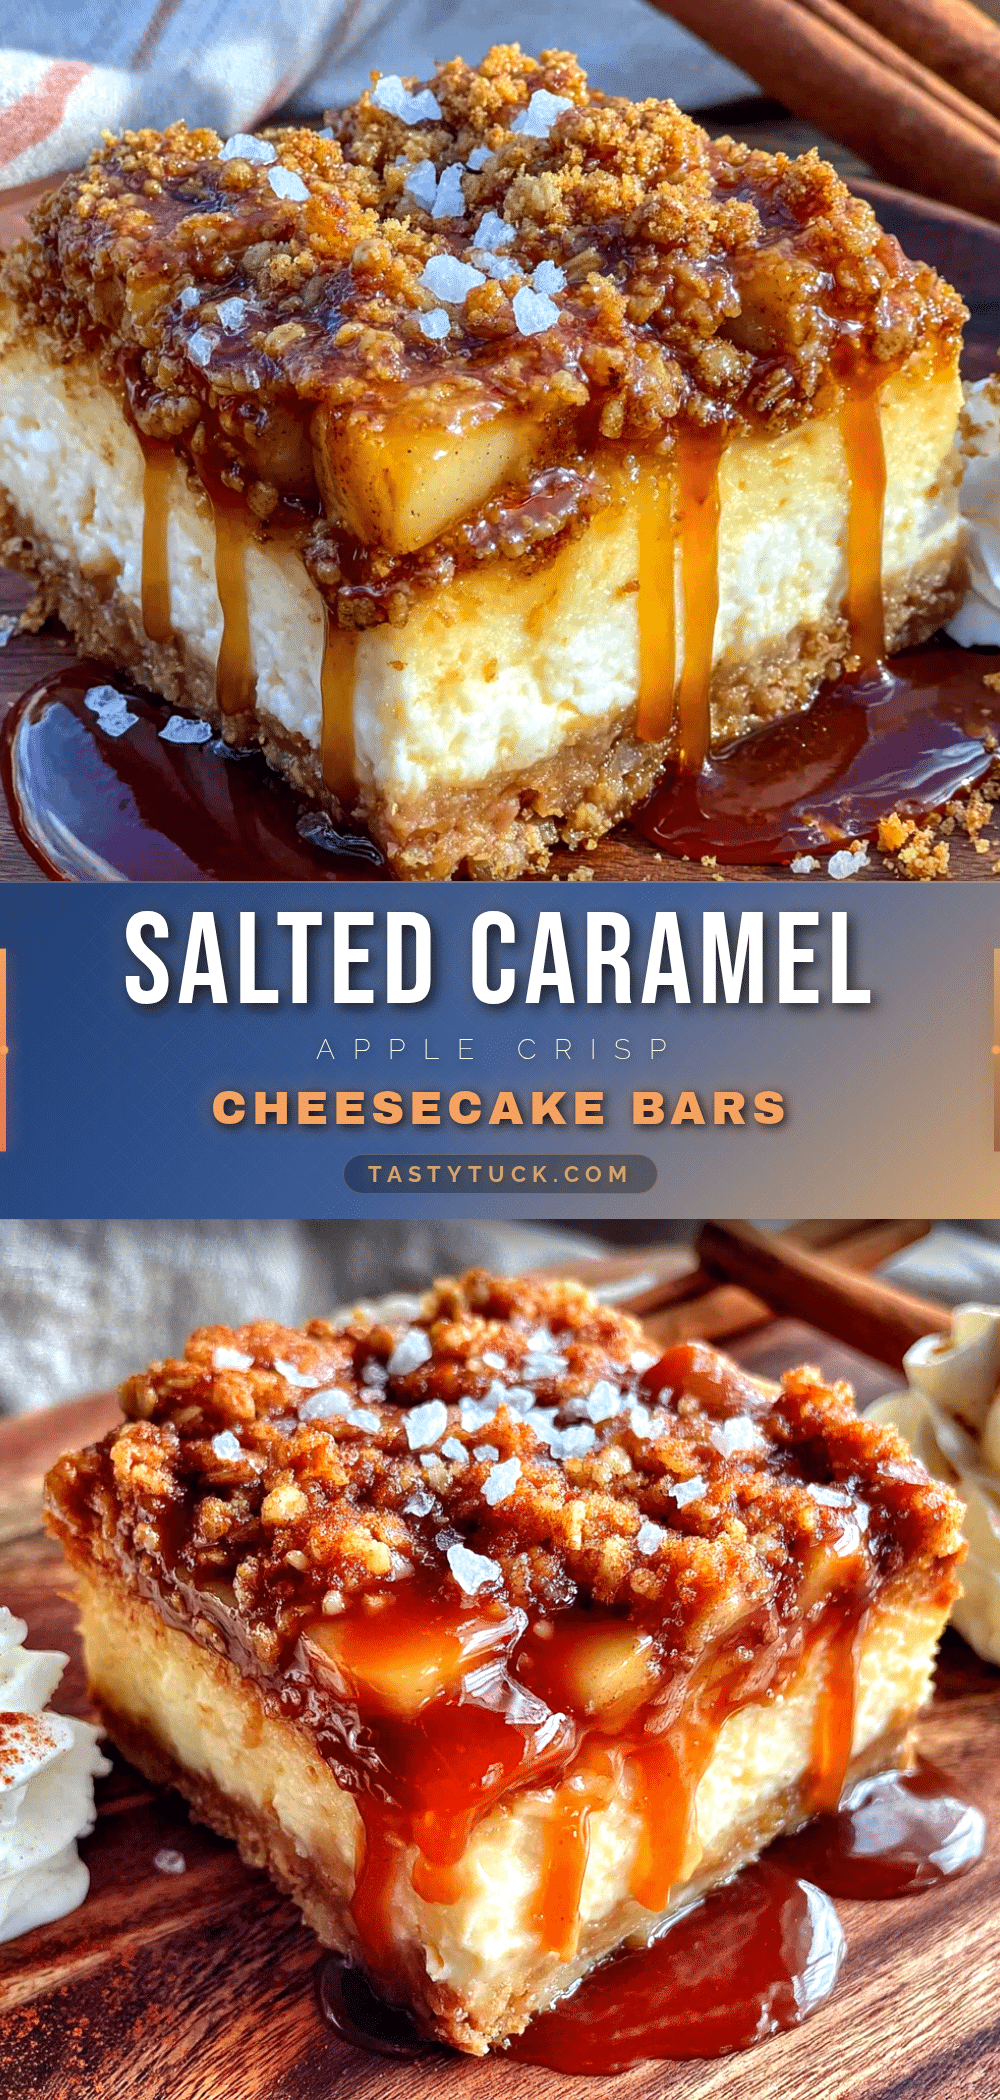
Best Salted Caramel Apple Crisp Cheesecake Bars: Easy Fall Dessert
Three layers of fall perfection: a buttery shortbread crust, creamy cheesecake filling, and brown sugar oat topping, all finished with a drizzle of homemade salted caramel. These bars are make-ahead friendly and deliver real apple flavor without a water bath.
- Prep Time: 30 minutes
- Cook Time: 50 minutes
- Total Time: 5 hours (includes chilling time)
- Yield: 12 servings 1x
- Category: Dessert
- Cuisine: American
Ingredients
- 1 ½ cups all-purpose flour (190g)
- ½ cup granulated sugar (100g)
- ½ cup unsalted butter, cold and cubed (113g, 1 stick)
- ¼ teaspoon salt
- 16 oz cream cheese, softened (two 8-ounce blocks)
- ½ cup granulated sugar (100g)
- 2 large eggs, room temperature
- 1 teaspoon vanilla extract
- 2 tablespoons all-purpose flour (16g)
- 3 cups peeled and diced apples (about 3 medium apples)
- 3 tablespoons granulated sugar (36g)
- 1 tablespoon all-purpose flour (8g)
- 1 teaspoon cinnamon
- ¼ teaspoon nutmeg, freshly grated if possible
- ¾ cup old-fashioned rolled oats (70g)
- ½ cup all-purpose flour (60g)
- ½ cup packed brown sugar (100g, light or dark)
- ½ cup unsalted butter, cold and cubed (113g, 1 stick)
- ½ teaspoon cinnamon
- ¼ teaspoon salt
- ½ cup granulated sugar (100g)
- 3 tablespoons unsalted butter, cubed (42g)
- ¼ cup heavy cream (60ml)
- ½ teaspoon flaky sea salt (like Maldon)
Instructions
- Preheat oven to 350°F (175°C). Line a 9×13-inch baking pan with parchment paper, leaving about 2 inches of overhang on the long sides. Lightly spray with non-stick spray.
- Make the crust: In a food processor, combine 1½ cups flour, ½ cup sugar, and ¼ teaspoon salt. Pulse to mix. Add cold, cubed butter and pulse until mixture looks like coarse sand with a few pea-sized butter pieces. Press evenly into prepared pan. Bake for 15-18 minutes until edges are just golden. Set aside to cool slightly.
- Make the cheesecake filling: In a large bowl, beat softened cream cheese with an electric mixer until smooth, about 2 minutes. Add ½ cup sugar and beat until combined. Add eggs one at a time, beating on low just until incorporated. Add vanilla and 2 tablespoons flour, mix on low until just combined. Pour over cooled crust and spread evenly.
- Prepare the apples: In a medium bowl, toss diced apples with 3 tablespoons sugar, 1 tablespoon flour, 1 teaspoon cinnamon, and ¼ teaspoon nutmeg. Let sit for 5 minutes. Spoon evenly over cheesecake layer.
- Make the crisp topping: In the same food processor, combine ¾ cup oats, ½ cup flour, ½ cup brown sugar, ½ teaspoon cinnamon, and ¼ teaspoon salt. Pulse to mix. Add cold butter and pulse until mixture forms clumps. Sprinkle evenly over apples without pressing down.
- Bake at 350°F for 45-50 minutes until edges are bubbly and topping is golden brown. If topping browns too quickly, tent with foil after 30 minutes. Cool completely in pan on wire rack (about 2 hours), then refrigerate for at least 4 hours, preferably overnight.
- Make the salted caramel: In a medium saucepan over medium heat, spread ½ cup sugar in an even layer. Let melt without stirring, swirling occasionally until deep amber color (about 5-7 minutes). Remove from heat and whisk in cubed butter. Slowly pour in heavy cream while whisking constantly. Whisk until smooth. Stir in ½ teaspoon flaky sea salt. Cool for 15 minutes.
- Assemble: Use parchment sling to lift bars onto cutting board. Cut into 12 squares with a sharp knife, wiping clean between cuts. Drizzle with salted caramel just before serving and sprinkle with extra flaky sea salt. Serve cold or at room temperature.
Notes
Room temperature ingredients are essential for a smooth cheesecake. Chill overnight for clean slices. Caramel can burn quickly—watch carefully. Store bars in refrigerator for up to 5 days; keep caramel separate until serving. Freeze bars for up to 3 months.
Nutrition
- Serving Size: 1 bar
- Calories: 480
- Sugar: 36
- Sodium: 320
- Fat: 28
- Saturated Fat: 17
- Carbohydrates: 52
- Fiber: 2
- Protein: 7
Keywords: salted caramel, apple crisp, cheesecake bars, fall dessert, apple dessert, cheesecake bars, easy dessert, holiday dessert


