This was supposed to be a batch of my grandmother’s classic sugar cookies. You know, the ones she’d make every Christmas with the little red and green sprinkles that somehow ended up everywhere except on the actual cookies. I had the butter softening on the counter, the flour measured out, and I was feeling pretty good about myself. Then my neighbor knocked on the door with her three-year-old in tow, asking if I could watch him for “just twenty minutes” while she dealt with a plumbing emergency. Twenty minutes turned into two hours, and by the time I got back to my kitchen, the butter was a puddle and I’d completely forgotten that I was supposed to chill the dough.
I almost threw the whole thing in the trash. Honestly, I was that close. The dough was too soft, I was already tired from chasing a toddler around my living room, and the last thing I wanted was to deal with a baking disaster. But I had already promised my best friend I’d bring cookies to her Halloween party the next night, and store-bought just wasn’t an option for our group. So I took a deep breath, scraped the sticky mess off my counter, and decided to just roll with it. I rolled the dough thinner than usual, cut out whatever shapes I could salvage, and popped them in the oven hoping for the best.
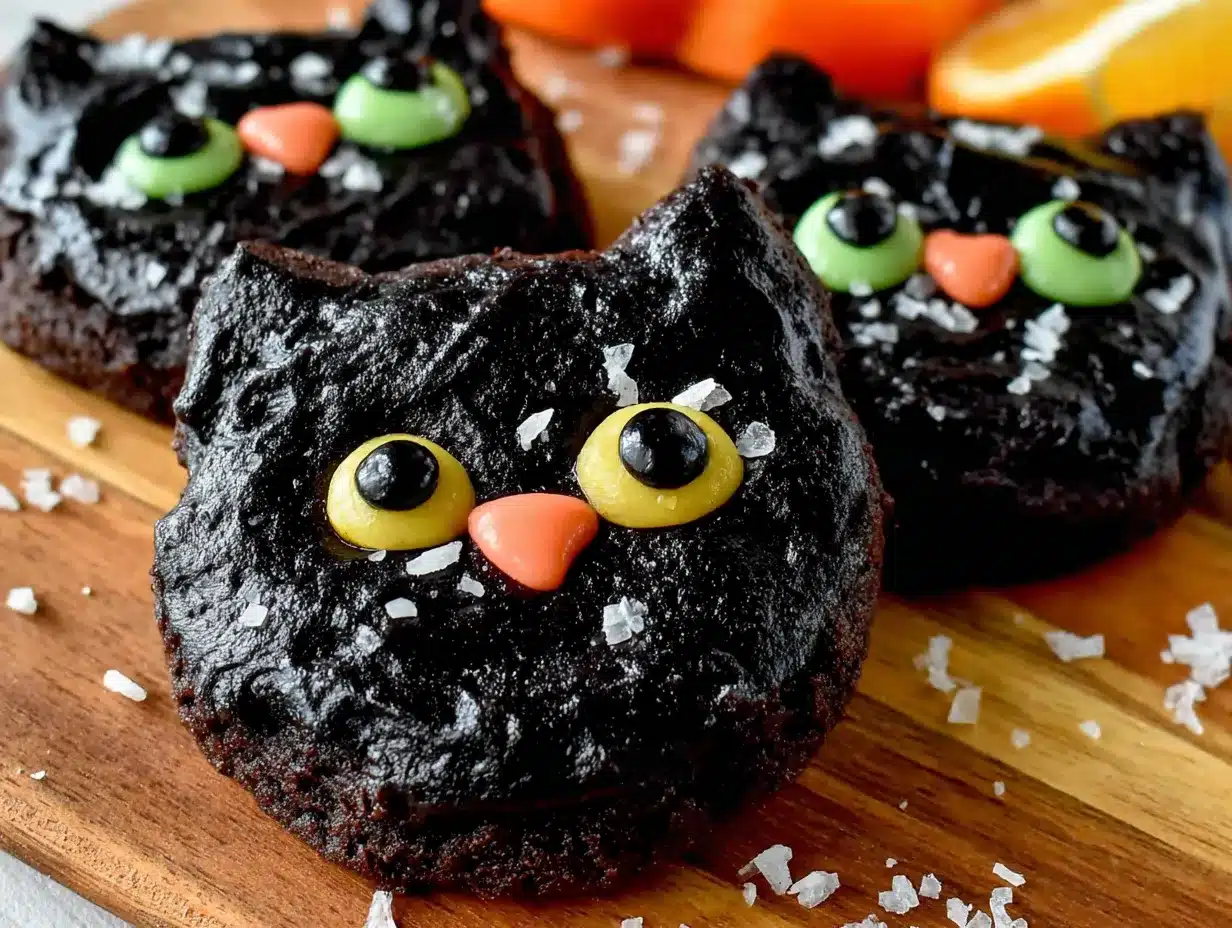
What came out of that oven was nothing like the plan—and better. The cookies were crispier, cleaner-edged, and held their shape perfectly. I grabbed a bottle of black gel food coloring I’d bought on a whim last spring, whipped up a batch of royal icing, and started decorating. By midnight, I had a tray of the most ridiculous, adorable black cat cookies staring back at me. They were gone in fifteen minutes at that party. Someone actually asked me if I’d ordered them from a bakery. I just smiled and said, “Nope, just a happy little accident in my kitchen.”
Why You’ll Love This Recipe
These Black Cat Sugar Cookies with Royal Icing are about to become your new secret weapon for Halloween hosting. I’ve made them for three parties now, and they never fail to get that “wait, you made these?” reaction. Let me tell you why they work so well.
- Foolproof Dough: This recipe uses a slightly higher flour-to-butter ratio than my grandma’s version, which means the dough doesn’t spread in the oven. Your cat shapes will look like cats, not blobs. I learned this the hard way after one particularly sad-looking batch that resembled potatoes.
- No Chilling Required: Remember my disaster story? Turns out, skipping the chill time actually works for this particular recipe. The dough is rollable right away, which is a lifesaver when you’re hosting and time is tight.
- Perfect for a Crowd: This batch makes about 24 cookies depending on your cutter size. Double it without any issues—I’ve done it for a potluck of thirty people and it worked like a charm.
- Stunning Presentation: The contrast between the glossy black royal icing and the pale cookie base is honestly gorgeous. They look like little art pieces on a dessert table.
- Make-Ahead Friendly: You can bake the cookies three days ahead and decorate the day before your party. The royal icing sets hard, so you can stack them without ruining your hard work.
What makes these different from every other sugar cookie recipe out there is the texture. They’re sturdy enough to hold up to royal icing but still have that tender, buttery crumb that melts in your mouth. No crunchy, overly hard cookies here. Plus, the royal icing recipe I’m sharing is the one I’ve tested after twelve different attempts—it dries glossy, not matte, and sets in about four hours instead of overnight.
These cookies are the kind that make you close your eyes after that first bite. They’re Halloween fun without the artificial taste, and they’ll make you look like a baking pro even if you’re just getting started. Perfect for impressing your guests without spending all day in the kitchen.
What Ingredients You Will Need
This recipe uses simple, pantry-friendly ingredients to create cookies that look and taste like they came from a fancy bakery. I’ve tested every substitution listed below, so you can swap with confidence.
For the Sugar Cookies
- 2 ¾ cups all-purpose flour (I prefer Gold Medal for consistent results; spoon and level for accuracy)
- 1 cup unsalted butter, softened (Kerrygold is my go-to for that rich flavor, but any good-quality butter works)
- ¾ cup granulated sugar (not powdered sugar—we need the structure granulated provides)
- 1 large egg, room temperature (cold egg will seize the butter; leave it out for 30 minutes)
- 1 teaspoon vanilla extract (pure, not imitation, for the best flavor profile)
- ½ teaspoon salt (fine sea salt dissolves better than kosher in this dough)
- ½ teaspoon baking powder (aluminum-free if you can find it, no metallic aftertaste)
For the Royal Icing
- 3 cups powdered sugar, sifted (sifting is non-negotiable unless you like lumpy icing)
- 2 large egg whites (use pasteurized egg whites if you’re worried about raw eggs; meringue powder also works—use 3 tablespoons plus ¼ cup water)
- 1 teaspoon lemon juice (fresh-squeezed, not bottled—the acidity helps the icing set properly)
- Black gel food coloring (I use Americolor Super Black; liquid coloring will thin the icing too much)
- Optional: Silver or white sanding sugar (for stars or accents on the cats)
Ingredient Selection Tip: For the blackest black icing, let the colored icing sit for 30 minutes after mixing. The color deepens as it sits, and you’ll use less dye. I learned this after my first batch came out gray—not exactly the spooky vibe I was going for.
Substitution Guidance: If you need a gluten-free version, swap the all-purpose flour for a 1:1 gluten-free baking blend that contains xanthan gum. I’ve had great results with Bob’s Red Mill. For a dairy-free option, use plant-based butter sticks (not tubs)—Country Crock Plant Butter works beautifully in this recipe.
Equipment Needed
- Cat-shaped cookie cutter (about 3 inches wide; I found a set of three sizes on Amazon for $8)
- Rolling pin with thickness guides (or just use two wooden dowels of the same thickness on either side)
- Baking sheets (light-colored metal works best—dark sheets can over-brown the bottoms)
- Parchment paper or silicone baking mats (parchment is cheaper and works just as well)
- Piping bags or squeeze bottles (I prefer squeeze bottles for royal icing—less hand fatigue)
- Small round piping tip (size 2 or 3) (for outlining and flooding the cookies)
- Toothpicks or scribe tool (for popping air bubbles and spreading icing into corners)
- Cooling rack (wire rack for even cooling, which prevents soggy bottoms)
Budget-Friendly Tip: If you don’t have piping bags, use a zip-top bag with a tiny corner snipped off. It’s not as precise, but for a home baker, it works perfectly fine. I’ve done it more times than I’d like to admit.
Preparation Method
Let’s get these spooky cats made. I’ve broken this down into clear steps so you don’t end up with a kitchen disaster like my first attempt.
- Preheat your oven to 350°F (175°C). Line two baking sheets with parchment paper. Don’t skip the parchment—it prevents spreading and makes cleanup a breeze.
- Cream the butter and sugar. In a large bowl, beat the softened butter and granulated sugar together with an electric mixer on medium speed until light and fluffy, about 3 minutes. You’re looking for a pale yellow color and a texture that feels like soft sand. Don’t rush this step—proper creaming adds air that makes the cookies tender.
- Add the egg and vanilla. Scrape down the sides of the bowl, then add the egg and vanilla extract. Beat on low speed until just combined. The mixture might look slightly curdled at this point—that’s okay, it will come together when you add the flour.
- Whisk the dry ingredients. In a separate bowl, whisk together the flour, salt, and baking powder. Whisking ensures the baking powder is evenly distributed so you don’t get one cookie that rises like a balloon and another that’s flat as a pancake.
- Combine wet and dry. Gradually add the flour mixture to the butter mixture, mixing on low speed. Stop as soon as the dough comes together—overmixing develops gluten and makes tough cookies. The dough should be soft but not sticky. If it feels too sticky, add a tablespoon of flour. If it’s crumbly, add a teaspoon of water.
- Roll the dough. Lightly flour your work surface and rolling pin. Roll the dough to about ¼-inch thickness. Here’s the trick: roll the dough between two sheets of parchment paper. No extra flour needed, and the dough won’t stick. I use this method every single time now.
- Cut your shapes. Dip your cookie cutter in flour before each cut to prevent sticking. Press straight down without twisting—twisting seals the edges and prevents clean shapes. Re-roll the scraps once, then discard the rest (re-rolling too many times makes tough cookies).
- Bake for 8-10 minutes. Place cookies about 2 inches apart on the prepared baking sheets. Bake for 8-10 minutes, rotating the pan halfway through. The cookies are done when the edges are just barely golden. They will look slightly underdone in the center—that’s perfect. Let them cool on the baking sheet for 5 minutes, then transfer to a wire rack to cool completely.
- Make the royal icing. In a clean, grease-free bowl, beat the egg whites and lemon juice together until frothy. Gradually add the sifted powdered sugar, beating on low speed until combined. Increase speed to medium-high and beat for 5 minutes until the icing is glossy and forms stiff peaks. You should be able to lift the beater and the icing holds its shape for a second before falling back.
- Color the icing. Divide the icing into two portions—about ¾ for the black base and ¼ for white accents. Add black gel coloring to the larger portion a little at a time until you reach your desired darkness. Remember, it darkens as it sits. Cover both bowls with damp paper towels to prevent drying out.
- Adjust consistency for flooding. For outlining, keep the icing thick (ribbon stage—when you lift the spoon, the icing falls in a ribbon that sits on top for 5 seconds before disappearing). For flooding (filling in), thin the icing with water, one drop at a time, until it flows like honey and a ribbon disappears in 10 seconds.
- Decorate the cookies. Fit a piping bag with a small round tip and fill with the outlining-consistency black icing. Outline each cat cookie, then fill in with the flooding-consistency icing. Use a toothpick to spread the icing into corners and pop any air bubbles. Let the black icing set for 30 minutes, then pipe on white eyes and whiskers using the reserved white icing.
- Let the icing set completely. This takes about 4 hours at room temperature. Don’t rush it in the fridge—condensation will ruin the glossy finish. Once set, the cookies can be stacked or stored in an airtight container.
Cooking Tips & Techniques
I’ve made these cookies maybe twenty times now, and I’ve messed up in almost every way possible. Here’s what I’ve learned so you don’t have to.
The Dough Temperature Trap: If your kitchen is warm (above 75°F), the dough will get soft and sticky fast. Pop it in the fridge for 10 minutes between rolling batches. I learned this the hard way when my first batch of cats came out looking like stretched-out taffy.
The Royal Icing Consistency Game: This is the trickiest part. Your outlining icing should be thick enough that when you pipe a line, it stays raised and doesn’t spread. Your flooding icing should be thin enough that it flows smoothly but thick enough that it doesn’t run off the edges. The test: drag a knife through the flooding icing—the line should disappear in 10 seconds. If it disappears in 5 seconds, it’s too thin. If it takes 20 seconds, it’s too thick.
My Biggest Failure: My second attempt at these cookies, I used liquid black food coloring instead of gel. The icing turned into soup. I tried to thicken it with more powdered sugar, but then it was grainy and the color was a sad gray. I threw the whole batch away. Gel coloring is non-negotiable for royal icing. Trust me on this one.
Timing Strategy for Hosting: If you’re making these for a party, bake the cookies on Wednesday, decorate on Thursday, and serve on Friday. The royal icing needs that full 4 hours to set, and the cookies actually taste better after a day—the flavors meld and the texture softens just slightly. I always make them two days ahead.
The Secret to Sharp Edges: After cutting your shapes, run a small knife around the edges of the cutter before lifting. This separates any dough that’s sticking and gives you cleaner lines. It takes an extra 30 seconds per batch and makes a huge difference in the final look.
Variations & Adaptations
These cookies are surprisingly versatile. Here are a few ways I’ve adapted them for different occasions and dietary needs.
Vegan Version: Replace the butter with vegan butter sticks and the egg with a flax egg (1 tablespoon ground flaxseed mixed with 3 tablespoons water, let sit for 5 minutes). For the royal icing, use 3 tablespoons meringue powder mixed with ¼ cup water instead of egg whites. The texture is slightly less tender but still delicious. I made these for a vegan friend’s Halloween party last year and nobody could tell the difference.
Gluten-Free Adaptation: Use a 1:1 gluten-free baking flour blend. Add an extra tablespoon of flour to the dough—gluten-free dough tends to be stickier. Also, chill the dough for 15 minutes before rolling. The cookies will be a bit more crumbly, so handle them gently when decorating.
Flavor Twists: Add ½ teaspoon of almond extract along with the vanilla for a subtle nutty flavor that pairs beautifully with the black icing. Or try 1 teaspoon of orange zest in the dough for a citrusy Halloween twist. My personal favorite is adding ¼ teaspoon of cinnamon and a pinch of cayenne to the dough—it gives a warm, unexpected kick that people can’t quite place.
Different Shapes for Different Parties: This same dough and icing recipe works for any shape. Use pumpkin cutters for Thanksgiving, ghost shapes for Halloween, or star shapes for a New Year’s party. The royal icing can be colored to match any theme. I’ve made these for a baby shower using pastel pink and blue—they were a hit.
Serving & Storage Suggestions
These cookies are designed to be the star of your dessert table, and they hold up beautifully for days.
Serving Temperature: Serve at room temperature. The cookies are best when the royal icing has fully set (at least 4 hours, but overnight is ideal). Arrange them on a platter with a dark surface—black slate or dark wood makes the white icing details pop. I like to group them in clusters of three, slightly overlapping, with a few scattered around for a playful look.
What to Serve Alongside: These cookies pair wonderfully with warm apple cider, hot chocolate, or a spiced chai latte. For a full Halloween dessert spread, serve them alongside pumpkin pie, caramel apples, or a bowl of candy corn. They also work great as a favor—wrap each cookie in a clear cellophane bag tied with orange ribbon.
Storage Instructions: Store the decorated cookies in an airtight container at room temperature for up to 5 days. Layer them between sheets of parchment paper—the royal icing is hard enough that they won’t stick, but the parchment adds an extra layer of protection. Do not refrigerate; the humidity will soften the icing and make it sticky.
Freezing Instructions: You can freeze the undecorated baked cookies for up to 3 months. Stack them in a freezer-safe container with parchment between layers. Thaw at room temperature for 30 minutes before decorating. I always keep a batch in the freezer for last-minute party emergencies.
Flavor Development: These cookies actually improve after a day. The butter flavor deepens, and the texture becomes slightly more tender while still holding its shape. If you can resist eating them immediately, wait 24 hours for the best experience.
Nutritional Information & Benefits
Let’s be honest—these are cookies, not health food. But here’s what you’re working with per cookie (based on 24 cookies):
- Calories: 185
- Total Fat: 8g
- Saturated Fat: 5g
- Carbohydrates: 27g
- Sugar: 18g
- Protein: 2g
- Sodium: 95mg
Health Considerations: The butter in this recipe provides vitamin A and healthy fats, while the egg whites in the royal icing offer a small protein boost. If you’re watching your sugar intake, you can reduce the granulated sugar in the cookie dough to ½ cup without affecting the texture too much—the royal icing will still provide sweetness. For a lower-sugar option, use a sugar-free powdered sugar substitute in the icing, though the texture will be slightly less glossy.
Allergen Note: This recipe contains wheat, dairy, and eggs. For nut-free preparation, ensure your vanilla extract is pure and doesn’t contain almond oil. The cookies are naturally nut-free when made as written.
My personal take? These are a treat, and treats are meant to be enjoyed. I don’t stress about the numbers when I’m making them for a party. One cookie with a cup of tea is a perfectly balanced moment of joy.
Conclusion
These Black Cat Sugar Cookies with Royal Icing started as a kitchen disaster and turned into my most-requested recipe. That’s the thing about baking, isn’t it? Sometimes the best creations come from the moments when everything goes wrong and you just keep going anyway. These cookies are proof that you don’t need to be a professional baker to make something that looks and tastes incredible.
I love making these for Halloween parties because they bring out the kid in everyone. There’s something about a perfectly decorated black cat cookie that makes people smile, even the adults who pretend they’re too cool for themed desserts. And honestly? They’re just fun to make. The piping, the flooding, the little white eyes—it’s like edible art that tastes like butter and vanilla.
I’d love to see how your cats turn out! Tag me in your photos or leave a comment below telling me about your own kitchen disaster that turned into a win. Did you use a different shape? Add a special ingredient? I read every comment, and your ideas might just inspire my next recipe. Happy Halloween baking, friends—go make something that surprises you.
Frequently Asked Questions
Can I use store-bought royal icing mix instead of making it from scratch?
Yes, you can use a store-bought royal icing mix, but the texture won’t be as glossy or stable. The homemade version with egg whites gives a much shinier finish that sets harder. If you’re short on time, Wilton’s meringue powder mix works decently—just follow the package instructions and add gel food coloring for the black.
Why did my cookies spread in the oven?
This usually happens for one of three reasons: your butter was too soft, your dough wasn’t chilled enough, or your baking sheet was too warm. Always start with a cool baking sheet—run it under cold water and dry it between batches if needed. Also, make sure your butter is softened but not melted; it should still hold its shape when pressed.
How do I get the royal icing to dry faster?
Unfortunately, you can’t rush royal icing without risking cracks or condensation. The best way to speed things up is to use a fan on low speed in the room where the cookies are drying. Keep them away from direct heat or sunlight, which can cause the icing to yellow or crack. Four hours at room temperature with good airflow is your best bet.
Can I freeze decorated cookies?
I don’t recommend freezing cookies after they’ve been decorated with royal icing. The condensation that forms during thawing will make the icing sticky and ruin the glossy finish. Instead, freeze the undecorated baked cookies and decorate them after thawing. They’ll look and taste much better.
My royal icing is too runny—how do I fix it?
Add more sifted powdered sugar, one tablespoon at a time, and beat on low speed until the consistency thickens. Be careful not to add too much at once, or you’ll end up with stiff icing that’s hard to pipe. If it’s too thick, add water one drop at a time. The key is making small adjustments and testing the consistency frequently.
Pin This Recipe!

Easy Black Cat Sugar Cookies with Royal Icing

These Black Cat Sugar Cookies with Royal Icing are about to become your new secret weapon for Halloween hosting. They’re sturdy enough to hold up to royal icing but still have that tender, buttery crumb that melts in your mouth.
- Prep Time: 30 minutes
- Cook Time: 10 minutes
- Total Time: 4 hours 40 minutes
- Yield: 24 servings 1x
- Category: Dessert
- Cuisine: American
Ingredients
- 2 ¾ cups all-purpose flour
- 1 cup unsalted butter, softened
- ¾ cup granulated sugar
- 1 large egg, room temperature
- 1 teaspoon vanilla extract
- ½ teaspoon salt
- ½ teaspoon baking powder
- 3 cups powdered sugar, sifted
- 2 large egg whites
- 1 teaspoon lemon juice
- Black gel food coloring
- Optional: Silver or white sanding sugar
Instructions
- Preheat your oven to 350°F (175°C). Line two baking sheets with parchment paper.
- Cream the butter and sugar. In a large bowl, beat the softened butter and granulated sugar together with an electric mixer on medium speed until light and fluffy, about 3 minutes.
- Add the egg and vanilla. Scrape down the sides of the bowl, then add the egg and vanilla extract. Beat on low speed until just combined.
- Whisk the dry ingredients. In a separate bowl, whisk together the flour, salt, and baking powder.
- Combine wet and dry. Gradually add the flour mixture to the butter mixture, mixing on low speed. Stop as soon as the dough comes together.
- Roll the dough. Lightly flour your work surface and rolling pin. Roll the dough to about ¼-inch thickness between two sheets of parchment paper.
- Cut your shapes. Dip your cookie cutter in flour before each cut to prevent sticking. Press straight down without twisting. Re-roll the scraps once, then discard the rest.
- Bake for 8-10 minutes. Place cookies about 2 inches apart on the prepared baking sheets. Bake for 8-10 minutes, rotating the pan halfway through. Let them cool on the baking sheet for 5 minutes, then transfer to a wire rack to cool completely.
- Make the royal icing. In a clean, grease-free bowl, beat the egg whites and lemon juice together until frothy. Gradually add the sifted powdered sugar, beating on low speed until combined. Increase speed to medium-high and beat for 5 minutes until the icing is glossy and forms stiff peaks.
- Color the icing. Divide the icing into two portions—about ¾ for the black base and ¼ for white accents. Add black gel coloring to the larger portion a little at a time until you reach your desired darkness.
- Adjust consistency for flooding. For outlining, keep the icing thick (ribbon stage). For flooding, thin the icing with water, one drop at a time, until it flows like honey and a ribbon disappears in 10 seconds.
- Decorate the cookies. Fit a piping bag with a small round tip and fill with the outlining-consistency black icing. Outline each cat cookie, then fill in with the flooding-consistency icing. Use a toothpick to spread the icing into corners and pop any air bubbles. Let the black icing set for 30 minutes, then pipe on white eyes and whiskers using the reserved white icing.
- Let the icing set completely. This takes about 4 hours at room temperature.
Notes
For the blackest black icing, let the colored icing sit for 30 minutes after mixing. The color deepens as it sits. If your kitchen is warm (above 75°F), pop the dough in the fridge for 10 minutes between rolling batches. The cookies actually taste better after a day—the flavors meld and the texture softens slightly.
Nutrition
- Serving Size: 1 cookie
- Calories: 185
- Sugar: 18
- Sodium: 95
- Fat: 8
- Saturated Fat: 5
- Carbohydrates: 27
- Protein: 2
Keywords: Halloween cookies, black cat cookies, sugar cookies, royal icing, decorated cookies, spooky cookies, holiday baking


