Late October, and the only thing I want is a no-bake pumpkin cheesecake cup. Not a whole pie — I’m not feeding an army, just that quiet corner of the kitchen counter where the light slants in at four o’clock. The air smells like woodsmoke and the last of the basil dying in the garden. I had bought a can of pumpkin puree on a whim, the kind of impulse that happens when you’re standing in the baking aisle and suddenly it’s fall and you owe yourself something good. So I grabbed a box of gingersnaps too, because that crunch — spicy, dark, a little molasses-bitter — felt right. It is a strange thing, making a dessert that doesn’t ask you to turn on the oven. There’s no heat, no timer beeping, no anxious peeking through the glass. Just a bowl, a spoon, and the quiet satisfaction of watching cream cheese and pumpkin swirl together into something that looks like velvet. I didn’t plan this recipe. It just… happened. And honestly, that’s the best kind of kitchen magic — the kind that shows up when you stop trying so hard.
Why You’ll Love This Recipe
These no-bake pumpkin cheesecake cups are the kind of dessert that makes you feel like you have your life together, even if you’re eating one over the sink at 10 p.m. I’ve tested this more times than I care to admit, adjusting the spice ratios, swapping in different cream cheeses, even trying it with dairy-free alternatives (which worked, by the way). Here’s why this version stuck:
- No oven required. Seriously — zero baking. Perfect for those days when you want fall flavor without the heat.
- Ready in 20 minutes. Hands-on time is minimal. Then the fridge does the rest of the work.
- Simple ingredients. Pumpkin puree, cream cheese, gingersnaps, a little sugar and spice. That’s it.
- Perfect for Thanksgiving. Make them ahead, serve them in cute little cups, and watch everyone ask for the recipe.
- Crowd-pleaser. Kids love the creamy texture, adults love the sophisticated gingersnap crunch.
What makes this recipe different from every other pumpkin dessert out there? It’s the texture. The filling is light but not airy, rich but not heavy. And that gingersnap crust — it stays crunchy, even after a day in the fridge. No soggy bottoms here. This isn’t just another pumpkin cheesecake. It’s the one you’ll make again and again, because it’s easy enough for a Tuesday and pretty enough for a dinner party.
What Ingredients You Will Need
This recipe uses simple, wholesome ingredients to deliver bold flavor and satisfying texture without the fuss. Most of these are pantry staples, especially once fall hits. Here’s what you need:
- 1 ½ cups gingersnap crumbs — about 20-25 cookies, crushed fine. I recommend Nabisco or Anna’s Ginger Thins for that perfect spicy kick. (adds warmth and crunch)
- ¼ cup unsalted butter, melted — binds the crust. Use salted if that’s all you have, just skip the extra salt.
- 8 oz cream cheese, softened — full-fat works best for that silky texture. Let it sit out for 30 minutes before mixing. (use dairy-free if needed)
- ½ cup pumpkin puree — not pumpkin pie filling. Canned is fine, just make sure it’s 100% pumpkin.
- ¼ cup granulated sugar — just enough sweetness to balance the tang.
- ¼ cup powdered sugar — helps keep the filling smooth and stable.
- ½ teaspoon vanilla extract — pure, not imitation. It matters here.
- ½ teaspoon pumpkin pie spice — or make your own with cinnamon, nutmeg, ginger, and cloves.
- ¼ teaspoon cinnamon — extra warmth because why not.
- ½ cup heavy cream — whipped to soft peaks for that light, mousse-like texture. (use coconut cream for dairy-free)
- Optional: 2 tablespoons brown sugar — for a deeper molasses note in the crust.
I’ve made this with reduced-fat cream cheese and it worked, but the texture wasn’t quite as dreamy. Stick with full-fat if you can. For the pumpkin, Libby’s is my go-to — consistent and never bitter. And if you’re feeling fancy, toast the gingersnap crumbs in a dry pan for a minute before mixing with butter. It deepens the flavor like crazy.
Equipment Needed
You don’t need much for this one. That’s the beauty of it. Here’s what you’ll want:
- Small bowls — one for the crust, one for the filling.
- Electric hand mixer or stand mixer — for whipping the cream and beating the cream cheese. A whisk works, but your arm will hate you.
- Measuring cups and spoons — precision helps, especially with the spices.
- 6-8 small serving cups or ramekins — 4-ounce jars or small juice glasses work great.
- Ziploc bag and rolling pin — for crushing the gingersnaps. Or a food processor if you want to be fancy.
- Spatula — for scraping every last bit of filling. Don’t waste that goodness.
I’ve used everything from mason jars to vintage teacups. No special equipment required. If you don’t have a mixer, you can whip the cream by hand — just chill the bowl and cream first for better results. And if you’re short on time, store-bought gingersnap crumbs work fine.
Preparation Method
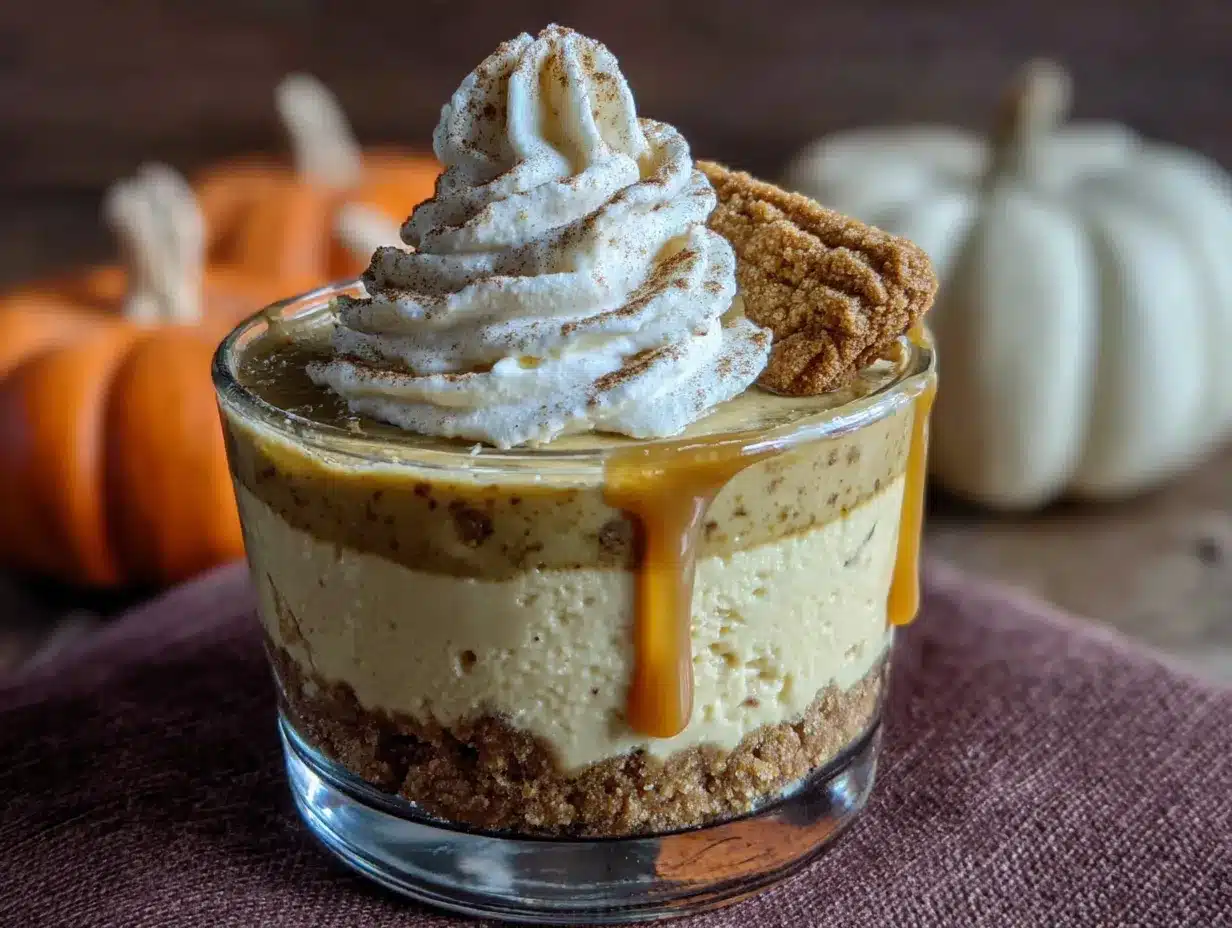
Let’s get into it. This comes together fast, so have your ingredients ready.
- Make the crust. Crush the gingersnaps into fine crumbs. You want about 1 ½ cups. I use a Ziploc bag and a rolling pin — it’s oddly satisfying. Mix the crumbs with the melted butter (and brown sugar if using) until it looks like wet sand. Press about 2 tablespoons of the mixture into the bottom of each serving cup. Use the back of a spoon to pack it down firmly. Set aside.
- Whip the cream. In a cold bowl, beat the heavy cream until soft peaks form. This takes about 2-3 minutes with a hand mixer. Don’t overdo it — you want it light and billowy, not butter. Pop it in the fridge while you make the filling.
- Beat the cream cheese. In another bowl, beat the softened cream cheese with the granulated sugar, powdered sugar, and vanilla until smooth. Scrape the sides. It should be fluffy and lump-free. Takes about 2 minutes.
- Add the pumpkin. Mix in the pumpkin puree, pumpkin pie spice, and cinnamon. Beat until fully combined. The color will turn a gorgeous burnt orange. Taste it — yes, right now. Adjust spices if you want more kick.
- Fold in the whipped cream. Gently fold the whipped cream into the pumpkin mixture. Use a spatula, not the mixer. Fold until no white streaks remain. Be gentle — you want to keep that airiness.
- Assemble the cups. Spoon or pipe the filling over the crust. Divide evenly among your cups. Smooth the tops with the back of a spoon.
- Chill. Refrigerate for at least 4 hours, but overnight is better. The flavors deepen, the crust sets, and the texture becomes perfectly creamy. I know it’s hard to wait. Do it anyway.
- Garnish before serving. Top with a dollop of whipped cream, a sprinkle of cinnamon, and maybe a crumbled gingersnap. Serve cold.
One tip: if you’re piping the filling, use a Ziploc bag with the corner snipped off. It makes for cleaner layers and less mess. And if you’re short on time, 2 hours of chilling will work, but the cups won’t be as firm.
Cooking Tips & Techniques
I’ve made this recipe at least a dozen times, and I’ve learned a few things the hard way. Here’s what I wish someone had told me:
- Don’t skip softening the cream cheese. Cold cream cheese makes lumps. Lumpy filling is sad filling. Let it sit out for 30 minutes, or microwave it in 10-second bursts if you’re impatient.
- Fold, don’t stir. When you add the whipped cream, use a gentle folding motion. Stirring deflates all that air you worked for. You want the filling to be light, not dense.
- Chill the bowl for the cream. A cold bowl and cold beaters help the cream whip faster and hold its shape better. Pop them in the freezer for 10 minutes before starting.
- Press the crust firmly. A loose crust crumbles when you try to eat it. Use the bottom of a shot glass or a small measuring cup to really pack it down.
- Make ahead. These cups actually taste better after a day in the fridge. The flavors meld, the texture sets, and everything becomes more cohesive. Perfect for holiday prep.
I once forgot to chill the cream and ended up with soup. Not my finest moment. But that’s how you learn, right? Now I always chill everything first. And I always make extra — because someone will inevitably eat one before dinner.
Variations & Adaptations
This recipe is a canvas. Here are some ways to make it your own:
- Dairy-free version. Use dairy-free cream cheese (Kite Hill works great) and coconut cream instead of heavy cream. The texture is slightly different but still delicious.
- Gluten-free option. Use gluten-free gingersnaps or even gluten-free graham crackers. The rest of the recipe is naturally gluten-free.
- Extra spice. Add a pinch of cloves or cardamom to the filling. Or use speculoos cookies instead of gingersnaps for a deeper, more caramelized flavor.
- Chocolate twist. Drizzle melted dark chocolate over the finished cups. The bitterness pairs beautifully with the sweet pumpkin.
- Pecan crunch. Toast some chopped pecans and sprinkle them on top. Adds texture and a nutty warmth that screams fall.
I once made a version with a bourbon-caramel drizzle for a Friendsgiving party. It was gone in ten minutes. Don’t be afraid to experiment — that’s half the fun.
Serving & Storage Suggestions
Serve these cups cold, straight from the fridge. I like to garnish them just before serving with a swirl of whipped cream, a dusting of cinnamon, and a whole gingersnap stuck in the top for crunch. They look gorgeous in clear glass cups — the layers are part of the show.
These pair beautifully with a hot cup of coffee or a spiced chai latte. If you’re serving them after a big meal, they’re light enough to not weigh anyone down. For a full fall spread, I love serving these alongside a cozy Cracker Barrel loaded peach cobbler for contrast — one warm, one cold, both incredible.
Storage: Keep them covered in the fridge for up to 5 days. The crust stays surprisingly crunchy for the first 2 days, then softens slightly. If you’re making them for a party, assemble them the day before — they’ll be perfect.
Freezing: You can freeze these for up to 2 months. Wrap each cup tightly in plastic wrap, then foil. Thaw in the fridge overnight. The texture might be slightly softer after freezing, but still delicious.
Flavors deepen over time. Day two is always better than day one. Just saying.
Nutritional Information & Benefits
Per serving (based on 6 cups):
- Calories: 320
- Fat: 22g
- Carbohydrates: 28g
- Protein: 4g
- Fiber: 1g
- Sugar: 18g
Pumpkin is packed with vitamin A and fiber, and the cream cheese adds a good dose of calcium. The gingersnaps provide a little iron from the molasses. This isn’t health food, but it’s a more balanced dessert than most — especially if you use the dairy-free version. It’s also naturally vegetarian and can easily be made gluten-free or dairy-free. I love that I can serve this to almost anyone without worrying about dietary restrictions.
For a lighter option, you can reduce the sugar by a tablespoon or two and use low-fat cream cheese. The texture won’t be as luxurious, but it’ll still hit the spot.
Conclusion
These no-bake pumpkin cheesecake cups are the dessert I turn to when I want something that feels special without the stress. They’re creamy, crunchy, spicy, and sweet — everything fall should be. And the best part? You don’t need to turn on the oven. That’s a win in my book.
I’d love to hear how yours turn out. Did you add a twist? Use a different cookie? Forget to chill the cream and end up with soup? (It happens.) Drop a comment below and let me know. And if you’re looking for more no-fuss desserts, try my creamy no-bake loaded peanut butter pie or these creamy no-bake loaded Oreo dessert cups — both are just as easy and just as good.
Happy fall, friends. Go make something delicious.
Frequently Asked Questions
Can I use fresh pumpkin instead of canned?
Yes, but you’ll need to cook and puree it first, then drain off any excess liquid. Canned pumpkin is more consistent and has less water, which gives a better texture. If using fresh, let it sit in a strainer for 30 minutes to remove extra moisture.
How far in advance can I make these?
You can make them up to 2 days ahead. The flavors actually improve after a day in the fridge. Just wait to add any garnishes until right before serving.
Can I use a different cookie for the crust?
Absolutely. Graham crackers, speculoos, shortbread, or even vanilla wafers all work. Just adjust the butter slightly if the cookie is more or less oily. Gingersnaps give the best spicy kick, though.
My filling turned out runny. What went wrong?
Most likely the cream cheese wasn’t fully softened, or the cream was over- or under-whipped. Also, make sure your pumpkin puree isn’t too watery. Pat it dry with a paper towel if you’re unsure. Chilling for at least 4 hours helps firm things up.
Can I make this into a full-sized cheesecake?
Yes! Double the recipe and press the crust into a 9-inch springform pan. Spread the filling evenly and chill for at least 6 hours or overnight. Slice and serve. It’s just as good — but the cups are cuter for individual servings.
Pin This Recipe!
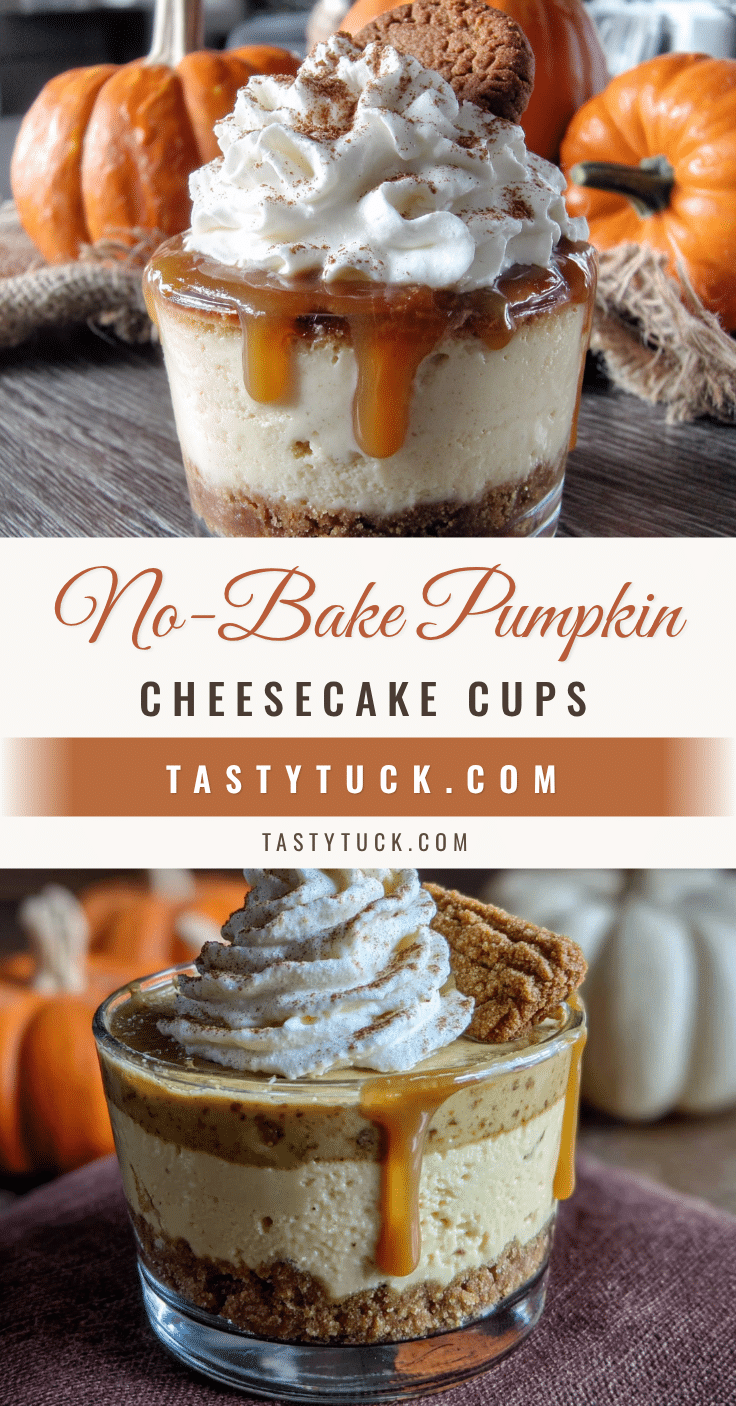
Easy No-Bake Pumpkin Cheesecake Cups with Gingersnap Crust
These no-bake pumpkin cheesecake cups are the kind of dessert that makes you feel like you have your life together, even if you’re eating one over the sink at 10 p.m. They’re creamy, crunchy, spicy, and sweet — everything fall should be — and you don’t need to turn on the oven.
- Prep Time: 20 minutes
- Cook Time: 0 minutes
- Total Time: 4 hours 20 minutes (includes chilling)
- Yield: 6 servings 1x
- Category: Dessert
- Cuisine: American
Ingredients
- 1 ½ cups gingersnap crumbs (about 20–25 cookies, crushed fine)
- ¼ cup unsalted butter, melted
- 8 oz cream cheese, softened
- ½ cup pumpkin puree (not pumpkin pie filling)
- ¼ cup granulated sugar
- ¼ cup powdered sugar
- ½ teaspoon vanilla extract
- ½ teaspoon pumpkin pie spice
- ¼ teaspoon cinnamon
- ½ cup heavy cream
- Optional: 2 tablespoons brown sugar (for deeper molasses note in crust)
Instructions
- Make the crust: Crush the gingersnaps into fine crumbs (about 1 ½ cups). Mix with melted butter (and brown sugar if using) until it looks like wet sand. Press about 2 tablespoons of the mixture into the bottom of each serving cup. Use the back of a spoon to pack it down firmly. Set aside.
- Whip the cream: In a cold bowl, beat the heavy cream until soft peaks form (about 2-3 minutes with a hand mixer). Don’t overdo it. Pop it in the fridge while you make the filling.
- Beat the cream cheese: In another bowl, beat the softened cream cheese with granulated sugar, powdered sugar, and vanilla until smooth and fluffy (about 2 minutes). Scrape the sides.
- Add the pumpkin: Mix in the pumpkin puree, pumpkin pie spice, and cinnamon. Beat until fully combined. The color will turn a gorgeous burnt orange. Taste and adjust spices if desired.
- Fold in the whipped cream: Gently fold the whipped cream into the pumpkin mixture using a spatula. Fold until no white streaks remain. Be gentle to keep the airiness.
- Assemble the cups: Spoon or pipe the filling over the crust. Divide evenly among your cups. Smooth the tops with the back of a spoon.
- Chill: Refrigerate for at least 4 hours, but overnight is better. The flavors deepen, the crust sets, and the texture becomes perfectly creamy.
- Garnish before serving: Top with a dollop of whipped cream, a sprinkle of cinnamon, and maybe a crumbled gingersnap. Serve cold.
Notes
Don’t skip softening the cream cheese. Fold, don’t stir, when adding whipped cream. Chill the bowl for the cream. Press the crust firmly. Make ahead: these cups taste better after a day in the fridge. For dairy-free, use dairy-free cream cheese and coconut cream. For gluten-free, use gluten-free gingersnaps. Store covered in fridge for up to 5 days. Freeze for up to 2 months.
Nutrition
- Serving Size: 1 cup
- Calories: 320
- Sugar: 18
- Sodium: 200
- Fat: 22
- Saturated Fat: 12
- Carbohydrates: 28
- Fiber: 1
- Protein: 4
Keywords: no-bake pumpkin cheesecake, pumpkin cheesecake cups, gingersnap crust, fall dessert, easy dessert, no-bake dessert, Thanksgiving dessert


