I want a cheesecake bar that tastes like a candy cane and a chocolate bar had a baby, but I don’t want to turn on the mixer for twenty minutes or dirty every bowl I own. That’s the thought that started this whole thing. Honestly, it was three days before Christmas, I had a block of cream cheese that needed using, and a half-eaten box of peppermint bark staring at me from the counter. The math just kind of did itself.
This isn’t one of those fussy layered desserts that takes all afternoon. It’s a graham cracker crust, a no-fuss creamy filling swirled with crushed peppermint, and a glossy chocolate topping that sets up like a dream. The whole thing comes together in about thirty minutes of active work, then the fridge does the rest. I’ve made these Creamy Peppermint Bark Cheesecake Bars for cookie swaps, holiday parties, and one particularly desperate Tuesday night when I needed something sweet and festive but had zero energy left.
They slice clean. They travel well. And they have that perfect texture—creamy, slightly dense, with little crunchy bits of candy cane in every bite. The chocolate layer on top isn’t just for show; it seals in the moisture and gives you that classic peppermint bark experience in bar form. I think you’re going to love how simple these are, and how impressive they look on a plate.
Why You’ll Love This Recipe
Let me tell you why these bars have become my go-to holiday dessert. I’ve tested this recipe about six times now, tweaking the cream cheese ratio and the peppermint distribution, and I can say with confidence—this version works every single time.
- Quick & Easy: You only need about 30 minutes of hands-on time. The fridge does all the hard work after that. No water baths, no complicated techniques, no stress.
- Simple Ingredients: Cream cheese, butter, sugar, vanilla, eggs, chocolate chips, and candy canes. That’s it. You probably already have most of this in your kitchen right now.
- Perfect for Holiday Gatherings: These bars are designed for cookie exchanges, Christmas parties, and dessert tables. They slice into neat squares and hold their shape beautifully at room temperature.
- Crowd-Pleaser: I brought these to a family gathering last month and watched my uncle, who “doesn’t do peppermint,” go back for thirds. Kids love them. Adults love them. Even the picky eaters at your table will find something to enjoy here.
- Unbelievably Delicious: The combination of creamy cheesecake, crunchy candy cane pieces, and smooth dark chocolate is honestly addictive. It’s like eating a fancy candy bar, but better because you made it yourself.
What makes these bars different from other peppermint desserts I’ve tried is the texture balance. The cheesecake layer is dense but not heavy, the crust stays crisp, and the chocolate topping cracks just slightly when you bite into it. I’ve tried versions that use melted chocolate mixed directly into the batter, but that makes the texture weird. Layering it on top is the way to go—you get distinct bites of each component, and the final result is much more satisfying.
This is the kind of dessert that makes you close your eyes after the first bite. It’s comfort food dressed up in holiday colors, and it’s exactly what you need when you want something special without spending all day in the kitchen.
What Ingredients You Will Need
This recipe uses simple, straightforward ingredients to create something that tastes much more complex than it is. Most of these are pantry staples, and the few specialty items are easy to find during the holiday season.
For the Crust
- 1 ½ cups graham cracker crumbs (about 12 full sheets, crushed finely)—you can use store-bought crumbs if you’re short on time, but fresh-crushed gives a better texture
- ¼ cup granulated sugar—just enough to sweeten the crust without making it candy-like
- 6 tablespoons unsalted butter, melted—I use salted butter in a pinch, just reduce the added salt elsewhere
- ¼ teaspoon salt—balances the sweetness and keeps the crust from being one-note
For the Cheesecake Filling
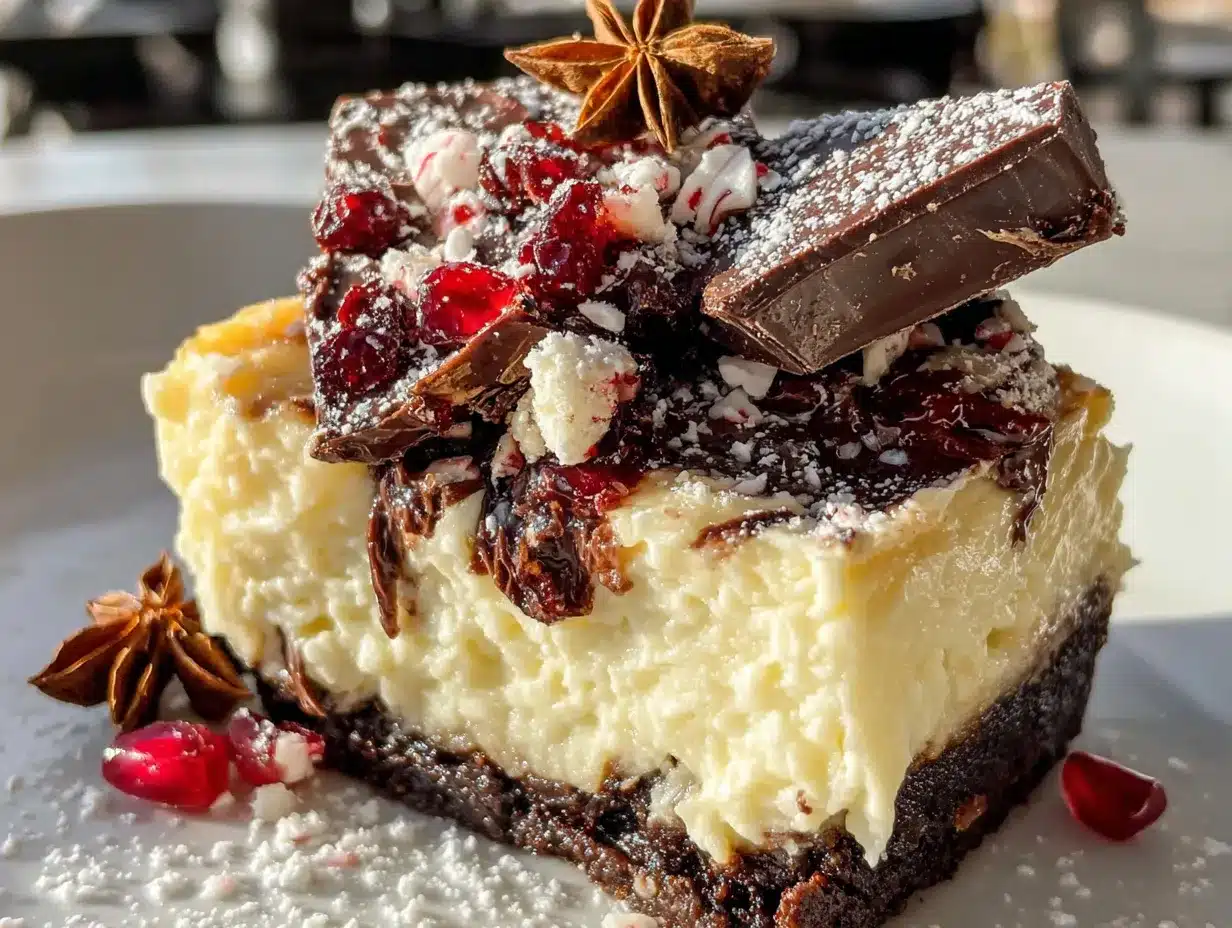
- 16 ounces cream cheese, softened to room temperature—this is non-negotiable. Cold cream cheese makes lumpy filling, and nobody wants that. I like Philadelphia brand for consistent results
- ½ cup granulated sugar—keeps the filling sweet but not overwhelming
- 2 large eggs, room temperature—cold eggs can seize the batter, so let them sit out for about 30 minutes first
- 1 teaspoon vanilla extract—pure vanilla, not imitation, if you can swing it
- ½ cup sour cream, room temperature—adds tanginess and makes the texture silky smooth (Greek yogurt works as a substitute)
- ½ cup crushed peppermint candies or candy canes—about 6-8 regular-sized candy canes, crushed into small pieces (not powder)
For the Topping
- 1 cup semi-sweet or dark chocolate chips—I prefer Ghirardelli 60% cacao for that deep chocolate flavor that stands up to the peppermint
- ¼ cup heavy cream—creates a smooth, glossy ganache that sets perfectly
- ¼ cup crushed peppermint candies—for garnish on top, because we eat with our eyes first
Ingredient Selection Tips: When choosing candy canes, look for ones that are bright in color and fresh—stale candy canes can be soft and won’t give you that satisfying crunch. I’ve found that name-brand candy canes (like Brach’s or Bob’s Sweet Stripes) crush more consistently than generic store brands. For the chocolate, don’t use chocolate chips that have a waxy coating—good quality chips melt smoothly and taste better.
Substitution Guidance: If you need a gluten-free option, use gluten-free graham crackers or crushed gluten-free cookies for the crust. For a dairy-free version, use vegan cream cheese and coconut cream instead of heavy cream—the texture will be slightly different but still delicious. You can also swap the peppermint for crushed Andes mints if you want a mint-chocolate vibe without the intense peppermint kick.
Equipment Needed
- 9×9-inch baking pan—this is the perfect size for these bars. An 8×8 pan works too, but the bars will be slightly thicker and may need an extra 5 minutes of baking time
- Parchment paper—line your pan with two long strips that hang over the sides. This makes lifting the bars out so much easier, and you won’t scratch your pan trying to get them out
- Electric hand mixer or stand mixer—you can mix by hand if you’re patient, but a mixer makes the filling smooth and lump-free in half the time
- Mixing bowls—one large, one medium, one small
- Ziploc bag and rolling pin—for crushing candy canes without making a mess (or a food processor if you want to be fancy)
- Spatula—rubber or silicone, for scraping every last bit of filling into the pan
- Measuring cups and spoons
I’ve made these bars with a hand mixer and with a stand mixer, and honestly, both work great. If you’re using a hand mixer, just make sure your cream cheese is truly room temperature or you’ll be fighting lumps the whole time. Also, invest in a good offset spatula—it makes spreading the cheesecake filling even in the pan so much easier than using a regular spoon.
Preparation Method
- Preheat your oven to 325°F (163°C). Line your 9×9 pan with parchment paper, leaving about 2 inches of overhang on two opposite sides. This creates handles that let you lift the entire block of cheesecake bars out later without any drama.
- Make the crust. In a medium bowl, combine the graham cracker crumbs, sugar, and salt. Pour the melted butter over the top and stir with a fork until every crumb is moistened and the mixture looks like wet sand. Press this mixture firmly into the bottom of your prepared pan. I use the bottom of a measuring cup to really pack it down—you want a compact, even layer. Bake for 10 minutes, then set aside to cool slightly while you make the filling.
- Crush your candy canes. Place about 6-8 candy canes in a ziploc bag and seal it tight. Use a rolling pin or a heavy skillet to crush them into small pieces. You want some smaller bits and some slightly larger chunks—variety in texture is your friend here. Set aside about ¼ cup for the topping garnish.
- Make the cheesecake filling. In a large bowl, beat the softened cream cheese with an electric mixer on medium speed until it’s completely smooth, about 2 minutes. Scrape down the sides and bottom of the bowl with a spatula. Add the sugar and beat for another minute until well combined and fluffy.
- Add the eggs one at a time, beating on low speed after each addition just until incorporated. Overmixing at this stage can incorporate too much air, which might cause cracks in your cheesecake later. Add the vanilla and sour cream, and mix on low until just combined. The batter should be smooth, thick, and slightly glossy.
- Fold in the crushed peppermint. Use a spatula to gently fold about ½ cup of the crushed candy into the batter. Don’t overmix—you want little pockets of peppermint throughout, not a uniformly pink batter. A few streaks are totally fine and actually look pretty.
- Pour the filling over the crust. Use your spatula to spread it evenly, getting into all the corners. Give the pan a gentle tap on the counter to release any air bubbles that might be hiding in the filling.
- Bake for 35-40 minutes. The edges should look set and slightly puffed, but the center should still have a slight jiggle when you gently shake the pan. This is the sweet spot—overbaking will give you dry, cracked cheesecake. If the center looks completely firm and doesn’t move at all, you’ve gone too far.
- Cool completely at room temperature. Place the pan on a wire rack and let it cool for about 1 hour. Don’t rush this step—putting warm cheesecake in the fridge can cause condensation that makes the top soggy.
- Make the chocolate topping. Once the cheesecake is cool, place the chocolate chips and heavy cream in a small microwave-safe bowl. Microwave in 30-second intervals, stirring between each, until the chocolate is fully melted and the mixture is smooth and glossy. This usually takes about 1-2 minutes total. Let it cool for 5 minutes before pouring over the cheesecake.
- Spread the ganache evenly over the cooled cheesecake layer. Sprinkle the reserved crushed peppermint on top while the chocolate is still wet so it sticks. Refrigerate for at least 4 hours, but overnight is better—the bars need time to set up fully for clean slices.
- Slice and serve. Use the parchment paper handles to lift the entire block out of the pan. Place it on a cutting board and use a sharp knife to slice into squares. Wipe the knife clean between cuts for the neatest edges.
Cooking Tips & Techniques
Let me save you some trial and error. I’ve made plenty of mistakes with these bars so you don’t have to. Here are the things I wish someone had told me.
Room temperature ingredients matter more than you think. Cold cream cheese creates lumps that no amount of mixing will fully eliminate. Cold eggs can cause the batter to separate or curdle. Trust me on this—set everything out on the counter at least 30 minutes before you start. Your future self will thank you when you’re looking at a perfectly smooth, crack-free surface.
Don’t overmix the batter after adding the eggs. I know it’s tempting to keep beating until everything looks perfectly uniform, but overmixing incorporates too much air. That air expands in the oven, then collapses as the cheesecake cools, leaving you with cracks on the surface. Mix just until you don’t see streaks of egg anymore, then stop. Seriously. Stop.
The jiggle test is your best friend. When you think the cheesecake might be done, gently shake the pan. The center should wobble like Jell-O, not slosh like liquid. If it’s completely still and firm in the center, you’ve overbaked it. If it ripples like water, it needs more time. That gentle jiggle in the center is exactly what you’re looking for.
Let the ganache cool before pouring. I made the mistake of pouring hot ganache over a room-temperature cheesecake once, and it melted the top layer into a chocolate-swirled mess. Not the worst thing in the world, but not as pretty. Let your ganache cool for about 5 minutes after melting, then pour it slowly over the center of the cheesecake. Tilt the pan gently to spread it to the edges instead of using a spatula—this gives you a smoother finish.
Patience with chilling is non-negotiable. I know you want to eat these immediately. I get it. But cutting into them before they’ve had at least 4 hours in the fridge will result in a gooey, messy situation. The cheesecake needs time to set completely, and the ganache needs to firm up. Overnight chilling is ideal. The bars slice cleanly, hold their shape, and taste better after the flavors have had time to meld together.
Variations & Adaptations
One of the best things about this recipe is how flexible it is. Here are some variations I’ve tried and loved.
White Chocolate Peppermint Bars: Swap the dark chocolate ganache for white chocolate. Use 1 cup white chocolate chips and ¼ cup heavy cream, melted together the same way. The white chocolate gives these bars a more traditional candy cane look and a sweeter, creamier flavor. I made this version for a friend who doesn’t like dark chocolate, and she ate half the pan in one sitting.
Gluten-Free Version: Use gluten-free graham crackers or crushed gluten-free vanilla cookies for the crust. The rest of the ingredients are naturally gluten-free, so this adaptation is surprisingly easy. Just make sure your candy canes are certified gluten-free if that’s a concern—most are, but it’s worth checking the label.
Mint Chocolate Chip Variation: Fold ½ cup mini chocolate chips into the cheesecake batter along with the crushed peppermint. This adds little pockets of melted chocolate throughout the creamy filling, giving you a texture similar to mint chocolate chip ice cream. I tried this during a summer baking session, and it was a huge hit at a backyard barbecue.
Oreo Crust Option: Replace the graham cracker crust with crushed Oreos (filling included) mixed with melted butter. Use about 20 Oreos, crushed fine, and 5 tablespoons melted butter. The chocolate cookie crust pairs beautifully with the peppermint cheesecake and creates an even more decadent dessert. This version is especially good if you’re serving chocolate lovers.
Dairy-Free Adaptation: Use vegan cream cheese (I like Kite Hill or Violife), dairy-free sour cream, and coconut cream instead of heavy cream for the ganache. The texture will be slightly softer than the original, but the flavor is still fantastic. I tested this for a friend with dairy allergies, and she said it was the best holiday dessert she’d had in years.
Serving & Storage Suggestions
These bars are best served cold, straight from the refrigerator. The texture is firmer, the flavors are more pronounced, and the slices hold their shape beautifully. If you prefer a softer texture, let them sit at room temperature for about 10-15 minutes before serving.
Presentation Tips: Arrange the bars on a white platter or cake stand for maximum visual impact. The contrast between the dark chocolate top, the creamy filling, and the red-and-white peppermint pieces is stunning against a neutral background. For extra holiday flair, dust the top with a light sprinkle of powdered sugar just before serving.
Complementary Dishes: These bars pair wonderfully with a cup of hot cocoa, a peppermint mocha, or a strong black coffee. If you’re serving them as part of a larger dessert spread, they go beautifully with Southern hummingbird cake or a simple vanilla ice cream on the side. For a complete holiday dessert table, consider adding some no-bake Oreo dessert for variety.
Storage Instructions: Store leftover bars in an airtight container in the refrigerator for up to 5 days. Layer them between sheets of parchment paper to prevent sticking. The bars actually taste better on day two—the flavors have more time to meld together, and the texture becomes even creamier.
Freezing Instructions: These bars freeze beautifully. Place the fully set and sliced bars on a baking sheet and freeze until solid, about 2 hours. Transfer to a freezer-safe container or ziploc bag, layering with parchment paper. They’ll keep for up to 3 months. To thaw, transfer to the refrigerator overnight. The texture remains creamy and delicious—I’ve served frozen-thawed bars to guests who had no idea they weren’t freshly made.
Reheating Notes: Honestly, I prefer these bars cold, but if you want a slightly softer texture, you can microwave individual slices for about 10-15 seconds. Just be careful not to overheat, or the chocolate topping will melt and slide off.
Nutritional Information & Benefits
Let’s be real—this is a dessert, not a health food. But knowing what’s in your food is always a good thing. Here’s the estimated nutritional breakdown per bar (based on 16 servings):
- Calories: Approximately 320
- Total Fat: 22g
- Saturated Fat: 13g
- Cholesterol: 75mg
- Sodium: 220mg
- Total Carbohydrates: 28g
- Dietary Fiber: 1g
- Sugars: 20g
- Protein: 5g
Health Benefits of Key Ingredients: Dark chocolate contains antioxidants called flavonoids that may support heart health. Cream cheese provides calcium and protein, while the peppermint can aid digestion and provide a refreshing sensation. Of course, these benefits come in the context of a rich dessert, so portion control is your friend here.
Dietary Considerations: This recipe contains dairy, gluten, and eggs. For gluten-free and dairy-free options, check the variations section above. The bars are nut-free as written, making them a safe option for school events or gatherings where nut allergies are a concern.
Personal Wellness Perspective: I believe in enjoying treats in moderation. These bars are special-occasion food, and that’s okay. The joy of sharing something homemade with people you love has its own kind of nutritional value, if you ask me.
Conclusion
These Creamy Peppermint Bark Cheesecake Bars have become my signature holiday dessert, and I think they’ll become yours too. They’re simple enough for a beginner baker to tackle with confidence, but impressive enough to steal the show at any gathering. The combination of creamy cheesecake, crunchy peppermint, and rich chocolate is just right—not too sweet, not too heavy, just perfectly balanced.
I love that this recipe feels special without being stressful. You don’t need a stand mixer or a culinary degree. You just need good ingredients, a little patience, and the willingness to crush some candy canes with a rolling pin. That’s my kind of holiday baking.
I’d love to hear how these turn out for you. Did you try any variations? Did you serve them at a party? Drop a comment below and let me know—I read every single one, and your feedback helps me create better recipes for you. If you’re looking for another easy holiday dessert, you might also enjoy this no-bake strawberry icebox cake for when you want something fruity and refreshing.
Happy baking, and may your holidays be filled with good food and even better company!
Frequently Asked Questions
Can I use pre-crushed graham crackers for the crust?
Absolutely. Store-bought graham cracker crumbs work perfectly fine. Just make sure you’re measuring 1½ cups of crumbs, not 1½ cups of whole crackers that you then crush. The texture might be slightly finer than fresh-crushed, but the taste and structure will be the same.
Why did my cheesecake crack on top?
Cracks usually happen from overbaking or overmixing. If the center was completely firm when you took it out of the oven, you baked it too long. Next time, pull it when the center still has that slight jiggle. Also, make sure you’re not overmixing the batter after adding the eggs—too much air causes the cheesecake to puff up and then collapse, creating cracks.
Can I use peppermint extract instead of crushed candy canes?
You can, but the texture won’t be the same. Crushed candy canes add little crunchy bits throughout the filling, which is part of what makes these bars special. If you use extract, start with ½ teaspoon and taste the batter before adding more—peppermint extract is potent and can easily overwhelm the other flavors.
How far in advance can I make these bars?
You can make them up to 3 days ahead and keep them in the refrigerator. They actually taste better on day two after the flavors have had time to meld. You can also freeze the fully assembled and sliced bars for up to 3 months—just thaw in the refrigerator overnight before serving.
Can I double this recipe for a larger pan?
Yes, you can double the recipe and bake it in a 9×13-inch pan. The baking time will be similar, but start checking at 35 minutes. The bars will be slightly thinner, so they may set a little faster. Just keep an eye on that center jiggle and you’ll be fine.
Pin This Recipe!
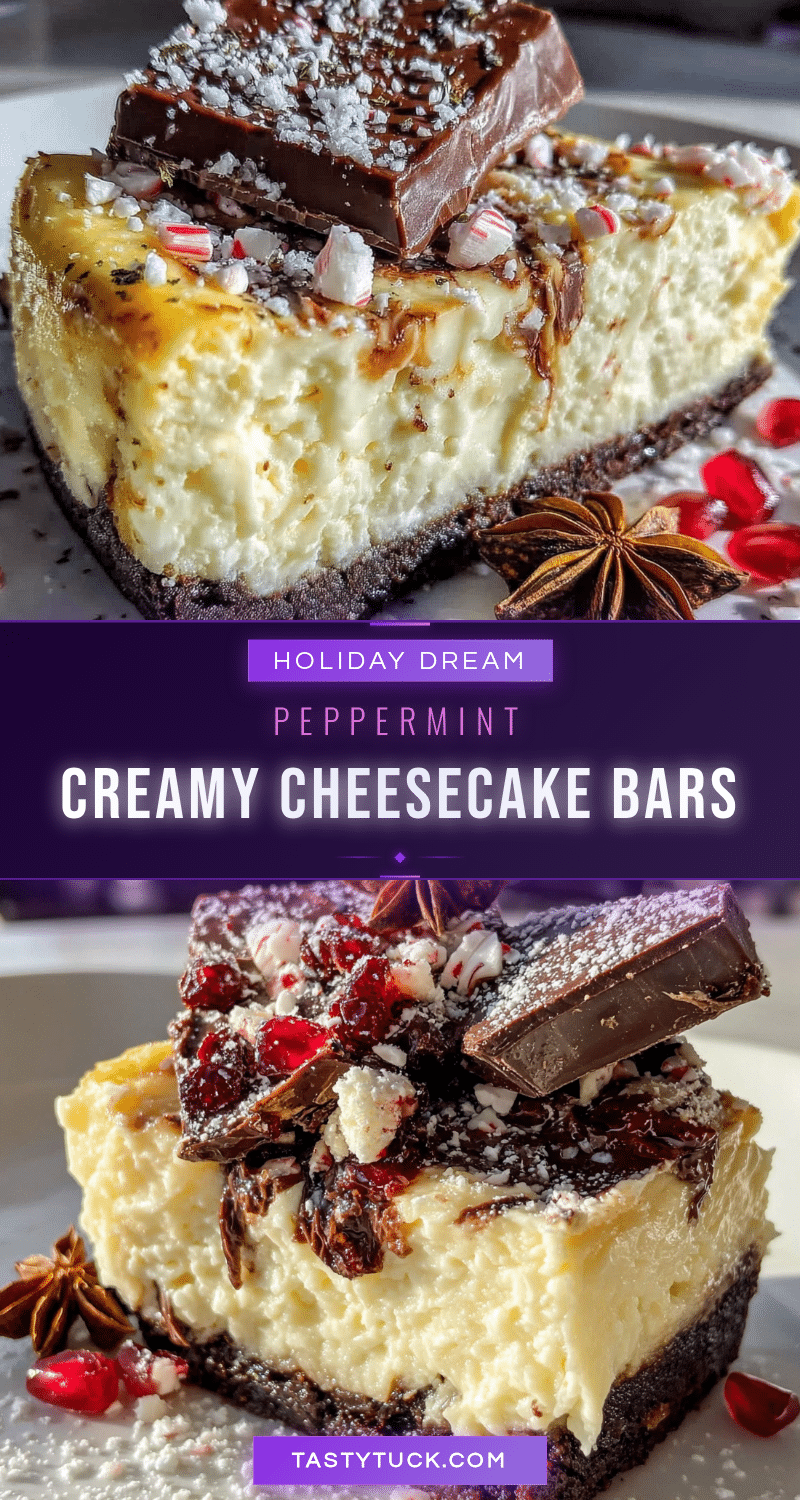
Creamy Peppermint Bark Cheesecake Bars

Easy no-fuss cheesecake bars with a graham cracker crust, creamy peppermint filling, and glossy chocolate topping. Perfect for holiday gatherings and cookie swaps.
- Prep Time: 30 minutes
- Cook Time: 40 minutes
- Total Time: 5 hours 10 minutes (includes chilling)
- Yield: 16 servings 1x
- Category: Dessert
- Cuisine: American
Ingredients
- 1 ½ cups graham cracker crumbs (about 12 full sheets)
- ¼ cup granulated sugar
- 6 tablespoons unsalted butter, melted
- ¼ teaspoon salt
- 16 ounces cream cheese, softened to room temperature
- ½ cup granulated sugar
- 2 large eggs, room temperature
- 1 teaspoon vanilla extract
- ½ cup sour cream, room temperature
- ½ cup crushed peppermint candies or candy canes (about 6–8 regular-sized)
- 1 cup semi-sweet or dark chocolate chips
- ¼ cup heavy cream
- ¼ cup crushed peppermint candies (for garnish)
Instructions
- Preheat oven to 325°F (163°C). Line a 9×9-inch baking pan with parchment paper, leaving overhang on two sides.
- Make the crust: In a medium bowl, combine graham cracker crumbs, ¼ cup sugar, and salt. Pour in melted butter and stir until mixture resembles wet sand. Press firmly into the bottom of the prepared pan. Bake for 10 minutes, then set aside to cool slightly.
- Crush candy canes: Place 6-8 candy canes in a ziploc bag and crush with a rolling pin into small pieces. Set aside ¼ cup for garnish.
- Make the cheesecake filling: In a large bowl, beat softened cream cheese with an electric mixer on medium speed until smooth, about 2 minutes. Add ½ cup sugar and beat for another minute until fluffy.
- Add eggs one at a time, beating on low speed after each addition just until incorporated. Add vanilla and sour cream, mix on low until just combined.
- Fold in ½ cup crushed peppermint candies with a spatula until just distributed.
- Pour filling over crust and spread evenly. Tap pan gently on counter to release air bubbles.
- Bake for 35-40 minutes until edges are set but center still has a slight jiggle. Cool completely on a wire rack for about 1 hour.
- Make the chocolate topping: In a microwave-safe bowl, combine chocolate chips and heavy cream. Microwave in 30-second intervals, stirring between each, until smooth. Let cool for 5 minutes.
- Pour ganache over cooled cheesecake and spread evenly. Sprinkle reserved crushed peppermint on top. Refrigerate for at least 4 hours, preferably overnight.
- Use parchment handles to lift cheesecake out of pan. Slice into squares with a sharp knife, wiping clean between cuts.
Notes
Room temperature ingredients are crucial for a smooth filling. Don’t overmix after adding eggs to prevent cracks. The jiggle test is key for doneness. Let ganache cool before pouring to avoid melting the cheesecake. Chill at least 4 hours for clean slices. Bars can be stored in the refrigerator for up to 5 days or frozen for up to 3 months.
Nutrition
- Serving Size: 1 bar
- Calories: 320
- Sugar: 20
- Sodium: 220
- Fat: 22
- Saturated Fat: 13
- Carbohydrates: 28
- Fiber: 1
- Protein: 5
Keywords: peppermint bark cheesecake bars, holiday dessert, easy cheesecake bars, peppermint dessert, Christmas dessert, no-fuss cheesecake


