My sister called me last December, frantic. She had promised three different neighbors, her book club, and the mailman her famous peppermint bark, and her double boiler had given up the ghost. “Just melt it in the microwave,” I said, the way you do when you’re trying to be helpful from six hundred miles away. She scoffed. “That’s how you get grainy, greasy chocolate. I’m not a savage.” Honestly, I thought she was being a little dramatic, but I kept my mouth shut. She ended up using a metal bowl over a saucepan of simmering water, which is basically the same thing, and her bark turned out beautiful. But that phone call got me thinking. I love peppermint bark, the classic kind with the dark and white chocolate layers, but I’ve always found it a bit fiddly. You have to temper the chocolate just right, or it blooms and looks sad. You have to spread it thin, or it cracks when you break it. It’s a whole production. And let’s face it, by the time December rolls around, I am usually out of production energy. I want something that tastes just as impressive but doesn’t require a culinary degree or a perfectly calibrated double boiler. So I started playing around with the idea of a fudge version. Fudge is forgiving. Fudge is rich. And fudge, I realized, could be the perfect vehicle for that cool, crisp peppermint crunch against a backdrop of sweet, creamy white chocolate. This Perfect White Chocolate Peppermint Bark Fudge was born from that stubborn phone call and a deep desire for a holiday treat that felt special without the stress. It has all the flavor of the classic bark—the sweet vanilla of the white chocolate, the refreshing zing of the peppermint—but in a soft, melt-in-your-mouth fudge format that is almost impossible to mess up. It’s the kind of recipe that makes you look like a hero with very little actual effort. And honestly? That’s my favorite kind of recipe.
Why You’ll Love This Recipe
This isn’t just another holiday dessert. It’s a game-changer for your holiday baking lineup. I’ve tested this more times than I care to admit (my neighbors are very happy), and I can tell you with confidence that this recipe delivers every single time. Here is why it works so well:
- No Candy Thermometer Needed: Traditional fudge can be a science experiment. This one relies on sweetened condensed milk, which means you get a perfectly creamy texture without any of the fuss. It’s practically foolproof.
- Simple, Pantry-Friendly Ingredients: You likely have most of these items on hand or can grab them in one quick trip. No fancy equipment or hard-to-find ingredients required. This is real, honest-to-goodness holiday baking.
- Perfect for Holiday Gifting: This fudge slices cleanly, stacks beautifully in tins, and travels like a dream. It’s the ideal homemade gift for teachers, neighbors, and holiday party hosts. I always make a double batch just for gifting.
- Incredibly Crowd-Pleasing: The combination of rich white chocolate and cool peppermint is a classic for a reason. It appeals to both kids and adults, and it always disappears first from the dessert table.
- Faster Than Traditional Bark: While traditional bark requires careful tempering and thin layers, this fudge comes together in about 15 minutes of active time. The hardest part is waiting for it to set in the fridge.
This recipe is different from the rest because it solves the texture problem. So many white chocolate peppermint treats are either too hard, too crumbly, or overly sweet. This fudge is soft, creamy, and rich without being cloying. The salt from the butter and a pinch of flaky sea salt on top balances the sweetness perfectly. It’s comfort food reimagined for the holiday season—faster, easier, but with the same soul-soothing satisfaction as a labor-intensive project. It’s the kind of treat that makes you close your eyes after the first bite.
What Ingredients You Will Need
This recipe uses simple, wholesome ingredients to deliver bold flavor and a satisfyingly creamy texture without any fuss. Most of these are pantry staples for holiday baking, which makes this a great last-minute recipe.
- 3 cups (18 oz or 510g) White Chocolate Chips: This is the star of the show. I recommend using a good quality brand like Ghirardelli or Guittard for the best melt and creamiest texture. Avoid generic store-brand chips, as they can contain stabilizers that prevent them from melting smoothly. The higher the quality, the silkier your fudge will be.
- 1 can (14 oz or 397g) Sweetened Condensed Milk: This is the secret to our no-fuss fudge. It provides the perfect sweetness and creamy body without needing a candy thermometer. Use full-fat for the best results; low-fat versions can make the fudge grainy.
- 2 tablespoons (28g) Unsalted Butter: The butter adds richness and a beautiful sheen to the fudge. It also helps create a slightly softer, more melt-in-your-mouth texture. Make sure it’s unsalted so you can control the overall salt level.
- 1/2 teaspoon Pure Vanilla Extract: Vanilla enhances the flavor of the white chocolate, making it taste more complex and less one-dimensional. Use pure extract, not imitation, for the best flavor profile.
- 1/4 teaspoon Peppermint Extract: This is where that cool, refreshing flavor comes from. Be careful not to overdo it—peppermint extract is potent. Start with 1/4 teaspoon, taste, and add a tiny drop more if you want a stronger mint kick. A little goes a long way.
- 1/2 cup (about 60g) Crushed Peppermint Candies or Candy Canes: You need these for the classic bark texture and festive look. I prefer to crush my own candy canes in a zip-top bag with a rolling pin because you get a mix of fine dust and larger chunks, which is perfect. You can also buy pre-crushed peppermint bits.
- Optional: 1/4 teaspoon Flaky Sea Salt (like Maldon): Do not skip this. A light sprinkle of flaky salt on top right after pouring the fudge into the pan balances the sweetness and makes the peppermint flavor pop. It’s the secret to taking this from “good” to “absolutely irresistible.”
- Optional: 1/2 cup Semi-Sweet or Dark Chocolate Chips: For a classic bark look, you can melt a small amount of dark chocolate and drizzle it over the top of the fudge before it sets. This adds a beautiful color contrast and a touch of bitterness that complements the sweet fudge perfectly.
Equipment Needed
You don’t need a lot of fancy tools to make this fudge, which is one of the reasons I love it. Here is what you will need:
- 8×8-inch Baking Pan: This is the perfect size for a nice, thick slab of fudge. If you only have a 9×9, that works too; your fudge will just be slightly thinner.
- Parchment Paper or Aluminum Foil: You will line your pan with this to create a sling for easy removal. Parchment is my preference because nothing sticks to it.
- Medium-Sized Microwave-Safe Bowl: For melting the chocolate. A glass bowl works best. If you don’t have a microwave, you can use a double boiler or a heatproof bowl set over a saucepan of simmering water.
- Rubber Spatula: For stirring. A silicone spatula is ideal because it won’t scratch your bowl and you can scrape every last bit of fudge out.
- Sharp Knife: For cutting the fudge into clean squares. A chef’s knife works great. Run it under hot water and wipe it dry between cuts for the cleanest edges.
- Measuring Cups and Spoons: Standard set for accuracy.
Preparation Method
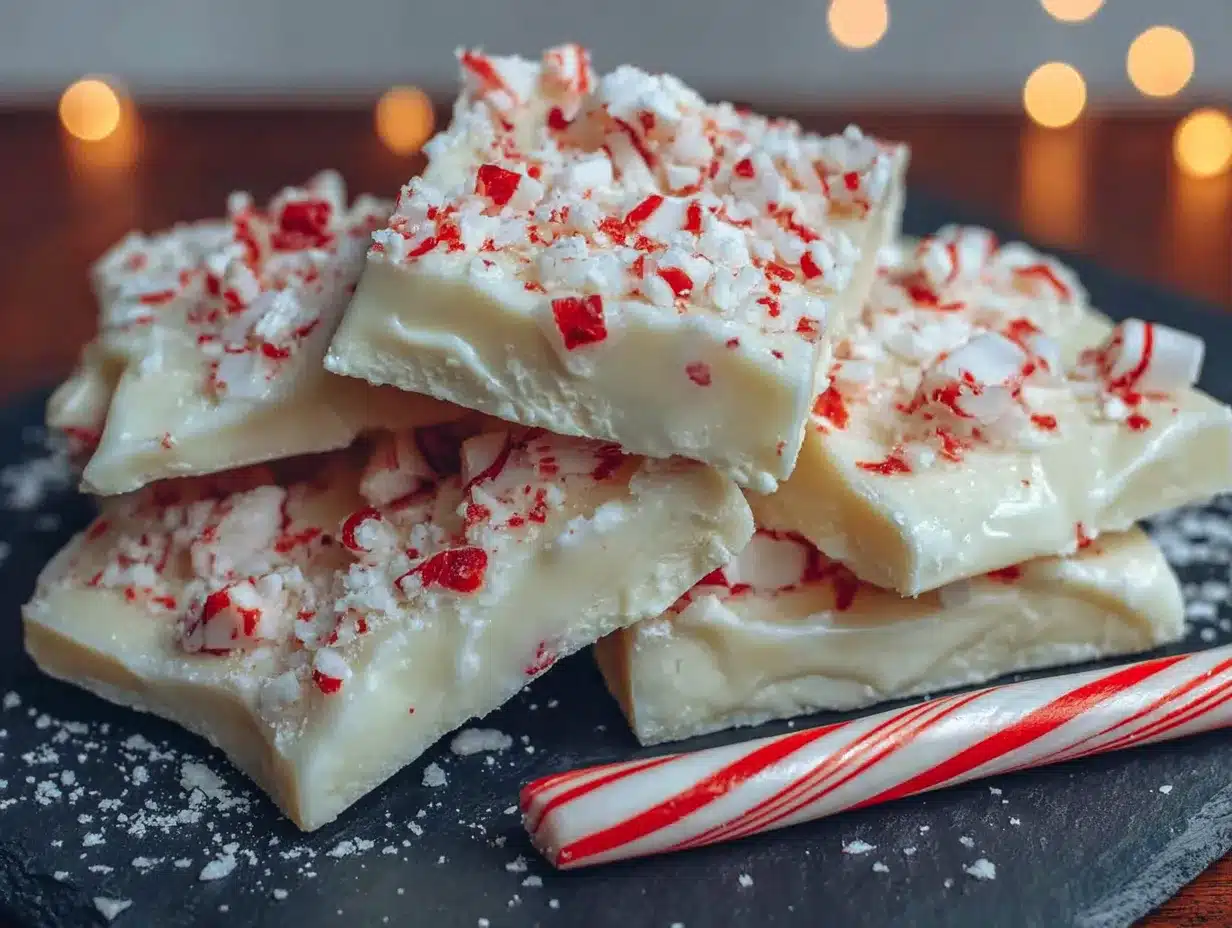
Making this fudge is so simple, you’ll wonder why you ever bothered with traditional bark. Follow these steps, and you will have perfect fudge every time.
- Prepare Your Pan: Line your 8×8-inch baking pan with a sheet of parchment paper, leaving a 2-inch overhang on two opposite sides. This creates a “sling” that will let you lift the entire block of fudge out once it’s set. If you’re using foil, lightly grease it with butter or non-stick spray. Set the pan aside.
- Melt the Base: In your medium microwave-safe bowl, combine the white chocolate chips, sweetened condensed milk, and unsalted butter. Microwave in 30-second intervals on 50% power (this is important to prevent scorching), stirring well with your rubber spatula after each interval. It will look thick and lumpy at first—that’s normal. Keep going. After about 2 to 3 minutes total, the mixture will become smooth, glossy, and completely combined. Sensory cue: It should look like a thick, shiny, pale caramel.
- Add the Flavorings: Once the mixture is smooth, immediately stir in the vanilla extract and the peppermint extract. Stir until they are fully incorporated. Give it a quick taste (careful, it’s hot!) and add a tiny drop more peppermint extract if you want a stronger mint kick. Tip: If the mixture seems a little oily or separated at this point, you may have overheated it. Don’t panic! Stir in 1-2 tablespoons of cold heavy cream or additional sweetened condensed milk and whisk vigorously until it comes back together.
- Pour and Spread: Pour the hot fudge mixture into your prepared pan. Use your spatula to gently spread it into an even layer, pushing it into the corners. The mixture is thick, so be patient.
- Add the Toppings: While the fudge is still warm, immediately sprinkle the crushed peppermint candies evenly over the top. Gently press them into the surface of the fudge with your spatula or the back of a spoon so they stick. If you are using the optional dark chocolate drizzle, melt 1/2 cup of dark chocolate chips with 1 teaspoon of coconut oil in the microwave in 15-second intervals, then drizzle it over the peppermint layer with a fork. Finally, sprinkle the flaky sea salt over everything.
- Set the Fudge: Place the pan in the refrigerator, uncovered, for at least 3-4 hours, or until the fudge is completely firm to the touch. For best results, let it chill overnight. The fudge needs time to fully set and develop its creamy texture.
- Slice and Serve: Once the fudge is fully set, use the parchment paper sling to lift the entire block out of the pan and onto a cutting board. Use a sharp knife to cut it into 1-inch squares. For the cleanest cuts, run your knife under hot water, dry it, and make one clean cut. Wipe the blade clean between cuts. This will give you beautiful, professional-looking squares.
Cooking Tips & Techniques
Over the years, I’ve made my share of fudge mistakes so you don’t have to. Here are the most important things I have learned to guarantee success.
- The 50% Power Rule is Non-Negotiable: I know it’s tempting to blast the chocolate on high to get it done faster. Do not do it. High heat will scorch the white chocolate, turning it grainy, lumpy, and brown. Low and slow is the way to go. Patience is the only skill you need for this recipe.
- Beware of “Seized” Chocolate: If even a drop of water gets into your melting chocolate, it can “seize” and turn into a stiff, grainy mess. Make sure your bowl and spatula are completely dry before you start. If your mixture does seize, you can sometimes save it by whisking in a tablespoon of warm heavy cream or melted coconut oil, but prevention is much easier.
- Crush Your Own Candy Canes: Pre-crushed peppermint bits are convenient, but they are often too fine and can dissolve into the fudge, leaving you with just pink coloring and no crunch. Crushing your own candy canes in a zip-top bag gives you a perfect mix of fine dust and satisfying chunks. It takes two minutes and makes a huge difference in texture.
- Don’t Skip the Chill Time: This fudge needs a solid 3-4 hours in the fridge to set properly. Cutting it too early will result in a gooey mess. Overnight is best. The fudge will be perfectly firm and slice like a dream.
- Room Temperature Knife for Clean Cuts: A cold knife can cause the white chocolate to crack and crumble. Let your knife come to room temperature, or run it under warm water and dry it thoroughly before cutting. This one trick will give you the cleanest, most beautiful squares.
Variations & Adaptations
This recipe is a fantastic base for experimentation. Once you master the basic method, feel free to play around with these variations.
- Dark Chocolate Peppermint Fudge: For a less sweet, more sophisticated version, swap the white chocolate chips for high-quality semi-sweet or dark chocolate chips (60-70% cacao). The bitterness of the dark chocolate pairs beautifully with the cool peppermint. Follow the same exact method.
- Mint Chocolate Chip Fudge: After you pour the fudge into the pan and before you add the peppermint candies, sprinkle 1/2 cup of mini semi-sweet chocolate chips over the top. Gently press them in. This gives you that classic mint chocolate chip ice cream flavor in fudge form.
- Gluten-Free and Vegan Adaptation: This recipe is naturally gluten-free, but for a vegan version, use a high-quality vegan white chocolate (make sure it’s dairy-free) and a can of full-fat coconut condensed milk. Use a vegan butter stick. The texture will be slightly different—a bit softer—but it will still be delicious and creamy.
- Cookies and Cream Peppermint Fudge: Crush about 10-12 chocolate sandwich cookies (like Oreos) into chunks. After pouring the fudge into the pan, fold half of the cookie chunks into the mixture, then sprinkle the remaining chunks on top along with the peppermint candies. It adds a wonderful crunch and chocolatey depth.
- Add a Crunchy Base: For a bark-like texture, press a layer of crushed pretzels or graham crackers into the bottom of the pan before pouring in the fudge. This creates a salty, crunchy crust that contrasts with the creamy fudge. It’s a fantastic twist that I tried for a holiday party and it was a massive hit.
Serving & Storage Suggestions
This fudge is a showstopper, and how you serve and store it can make all the difference.
- Serving Temperature: This fudge is best served chilled, straight from the refrigerator. It holds its shape perfectly and the cool temperature enhances the refreshing peppermint flavor. Let it sit at room temperature for more than 10-15 minutes, and it will start to soften.
- Presentation: Arrange the fudge squares on a festive platter or in a decorative tin. For a truly elegant look, place each square in a mini paper candy cup. A dusting of powdered sugar or a single candy cane piece on top of each square looks beautiful.
- Complementary Pairings: This fudge is wonderful on its own, but it pairs beautifully with a cup of hot coffee, a rich hot chocolate, or a glass of cold milk. For a dessert board, serve it alongside fresh berries, nuts, and other holiday cookies. You could even serve it alongside a slice of cozy peach cobbler for a contrasting flavor profile.
- Storage: Store the fudge in an airtight container in the refrigerator. It will keep perfectly for up to 2 weeks. In fact, the flavor actually melds and improves after a day or two. Layer the squares between sheets of parchment paper to prevent them from sticking together.
- Freezing: This fudge freezes beautifully. Wrap the entire block or individual squares tightly in plastic wrap, then place them in a freezer-safe bag or container. It will keep for up to 3 months. To thaw, transfer the fudge to the refrigerator overnight. Do not thaw at room temperature, as it can become too soft.
Nutritional Information & Benefits
Let’s be real: this is a treat, a special occasion dessert. It is rich and decadent, and it should be enjoyed as such. But it’s not without its small redeeming qualities. The following nutritional information is an estimate per 1-inch square (based on 36 squares).
| Nutrient | Amount Per Square (approx.) |
|---|---|
| Calories | 140-160 |
| Fat | 8-10g |
| Saturated Fat | 5-7g |
| Carbohydrates | 18-22g |
| Sugar | 16-19g |
| Protein | 2g |
| Sodium | 30-50mg (with flaky salt) |
Pin This Recipe!

Perfect White Chocolate Peppermint Bark Fudge Recipe

This Perfect White Chocolate Peppermint Bark Fudge delivers all the classic, nostalgic flavor of a labor-intensive peppermint bark with a fraction of the effort. It’s creamy, crunchy, perfectly sweet with a hint of salt, and guaranteed to impress.
- Prep Time: 15 minutes
- Cook Time: 5 minutes
- Total Time: 3 hours 20 minutes (includes chilling)
- Yield: 36 servings 1x
- Category: Dessert
- Cuisine: American
Ingredients
- 3 cups (18 oz or 510g) White Chocolate Chips
- 1 can (14 oz or 397g) Sweetened Condensed Milk
- 2 tablespoons (28g) Unsalted Butter
- 1/2 teaspoon Pure Vanilla Extract
- 1/4 teaspoon Peppermint Extract
- 1/2 cup (about 60g) Crushed Peppermint Candies or Candy Canes
- Optional: 1/4 teaspoon Flaky Sea Salt (like Maldon)
- Optional: 1/2 cup Semi-Sweet or Dark Chocolate Chips
Instructions
- Prepare Your Pan: Line your 8×8-inch baking pan with a sheet of parchment paper, leaving a 2-inch overhang on two opposite sides. Set aside.
- Melt the Base: In a medium microwave-safe bowl, combine the white chocolate chips, sweetened condensed milk, and unsalted butter. Microwave in 30-second intervals on 50% power, stirring well after each interval, until smooth and glossy (about 2 to 3 minutes total).
- Add the Flavorings: Immediately stir in the vanilla extract and peppermint extract until fully incorporated. Taste and add more peppermint extract if desired.
- Pour and Spread: Pour the hot fudge mixture into the prepared pan and spread into an even layer.
- Add the Toppings: While the fudge is still warm, sprinkle the crushed peppermint candies evenly over the top and gently press them in. If using, melt the dark chocolate chips with 1 teaspoon coconut oil and drizzle over the peppermint layer. Sprinkle flaky sea salt over everything.
- Set the Fudge: Refrigerate uncovered for at least 3-4 hours, or until completely firm. Overnight is best.
- Slice and Serve: Use the parchment sling to lift the fudge out of the pan. Cut into 1-inch squares using a sharp knife (run under hot water and wipe dry between cuts for clean edges).
Notes
Use good quality white chocolate chips for best results. Do not overheat the chocolate; melt on 50% power. Crush your own candy canes for better texture. Chill thoroughly before slicing. Store in an airtight container in the refrigerator for up to 2 weeks or freeze for up to 3 months.
Nutrition
- Serving Size: 1 square
- Calories: 150
- Sugar: 18
- Sodium: 40
- Fat: 9
- Saturated Fat: 6
- Carbohydrates: 20
- Protein: 2
Keywords: white chocolate, peppermint, fudge, bark, holiday, Christmas, easy, no-bake


