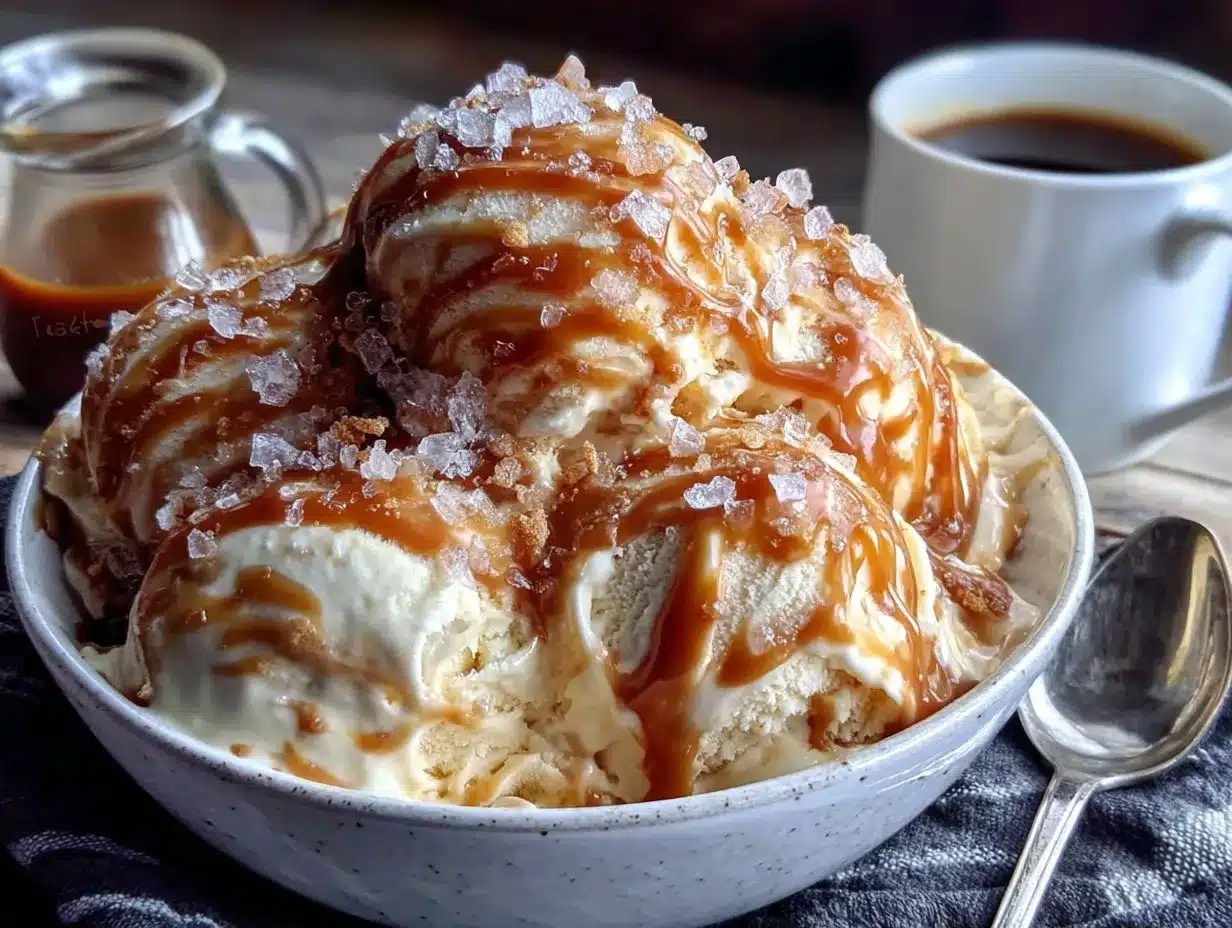
I pulled the container out of the freezer, hoping no one had noticed. My husband had already finished his bowl of chili and was eyeing the kitchen with that look—the one that says, “What’s for dessert?” I popped the lid off, and there it was. Perfect. The swirls of caramel had settled into golden ribbons against the pale, creamy base. I scooped out two generous balls, sprinkled a little flaky salt on top, and handed him a bowl without a word. He took one bite, stopped mid-chew, and just looked at me. Then he went back for a second scoop before I even sat down. That was the moment I knew this recipe was a keeper.
I had been chasing that perfect no-churn ice cream for a while. You know the kind—creamy enough to rival the fancy store-bought stuff but made with stuff you actually have in your kitchen. I had tried versions with condensed milk that were way too sweet, and others with whipped cream that turned icy after a day. This one? It hit the sweet spot. The salted caramel isn’t just a flavor—it’s the whole reason this works. The caramel cuts through the richness of the cream, and the salt? Honestly, it makes everything sing.
This Easy No-Churn Salted Caramel Ice Cream is the kind of dessert that feels special without the fuss. No ice cream machine, no constant stirring, no complicated steps. Just a few ingredients, a little patience, and a whole lot of flavor. It’s become my go-to for everything from lazy Sunday afternoons to last-minute dinner parties. If you’ve ever thought homemade ice cream was too much trouble, let me show you why it’s not.
Why You’ll Love This Recipe
I’ve tested this recipe more times than I care to admit. There were batches that were too icy, some that were too sweet, and a few that just didn’t set right. But this version? It’s the one I keep coming back to. Here’s why I think you’ll love it too:
- No Ice Cream Machine Needed: That’s right. No fancy equipment, no churning, no fuss. Just a mixer and a freezer.
- Simple Ingredients: You probably have most of these in your pantry right now. Heavy cream, sweetened condensed milk, sugar, butter, and salt. That’s it.
- Perfect for Warm Weather: Whether it’s a backyard barbecue or a quiet evening on the porch, this ice cream hits the spot. Pair it with a slice of our cozy cast iron peach cobbler for a dessert combo that’ll steal the show.
- Crowd-Pleaser: I’ve served this at family gatherings, potlucks, and even a book club meeting. Not a single complaint. Kids and adults alike go back for seconds.
- Unbelievably Creamy: The texture is smooth, rich, and scoopable straight from the freezer. No rock-hard ice cream here.
What makes this recipe different from the others? It’s the homemade salted caramel. Store-bought caramel sauce works in a pinch, but making your own gives you control over the sweetness and saltiness. Plus, it’s surprisingly easy. You just need a little patience and a watchful eye. The caramel thickens as it cools, creating those beautiful ribbons throughout the ice cream. And that flaky salt on top? It’s not just for looks—it balances the sweetness and makes every bite feel intentional.
This isn’t just another no-churn ice cream recipe. It’s the one that’ll make you close your eyes after the first bite. It’s comfort food reimagined—creamy, indulgent, and just a little bit salty. Perfect for impressing guests without stressing yourself out.
What Ingredients You Will Need
This recipe uses simple, wholesome ingredients to deliver that rich, creamy texture and bold salted caramel flavor. Most of these are pantry staples, which is exactly what I love about it.
For the Salted Caramel Sauce
- 1 cup (200g) granulated sugar — I prefer regular white sugar for that classic caramel flavor. Don’t substitute with brown sugar here; it changes the texture.
- 6 tablespoons (85g) unsalted butter, cut into small pieces — Use good-quality butter. I like Kerrygold for its richness, but any unsalted butter works. The butter adds that silky mouthfeel.
- 1/2 cup (120ml) heavy cream, room temperature — Cold cream will cause the caramel to seize up. Let it sit out for about 15 minutes before using.
- 1 teaspoon flaky sea salt, plus more for topping — Maldon is my go-to. The flakes dissolve beautifully into the caramel and add that perfect salty finish.
- 1 teaspoon vanilla extract — Pure vanilla extract, not imitation. It rounds out the caramel flavor nicely.
For the Ice Cream Base
- 2 cups (480ml) heavy whipping cream, cold — This is the backbone of the ice cream. Make sure it’s very cold for best whipping results.
- 1 can (14 ounces or 397g) sweetened condensed milk — This replaces the need for an ice cream machine. It adds sweetness and prevents ice crystals from forming. I use Eagle Brand or Borden.
- 1 teaspoon vanilla extract — Adds depth to the flavor profile.
Ingredient Tips: For the caramel, don’t walk away while the sugar is melting. It can go from golden to burnt in seconds. If you’re dairy-free, you can substitute the heavy cream with full-fat coconut cream and use a dairy-free butter alternative. The texture will be slightly different but still delicious. And if you’re watching your sugar intake, try using a sugar-free sweetened condensed milk alternative—though I haven’t tested that myself, so results may vary.
You can also customize the caramel. Add a pinch of cinnamon or a splash of bourbon for a grown-up twist. I’ve tried both, and the bourbon version is particularly good on top of a warm brownie.
Equipment Needed
You don’t need much for this recipe, which is part of its charm. Here’s what you’ll need:
- Electric mixer (stand mixer or hand mixer) — Whipping the cream by hand is possible but exhausting. A mixer makes it quick and easy.
- Medium saucepan — For making the caramel. A light-colored pan helps you see the color of the sugar as it melts.
- 8×4-inch loaf pan or similar freezer-safe container — For freezing the ice cream. A metal pan freezes faster than glass.
- Rubber spatula — For folding the cream into the condensed milk and layering the caramel.
- Parchment paper (optional) — Lining the pan makes it easier to lift the ice cream out later.
- Candy thermometer (optional but helpful) — If you’re nervous about making caramel, a thermometer takes the guesswork out. Aim for 235°F to 240°F for a soft-ball stage.
I’ve made this with both a hand mixer and a stand mixer. The hand mixer works perfectly fine and is easier to clean. If you don’t have a mixer at all, you can whip the cream with a whisk—it’ll just take a good 5-7 minutes of arm work. Trust me, it’s worth it. As for the loaf pan, any freezer-safe container works. I’ve used a glass baking dish and even a plastic deli container in a pinch. The key is to cover it tightly so the ice cream doesn’t absorb any freezer odors.
Preparation Method
Let’s get into it. This recipe comes together in about 20 minutes of active time, plus at least 6 hours of freezing. The waiting is the hardest part, I know.
Step 1: Make the Salted Caramel Sauce
Start by placing the granulated sugar in a medium saucepan over medium heat. Stir it gently with a wooden spoon or heat-resistant spatula as it begins to melt. The sugar will clump at first—don’t panic. Just keep stirring. After about 5-7 minutes, it will turn into a smooth, amber-colored liquid. Watch it closely. Once it reaches a deep golden color (think the color of a penny), remove it from the heat immediately.
Add the butter pieces and stir vigorously. The mixture will bubble up—that’s normal. Keep stirring until the butter is fully melted and incorporated. Then slowly pour in the heavy cream while stirring. Be careful here; the cream will cause the caramel to bubble up again. Once it’s smooth, stir in the vanilla extract and flaky sea salt. Let the caramel cool in the pan for about 10 minutes, then transfer it to a heat-safe jar or bowl. It will thicken as it cools. Set it aside to cool completely while you make the ice cream base.
Step 2: Whip the Cream
In a large mixing bowl, pour in the cold heavy whipping cream. Using your electric mixer, beat the cream on medium-high speed until stiff peaks form. This usually takes about 3-4 minutes with a hand mixer. You’ll know it’s ready when the cream holds its shape and doesn’t slump when you lift the beaters. Be careful not to over-whip, or you’ll end up with butter. Trust me, I’ve done that before—it’s not a pretty sight.
Step 3: Combine the Base
In a separate large bowl, whisk together the sweetened condensed milk and vanilla extract until smooth. Take about one-third of the whipped cream and gently fold it into the condensed milk mixture using a rubber spatula. This lightens the base and makes it easier to incorporate the rest of the cream. Then add the remaining whipped cream and fold gently until no white streaks remain. The mixture should be light, airy, and uniform in color.
Step 4: Layer and Swirl
Line your loaf pan with parchment paper if using. Spoon about one-third of the ice cream base into the pan and spread it evenly. Drizzle about one-third of the cooled caramel sauce over the top. Use a knife or skewer to gently swirl the caramel into the base. Repeat with another layer of ice cream base, another layer of caramel, and swirl again. Finish with the remaining ice cream base and caramel, then give it one final swirl. Don’t over-swirl, or you’ll lose those distinct caramel ribbons.
Step 5: Freeze
Sprinkle a little extra flaky sea salt on top—just a pinch. Cover the pan tightly with plastic wrap or a lid and place it in the freezer. Freeze for at least 6 hours, but overnight is better. The longer it freezes, the firmer and creamier it gets.
Step 6: Serve
When you’re ready to serve, let the ice cream sit at room temperature for about 5-10 minutes to soften slightly. This makes scooping much easier. Scoop into bowls or cones, and if you’re feeling fancy, drizzle a little extra caramel sauce on top.
Cooking Tips & Techniques
I’ve made this recipe more times than I can count, and I’ve learned a few things along the way. Here are my best tips:
- Don’t rush the caramel. Making caramel is all about patience. If you stir too aggressively or use high heat, the sugar can crystallize. Keep the heat medium and stir gently. If you see crystals forming on the sides of the pan, brush them down with a wet pastry brush.
- Room temperature cream is key. When you add cold cream to hot caramel, it can seize up and become grainy. Let your cream sit out for 15-20 minutes before adding it. If it does seize, don’t panic—just return the pan to low heat and stir until it smooths out.
- Whip the cream to stiff peaks. This is crucial for the texture. Under-whipped cream will result in a denser, icier ice cream. You want it thick enough to hold its shape but not so stiff that it turns into butter.
- Fold, don’t stir. When combining the whipped cream with the condensed milk, use a gentle folding motion. Stirring too vigorously will deflate the cream and make the ice cream dense.
- Let it freeze long enough. I know it’s tempting to sneak a taste after a few hours, but 6 hours is the minimum. Overnight freezing gives you that perfect scoopable texture.
One of my biggest failures with this recipe was the first time I tried it. I was in a hurry and didn’t let the caramel cool enough before swirling it into the base. The heat melted the whipped cream, and I ended up with a soupy mess that never froze properly. Learn from my mistake—let that caramel cool completely!
Variations & Adaptations
This recipe is incredibly versatile. Here are a few ways to switch it up:
- Chocolate Salted Caramel: Add 1/4 cup of unsweetened cocoa powder to the sweetened condensed milk before folding in the whipped cream. The chocolate pairs beautifully with the salted caramel.
- Vegan Version: Use full-fat coconut cream instead of heavy cream and a dairy-free sweetened condensed milk alternative. The coconut flavor adds a nice tropical note, but it’s subtle enough not to overpower the caramel.
- Boozy Bourbon Caramel: Add 2 tablespoons of bourbon to the caramel sauce after removing it from the heat. The alcohol keeps the ice cream slightly softer and adds a warm, complex flavor. This is my personal favorite for adult gatherings.
- Mix-Ins: Fold in crushed pretzels, chopped pecans, or chocolate chips after swirling in the caramel. The salty crunch from pretzels is especially good.
I once made a batch with crushed toffee bits and a drizzle of extra caramel on top. It was dangerously good. If you’re feeling adventurous, try layering in some crumbled creamy no-bake Oreo dessert for a cookies-and-cream-meets-salted-caramel situation. Trust me, it works.
Serving & Storage Suggestions
This ice cream is best served slightly softened, about 5-10 minutes out of the freezer. Scoop it into bowls, cones, or even over a warm brownie for an extra indulgent treat. I love serving it alongside a slice of our easy one-bowl strawberry cake for a dessert spread that feels like a celebration.
For storage, keep the ice cream in an airtight container in the freezer. Press a piece of plastic wrap directly onto the surface before sealing to prevent ice crystals from forming. It will keep for up to 2 weeks, though I doubt it will last that long. The flavors actually deepen after a day or two, so don’t be afraid to make it ahead.
To reheat leftover caramel sauce (if you have any), simply microwave it in 10-second intervals, stirring between each, until it’s pourable again. And if the ice cream gets too hard, just let it sit at room temperature for 10-15 minutes before scooping.
Nutritional Information & Benefits
Let’s be real—this is an indulgent treat. But here’s the thing: because it’s homemade, you control what goes in it. No weird additives, no preservatives, no artificial flavors. Just real cream, real butter, and real caramel.
Per serving (about 1/2 cup), you’re looking at roughly:
- Calories: 350-400
- Fat: 24g
- Carbohydrates: 35g
- Protein: 4g
- Sugar: 32g
That said, heavy cream contains beneficial fat-soluble vitamins like A, D, and E. And believe it or not, a little bit of salt is essential for electrolyte balance. So while this isn’t health food, it’s certainly not the worst thing you could eat. Enjoy it in moderation, and maybe take a walk after—that’s my philosophy anyway.
For those with dietary restrictions, this recipe contains dairy and gluten (if you add mix-ins like pretzels). It’s not suitable for vegans unless you use the substitutions mentioned above.
Conclusion
This Easy No-Churn Salted Caramel Ice Cream has become a staple in my kitchen for good reason. It’s simple enough for a weekday craving but impressive enough for company. The homemade caramel, the creamy texture, that perfect salty-sweet balance—it’s everything I want in a dessert.
I love that I can make it without any special equipment. I love that I can customize it with different mix-ins. And I really love that first bite, when the caramel ribbons melt on my tongue and the flaky salt hits just right. It’s the kind of dessert that makes you slow down and savor the moment.
So go ahead—give it a try. Make it your own. Add some crushed pretzels, drizzle extra caramel, or just enjoy it plain. However you serve it, I think you’ll find yourself coming back to this recipe again and again. And when you do, come back and let me know how it turned out. I’d love to hear about your variations, your successes, and even your happy accidents. Happy cooking!
Frequently Asked Questions
Can I use store-bought caramel sauce instead of making my own?
Absolutely. While homemade caramel gives you the best flavor and texture, a good-quality store-bought caramel sauce works in a pinch. Just look for one that’s thick and not too runny. You’ll need about 1 cup.
Why is my no-churn ice cream icy?
Icy texture usually means the cream wasn’t whipped to stiff peaks, or the mixture wasn’t folded gently enough. The sweetened condensed milk helps prevent ice crystals, but if the cream is under-whipped, you’ll end up with a denser, icier result. Make sure your cream is very cold and whip until it holds stiff peaks.
How long does this ice cream keep in the freezer?
It will keep well for up to 2 weeks if stored properly in an airtight container. Press plastic wrap directly onto the surface to prevent freezer burn. After that, it may start to develop ice crystals, but it’s still safe to eat.
Can I make this without a mixer?
Yes, but you’ll need some arm strength. Whisk the heavy cream by hand until stiff peaks form—it takes about 5-7 minutes of vigorous whisking. It’s a good workout, and the result is just as delicious.
Can I use low-fat or non-dairy alternatives?
You can use full-fat coconut cream for a dairy-free version, but I don’t recommend low-fat or skim options. The fat content is what gives this ice cream its creamy texture. Skim milk or low-fat cream will result in an icy, watery mess. Stick with full-fat ingredients for the best results.
Pin This Recipe!
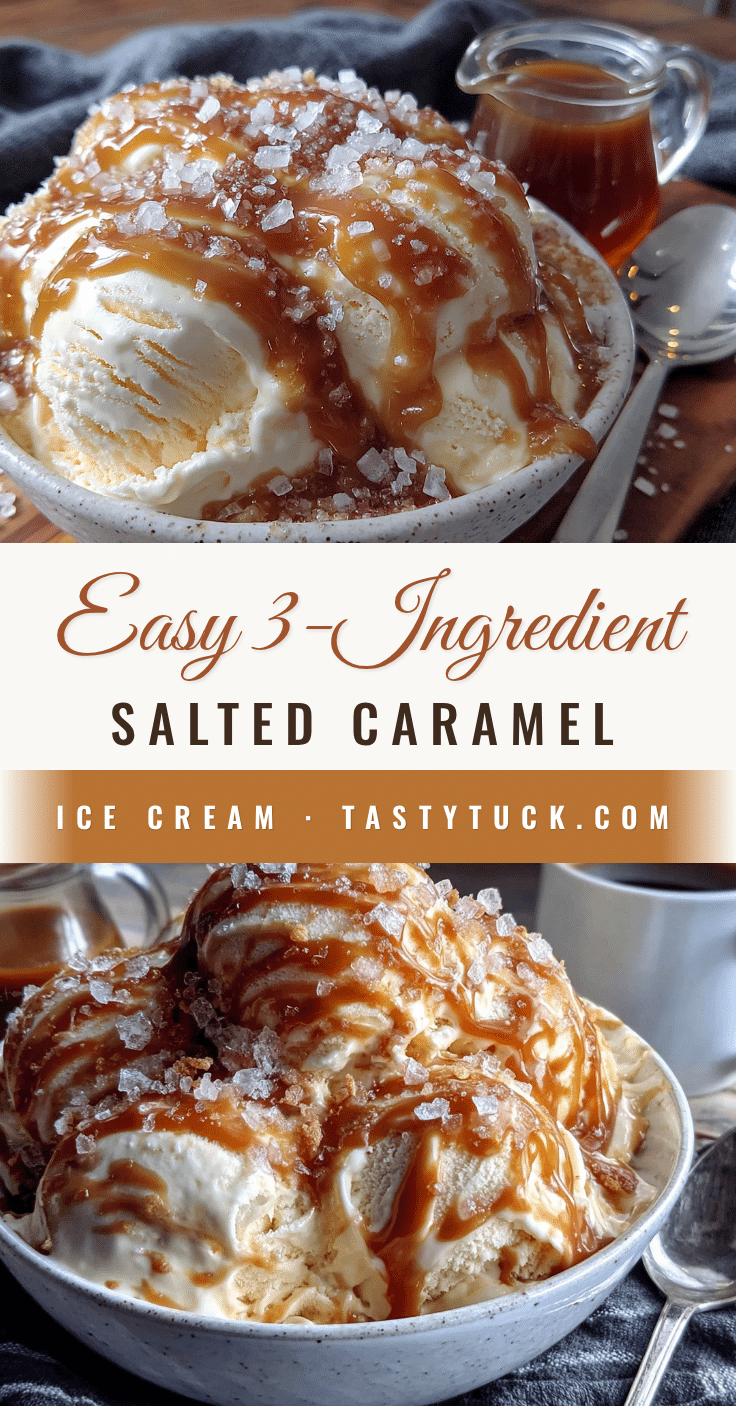
Easy No-Churn Salted Caramel Ice Cream: Best Homemade Treat
This creamy, no-churn salted caramel ice cream is made without an ice cream machine, using simple ingredients like heavy cream, sweetened condensed milk, and homemade salted caramel. It’s the perfect indulgent treat for warm weather, with a rich, scoopable texture and a perfect salty-sweet balance.
- Prep Time: 20 minutes
- Cook Time: 10 minutes
- Total Time: 6 hours 30 minutes (including freezing)
- Yield: 8 servings 1x
- Category: Dessert
- Cuisine: American
Ingredients
- 1 cup (200g) granulated sugar
- 6 tablespoons (85g) unsalted butter, cut into small pieces
- 1/2 cup (120ml) heavy cream, room temperature
- 1 teaspoon flaky sea salt, plus more for topping
- 1 teaspoon vanilla extract
- 2 cups (480ml) heavy whipping cream, cold
- 1 can (14 ounces or 397g) sweetened condensed milk
- 1 teaspoon vanilla extract
Instructions
- Make the salted caramel sauce: Place granulated sugar in a medium saucepan over medium heat. Stir gently as it melts, about 5-7 minutes, until it turns a deep golden color. Remove from heat immediately.
- Add butter pieces and stir vigorously until melted and incorporated. Slowly pour in heavy cream while stirring. Stir in vanilla extract and flaky sea salt. Let cool for 10 minutes, then transfer to a jar or bowl to cool completely.
- Whip the cream: In a large mixing bowl, beat cold heavy whipping cream on medium-high speed until stiff peaks form, about 3-4 minutes.
- Combine the base: In a separate large bowl, whisk together sweetened condensed milk and vanilla extract until smooth. Gently fold in one-third of the whipped cream, then fold in the remaining whipped cream until no white streaks remain.
- Layer and swirl: Line a loaf pan with parchment paper. Spoon one-third of the ice cream base into the pan. Drizzle one-third of the cooled caramel sauce over the top and gently swirl with a knife. Repeat layers, finishing with a final swirl of caramel.
- Sprinkle extra flaky sea salt on top. Cover tightly and freeze for at least 6 hours, preferably overnight.
- Serve: Let sit at room temperature for 5-10 minutes to soften slightly before scooping.
Notes
For best results, let the caramel cool completely before swirling into the base to avoid melting the whipped cream. Whip cream to stiff peaks for a creamy texture. Store in an airtight container with plastic wrap pressed onto the surface to prevent ice crystals. Keeps for up to 2 weeks.
Nutrition
- Serving Size: 1/2 cup
- Calories: 375
- Sugar: 32
- Sodium: 180
- Fat: 24
- Saturated Fat: 15
- Carbohydrates: 35
- Protein: 4
Keywords: no-churn ice cream, salted caramel, homemade ice cream, easy dessert, no ice cream machine


