It was 11:47 PM on a random Thursday in March, and I was staring at a bubbling jar of sourdough starter on my counter with a desperate kind of hope. The craving hit me out of nowhere—not for bread exactly, but for something pillowy and golden, with that crackling crust that sounds like autumn leaves when you break it open. I didn’t have the energy for a full boule, but I had a half-bottle of fruity olive oil, a sprig of rosemary that was practically begging to be used, and the wild idea that maybe, just maybe, focaccia could be a late-night experiment worth attempting.
The thing about late-night cooking, if you’ve ever done it, is that your brain stops overthinking. You don’t second-guess the hydration percentage or obsess over the perfect windowpane test. You just go with it. I dumped my starter into the bowl, added way more olive oil than I probably should have, and let my hands do the work while my mind wandered. The kitchen was quiet except for the hum of the refrigerator and the occasional drip from the faucet. Honestly, it felt like a secret—like I was getting away with something.
I’ll never forget pulling that pan out of the oven at 1:15 AM. The rosemary had crisped up into these little green jewels, the garlic had mellowed into something sweet and almost buttery, and the top was this gorgeous shade of amber that made me actually gasp. I tore off a piece right there over the sink—burned my fingers, obviously—and that first bite was pure vindication. The crust shattered, the inside was so airy it practically dissolved, and the flavor hit me in waves: tangy from the starter, floral from the olive oil, woodsy from the rosemary. I stood there in my pajamas, eating focaccia at one in the morning, thinking this might be the best decision I’d made all week. And you know what? I’ve been making it ever since. This spring rosemary garlic sourdough focaccia became my go-to for those moments when you need something that feels both rustic and special, without any of the fuss.
Why You’ll Love This Recipe
Let me tell you why this focaccia has earned a permanent spot in my weekly rotation. I’ve tested this recipe about seven times now—each batch teaching me something new about timing, hydration, or just how much olive oil is too much olive oil (spoiler: there’s no such thing).
- Simple Ingredients : You likely have everything already. Flour, water, olive oil, salt, garlic, rosemary, and your sourdough starter. That’s it. No specialty flours, no obscure pantry items.
- Minimal Hands-On Time : The dough does most of the work while you go about your day. Actual active time is maybe 15 minutes spread across a few hours.
- Perfect for Spring Gatherings : This focaccia screams spring. The fresh rosemary and roasted garlic feel bright and seasonal, making it ideal for Easter brunch, garden parties, or just a sunny afternoon snack.
- Crowd-Pleaser : I’ve brought this to three different gatherings now, and every single time, someone asks for the recipe. It disappears faster than anything else on the table.
- Forgiving for Beginners : Unlike some sourdough recipes that feel like a science experiment, focaccia is wonderfully forgiving. Wet dough? Great, that’s what you want. Sticky? Perfect. It practically refuses to fail.
What makes this version different from all the other focaccia recipes out there is the sourdough starter. The natural fermentation adds this subtle tang that plays beautifully against the floral rosemary and the sweet, roasted garlic. It’s not just bread—it’s bread with personality. The kind that makes you close your eyes after the first bite and just sit there for a moment. I’ve had friends tell me it reminds them of the focaccia they ate at a tiny bakery in Tuscany, which is about the highest compliment I can imagine. This isn’t just another recipe—it’s the one I keep coming back to, and I think you will too.
What Ingredients You Will Need
This recipe uses simple, wholesome ingredients that come together to create something far greater than the sum of their parts. The magic is in the fermentation and the quality of your olive oil, so don’t skimp where it counts.
- Active Sourdough Starter (100g) – Make sure it’s bubbly and doubled in size. I feed mine about 6-8 hours before I plan to mix the dough. A hungry starter won’t give you the rise you need, and trust me, I learned that the hard way on batch number three.
- Bread Flour (400g, about 3 cups) – I prefer King Arthur for its consistent protein content, but any good bread flour works. The higher protein helps develop that chewy, satisfying crumb.
- Warm Water (300g, about 1 1/4 cups) – Aim for around 85°F. Too hot and you’ll kill the yeast activity; too cold and fermentation slows to a crawl. I use my instant-read thermometer because I’m that person now.
- Extra Virgin Olive Oil (60g, about 1/4 cup plus 2 tablespoons for the dough, plus more for the pan and topping) – This is non-negotiable. Use a good-quality olive oil here because the flavor really comes through. I love California Olive Ranch for everyday baking, but splurge on something fancy if you have it.
- Fine Sea Salt (10g, about 1 3/4 teaspoons) – I use fine sea salt because it dissolves more evenly. If you’re using kosher salt, you’ll need about double the volume.
- Fresh Rosemary (3-4 sprigs) – Fresh is absolutely essential here. Dried rosemary just doesn’t have the same aromatic punch. I grow a little pot on my windowsill specifically for this recipe.
- Garlic (4-5 cloves) – You’ll want to slice these thin or roughly chop them. They’ll roast right into the top of the focaccia, becoming sweet and almost jammy.
- Flaky Sea Salt (for finishing) – Maldon is my go-to. Those little crunchy crystals on top make such a difference.
For the topping, I sometimes add a few springs of fresh thyme if I have it, or a sprinkle of red pepper flakes for a little heat. In spring, I’ve also been known to press edible flowers into the top before baking—nasturtiums or chive blossoms look absolutely stunning against the golden crust. If you’re making this gluten-free, I’ve had success using a 1:1 gluten-free flour blend, but the texture will be denser and more cake-like. For a dairy-free version, you’re already there—this recipe contains no dairy at all.
Equipment Needed
You don’t need a lot of fancy gear for this recipe, which is part of why I love it. Here’s what you’ll need:
- Large Mixing Bowl – Any bowl works, but I prefer a wide, shallow one for easier mixing. My favorite is a simple ceramic bowl I picked up at a thrift store.
- 9×13 Inch Baking Pan – A metal or ceramic baking dish works best. Glass can work, but it doesn’t conduct heat as well, so the bottom might not get as crispy. I use a half-sheet pan sometimes too, which gives you a thinner, crispier focaccia.
- Bench Scraper – Not essential, but it makes handling the sticky dough so much easier. A plastic dough scraper is cheap and saves your sanity.
- Kitchen Scale – I’m going to be honest here: measuring by weight is so much more accurate for baking. A simple digital scale costs about $15 and will improve every bread you make.
- Instant-Read Thermometer – For checking water temperature and dough temperature during bulk fermentation. I use a Thermapen, but any reliable thermometer works.
- Clean Kitchen Towel or Plastic Wrap – For covering the dough while it rises. I use a linen towel because it breathes, but plastic wrap works fine too.
If you don’t have a bench scraper, you can use a spatula or even just well-oiled hands. I actually prefer using my hands for most of the folding—there’s something therapeutic about feeling the dough transform under your fingers. And if you don’t have a 9×13 pan, a 10-inch cast iron skillet makes an amazing focaccia with extra-crispy edges.
Preparation Method
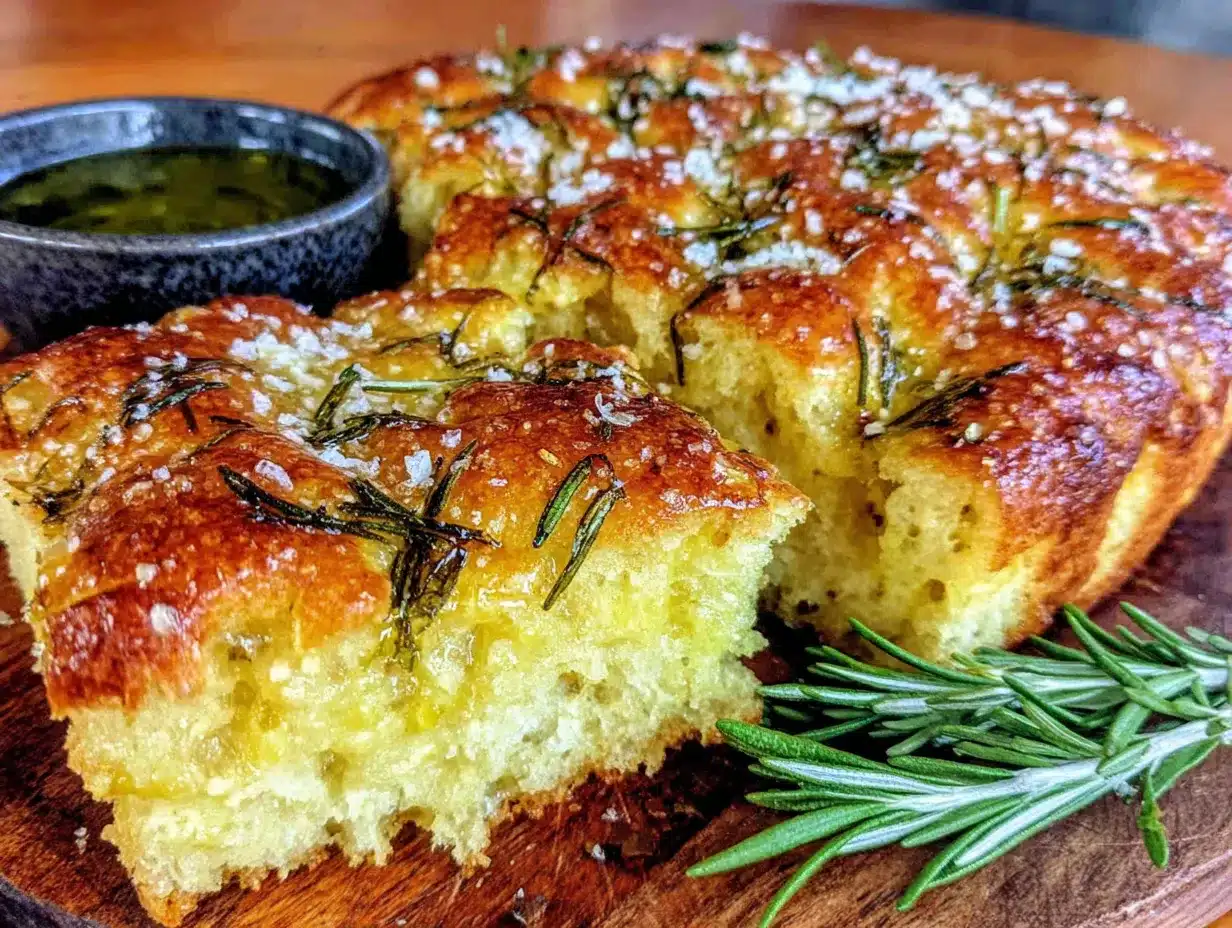
Alright, let’s get into the actual process. I’m going to walk you through this step by step, including all the little things I wish someone had told me when I first started making sourdough focaccia.
- Mix the Dough (5 minutes) – In your large bowl, combine 400g bread flour and 10g fine sea salt. Whisk them together. In a separate measuring cup, mix 300g warm water with 100g active sourdough starter. Stir until the starter is mostly dissolved—it doesn’t need to be perfect. Pour the wet ingredients into the dry, add 60g olive oil, and mix with a spatula until a shaggy, sticky dough forms. It will look rough and unappealing. That’s normal. Cover the bowl with a towel and let it rest for 30 minutes. This is called the autolyse, and it lets the flour absorb the water, making the dough easier to work with later.
- Perform Stretch and Folds (2 minutes each, 4 rounds) – After the rest, wet your hands slightly (this prevents sticking) and grab one side of the dough. Stretch it up as far as it will go without tearing, then fold it over the top of the dough. Rotate the bowl a quarter turn and repeat. Do this 4 times total—that’s one round. Cover and rest 30 minutes. Repeat this process 3 more times, for a total of 4 rounds of stretch and folds. You’ll notice the dough becoming smoother and more elastic with each round. This is where the gluten develops, giving your focaccia that chewy, satisfying texture.
- Bulk Fermentation (4-6 hours at room temperature) – After the last round of folds, cover the bowl and let the dough rise at room temperature. The time depends on your starter’s strength and your kitchen temperature. In my 70°F kitchen, it takes about 5 hours. You’re looking for the dough to be puffy, about 50% larger than its original size, with small bubbles visible on the surface and sides. Don’t rush this step—under-proofed focaccia is dense and disappointing.
- Cold Retard (Optional but Recommended, 8-24 hours) – For the best flavor, cover the bowl tightly with plastic wrap and stick it in the fridge overnight. This slow fermentation develops that complex, tangy sourdough flavor that makes this bread special. The dough will continue to rise slowly in the fridge. If you’re in a hurry, you can skip this step and move straight to panning, but honestly, the overnight rest is worth the wait.
- Prepare the Pan and Transfer the Dough (5 minutes) – Generously coat your 9×13 pan with olive oil—don’t be shy here, use about 2 tablespoons. The oil creates that crispy, golden bottom. Gently coax the cold dough out of the bowl and into the pan. It will be stiff and cold from the fridge. Don’t try to stretch it yet. Just plop it in, cover with a towel, and let it come to room temperature for about 1 hour.
- Dimple and Top the Dough (10 minutes) – Once the dough has warmed up and relaxed, it will be more cooperative. Drizzle another tablespoon of olive oil over the top. Using your fingertips, press straight down into the dough, creating deep dimples all across the surface. Don’t be gentle—really press down to the bottom of the pan. This creates those signature focaccia pockets that catch all the oil and toppings. Scatter your sliced garlic and rosemary sprigs over the top, pressing them gently into the dimples. Sprinkle with flaky sea salt.
- Final Proof (1-2 hours) – Cover the pan and let the dough rise again until it’s puffy and jiggly, about 1-2 hours. It should look like a soft pillow. The dimples will have mostly filled in, which is fine—you’ll get more character that way.
- Bake (25-30 minutes at 425°F) – Preheat your oven to 425°F with a rack in the middle. Bake the focaccia for 25-30 minutes, rotating the pan halfway through. You’re looking for a deep golden brown color—don’t pull it out when it’s pale. The crust should look like caramel. If the top is browning too fast but the bottom isn’t done, tent loosely with foil for the last 5 minutes.
- Cool and Serve – Let the focaccia cool in the pan for 5 minutes, then transfer to a wire rack. Brush the top with another tablespoon of olive oil while it’s still warm—this adds shine and flavor. Wait at least 15 minutes before cutting, if you can stand it. The texture improves as it cools slightly.
Cooking Tips & Techniques
After making this recipe more times than I can count, I’ve collected a few tricks that make a real difference. The first one is about your starter. Feed it at least 6-8 hours before mixing, and use it when it’s at its peak—bubbly, doubled, and smelling pleasantly tangy. A hungry starter won’t give you the rise you want, and you’ll end up with a flat, dense focaccia. I learned this the hard way when I used a starter that had peaked hours earlier and was starting to deflate. The result was edible but sad.
Temperature control is another big one. If your kitchen is cold (below 68°F), your dough will take forever to rise. I’ve had winter batches that took 8 hours for bulk fermentation. On the flip side, if your kitchen is hot (above 78°F), the dough can overproof quickly, leading to a collapsed, sour-tasting bread. I use a simple trick: I turn my oven light on and place the dough inside with the door cracked. It stays around 75-78°F in there, which is perfect.
Don’t skip the dimpling step. I know it feels aggressive, but those deep wells are what catch the olive oil and create the crispy, flavorful pockets that make focaccia so addictive. And here’s a mistake I’ve made more than once: don’t overload the top with garlic. Raw garlic can be harsh and overpowering. Stick to 4-5 cloves, sliced thin, and they’ll roast into sweet, mellow goodness. Too much garlic and it’ll taste bitter and raw.
For multitasking, I mix the dough in the morning, do the stretch and folds while I’m making coffee, then let it bulk ferment while I work. The overnight cold retard means I can bake it the next day whenever I’m ready. It’s the most forgiving bread schedule I know.
Variations & Adaptations
One of the best things about this focaccia is how adaptable it is. Here are some variations I’ve tried and loved:
- Spring Herb Medley : Swap the rosemary for a mix of fresh thyme, chives, and parsley. Press edible flowers like pansies or chive blossoms into the top before baking for a stunning presentation. This version is perfect for Easter brunch or a spring bridal shower.
- Roasted Tomato and Basil : After dimpling, press halved cherry tomatoes into the dough. They’ll roast and burst, creating little pockets of jammy sweetness. Add fresh basil leaves after baking. This is my go-to summer version.
- Everything Bagel Focaccia : Skip the rosemary and garlic. After dimpling, brush with olive oil and sprinkle generously with everything bagel seasoning (sesame seeds, poppy seeds, dried garlic, dried onion, salt). This one disappears fastest at parties.
- Gluten-Free Version : Use a high-quality 1:1 gluten-free flour blend. The dough will be more like a thick batter than a traditional dough. Bake in a smaller pan (8×8) and expect a denser, more cake-like texture. It won’t have the same chewy crumb, but it’s still delicious.
- Whole Wheat Variation : Substitute up to 50% of the bread flour with whole wheat flour. You’ll need to add about 25g more water since whole wheat absorbs more liquid. The flavor will be nuttier and more rustic.
Serving & Storage Suggestions
This focaccia is best served warm, within an hour of baking. The crust is at its crispiest, and the interior is still pillowy and soft. I love serving it alongside a big spring salad with lemon vinaigrette, or as a side to a bowl of creamy tomato soup. It’s also incredible split in half and used for sandwiches—try it with prosciutto, fresh mozzarella, and a drizzle of balsamic glaze.
For storage, let the focaccia cool completely, then wrap it tightly in foil or plastic wrap. It will keep at room temperature for 2 days. After that, the texture starts to decline—the crust softens and the interior dries out. To refresh it, pop it in a 350°F oven for 5-7 minutes. It will come back to life, almost like fresh-baked.
You can also freeze focaccia. Slice it first, wrap each piece in plastic wrap, then place in a freezer bag. It keeps for up to 3 months. To reheat, thaw at room temperature, then warm in a 350°F oven for 5 minutes. The flavor actually improves slightly after freezing—the garlic mellows even more.
One thing I’ve noticed: this focaccia tastes even better the next day for breakfast. Something about the olive oil soaking in overnight makes the flavor more cohesive. Toast a slice and top it with a fried egg for a breakfast that feels like a hug.
Nutritional Information & Benefits
Here’s the approximate nutritional breakdown per serving (1/12th of the recipe):
| Nutrient | Amount |
|---|---|
| Calories | 210 |
| Total Fat | 9g |
| Saturated Fat | 1.5g |
| Carbohydrates | 28g |
| Fiber | 1.5g |
| Protein | 5g |
| Sodium | 320mg |
The sourdough fermentation process offers some health benefits worth mentioning. The natural fermentation breaks down phytic acid, making the minerals in the flour more bioavailable. It also produces beneficial bacteria that can support gut health. Plus, sourdough has a lower glycemic index compared to bread made with commercial yeast, meaning it won’t spike your blood sugar as dramatically. The olive oil provides heart-healthy monounsaturated fats, and the garlic and rosemary offer antioxidant and anti-inflammatory properties. This isn’t health food, exactly, but it’s certainly a more nourishing choice than many other bread options. As I always say, food made with intention and good ingredients is food that feeds more than just your hunger.
Conclusion
This spring rosemary garlic sourdough focaccia has become more than just a recipe in my kitchen—it’s become a ritual. There’s something deeply satisfying about the process: watching the starter bubble to life, feeling the dough transform under your hands, and pulling that golden pan from the oven, filling your whole house with the smell of rosemary and garlic. It’s the kind of bread that makes you slow down and pay attention, even for just a moment.
I hope you’ll give this recipe a try, whether you’re a seasoned sourdough baker or someone who’s never worked with a starter before. Don’t be afraid to make it your own—add your favorite herbs, press in some cherry tomatoes, or go wild with toppings. The beauty of focaccia is that it’s endlessly forgiving and endlessly adaptable. And when you take that first bite, warm and crispy and full of flavor, I think you’ll understand why I keep coming back to it, late at night and every other time of day.
If you make this recipe, I’d love to hear about it. Drop a comment below and let me know how it turned out, what variations you tried, or just say hello. And if you’re looking for more spring baking inspiration, you might enjoy my lemon blueberry sourdough scones or this spring vegetable frittata that pairs beautifully with a slice of warm focaccia. Happy baking, friends!
Frequently Asked Questions
Can I use active dry yeast instead of sourdough starter?
Yes, you can substitute 1 teaspoon of active dry yeast for the sourdough starter. Dissolve it in the warm water with a pinch of sugar and let it sit for 5 minutes until foamy. The flavor won’t have the same tang, but you’ll still get a delicious focaccia. Reduce the water by about 50g since you won’t need as much hydration without the starter.
Why is my focaccia dense and not airy?
This usually happens for one of three reasons: your starter wasn’t active enough, you didn’t let the dough ferment long enough, or you handled it too roughly during shaping. Make sure your starter is bubbly and doubled before using, and don’t rush the bulk fermentation. The dough should be noticeably puffy and jiggly before you bake it.
Can I make this recipe in a different size pan?
Absolutely. A 9×13 pan gives you a focaccia that’s about 1 inch thick. If you use a 10-inch cast iron skillet, you’ll get a thicker, more bread-like focaccia with extra-crispy edges. For a thinner, crispier version, use a half-sheet pan (13×18). Just adjust the baking time—thicker focaccia needs a few extra minutes, thinner needs less.
How do I know when my sourdough starter is ready to use?
Your starter is ready when it has doubled in size, is full of bubbles (both large and small), and has a pleasant, tangy smell—like yogurt or sourdough bread. It should also pass the float test: drop a small spoonful into a glass of water, and if it floats, it’s ready. If it sinks, give it more time or another feeding.
Can I add cheese to this focaccia?
Yes, cheese is a wonderful addition. Sprinkle shredded Parmesan or pecorino over the top before baking for a salty, crispy crust. You can also press small cubes of fresh mozzarella into the dimples—they’ll melt into gooey pockets of goodness. Just be careful not to add too much, as cheese can make the focaccia greasy and heavy.
Pin This Recipe!
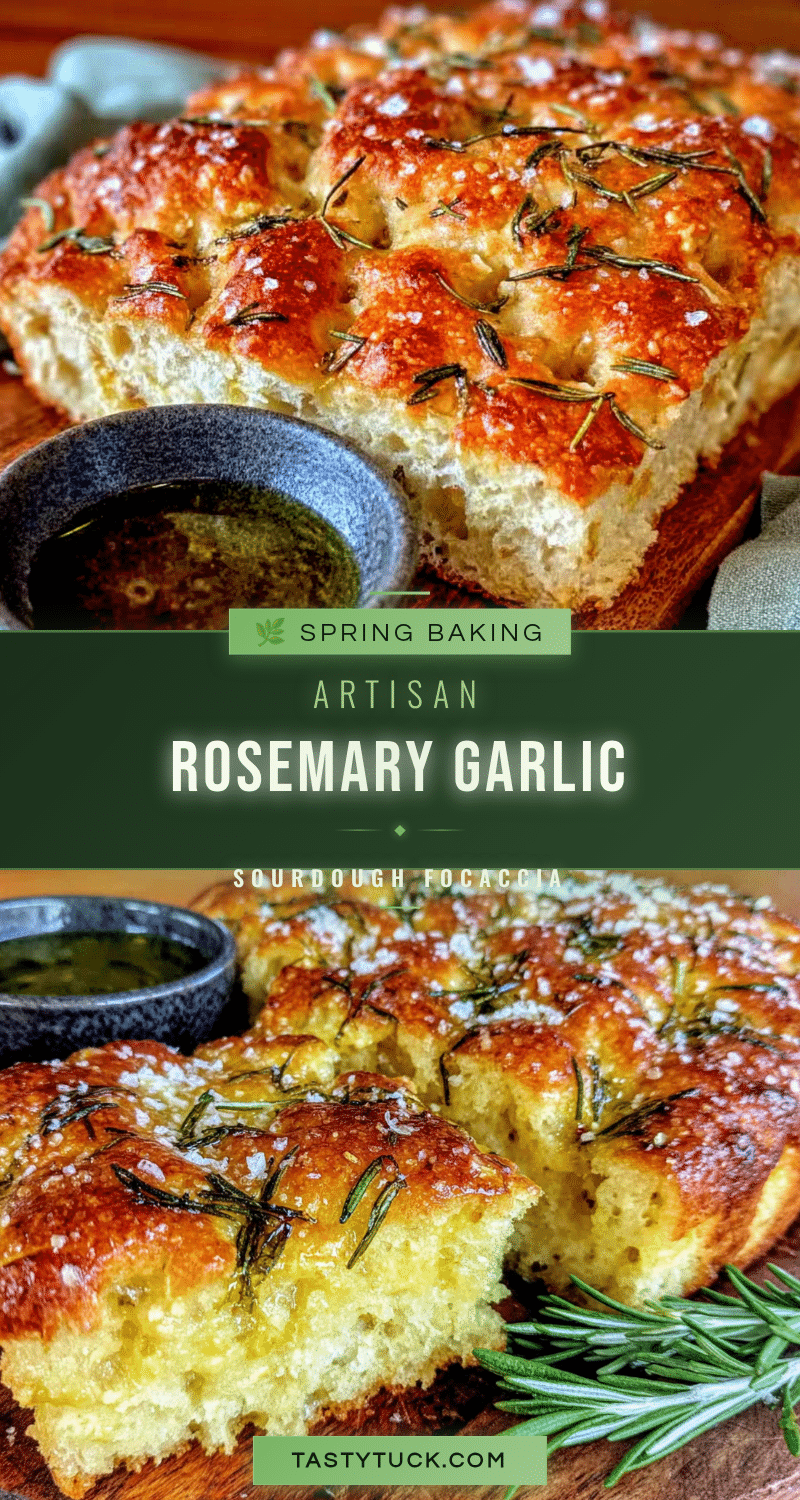
Easy Spring Rosemary Garlic Sourdough Focaccia
A pillowy, golden sourdough focaccia topped with fresh rosemary and roasted garlic, perfect for spring gatherings. This forgiving recipe delivers a crackling crust and airy interior with minimal hands-on time.
- Prep Time: 15 minutes
- Cook Time: 30 minutes
- Total Time: 5 hours 45 minutes (including bulk fermentation and proofing; overnight cold retard optional)
- Yield: 12 servings 1x
- Category: Bread
- Cuisine: Italian
Ingredients
- 100g active sourdough starter (about 1/2 cup)
- 400g bread flour (about 3 cups)
- 300g warm water (about 1 1/4 cups, 85°F)
- 60g extra virgin olive oil (about 1/4 cup plus 2 tablespoons, plus more for pan and topping)
- 10g fine sea salt (about 1 3/4 teaspoons)
- 3–4 sprigs fresh rosemary
- 4–5 cloves garlic, sliced thin
- Flaky sea salt (for finishing, e.g., Maldon)
Instructions
- Mix the Dough (5 minutes): In a large bowl, whisk together 400g bread flour and 10g fine sea salt. In a separate measuring cup, mix 300g warm water with 100g active sourdough starter until mostly dissolved. Pour wet ingredients into dry, add 60g olive oil, and mix with a spatula until a shaggy, sticky dough forms. Cover and rest 30 minutes (autolyse).
- Perform Stretch and Folds (2 minutes each, 4 rounds): After rest, wet your hands slightly. Grab one side of dough, stretch it up as far as it will go without tearing, and fold over the top. Rotate bowl a quarter turn and repeat. Do 4 stretches total (one round). Cover and rest 30 minutes. Repeat 3 more times (4 rounds total). Dough will become smoother and more elastic.
- Bulk Fermentation (4-6 hours at room temperature): Cover bowl and let dough rise until puffy and about 50% larger, with small bubbles visible. In a 70°F kitchen, this takes about 5 hours.
- Cold Retard (Optional but Recommended, 8-24 hours): Cover bowl tightly with plastic wrap and refrigerate overnight for best flavor. If short on time, skip this step.
- Prepare Pan and Transfer Dough (5 minutes): Generously coat a 9×13-inch pan with about 2 tablespoons olive oil. Gently coax cold dough into pan. Cover with towel and let come to room temperature for about 1 hour.
- Dimple and Top the Dough (10 minutes): Drizzle another tablespoon olive oil over dough. Using fingertips, press straight down to create deep dimples all across surface. Scatter sliced garlic and rosemary sprigs over top, pressing gently into dimples. Sprinkle with flaky sea salt.
- Final Proof (1-2 hours): Cover pan and let dough rise until puffy and jiggly, like a soft pillow.
- Bake (25-30 minutes at 425°F): Preheat oven to 425°F with rack in middle. Bake focaccia 25-30 minutes, rotating pan halfway through, until deep golden brown. If top browns too fast, tent with foil for last 5 minutes.
- Cool and Serve: Let cool in pan 5 minutes, then transfer to wire rack. Brush with another tablespoon olive oil while warm. Wait at least 15 minutes before cutting.
Notes
For best flavor, use an active, bubbly starter fed 6-8 hours before mixing. Don’t skip the dimpling step—it creates pockets for oil and toppings. If your kitchen is cold, place dough in oven with light on (door cracked) to maintain 75-78°F. Focaccia tastes even better the next day for breakfast; toast a slice and top with a fried egg.
Nutrition
- Serving Size: 1/12 of recipe
- Calories: 210
- Sodium: 320
- Fat: 9
- Saturated Fat: 1.5
- Carbohydrates: 28
- Fiber: 1.5
- Protein: 5
Keywords: sourdough focaccia, spring rosemary garlic focaccia, easy sourdough bread, rosemary garlic bread, spring bread recipe


