My cousin Leo wasn’t trying to impress anyone. I’d stopped by his place that Tuesday afternoon in early October to grab a ladder I’d borrowed, and the smell hit me before I even got through the screen door. Something savory, a little tangy, with this unexpected warmth that made my stomach growl on the spot. Leo’s not exactly known for his cooking—he’s more of a “grab a frozen pizza on the way home” kind of guy. So when I walked into his kitchen and saw a platter of deviled eggs on the counter, I actually laughed.
“What’s so funny?” he said, not looking up from the stove where he was toasting something that smelled incredible. “You’re making deviled eggs?” I asked. “Since when?” He shrugged like it was nothing. “Since my niece’s Halloween party. She wants something spooky but not gross.” That’s when I noticed the black olives on the cutting board. He was slicing them into thin rings, then cutting those rings in half. “What are you doing?” I asked, leaning in. “Making spiders,” he said, like it was the most obvious thing in the world.
Honestly, I stood there watching him for a good five minutes. He’d pipe the filling into the egg whites, nestle a whole olive half on top for the body, then arrange the sliced olive strips as legs. Eight legs per egg. He didn’t rush, didn’t stress, didn’t act like it was anything special. But the way those little spiders came together—creepy and cute at the same time—was pure genius. I grabbed my phone and took a picture before I even left. I’ve been making them every Halloween since, and let me tell you, they steal the show every single time. Maybe you’ve been there—looking for something festive that doesn’t require a culinary degree? These are it.
Why You’ll Love This Recipe
Let me be real with you—I’ve tested a lot of Halloween recipes over the years, and most of them fall into one of two categories: either they look amazing but taste terrible, or they taste good but look like an afterthought. These spider deviled eggs? They nail both. And I’ve made them enough times to know exactly where things can go wrong, so you won’t have to learn the hard way.
- Quick & Easy: You’re looking at about 20 minutes of active prep time. The eggs do most of the work while they boil and chill. Perfect for that last-minute Halloween party panic.
- Simple Ingredients: Eggs, mayo, mustard, paprika, and black olives. That’s it. No specialty stores, no weird ingredients you’ll never use again.
- Perfect for Halloween Parties: Whether it’s a kids’ costume party, a spooky movie night, or a work potluck, these fit right in. They’re festive without being over-the-top.
- Crowd-Pleaser: I’ve brought these to three different Halloween gatherings now, and they’re always the first thing to disappear. Kids love the spider look, adults love the classic deviled egg taste.
- Unbelievably Delicious: The creamy filling with that hint of paprika, the salty pop of the olive—it’s comfort food that happens to look like it crawled out of a haunted house.
What makes this recipe different from all the other deviled egg recipes out there? It’s the detail. Most spider deviled eggs use whole olives that look more like blobs than bugs. I’ll show you the trick to getting those legs just right so they actually look like spiders—creepy, not messy. And the filling? I’ve perfected the ratio so it’s creamy without being runny, flavorful without overpowering the egg. This isn’t just another version—it’s the one you’ll come back to year after year.
There’s something about food that makes you smile before you even take a bite. These eggs do that. They’re the kind of thing that makes people stop, point, and say “Oh my gosh, look at those!” And then they eat one and go back for seconds. That’s the magic of a good Halloween recipe—it brings out the kid in everyone.
What Ingredients You Will Need
This recipe keeps things simple. The ingredients are all pantry staples you probably already have, with one special addition that makes all the difference. Here’s what you’ll need and why each one matters.
- 12 large eggs: The foundation of the whole dish. I prefer large eggs because they give you a good amount of filling without being too big to eat in two bites. For best results, use eggs that are at least a week old—they peel much easier than super fresh ones. If you can, buy organic or pasture-raised eggs. The yolks are a deeper orange, which makes the filling look richer and more appetizing.
- 1/3 cup mayonnaise: This is where the creaminess comes from. I’ve tried this recipe with different brands, and I keep coming back to Hellmann’s or Duke’s—they have the right balance of tang and richness. If you’re dairy-free, use a good-quality vegan mayo. Just avoid the fat-free stuff; it makes the filling watery.
- 1 tablespoon Dijon mustard: Don’t skip this. The mustard adds a subtle tang that cuts through the richness of the yolks and mayo. I’ve tried yellow mustard in a pinch, and it works, but Dijon gives a more sophisticated flavor. Grey Poupon is my go-to.
- 1/2 teaspoon smoked paprika (plus more for garnish): This is the secret weapon. Smoked paprika adds a warm, slightly smoky depth that regular paprika just can’t match. It also gives the filling that beautiful golden-orange color. I use Sweet Smoked Paprika from The Spice House—it’s worth ordering online if you can’t find it locally.
- 1/4 teaspoon salt: Just regular table salt. Don’t overdo it—the olives add saltiness too.
- 1/8 teaspoon black pepper: Freshly ground is best, but pre-ground works fine.
- 1 can (6 ounces) large pitted black olives: This is where the spider magic happens. You need large olives so you can slice them into nice, wide pieces. I recommend Lindsay or California Ripe—they’re firm and hold their shape well. Look for olives that are uniformly sized so your spiders look consistent. You’ll use the whole olives for the spider bodies and sliced pieces for the legs.
- Optional: Fresh chives or parsley for garnish: A few tiny green specks add a nice pop of color against the white eggs and black olives. Totally optional, but it makes the presentation look more intentional.
Substitution Notes: If you’re avoiding dairy, most mayonnaise is dairy-free, but double-check the label. For a lighter version, you can swap half the mayo with plain Greek yogurt—just know the filling will be a little tangier. And if you can’t find smoked paprika, regular sweet paprika works, but you’ll lose that smoky depth. For a gluten-free option, everything here is naturally gluten-free, so you’re good.
Equipment Needed
You don’t need a fancy kitchen to make these. Here’s what you’ll need, along with a few tips I’ve picked up along the way.
- Medium saucepan with lid: For boiling the eggs. I use a stainless steel one because it heats evenly. If you have a nonstick saucepan, that works too—just be gentle when lowering the eggs in so you don’t scratch the surface.
- Large bowl with ice water: This is crucial for stopping the cooking process and making the eggs easier to peel. I’ve forgotten this step before, and trust me, you don’t want to skip it. The ice bath makes a huge difference.
- Sharp knife and cutting board: You’ll need a sharp knife to slice the olives cleanly. A dull knife will squish them. I use a 6-inch chef’s knife for everything, but a paring knife works fine for the delicate olive work.
- Small mixing bowl and fork (or potato masher): For mashing the yolks. I’ve used both, and honestly, a fork does the job just as well as a potato masher. Just make sure to mash until no lumps remain.
- Piping bag or zip-top bag: For piping the filling into the egg whites. A piping bag with a star tip gives a nice decorative look, but a zip-top bag with the corner snipped off works perfectly. I’ve done both, and the zip-top bag is actually easier for beginners.
- Small offset spatula or butter knife: For smoothing the filling if you’re not piping it. I’ve done it both ways, and both work.
- Platter or serving dish: Something wide enough to hold all 24 egg white halves without crowding them. I use a white ceramic platter—the contrast makes the spiders pop.
Budget-Friendly Tip: If you don’t have a piping bag, don’t buy one. A zip-top bag works just as well. And if you don’t have an offset spatula, a butter knife does the job. The only thing I wouldn’t skimp on is a good sharp knife for the olives—it makes a real difference in how clean your spider legs look.
Preparation Method
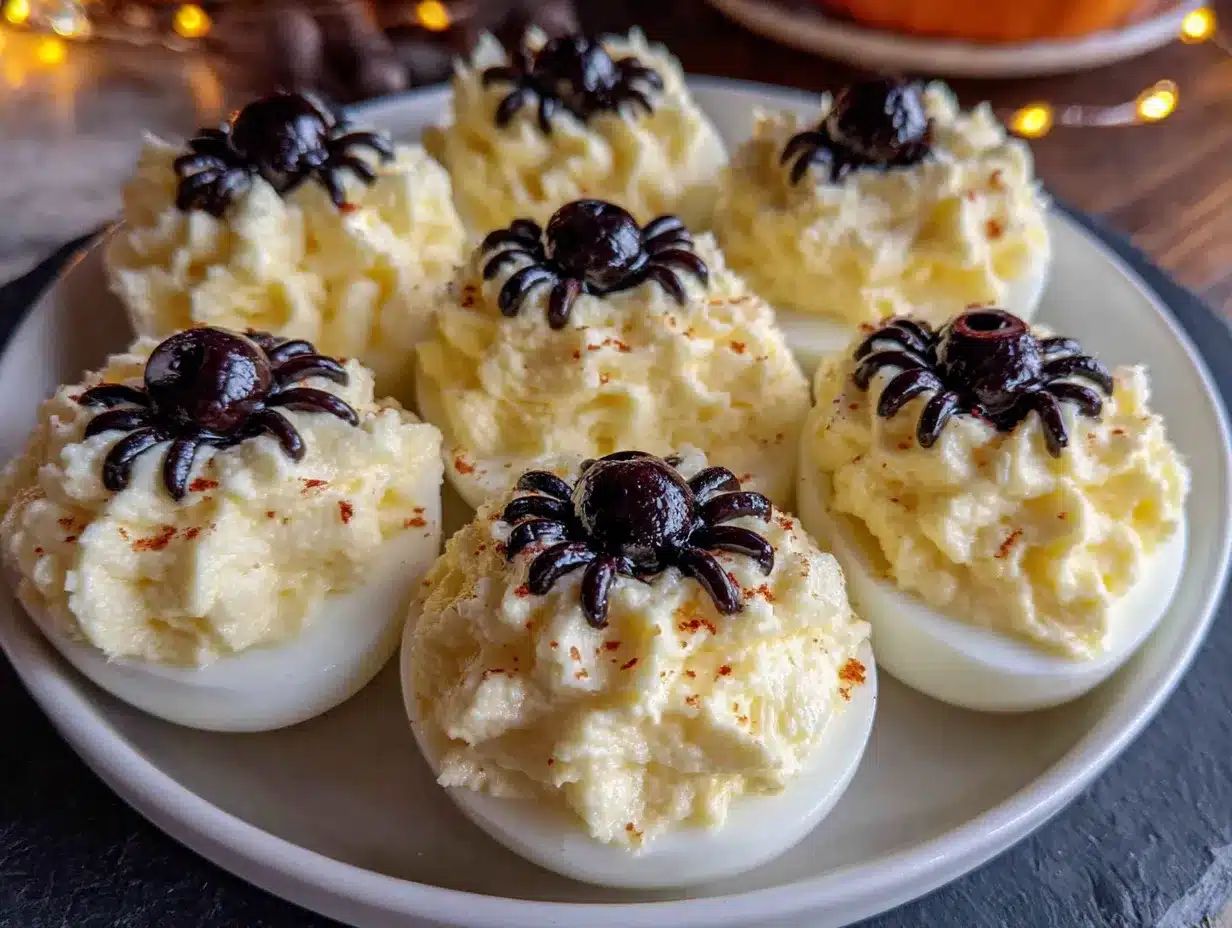
Alright, let’s get into the nitty-gritty. I’ve made these eggs more times than I can count, so I’ll walk you through every step with the little tricks I’ve picked up along the way. Take your time with the first batch—once you get the hang of it, you’ll be able to whip these out in no time.
- Boil the eggs: Place your 12 eggs in a single layer in your saucepan. Cover them with cold water by about an inch. Bring the water to a rolling boil over high heat. As soon as it boils, cover the pan, remove it from the heat, and let it sit for exactly 12 minutes. I set a timer every single time—it’s too easy to lose track. After 12 minutes, transfer the eggs immediately to your bowl of ice water. Let them sit for at least 10 minutes. This stops the cooking and makes peeling way easier.
- Peel the eggs: This is the part most people dread, but it doesn’t have to be a nightmare. Gently tap each egg on the counter to crack the shell all over, then roll it between your palms to loosen the shell. Start peeling from the wider end—there’s usually an air pocket there that makes it easier to get under the shell. Rinse the peeled eggs under cold water to remove any tiny shell fragments. If you get a stubborn one, try peeling it under running water. I’ve had eggs that fought me every step of the way, and the water trick saves them every time.
- Slice the eggs in half: Using a sharp knife, slice each peeled egg lengthwise. Wipe the knife clean between cuts to keep the edges neat. You should have 24 egg white halves. Gently pop out the yolks into your mixing bowl. Try not to tear the whites—if you do, don’t worry, just set that piece aside for snacking later. It happens to the best of us.
- Make the filling: Add the mayonnaise, Dijon mustard, smoked paprika, salt, and pepper to the bowl with the yolks. Mash everything together with a fork until it’s completely smooth. Taste it and adjust the seasoning. I usually add a tiny pinch more paprika here—I just love that smoky flavor. If the filling seems too thick, add a teaspoon of mayo. If it’s too thin, add another yolk (I keep an extra hard-boiled egg on hand just in case).
- Pipe the filling: Spoon the filling into your piping bag or zip-top bag. If using a zip-top bag, squeeze it into one corner and snip off about 1/2 inch from the tip. Twist the top of the bag to push the filling toward the opening. Pipe the filling into each egg white half, dividing it evenly. I like to pipe in a swirl pattern starting from the outside and working inward—it looks professional and gives a nice little peak in the center. If you’re not piping, use a small spoon to fill each half and smooth the top with a butter knife.
- Prepare the olives: Drain the can of olives and pat them dry with a paper towel. This is important—wet olives won’t stay in place. For each spider, you’ll need one whole olive (for the body) and one olive cut into thin rings (for the legs). To cut the rings, slice the olive crosswise into thin rounds, about 1/8 inch thick. Then cut each round in half to create two half-moon shapes. Each spider needs 8 leg pieces, so one olive should give you enough rings for one spider. I usually prep all the olives at once to save time.
- Assemble the spiders: Take one whole olive and place it on top of a filled egg white, slightly off-center toward one end. This is the spider’s body. Now take 8 half-moon olive pieces and arrange them around the body—4 on each side—to create the legs. The legs should curve slightly outward and downward, like a spider in motion. I use tweezers for this step when I’m feeling fancy, but my fingers work just fine. Repeat for all 24 eggs.
- Garnish and serve: Lightly sprinkle the finished eggs with a tiny pinch of smoked paprika. If you’re using fresh chives or parsley, snip a few tiny pieces and scatter them around the platter for contrast. Serve immediately or refrigerate until ready to serve.
Cooking Tips & Techniques
I’ve learned a few things the hard way so you don’t have to. Here are my best tips for perfect spider deviled eggs every time.
Perfect hard-boiled eggs every time: The 12-minute sit time is non-negotiable. I once got distracted and let them sit for 15 minutes, and the yolks had that unappealing gray-green ring around them. Still tasted fine, but they didn’t look as pretty. Also, don’t skip the ice bath—it shocks the eggs and pulls the shell away from the white, making peeling a breeze. If you’re in a hurry, you can use cold running water instead, but the ice bath works better.
Peeling without the pain: Here’s a trick I wish I’d known years ago: add a teaspoon of baking soda to the water before boiling. It raises the pH of the water, which makes the egg whites less likely to stick to the shell. I’ve been doing this for the last year, and my peeling success rate went from about 70% to nearly 100%. Also, older eggs peel easier than fresh ones, so if you’re planning ahead, buy your eggs a week in advance.
Making the filling smooth: The key to a silky filling is mashing the yolks while they’re still warm. Warm yolks mash more smoothly than cold ones. If your eggs have been in the fridge, let them sit at room temperature for 10 minutes before peeling. And don’t be afraid to really work that fork—you want zero lumps. If you have a food processor, you can pulse the yolks with the other ingredients for an ultra-smooth texture, but I actually prefer the slightly rustic texture you get from hand-mashing.
Olive placement matters: Here’s a mistake I made the first time: I put the olive body right in the center of the egg, and the legs looked weird and crowded. You want the body slightly off-center, closer to one end, so the legs have room to spread out. Think of it like a spider sitting on top of the egg, not in the middle of it. Also, don’t press the olive too hard into the filling—it should sit on top, not sink in.
Timing and multitasking: You can boil and peel the eggs a day ahead. Just store the peeled eggs in a covered container in the fridge. The filling can also be made a day ahead and stored in a piping bag in the fridge. Then on party day, all you have to do is pipe, assemble, and serve. This is my go-to strategy for Halloween parties—it takes all the stress out of last-minute prep.
Variations & Adaptations
One of the best things about this recipe is how easy it is to adapt. Here are a few variations I’ve tried and loved.
Spicy Spider Eggs: Add 1/2 teaspoon of cayenne pepper or a dash of hot sauce to the filling. The heat pairs beautifully with the cool, creamy egg and the salty olive. I made these for a friend’s Halloween party last year, and they were a hit with the spice lovers. Just be careful not to overdo it—you want a gentle warmth, not a fire alarm.
Avocado Deviled Spiders: Swap half the mayonnaise with mashed avocado. The filling turns a gorgeous pale green, and the avocado adds a creamy, slightly earthy flavor. This is my go-to when I want to feel a little healthier about my Halloween snacks. Just make sure to add a squeeze of lemon juice to keep the avocado from browning. These need to be served within a few hours of making them.
Bacon-Wrapped Spider Bodies: This one’s a showstopper. Cook 12 strips of bacon until crispy, then crumble them. Mix half the crumbled bacon into the filling, and sprinkle the rest over the finished eggs before adding the olive spiders. The smoky, salty crunch takes these to another level. I made these for a Halloween potluck once, and someone actually asked me for the recipe before they’d even finished eating one.
Dairy-Free Version: Use a vegan mayonnaise and skip the butter if you’re adding any (this recipe doesn’t call for butter anyway). Everything else is naturally dairy-free. I’ve made these for a friend with a dairy allergy, and she couldn’t tell the difference.
Mini Spider Eggs: If you’re serving a crowd or want a more bite-sized option, use quail eggs instead of chicken eggs. You’ll need about 24 quail eggs. Boil them for just 3-4 minutes, then peel carefully (they’re more delicate). The smaller size makes them perfect for passing around at a party. Just be prepared for a lot of peeling—it’s a labor of love.
Serving & Storage Suggestions
These spider deviled eggs are best served chilled or at room temperature. I like to take them out of the fridge about 15 minutes before serving so the flavors can open up a bit. Arrange them on a platter in a circular pattern, with the spiders facing outward for maximum visual impact. If you’re feeling extra festive, you can add a few fake spiderwebs around the platter or sprinkle some edible glitter for a spooky sparkle.
What to serve with them: These eggs pair beautifully with other Halloween finger foods. I love serving them alongside a platter of crispy bacon-wrapped jalapeno poppers for a spicy-savory combo. For a lighter option, a bowl of roasted pumpkin soup with sage makes a cozy starter. And for drinks, a crisp white wine or a dark beer complements the richness of the eggs nicely.
Storage: Store any leftovers in an airtight container in the refrigerator for up to 2 days. The eggs will stay fresh, but the olives might start to soften and lose their shape after a day. I don’t recommend freezing these—the texture of the filling changes when thawed, and the eggs become watery.
Reheating: These are meant to be served cold, so no reheating needed. If you’ve stored them in the fridge, just let them sit at room temperature for 10-15 minutes before serving. The flavors actually develop a bit overnight, so leftovers often taste even better the next day.
Nutritional Information & Benefits
Let’s be real—deviled eggs aren’t health food, but they’re not junk either. Here’s the breakdown per spider deviled egg (one filled half):
| Nutrient | Amount per serving |
|---|---|
| Calories | 85 |
| Protein | 6g |
| Fat | 6g |
| Saturated Fat | 1.5g |
| Carbohydrates | 1g |
| Fiber | 0g |
| Sugar | 0g |
| Sodium | 180mg |
Eggs are a great source of high-quality protein and contain essential nutrients like vitamin B12, vitamin D, and choline, which is important for brain health. The olives provide healthy monounsaturated fats and a dose of vitamin E. And while the mayonnaise adds some fat, it’s mostly unsaturated if you use a good-quality brand.
Dietary Considerations: This recipe is naturally gluten-free and low-carb, making it a good option for keto or paleo diets. It’s also vegetarian. The main allergens are eggs and, depending on your mayo, soy or eggs. If you’re serving a crowd with allergies, make a separate batch using vegan mayo and clearly label it.
Personally, I love that these eggs are a treat that doesn’t leave me feeling heavy. They’re satisfying without being over-the-top, and they fit into a balanced eating plan perfectly. Halloween doesn’t have to be all candy and sugar—sometimes the best party food is something savory and fun.
Conclusion
These Halloween spider deviled eggs are everything I want in a holiday recipe: fun to make, impressive to serve, and genuinely delicious. They’ve become a tradition in my house, and I look forward to making them every October. There’s something so satisfying about watching people’s faces light up when they see the platter—that mix of “ew, creepy!” and “ooh, I want one!” is pure Halloween magic.
I hope you give these a try, whether you’re hosting a big party or just want to surprise your family with something special. Don’t be afraid to make them your own—add some hot sauce, swap in avocado, or go all out with bacon. The best recipes are the ones you make your own.
If you make these spider deviled eggs, I’d love to hear about it! Drop a comment below and let me know how they turned out, or share a photo on Pinterest and tag me. And if you have your own Halloween recipe traditions, I’m always looking for new ideas. Happy Halloween, and happy cooking!
Frequently Asked Questions
Can I make these spider deviled eggs a day ahead?
Absolutely! In fact, I often do. Boil and peel the eggs, make the filling, and store them separately in the fridge. Assemble the spiders just before serving so the olives stay fresh and crisp. The filling can be piped into the egg whites a few hours ahead, but wait to add the olive spiders until right before serving.
How do I keep the olive legs from falling off?
This is a common issue, and the solution is simple: make sure the olives are dry before you slice them. Pat them with a paper towel after draining. Also, don’t press the legs into the filling too hard—just place them gently on top. The filling is sticky enough to hold them in place. If you’re transporting the eggs, arrange them on a flat platter and cover loosely with plastic wrap.
Can I use other types of olives?
You can, but I wouldn’t recommend it. Green olives are too small and have a pimiento in the middle that makes slicing messy. Kalamata olives are too soft and will fall apart. Large black olives are the perfect size and texture. Stick with those for the best results.
How many eggs should I plan per person?
For a party where there are other snacks, I usually plan for 2-3 spider deviled eggs per person. So one batch (12 eggs, 24 halves) serves about 8-12 people. If these are the main appetizer, you might want to double the recipe. They go fast!
Can I make these without a piping bag?
Definitely. If you don’t have a piping bag, just use a zip-top bag with the corner snipped off. Or skip the bag entirely and use a small spoon to fill the egg whites. The presentation won’t be as fancy, but they’ll taste just as good. I’ve done it both ways, and honestly, the spoon method is faster for a crowd.
Pin This Recipe!
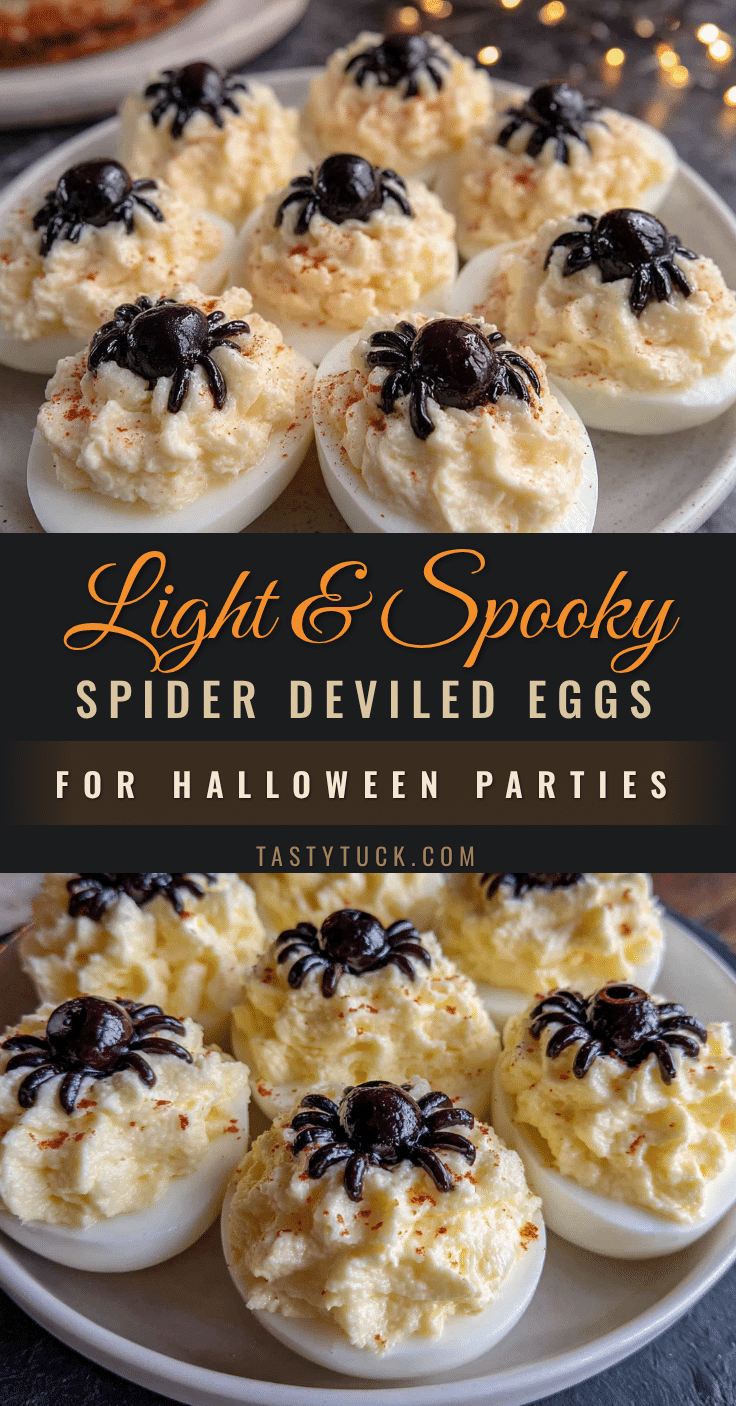
Halloween Spider Deviled Eggs: Easy & Creepy Recipe
These spider deviled eggs are creepy, cute, and delicious—perfect for Halloween parties. With a creamy filling and olive spiders, they’re a crowd-pleaser that’s quick and easy to make.
- Prep Time: 20 minutes
- Cook Time: 12 minutes
- Total Time: 32 minutes
- Yield: 24 servings 1x
- Category: Appetizer
- Cuisine: American
Ingredients
- 12 large eggs
- 1/3 cup mayonnaise
- 1 tablespoon Dijon mustard
- 1/2 teaspoon smoked paprika (plus more for garnish)
- 1/4 teaspoon salt
- 1/8 teaspoon black pepper
- 1 can (6 ounces) large pitted black olives
- Optional: Fresh chives or parsley for garnish
Instructions
- Boil the eggs: Place 12 eggs in a single layer in a saucepan. Cover with cold water by about an inch. Bring to a rolling boil over high heat. Cover, remove from heat, and let sit for exactly 12 minutes. Transfer eggs immediately to a bowl of ice water and let sit for at least 10 minutes.
- Peel the eggs: Gently tap each egg on the counter to crack the shell all over, then roll between palms to loosen. Start peeling from the wider end. Rinse under cold water to remove shell fragments.
- Slice the eggs in half: Using a sharp knife, slice each peeled egg lengthwise. Gently pop out the yolks into a mixing bowl.
- Make the filling: Add mayonnaise, Dijon mustard, smoked paprika, salt, and pepper to the yolks. Mash together with a fork until completely smooth. Taste and adjust seasoning.
- Pipe the filling: Spoon filling into a piping bag or zip-top bag. If using a zip-top bag, squeeze into one corner and snip off about 1/2 inch from the tip. Pipe filling into each egg white half, dividing evenly.
- Prepare the olives: Drain olives and pat dry. For each spider, use one whole olive for the body and one olive cut into thin rings (about 1/8 inch thick) for the legs. Cut each ring in half to create two half-moon shapes.
- Assemble the spiders: Place one whole olive on top of a filled egg white, slightly off-center. Arrange 8 half-moon olive pieces around the body (4 on each side) to create legs. Repeat for all 24 eggs.
- Garnish and serve: Lightly sprinkle finished eggs with smoked paprika. If using, scatter fresh chives or parsley around the platter. Serve immediately or refrigerate until ready to serve.
Notes
For best peeling, use eggs that are at least a week old. Add a teaspoon of baking soda to the water before boiling to make peeling easier. The filling can be made a day ahead and stored in a piping bag in the fridge. Assemble spiders just before serving to keep olives fresh.
Nutrition
- Serving Size: 1 spider deviled egg
- Calories: 85
- Sodium: 180
- Fat: 6
- Saturated Fat: 1.5
- Carbohydrates: 1
- Protein: 6
Keywords: Halloween, deviled eggs, spider, appetizer, party, easy, creepy, festive


