I was standing in the baking aisle of a grocery store last October, staring at a display of black food coloring that had been knocked over, when a woman next to me muttered, “I just need something that doesn’t make me want to cry.” She was holding a bag of powdered sugar like it was a lifeline. And honestly? I felt that. Halloween treats can be so complicated — the fondant, the layering, the piping bags that explode in your hand. I told her about these ghost meringue cookies, and she looked at me like I’d just handed her a winning lottery ticket.
That moment hit me with this weird, sharp memory of being seven years old at my Aunt Jo’s house. She wasn’t really my aunt — she was my mom’s friend from work, but we called her that anyway. She’d make these tiny white cookies every October that looked like little clouds, and I remember standing on a step stool next to her, watching her pipe them onto a baking sheet. She’d let me add the chocolate chip eyes, pressing them in with my sticky fingers. I never knew what they were called back then. I just knew they were the only Halloween treat that didn’t make my teeth ache or my stomach hurt.
I lost touch with Aunt Jo years ago. But last October, standing in that messy aisle with powdered sugar dust on my jeans, I realized I could just make them myself. And here’s the thing — they only take three ingredients. Three. You probably have all of them right now, sitting in your pantry, waiting to become something magical. Let me tell you, there’s something deeply satisfying about watching egg whites turn into these glossy, ghost-shaped cookies that look like they floated straight out of a haunted house. Maybe you’ve been there — staring at complicated Halloween recipes, wondering if you actually have the patience for royal icing and fondant cutters. This is the recipe that saves your sanity.
Why You’ll Love This Recipe
I’ve tested this recipe more times than I care to admit — including one spectacular failure where I used a plastic bowl that still had a trace of grease, and my meringue never stiffened. I sat on my kitchen floor eating flat, sad cookie puddles while my dog watched with concern. So trust me when I say this version works. Every single time.
- Quick & Easy: From start to finish, these cookies take about 15 minutes of active prep time. The oven does the rest. Perfect for weeknights when you promised your kid you’d make something for the school Halloween party and it’s already 8 PM.
- Simple Ingredients: Eggs, sugar, and vanilla extract. That’s it. No specialty baking supply runs, no weird stabilizers, no ingredients you’ll use once and then forget about until 2027.
- Perfect for Halloween: These little ghosts are the star of any spooky spread. They look impressive, but they’re secretly the easiest thing on the table.
- Crowd-Pleaser: Kids love them because they’re cute. Adults love them because they’re light and not overwhelmingly sweet. Everyone wins.
- Unbelievably Delicious: There’s something about the texture — crisp on the outside, slightly chewy on the inside, with that pure vanilla flavor that tastes like a hug. It’s comfort food that happens to look like a cartoon ghost.
What makes this recipe different from the dozens of meringue recipes out there? It’s the technique. I spent months figuring out exactly how long to whip the egg whites, exactly when to add the sugar, and exactly what temperature to bake them at so they turn out perfect without cracking or browning. This isn’t just another version — it’s the version that works for tired people who don’t have time for fussy baking.
Honestly, this recipe makes me close my eyes after the first bite every single time. It’s that good. And it’s that simple.
What Ingredients You Will Need
This recipe uses three humble ingredients to create something that feels almost magical. You probably have all of them in your kitchen right now, which is exactly the point. No fancy trips to specialty stores, no hunting down obscure extracts.
- 3 large egg whites (room temperature — this matters more than you think!)
- 3/4 cup (150g) granulated sugar (regular white sugar works perfectly; avoid superfine or powdered sugar for this recipe)
- 1/2 teaspoon vanilla extract (pure vanilla extract gives the best flavor, but imitation works in a pinch)
For the ghost faces:
- Mini chocolate chips (about 1/4 cup — you’ll use two per ghost for eyes)
Ingredient Notes & Tips:
Egg whites at room temperature whip up much faster and create a more stable meringue. I learned this the hard way after a particularly frustrating evening of whisking cold egg whites for what felt like hours. Take them out of the fridge about 30 minutes before you start, or place the bowl of egg whites in a larger bowl of warm water for 5 minutes if you’re in a hurry.
I prefer using organic cane sugar for this recipe — it dissolves more evenly and gives a slightly cleaner flavor. But honestly, any granulated sugar works. Just don’t use powdered sugar; it contains cornstarch, which will mess with the meringue structure.
For the vanilla, I’m partial to Nielsen-Massey pure vanilla extract. It’s pricier, but the flavor is noticeably deeper. That said, I’ve made these with the store-brand vanilla and they were still delicious. Don’t let perfectionism stop you from baking.
If you want to get creative, you can swap the vanilla for peppermint extract for a winter ghost version, or almond extract for a nutty twist. Just keep the amounts the same — extracts are potent, and too much can overwhelm the delicate meringue.
Equipment Needed
The equipment list for this recipe is refreshingly short. You don’t need a stand mixer — though it certainly helps — and you definitely don’t need any specialty pans.
- Electric mixer (handheld or stand mixer with whisk attachment — you can whisk by hand, but your arm will hate you for it)
- Large mixing bowl (must be completely clean and grease-free — glass or metal is best; plastic can hold onto oils)
- Baking sheet (standard half-sheet pan works perfectly)
- Parchment paper (essential — meringue sticks to everything else)
- Piping bag (or a zip-top bag with the corner snipped off — no need to get fancy)
- Large round piping tip (optional, but gives cleaner ghosts — Wilton 1A is my go-to)
- Spatula (for scraping down the bowl)
Budget-friendly alternatives: Don’t have a piping bag? A sturdy zip-top freezer bag works just as well. No parchment paper? A silicone baking mat is a great reusable option. No electric mixer? You can whisk by hand, but expect it to take 10-15 minutes of continuous whisking. I’ve done it. It’s a workout.
Maintenance tip: Before you start, wipe your mixing bowl and whisk attachment with a little lemon juice or vinegar on a paper towel. This removes any trace of grease that could prevent your egg whites from whipping properly. I learned this after ruining three batches of meringue in one afternoon. Trust me on this one.
Preparation Method
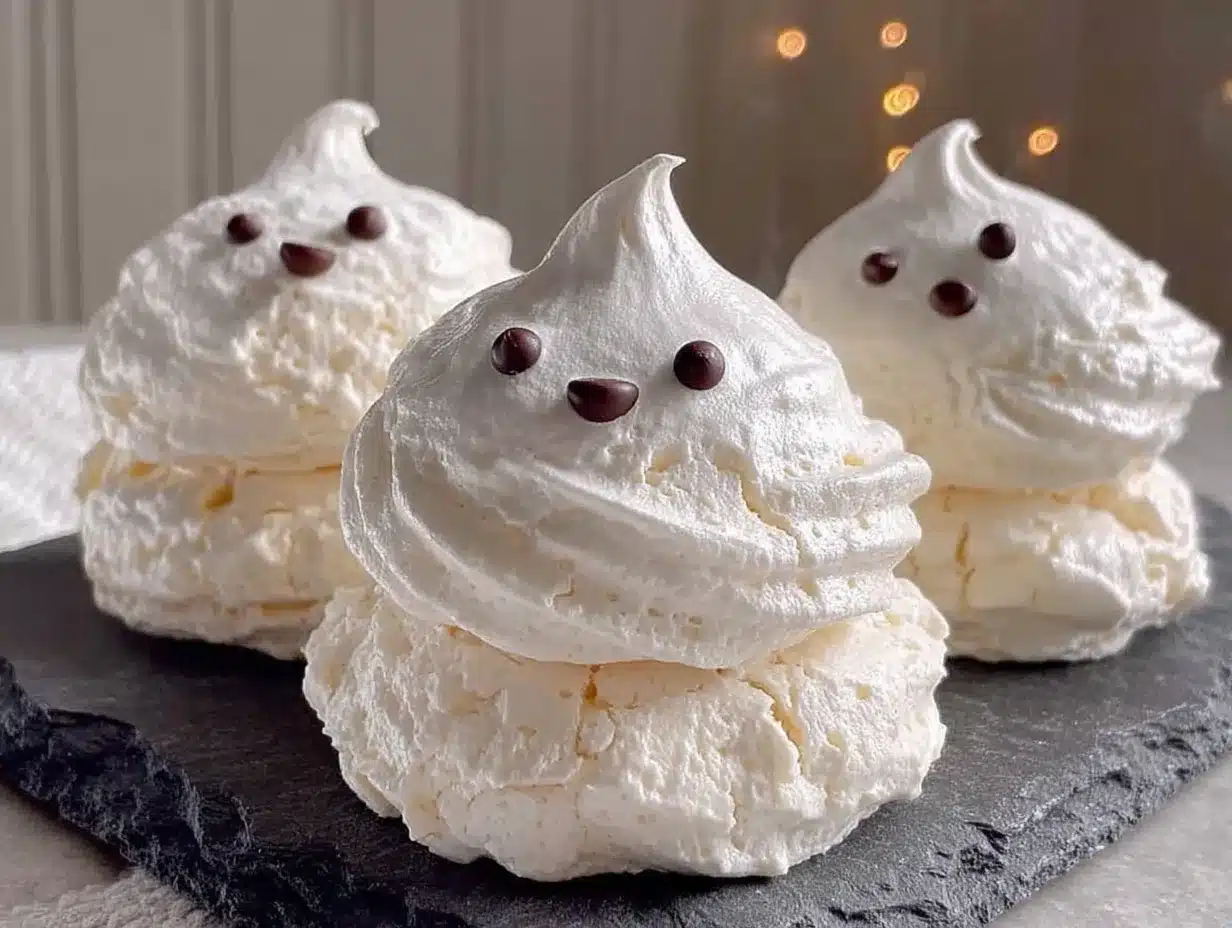
Alright, let’s make some ghosts. This process is straightforward, but meringue can be temperamental if you don’t follow the steps carefully. I’ve included all the little tricks I’ve learned through trial and error.
Step 1: Preheat and prepare. Preheat your oven to 200°F (95°C). Line a baking sheet with parchment paper. This low temperature is key — we’re drying the meringues, not baking them. If your oven runs hot, consider dropping the temperature to 190°F (88°C).
Step 2: Separate your eggs carefully. Crack the eggs one at a time, separating the whites from the yolks. Be super careful — even a tiny bit of yolk in the whites will prevent them from whipping properly. I use the three-bowl method: crack into a small bowl, check for yolk, then transfer to your mixing bowl. This way, if one egg breaks badly, you haven’t ruined the whole batch.
Step 3: Start whipping. Using your electric mixer, beat the egg whites on medium speed until they become frothy and bubbly — about 1-2 minutes. You’ll see lots of tiny bubbles forming. This is where patience starts to pay off.
Step 4: Add sugar gradually. With the mixer running on medium-high speed, add the sugar one tablespoon at a time. I know it’s tedious, but rushing this step can cause your meringue to deflate later. Wait about 15 seconds between each addition. The mixture will start looking glossy and smooth.
Step 5: Whip to stiff peaks. Continue beating on high speed for about 5-7 minutes total. You’re looking for stiff, glossy peaks that hold their shape when you lift the whisk. Here’s the test: turn the bowl upside down — if the meringue stays put, you’re done. If it slides, keep whipping. Add the vanilla extract during the last minute of whipping.
Step 6: Pipe the ghosts. Transfer the meringue to your piping bag fitted with a large round tip. Hold the bag straight up and down, about 1/2 inch above the baking sheet. Pipe a tall, round blob about 1.5 inches wide and 2 inches tall. To create the ghost shape, pull the bag straight up at the end — the meringue will form a little peak that looks like a ghost’s head. Space them about 1 inch apart — they don’t spread much.
Step 7: Add the eyes. Gently press two mini chocolate chips into each ghost for eyes. Do this immediately after piping, before the meringue starts to form a skin. Press them in just enough so they stay put — about halfway.
Step 8: Bake low and slow. Place the baking sheet in the preheated oven and bake for 60-75 minutes. The ghosts should be dry to the touch and easily lift off the parchment paper. They shouldn’t be brown at all — if they’re turning golden, your oven is too hot.
Step 9: Cool completely. Turn off the oven and leave the ghosts inside with the door slightly ajar for another 30 minutes. This gradual cooling prevents cracking. Then transfer them to a wire rack to cool completely before serving or storing.
Cooking Tips & Techniques
Here’s where I share all the hard-won wisdom from my meringue adventures — including the failures that taught me the most.
The clean bowl rule is non-negotiable. I once used a bowl that I thought was clean, but it had a microscopic trace of dish soap residue. My meringue never got past the frothy stage. I stood there for 20 minutes, whisking and cursing, before I figured out what went wrong. Wash your bowl and whisk with hot, soapy water, rinse thoroughly, then wipe with vinegar or lemon juice. Your future self will thank you.
Humidity is the enemy. Meringue absorbs moisture from the air, which can make it sticky and prevent it from drying properly. If you live in a humid climate (hello, fellow Southerners), try making these on a dry day. If you can’t wait, add an extra 15-20 minutes to the baking time and leave them in the oven with the door cracked for longer after baking.
Don’t overmix. Once you hit stiff peaks, stop. Overwhipped meringue looks grainy and separated, and it won’t pipe smoothly. If you see the mixture starting to look curdled or watery, you’ve gone too far. Start over with fresh egg whites — there’s no saving overwhipped meringue.
Room temperature eggs really matter. Cold eggs take forever to whip and don’t incorporate sugar as well. I learned this lesson on a particularly frustrating Tuesday night when I was making meringue at 10 PM because I’d promised my niece I’d bring ghost cookies to her class party. The cold egg whites took almost 15 minutes to whip. Fifteen minutes. Just let them sit on the counter for a bit.
Pipe with confidence. Don’t hesitate when you’re piping. A smooth, steady motion creates cleaner ghosts. If you stop and start, you’ll get weird bumps and ridges. And if your first few ghosts look terrible? That’s fine. Eat them. No one has to know.
Variations & Adaptations
One of the best things about this recipe is how easy it is to customize. Here are some variations I’ve tried and loved.
Chocolate Ghosts: Replace 2 tablespoons of the sugar with unsweetened cocoa powder. Sift it together before adding to the egg whites. You’ll get dark, spooky ghosts that taste like chocolate meringue. I made these for a Halloween party last year and they disappeared first.
Peppermint Specters: Swap the vanilla extract for peppermint extract. These are perfect for Christmas or winter-themed parties. Add a tiny drop of red food coloring to make pink ghosts if you’re feeling festive.
Vegan Meringue Ghosts: Use aquafaba (the liquid from a can of chickpeas) instead of egg whites. Replace 3 egg whites with 1/2 cup of aquafaba. Whip it exactly the same way — it takes a bit longer, but it works. The flavor is neutral, and the texture is identical. I was skeptical the first time I tried this, but honestly, I couldn’t tell the difference.
Gluten-Free: These are naturally gluten-free! No modifications needed. Just double-check that your vanilla extract is gluten-free (most are, but some brands use additives).
Flavor Variations: Try almond extract, coconut extract, or even a splash of rose water for a fancy twist. Just keep the total extract amount to 1/2 teaspoon — these extracts are potent, and too much can make the meringue taste like perfume.
Colorful Ghosts: Add a drop of gel food coloring after the stiff peaks form. Gently fold it in with a spatula until evenly distributed. Purple ghosts, green ghosts, orange ghosts — the possibilities are endless. Just avoid liquid food coloring, which can deflate the meringue.
Serving & Storage Suggestions
These ghosts are best served at room temperature, right after they’ve cooled. They have that perfect crisp exterior that gives way to a slightly chewy, marshmallow-like interior. Serve them on a platter with other Halloween treats — I like to arrange them around a bowl of candy corn or alongside chocolate cupcakes.
Storage: Store the ghosts in an airtight container at room temperature. Do NOT refrigerate them — the moisture in the fridge will make them sticky and soft. They’ll keep for about 2 weeks if stored properly, though they rarely last that long in my house.
Freezing: You can freeze baked meringue ghosts for up to 3 months. Place them in a single layer in a freezer-safe container with parchment paper between layers. Thaw at room temperature for about 30 minutes before serving. They might lose a bit of their crispness, but they’re still delicious.
Reheating: If your ghosts have gone soft (it happens, especially in humid weather), pop them back in a 200°F (95°C) oven for 10-15 minutes. Let them cool completely, and they’ll crisp right back up.
Flavor development: These cookies actually taste better the next day. The vanilla flavor deepens and the texture evens out. So if you’re making them for a party, bake them a day ahead. Your future self will thank you.
Pairing suggestions: Serve with hot chocolate, coffee, or a glass of cold milk. For an adult twist, pair with a dark stout beer or a bourbon-spiked apple cider. The light, airy texture of the meringue is a perfect contrast to rich, warming drinks.
Nutritional Information & Benefits
Per ghost (assuming 24 cookies per batch):
- Calories: ~25
- Fat: 0g
- Carbohydrates: 6g
- Sugar: 6g
- Protein: 0.5g
- Sodium: 8mg
These are a relatively low-calorie treat compared to most Halloween cookies. They’re fat-free and contain no butter or oil, which makes them a lighter option for those watching their intake. The egg whites provide a small amount of protein, and the sugar is the main source of calories.
Dietary considerations: These ghosts are naturally gluten-free, dairy-free, and nut-free (assuming you use pure vanilla extract). They’re also kosher-friendly. The only allergen concern is eggs, so they’re not suitable for those with egg allergies — unless you use the aquafaba variation mentioned above.
Health perspective: Look, these are still cookies. They’re made of sugar and egg whites. But they’re a lighter, simpler treat that doesn’t leave you feeling heavy or sluggish. I love that I can offer something sweet at a Halloween party without reaching for processed candy. Plus, making them from scratch feels good — there’s something meditative about whipping egg whites into glossy peaks.
Conclusion
These 3-ingredient ghost meringue cookies are the Halloween treat you didn’t know you needed. They’re simple enough for a tired weeknight, impressive enough for a party, and delicious enough to make you forget about all the complicated recipes you’ve been saving on Pinterest. I’ve made them for school parties, office potlucks, and quiet nights at home when I just wanted something sweet without a huge production.
What I love most about this recipe is how forgiving it is. Even when my ghosts come out lopsided or the chocolate chip eyes end up crooked, they’re still adorable. They still taste amazing. And they still make people smile. That’s the magic of a simple recipe done right.
I’d love to hear how your ghosts turn out! Did you try any fun variations? Did your kids help pipe them? Drop a comment below and share your spooky creations. And if you’re looking for more easy Halloween treats, check out our crispy garlic chicken for a savory break from all the sugar. Happy haunting, and happy baking!
Frequently Asked Questions
Can I make these without an electric mixer?
Yes, but be prepared for a workout. Whisking egg whites to stiff peaks by hand takes about 10-15 minutes of continuous, vigorous whisking. Use a large metal bowl and a balloon whisk for best results. Take breaks if you need to — just don’t stop for too long, or the meringue can start to deflate.
Why did my meringue ghosts turn out flat?
Flat meringue usually means the egg whites didn’t whip to stiff enough peaks, or there was a trace of grease on your bowl or whisk. Make sure your equipment is spotlessly clean, and whip until the meringue holds its shape when you lift the whisk. Also, make sure you’re adding the sugar slowly — dumping it all at once can weigh down the egg whites.
Can I use liquid egg whites from a carton?
You can, but I don’t recommend it. Carton egg whites are pasteurized, which affects their ability to whip properly. They’ll still work, but the meringue won’t be as stable or glossy. If you’re in a pinch, use 1/2 cup of carton egg whites for 3 large egg whites, and expect to whip them a bit longer.
How do I know when the ghosts are fully baked?
The ghosts should be completely dry to the touch and lift easily off the parchment paper. They shouldn’t be brown or golden at all — if they’re coloring, your oven is too hot. If you’re unsure, gently tap one — it should sound hollow. You can also break one open to check: the inside should be dry and airy, not sticky or chewy.
Can I double this recipe?
Absolutely! This recipe doubles beautifully. Just make sure your mixing bowl is large enough — meringue expands significantly as it whips. If you’re using a stand mixer, the 5-quart bowl can handle a double batch easily. For a handheld mixer, you might need to work in batches. The baking time stays the same for a double batch, just make sure the ghosts aren’t touching on the baking sheet.
Pin This Recipe!
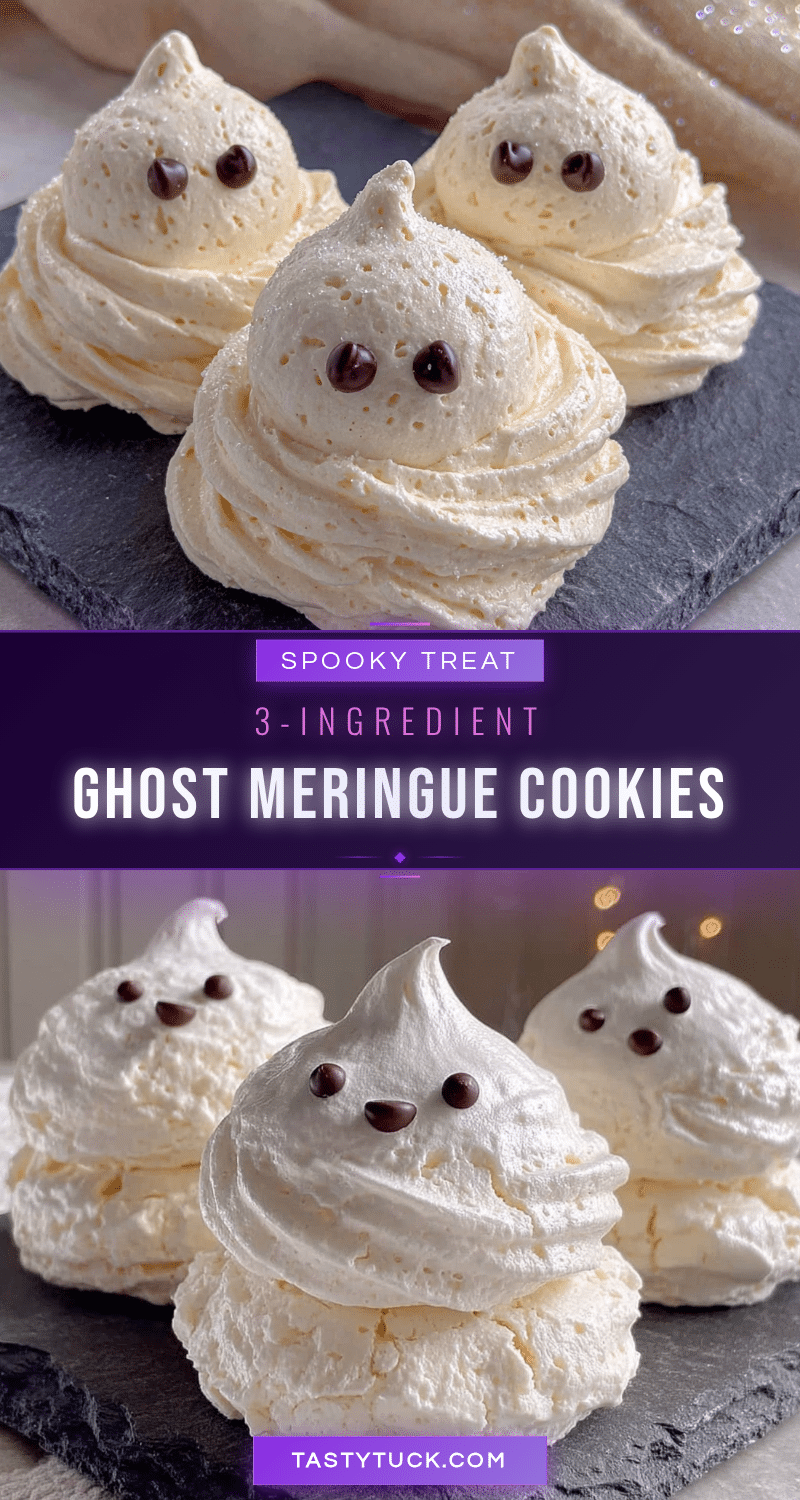
3-Ingredient Ghost Meringue Cookies: Easy Halloween Treat
These 3-ingredient ghost meringue cookies are the Halloween treat you didn’t know you needed. They’re simple enough for a tired weeknight, impressive enough for a party, and delicious enough to make you forget about all the complicated recipes you’ve been saving on Pinterest.
- Prep Time: 15 minutes
- Cook Time: 60-75 minutes
- Total Time: 1 hour 45 minutes
- Yield: 24 cookies 1x
- Category: Dessert
- Cuisine: American
Ingredients
- 3 large egg whites (room temperature)
- 3/4 cup (150g) granulated sugar
- 1/2 teaspoon vanilla extract
- 1/4 cup mini chocolate chips (for eyes)
Instructions
- Preheat oven to 200°F (95°C). Line a baking sheet with parchment paper.
- Separate eggs carefully, ensuring no yolk gets into the whites. Use the three-bowl method.
- Beat egg whites on medium speed until frothy and bubbly, about 1-2 minutes.
- With mixer on medium-high speed, add sugar one tablespoon at a time, waiting about 15 seconds between each addition.
- Continue beating on high speed for 5-7 minutes until stiff, glossy peaks form. Add vanilla extract during the last minute.
- Transfer meringue to a piping bag fitted with a large round tip. Pipe tall, round blobs about 1.5 inches wide and 2 inches tall, pulling straight up to create a peak.
- Immediately press two mini chocolate chips into each ghost for eyes, pressing them in about halfway.
- Bake for 60-75 minutes until dry to the touch and easily lifting off the parchment. They should not brown.
- Turn off oven and leave ghosts inside with door slightly ajar for 30 minutes to cool gradually. Then transfer to a wire rack to cool completely.
Notes
Ensure bowl and whisk are completely grease-free; wipe with lemon juice or vinegar. Room temperature eggs are crucial. Humidity can affect meringue; add extra baking time if needed. Do not overmix once stiff peaks form. Store in airtight container at room temperature for up to 2 weeks. Freeze for up to 3 months.
Nutrition
- Serving Size: 1 ghost cookie
- Calories: 25
- Sugar: 6
- Sodium: 8
- Carbohydrates: 6
- Protein: 0.5
Keywords: ghost meringue cookies, Halloween treats, 3-ingredient cookies, easy meringue, gluten-free Halloween cookies


