The school Halloween party was in four hours and I’d completely forgotten. Everyone else would be bringing elaborate themed cupcakes with hand-piped spiders, cake pops shaped like mummies, and those graveyard dirt desserts with the gummy worms crawling out. I had a bag of candy corn, some pretzel sticks, and a random block of white chocolate I’d bought for no particular reason. Honestly, I stood in my kitchen staring at these ingredients like they might magically transform themselves. They did not. But then I remembered that thing my friend Jenna did last year with a cutting board and all her leftover Halloween candy. The panic started to settle, just a little.
I grabbed the biggest wooden board I owned—the one with the crack running down one side that I keep meaning to replace—and started arranging. Candy corn in little rows. Pretzels in a cluster. I chopped that white chocolate into uneven chunks because, let’s face it, nobody was grading me on knife skills. I found a bag of dried cranberries shoved behind the oatmeal and threw those on too. It looked… fine. Acceptable. Something a person who remembered the party might bring. I tossed on some Halloween sprinkles for good measure and ran out the door.
Here’s the thing nobody tells you about Halloween party food: people don’t actually want to commit to a cupcake. They want to graze. They want to stand around holding a paper cup and pick at things while they talk about their kids’ costumes. My board was the first thing to get demolished. Not because it was fancy—it was literally candy on a board—but because it gave people permission to eat exactly what they wanted, in whatever order they wanted. The candy corn went first, which surprised me. I’d assumed it would be the last thing left, the way it usually is in my house. But there’s something about seeing it arranged nicely on a board that makes people trust it. Or maybe they just wanted the sugar. Either way, I’ve been making this board every Halloween since, and I keep learning new tricks each time. Maybe you’ve been there too—staring at a bag of candy corn and wondering what to actually do with it besides eat it straight from the bag. Well, I’ve got you covered.
Why You’ll Love This Recipe
Let me tell you why this Halloween candy board has become my go-to for every spooky season gathering. I’ve tested this thing at five different parties now, and it never fails. Here’s what makes it special:
- Five Minutes to Assemble: No baking, no melting, no complicated steps. If you can open a bag of candy, you can make this board. I’ve timed myself—it takes exactly four minutes and thirty-seven seconds if you arrange things neatly.
- Zero Special Ingredients: Everything comes from the regular grocery store or your Halloween candy stash. No hunting down obscure baking supplies or specialty items.
- Perfect for Halloween Parties: Whether it’s a school event, office potluck, or neighborhood gathering, this board fits right in. It’s shareable, snackable, and doesn’t require plates or forks.
- Crowd-Pleaser Across Ages: Kids go for the candy corn and chocolate. Adults pick at the pretzels and nuts. Everyone wins.
- Customizable in Seconds: Got leftover Halloween candy? Throw it on. Someone allergic to peanuts? Swap the nuts. This board bends to whatever you have.
What makes this different from just dumping candy in a bowl? It’s the arrangement, honestly. There’s something about seeing candy corn lined up with pretzel sticks and chocolate that makes it feel intentional—like you actually planned this. Plus, the salty-sweet combination keeps people coming back. The candy corn gets a little soft at room temperature, which sounds weird but actually makes it better. Trust me on this one.
This isn’t just a snack board—it’s the kind of thing that makes people stand around your kitchen island talking longer than they meant to. It’s comfort food for Halloween season, reimagined as something you can throw together without stress. Perfect for impressing other parents at the school party without actually trying too hard.
What Ingredients You Will Need
This recipe uses simple, store-bought ingredients to create a visually striking board that delivers on both flavor and presentation. Most of these are probably already in your pantry or candy stash. Here’s what you’ll need:
The Candy Corn Base
- Candy corn, 2 cups (about one standard bag; I prefer Brach’s for that classic chewy texture)
- Harvest corn or autumn mix, 1 cup (the little pumpkin-shaped ones add visual variety; look for the Brach’s Autumn Blend if you can find it)
- Chocolate-covered peanuts, 1 cup (adds richness and balances the sweetness of the candy corn)
The Salty Elements
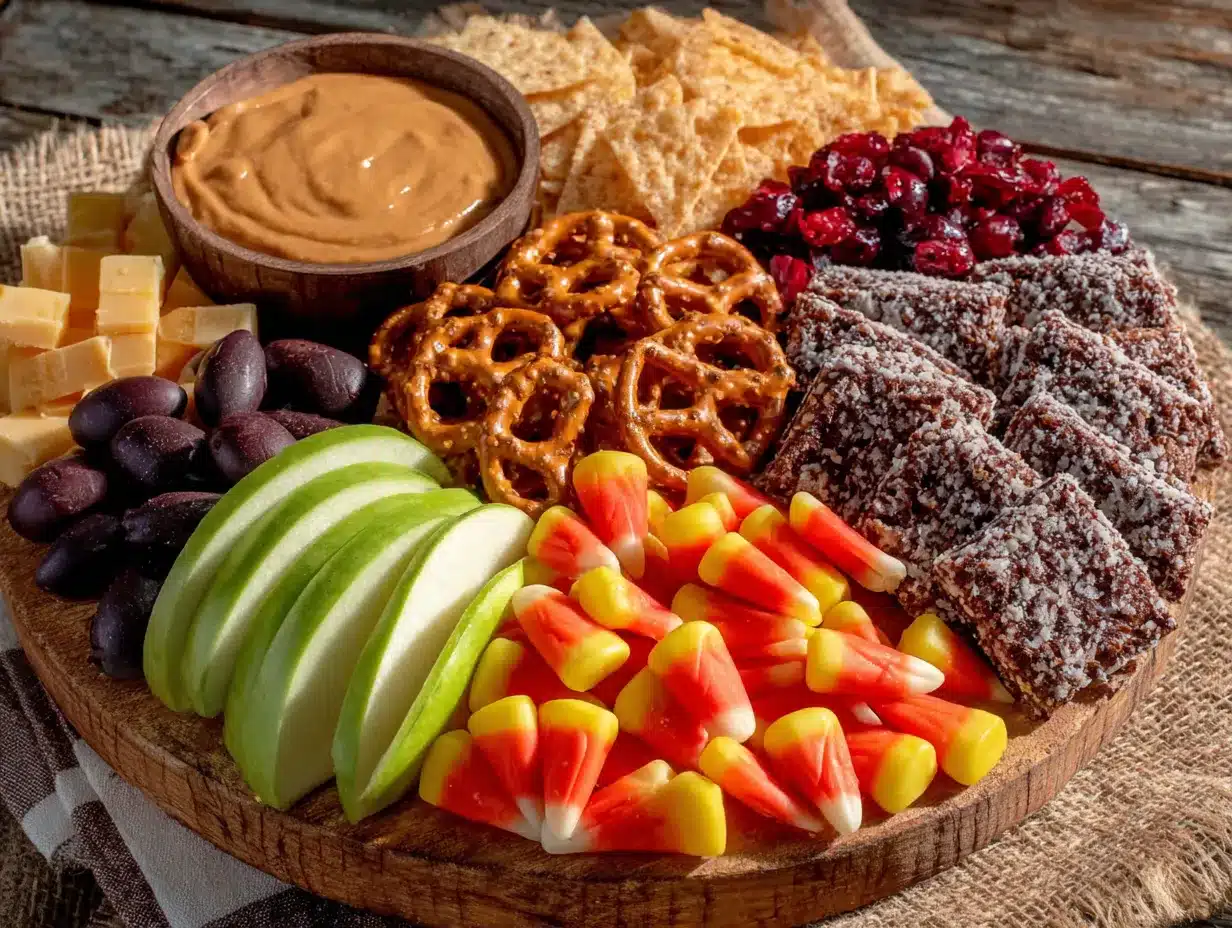
- Mini pretzel twists, 1.5 cups (the salted ones work best; unsalted will leave the board feeling flat)
- Roasted salted almonds, 1 cup (adds crunch and a savory note; you can substitute cashews or pecans)
- Pumpkin seeds, 1/2 cup (shelled, roasted, and salted—these add a nice seasonal touch)
The Sweet Accents
- White chocolate melting wafers, 1 cup (I use Ghirardelli; they melt smoothly and look beautiful on the board)
- Dark chocolate chips, 1/2 cup (adds a bitter contrast that makes the candy corn taste less sweet)
- Dried cranberries or cherries, 1/2 cup (adds a tart pop of color and flavor)
The Decorative Touches
- Halloween-themed sprinkles, 2 tablespoons (orange, black, and white jimmies work great)
- Edible glitter or luster dust, optional (for that Pinterest-worthy sparkle; totally optional but fun)
- Fresh rosemary sprigs, 2-3 (sounds weird, I know, but the green adds a gorgeous contrast against all the orange and black)
Ingredient selection tip: Look for candy corn that feels slightly soft when you squeeze it. If it’s rock hard, it’s probably from last season and won’t have that signature chewy texture. Fresh candy corn bends slightly before breaking. For the chocolate, I recommend using a brand you actually enjoy eating, because you’ll probably snack on a few pieces while assembling. I always do.
Substitution guidance: If you’re avoiding nuts, swap the almonds and chocolate-covered peanuts for extra pretzels and some yogurt-covered raisins. For a gluten-free version, use gluten-free pretzels (they exist and they’re surprisingly good). You can also swap the white chocolate for caramel squares if that’s more your style—just unwrap them first and arrange them in a little pile.
Equipment Needed
You don’t need much for this recipe, which is honestly my favorite part. Here’s what you’ll need:
- Large wooden cutting board or serving platter, at least 12 by 16 inches. I use a round board that’s about 14 inches across, but rectangular works just as well. A baking sheet lined with parchment paper works in a pinch—I’ve done it before and nobody noticed.
- Small bowls or ramekins, 3 to 4 of them. These hold the loose items like sprinkles and chocolate chips so they don’t roll everywhere. I use the little ceramic ones from my dipping sauce collection.
- Serving spoons or tongs, one for each item. People don’t want to touch the candy corn with the same spoon they used for the pretzels. Trust me on this.
- Parchment paper, if you’re using a baking sheet instead of a board. Makes cleanup a breeze.
Budget-friendly option: Thrift stores always have wooden cutting boards for a few dollars. Look for one with a lip around the edge to keep everything contained. My favorite board came from a garage sale for three dollars and it’s got more character than anything I’ve bought new.
Preparation Method
Follow these steps to create your Halloween candy board. I’ve included time estimates and sensory cues so you know exactly what to look for.
- Prepare your board or platter. Wash and dry your board thoroughly. If you’re using a wooden board, make sure it’s completely dry—moisture will make the pretzels soggy. Place it on your counter or table where you plan to serve it. Time: 1 minute.
- Position your small bowls. Place 3 to 4 small ramekins around the board. I put one in the upper left corner for the sprinkles, one in the lower right for the chocolate chips, and one in the center for the dried cranberries. This creates visual anchors that guide the eye around the board. Time: 30 seconds.
- Fill the bowls. Pour the sprinkles into one bowl, the chocolate chips into another, and the dried cranberries into the third. If you’re using edible glitter, put it in its own small dish—don’t sprinkle it directly on the board yet. Time: 1 minute.
- Create the candy corn base. Pour the candy corn and harvest corn mix into a large pile in the center of the board. Don’t arrange it yet—just dump it in a rough mound. This will be the foundation everything else builds around. Time: 30 seconds.
- Add the chocolate-covered peanuts. Scatter these around the candy corn mound, creating small clusters. Leave some space between clusters so people can grab individual pieces. The chocolate peanuts add a dark color contrast against the bright orange candy corn. Time: 30 seconds.
- Arrange the pretzels. Place the mini pretzel twists in a line along one edge of the board, slightly overlapping them. This creates a defined border and gives people something salty to reach for. I like to put them on the left side because most people are right-handed and reach to the right first. Time: 1 minute.
- Add the almonds and pumpkin seeds. Sprinkle these in the empty spaces between the candy corn and pretzels. Don’t pile them too high—you want them accessible but not overwhelming. The almonds add a golden-brown color that bridges the orange candy corn and the darker chocolate. Time: 1 minute.
- Place the white chocolate wafers. Arrange these in a small cluster near the center-right of the board. If you want to get fancy, you can stack a few of them like little tiles. They’ll soften slightly at room temperature, which makes them easier to bite into. Time: 30 seconds.
- Add the decorative elements. Sprinkle the Halloween sprinkles lightly over the white chocolate wafers and candy corn. Don’t go overboard—you want hints of color, not a full coating. Tuck the rosemary sprigs between the clusters of food, stems pointing outward like little green accents. Time: 1 minute.
- Final adjustments. Step back and look at your board. Fill any empty spots with extra candy corn or pretzels. Make sure there’s a good balance of colors and textures. The board should look abundant but not chaotic—think organized chaos. Time: 1 minute.
Troubleshooting tip: If your candy corn is sticking together, it’s either too humid or the candy is old. Try separating the pieces with your fingers and spreading them out more on the board. If they’re still sticking, toss them with a teaspoon of powdered sugar before arranging—it absorbs moisture and prevents clumping.
Efficiency tip: Set out all your ingredients before you start arranging. I learned this the hard way after having to pause halfway through to dig through my pantry for the pumpkin seeds. Having everything within arm’s reach makes the process feel effortless.
Cooking Tips & Techniques
I’ve made this board at least a dozen times now, and I’ve picked up some tricks along the way. Here’s what I wish someone had told me before my first attempt:
Layer your textures. The best boards have a mix of crunchy, chewy, and smooth elements. Candy corn is chewy, pretzels are crunchy, and white chocolate is smooth. Make sure each section of the board has at least two different textures within reach. Nobody wants to eat a mouthful of just candy corn—trust me, I’ve tried.
Don’t overthink the arrangement. My first board was a disaster because I tried to make it look like a Pinterest photo. I spent twenty minutes moving individual pieces around. The second time, I just dumped everything on and adjusted as I went. It looked better and took half the time. People don’t notice if a pretzel is slightly crooked.
Keep it at room temperature. Don’t refrigerate this board. The candy corn gets hard and loses that signature chewiness. The chocolate might bloom (get those white streaks) if it’s too cold. Just leave it on the counter until you’re ready to serve. If you’re making it ahead, assemble everything except the chocolate and add that just before serving.
Common mistake to avoid: Putting too much on the board. I know it’s tempting to fill every inch, but people need space to grab things. Leave about 20% of the board empty. It looks more intentional and makes the food feel more special. Plus, it gives you room to refill as things get eaten.
Timing strategy: Assemble the board no more than two hours before serving. The pretzels start absorbing moisture from the air and get soft after that. If you need to prep earlier, keep all the ingredients in separate containers and assemble right before guests arrive.
I once made the mistake of assembling this board the night before a party. The pretzels were sad and limp by morning, and the candy corn had absorbed all the moisture from the chocolate chips. It was edible but not pretty. Learn from my failures—fresh assembly is key.
Variations & Adaptations
One of the best things about this board is how easily it adapts. Here are some variations I’ve tried and loved:
Savory-Sweet Halloween Board
Swap half the candy corn for cheese cubes and add some salami slices rolled into little roses. The salty-savory elements balance the sweetness and make it more of a meal. I did this for a grown-up Halloween party and it was a hit—the adults appreciated having something that wasn’t pure sugar.
All-Chocolate Halloween Board
Replace the candy corn with chocolate-covered pretzels, chocolate truffles, and chocolate bark. Add some fresh strawberries for color. This is perfect for the chocolate lovers in your life. My husband requests this version every year and refuses to eat regular candy corn now.
Nut-Free Halloween Board
Swap the almonds and chocolate-covered peanuts for extra pretzels, yogurt-covered raisins, and some mini marshmallows. Make sure all your chocolate is labeled nut-free. I made this for a school event with allergy concerns and it disappeared just as fast as the original.
Spooky Color Theme Board
Use only black, orange, and white foods. Black licorice, orange candy corn, white chocolate. Add some black sesame seeds for texture. It looks incredibly dramatic on a white platter. I did this for a Halloween dinner party and everyone took photos before eating.
Healthy-ish Halloween Board
Replace most of the candy with fresh fruit like orange slices, apple wedges, and blackberries. Keep a small bowl of candy corn for the Halloween feel. Add some dark chocolate for antioxidants. This one makes me feel better about letting my kids eat candy before dinner.
Serving & Storage Suggestions
This board is best served at room temperature, right after assembly. The candy corn is at its peak chewiness, the chocolate is firm but not hard, and the pretzels are perfectly crunchy. Set it out on a counter or table where people can gather around and graze.
What to serve alongside: This board pairs beautifully with warm apple cider or pumpkin spice lattes. For a non-alcoholic option, try sparkling water with a splash of cranberry juice. If you’re serving adults, a dry sparkling wine cuts through the sweetness perfectly. I also like to have small paper cups nearby so people can create their own little snack piles.
Storage instructions: This board doesn’t store well once assembled. The pretzels get soft, the chocolate might bloom, and the candy corn absorbs moisture from everything around it. If you have leftovers, separate the components into individual airtight containers. The candy corn will keep for up to two weeks at room temperature. The pretzels will stay fresh for about a week if sealed tightly. Chocolate should be stored in a cool, dark place.
Reheating tip: You don’t really reheat this board, but if the chocolate has softened too much, pop it in the fridge for 10 minutes before serving. Don’t leave it in longer than that, or the candy corn will harden.
Flavor development note: The candy corn actually gets better after a day or two in an airtight container—it softens slightly and develops a more intense vanilla flavor. The pretzels, unfortunately, go downhill fast. Eat those first.
Nutritional Information & Benefits
Let’s be real—this is a candy board, so it’s not health food. But here’s what you’re working with:
Estimated per serving (about 1/8 of the board): 320 calories, 12g fat, 52g carbohydrates, 4g protein, 38g sugar, 2g fiber. These numbers vary depending on exactly what you put on the board and how much you eat. I always eat more than one serving, so I try not to think about it too much.
Health highlights: The almonds and pumpkin seeds provide healthy fats and a bit of protein. Dark chocolate has antioxidants (yes, I’m reaching here). The pretzels offer a tiny amount of iron from the enriched flour. Mostly, this board is about enjoyment and celebration—and that has its own health benefits.
Dietary considerations: This board is vegetarian. For gluten-free, use gluten-free pretzels. For vegan, choose dark chocolate and skip the white chocolate (most white chocolate contains dairy). The candy corn itself is typically vegan, but check the label—some brands use gelatin.
Potential allergens: Contains dairy (white chocolate), nuts (almonds, chocolate-covered peanuts), gluten (pretzels), and soy (often in chocolate). If you’re serving a crowd with allergies, label the components or offer a separate nut-free section.
My personal take: I don’t make this board for nutritional value. I make it because Halloween is one night a year, and candy corn brings back memories of trick-or-treating as a kid. Sometimes food is just about joy, and that’s okay.
Conclusion
This Halloween candy board has saved me more times than I can count. From forgotten school parties to last-minute neighborhood gatherings, it’s the recipe that always comes through. No baking, no stress, no fancy ingredients—just candy on a board, arranged with a little love.
I love that this board lets people eat exactly what they want. The kid who only wants candy corn can pick around the pretzels. The adult who’s watching their sugar can grab a handful of almonds. Everyone finds their happy place. And honestly, watching people discover that candy corn and dark chocolate are actually delicious together? That never gets old.
I’d love to hear how your board turns out. Did you add something unexpected? Did your kids help arrange it? Did someone eat all the candy corn before you even set it out? (That would be me, honestly.) Drop a comment below and share your Halloween candy board story. And if you’re looking for more easy entertaining ideas, check out my easy Halloween party snacks or this no-bake Halloween desserts roundup for more last-minute inspiration.
Happy Halloween, and happy snacking!
Frequently Asked Questions
Can I make this Halloween candy board ahead of time?
You can prep the ingredients ahead, but assemble the board no more than two hours before serving. The pretzels get soft and the candy corn absorbs moisture from other ingredients if left too long. I keep everything in separate containers and assemble right before guests arrive.
What if I don’t have a wooden board?
A large baking sheet, a pizza pan, or even a clean cutting board works perfectly. Line it with parchment paper for easy cleanup. I’ve used a cookie sheet before and it looked great—just make sure it’s clean and dry.
Can I use different candy instead of candy corn?
Absolutely. This board works with any Halloween candy. Try candy pumpkins, chocolate ghosts, or gummy worms. Just keep the salty-sweet balance in mind. If you’re swapping out the candy corn, add extra pretzels or nuts to maintain texture contrast.
How much does this board serve?
This recipe serves about 8 to 10 people as a snack. If it’s the main attraction at a party, you might want to double it. I usually make one board for every 10 guests and add a second board with savory items if people are staying for a while.
Can kids help make this board?
Yes! This is a great recipe for kids. They can help arrange the candy, fill the small bowls, and add the sprinkles. Just supervise the chocolate if you’re using melting wafers (they can get warm). My kids love making their own mini boards with their favorite candies.
Pin This Recipe!
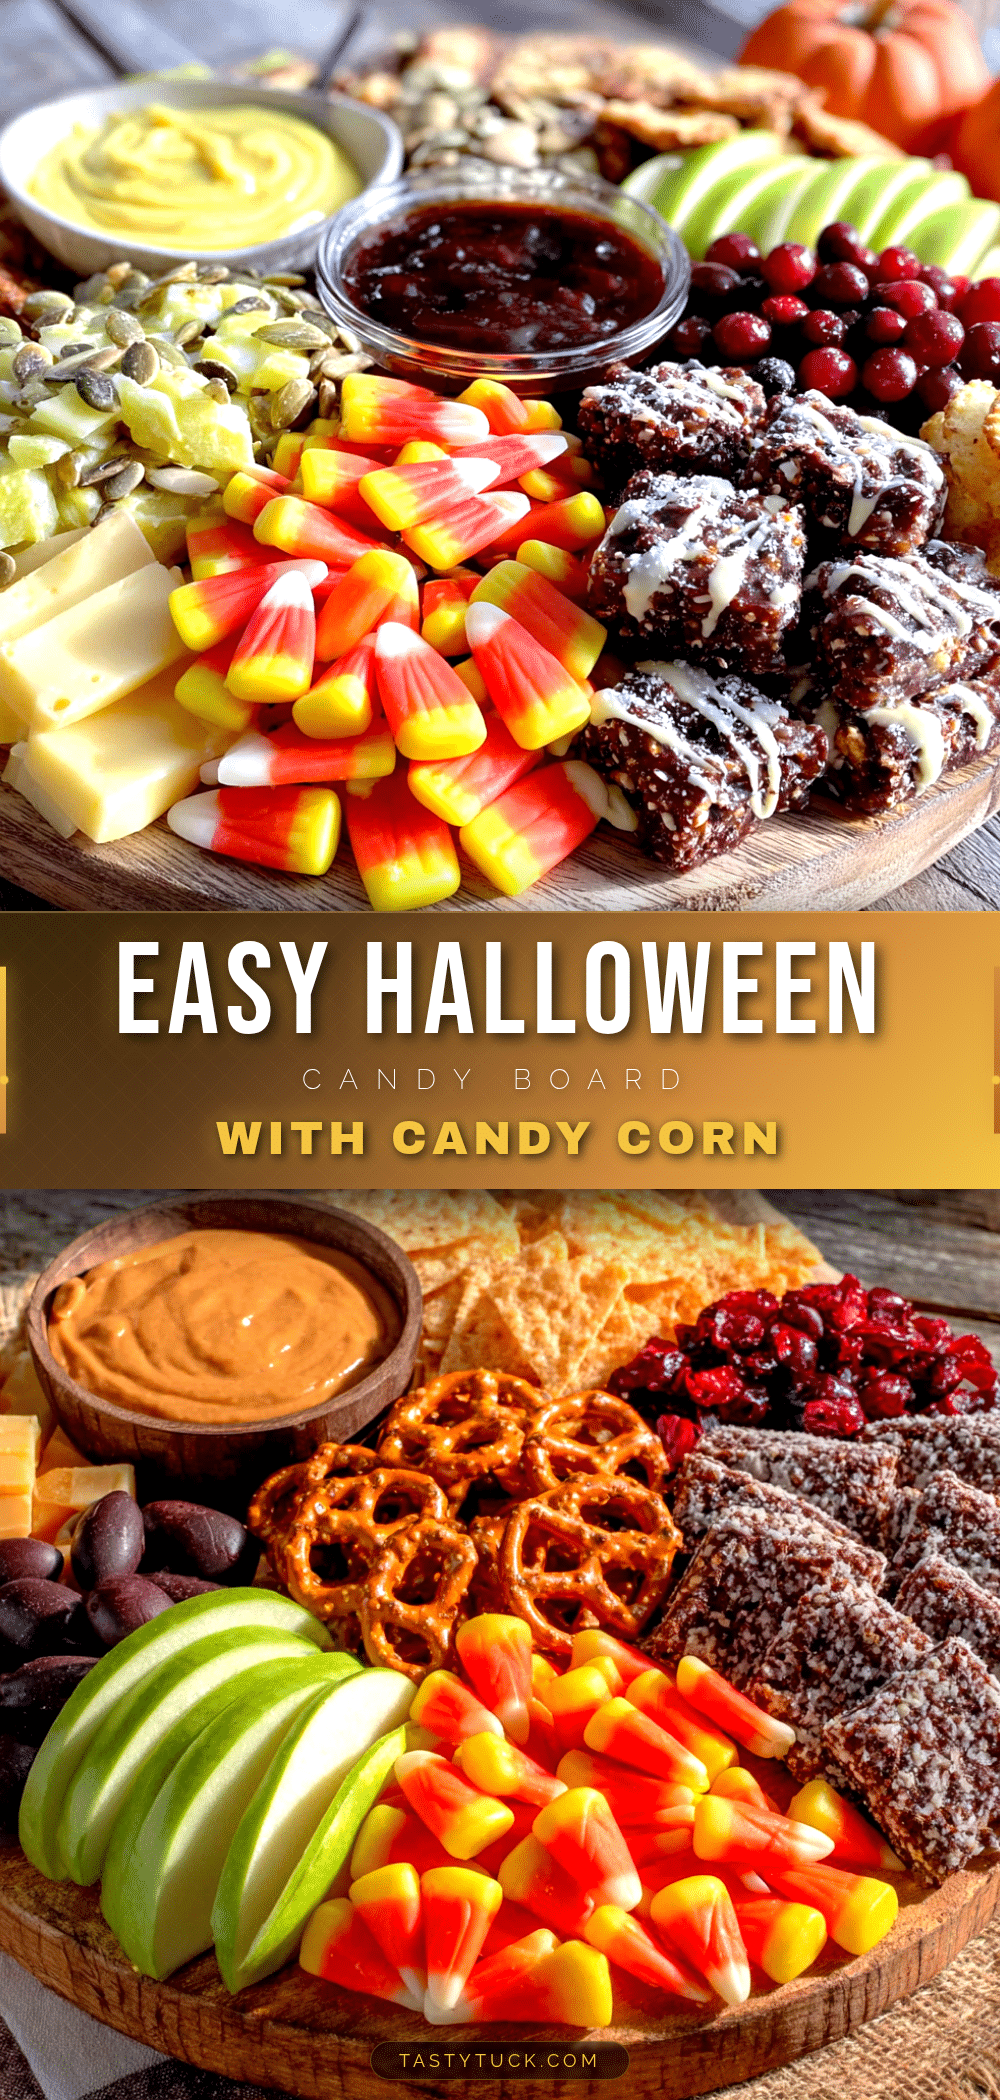
Easy Halloween Candy Board: Best Candy Corn Snack
A quick and easy Halloween candy board featuring candy corn, pretzels, chocolate, and nuts, perfect for parties and gatherings. Ready in just five minutes with no baking required.
- Prep Time: 5 minutes
- Cook Time: 0 minutes
- Total Time: 5 minutes
- Yield: 8-10 servings
- Category: Snack
- Cuisine: American
Ingredients
- Candy corn, 2 cups (about one standard bag; I prefer Brach’s for that classic chewy texture)
- Harvest corn or autumn mix, 1 cup (the little pumpkin-shaped ones add visual variety; look for the Brach’s Autumn Blend if you can find it)
- Chocolate-covered peanuts, 1 cup (adds richness and balances the sweetness of the candy corn)
- Mini pretzel twists, 1.5 cups (the salted ones work best; unsalted will leave the board feeling flat)
- Roasted salted almonds, 1 cup (adds crunch and a savory note; you can substitute cashews or pecans)
- Pumpkin seeds, 1/2 cup (shelled, roasted, and salted—these add a nice seasonal touch)
- White chocolate melting wafers, 1 cup (I use Ghirardelli; they melt smoothly and look beautiful on the board)
- Dark chocolate chips, 1/2 cup (adds a bitter contrast that makes the candy corn taste less sweet)
- Dried cranberries or cherries, 1/2 cup (adds a tart pop of color and flavor)
- Halloween-themed sprinkles, 2 tablespoons (orange, black, and white jimmies work great)
- Edible glitter or luster dust, optional (for that Pinterest-worthy sparkle; totally optional but fun)
- Fresh rosemary sprigs, 2-3 (sounds weird, I know, but the green adds a gorgeous contrast against all the orange and black)
Instructions
- Prepare your board or platter. Wash and dry your board thoroughly. If you’re using a wooden board, make sure it’s completely dry—moisture will make the pretzels soggy. Place it on your counter or table where you plan to serve it. Time: 1 minute.
- Position your small bowls. Place 3 to 4 small ramekins around the board. I put one in the upper left corner for the sprinkles, one in the lower right for the chocolate chips, and one in the center for the dried cranberries. This creates visual anchors that guide the eye around the board. Time: 30 seconds.
- Fill the bowls. Pour the sprinkles into one bowl, the chocolate chips into another, and the dried cranberries into the third. If you’re using edible glitter, put it in its own small dish—don’t sprinkle it directly on the board yet. Time: 1 minute.
- Create the candy corn base. Pour the candy corn and harvest corn mix into a large pile in the center of the board. Don’t arrange it yet—just dump it in a rough mound. This will be the foundation everything else builds around. Time: 30 seconds.
- Add the chocolate-covered peanuts. Scatter these around the candy corn mound, creating small clusters. Leave some space between clusters so people can grab individual pieces. The chocolate peanuts add a dark color contrast against the bright orange candy corn. Time: 30 seconds.
- Arrange the pretzels. Place the mini pretzel twists in a line along one edge of the board, slightly overlapping them. This creates a defined border and gives people something salty to reach for. I like to put them on the left side because most people are right-handed and reach to the right first. Time: 1 minute.
- Add the almonds and pumpkin seeds. Sprinkle these in the empty spaces between the candy corn and pretzels. Don’t pile them too high—you want them accessible but not overwhelming. The almonds add a golden-brown color that bridges the orange candy corn and the darker chocolate. Time: 1 minute.
- Place the white chocolate wafers. Arrange these in a small cluster near the center-right of the board. If you want to get fancy, you can stack a few of them like little tiles. They’ll soften slightly at room temperature, which makes them easier to bite into. Time: 30 seconds.
- Add the decorative elements. Sprinkle the Halloween sprinkles lightly over the white chocolate wafers and candy corn. Don’t go overboard—you want hints of color, not a full coating. Tuck the rosemary sprigs between the clusters of food, stems pointing outward like little green accents. Time: 1 minute.
- Final adjustments. Step back and look at your board. Fill any empty spots with extra candy corn or pretzels. Make sure there’s a good balance of colors and textures. The board should look abundant but not chaotic—think organized chaos. Time: 1 minute.
Notes
Assemble the board no more than two hours before serving to keep pretzels crunchy. If candy corn is sticky, toss with a teaspoon of powdered sugar. For a nut-free version, swap almonds and chocolate-covered peanuts for extra pretzels and yogurt-covered raisins. For gluten-free, use gluten-free pretzels.
Nutrition
- Serving Size: 1/8 of the board
- Calories: 320
- Sugar: 38
- Sodium: 180
- Fat: 12
- Saturated Fat: 5
- Carbohydrates: 52
- Fiber: 2
- Protein: 4
Keywords: Halloween candy board, candy corn snack, easy Halloween snack, no-bake Halloween, candy board, Halloween party snack


