It was 10:47 PM on a random Thursday in October, and the sugar high from the Halloween party we’d just hosted was still buzzing through the house. I was exhausted, honestly, but my brain wouldn’t shut off. I kept thinking about the kids—how they’d darted from station to station, grabbing cupcakes and cookies, their little hands sticky with frosting. It was chaos, the good kind, but I couldn’t help wondering: was there a way to give them that same thrill, that same feeling of a special treat, without the inevitable crash?
I didn’t have the energy for another elaborate baking project, but I had a bowl of tiny pumpkins sitting on the counter—the decorative ones you see at the farmer’s market that are technically edible but nobody ever eats. And I had this idea, a weird one, that maybe I could hollow them out and fill them with something fun. Something that felt like a party but was actually, you know, good for them. The kids were asleep, the kitchen was a mess, and I just started experimenting. I grabbed some cheese cubes, apple slices, and those little pretzel sticks, and I stuffed them into the tiny pumpkins. It looked ridiculous and wonderful, like a miniature harvest feast.
The next morning, I presented my late-night creation to my skeptical seven-year-old. She took one look, grabbed a cone (I’d added a waffle cone as a handle, because why not?), and her face lit up. “Mom, it’s a pumpkin that’s also a snack!” she yelled. And that, right there, is how the Wholesome Mini Pumpkin Charcuterie Cones for Kids were born. Maybe you’ve been there—staring into the fridge at 11 PM, trying to invent a snack that feels like a win for everyone. This one stuck. It’s the recipe I keep coming back to because it turns snack time into an adventure, and honestly, it makes me look like a hero with zero effort.
Why You’ll Love This Recipe
Let’s be real—finding a snack that kids actually get excited about and that you feel good about serving can feel impossible. These Wholesome Mini Pumpkin Charcuterie Cones for Kids solve that problem in the most fun way possible. I’ve tested this with my own kids and their friends (the harshest critics), and it passed with flying colors. Here’s why this one’s a keeper:
- Quick & Easy: Comes together in under 15 minutes. No oven required, no complicated steps. Perfect for when the afternoon hangries hit.
- Simple Ingredients: You probably have most of this stuff already. Cheese, fruit, nuts, and a few crunchy bits. No fancy grocery store runs needed.
- Perfect for Halloween, Fall Parties, or Lunchboxes: It’s festive enough for a school celebration but easy enough for a Tuesday afternoon snack.
- Crowd-Pleaser: I’ve served these to toddlers, teenagers, and even adults at a fall gathering. Everyone loves the interactive, build-your-own vibe.
- Unbelievably Delicious: The combination of sweet and salty, creamy and crunchy, all packed into a cute edible container? It’s next-level snack time.
What makes this different from just putting out a cheese platter? It’s the presentation. The mini pumpkin acts as a natural bowl, and the waffle cone adds this brilliant, edible handle that kids go crazy for. It’s not just a snack—it’s an experience. And honestly, it’s the kind of recipe that makes you close your eyes after the first bite because it’s that satisfying. Healthier, faster, but with the same soul-soothing joy as a big slice of pumpkin pie.
What Ingredients You Will Need
This recipe relies on simple, wholesome ingredients to create a snack that feels indulgent without the junk. You can mix and match based on what your kids love, but here’s my go-to lineup for the perfect Wholesome Mini Pumpkin Charcuterie Cones for Kids.
For the Pumpkin Base:
- 4-6 mini pumpkins (the small, ornamental ones that are edible—look for “sugar pumpkins” or “pie pumpkins” at the store)
- 1 tablespoon olive oil (for brushing, adds a nice sheen and helps the salt stick)
- Pinch of sea salt (optional, but brings out the pumpkin’s natural sweetness)
For the Filling & Toppings:
- 1 cup sharp cheddar cheese, cut into small cubes (I prefer Cabot or Tillamook for the best flavor)
- 1/2 cup mozzarella pearls (these little balls are perfect for little fingers)
- 1 cup red and green apple slices (tossed in a little lemon juice to prevent browning)
- 1/2 cup red seedless grapes, halved lengthwise
- 1/2 cup mini pretzel twists (the salty crunch is essential)
- 1/4 cup pumpkin seeds (pepitas), toasted (adds a seasonal touch and healthy fats)
- 1/4 cup dried cranberries or cherries (for a pop of sweetness)
For the Cones:
- 4-6 small waffle cones or sugar cones (the mini ones work best, but regular size is fine too)
When you’re picking out your mini pumpkins, look for ones that are firm, with no soft spots. They should be small enough to hold comfortably in a child’s hand. I like to buy a few extra just in case one has a weird shape or a hidden bruise. For the cheese, I recommend going with blocks and cubing them yourself—pre-shredded cheese has anti-caking agents that don’t melt or taste as good. And for the apples, Honeycrisp or Fuji are my favorites because they stay crisp and sweet. If you’re making these for a school event, you can swap the nuts for sunflower seeds to keep it nut-free. The beauty of this recipe is its flexibility.
Equipment Needed
You don’t need a lot of fancy gear for this one, which is part of its charm. Here’s what I use:
- Small sharp knife: For cutting the tops off the pumpkins and hollowing them out. A paring knife works perfectly.
- Melon baller or small spoon: For scooping out the pumpkin seeds and stringy insides. A melon baller is my favorite because it’s the perfect size.
- Baking sheet: To hold the pumpkins while you bake them (if you choose to).
- Parchment paper: For easy cleanup.
- Small bowls: For organizing your fillings before assembly.
- Cutting board: A sturdy one that won’t slide around.
If you don’t have a melon baller, a regular teaspoon works just fine—it just takes a little more elbow grease. I’ve also used a grapefruit spoon (the one with the serrated edge) in a pinch, and it did the job. For the baking sheet, any rimmed sheet pan will do. You can even skip the baking step entirely if you’re in a hurry—the pumpkins are perfectly safe to eat raw, though baking them for a few minutes softens them slightly and brings out their sweetness. Budget tip: I found my mini pumpkins at a local farm stand for $1 each. Check your grocery store’s seasonal display, too.
Preparation Method
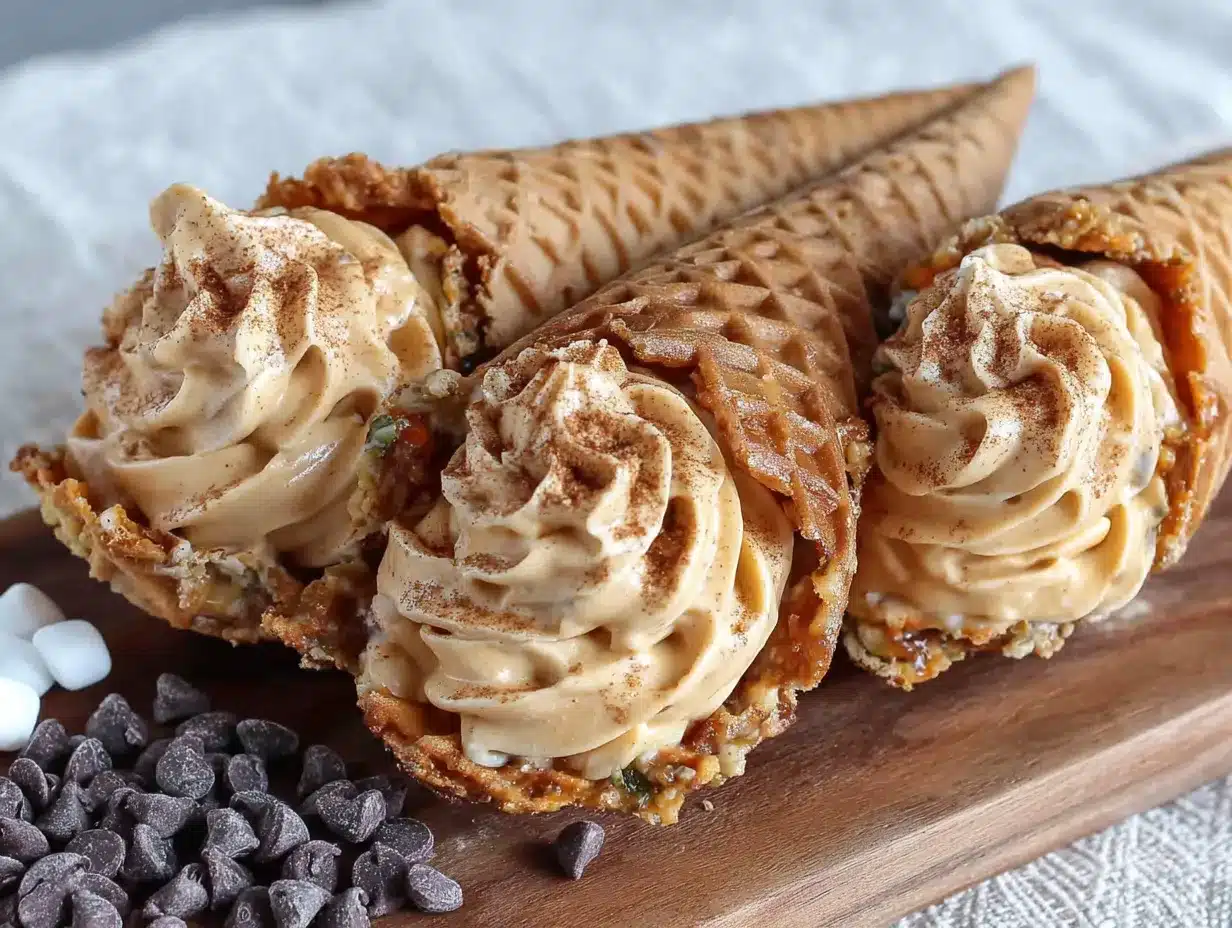
Making these Wholesome Mini Pumpkin Charcuterie Cones for Kids is surprisingly simple. I’ll walk you through it step by step, with all the little tricks I’ve learned from making these about a dozen times.
- Preheat your oven to 350°F (175°C). While it’s heating, line a baking sheet with parchment paper. This isn’t strictly necessary, but it makes cleanup a breeze.
- Prepare the pumpkins. Wash your mini pumpkins thoroughly to remove any dirt. Using a small sharp knife, carefully cut off the top quarter of each pumpkin, just like you’re making a jack-o’-lantern. Set the tops aside. Use your melon baller or a small spoon to scoop out all the seeds and stringy pulp from the inside. Don’t worry about getting every last seed—just get the bulk of it out. Rinse the inside quickly with water and pat dry with a paper towel.
- Brush and season. Lightly brush the outside of each pumpkin (and the inside, if you want) with the olive oil. Sprinkle a tiny pinch of sea salt over the outside. This step is optional, but it gives the pumpkins a beautiful sheen and a slightly savory edge that balances the sweet fillings.
- Bake the pumpkins. Place the hollowed-out pumpkins and their tops on the prepared baking sheet. Bake for 10-12 minutes, until the pumpkins are slightly softened but still hold their shape. You want them to be tender enough to eat but firm enough to hold the fillings. Keep an eye on them—baking times vary depending on the size of your pumpkins. Let them cool completely on the baking sheet before you start filling them. (Pro tip: if you’re in a rush, you can skip this step. The pumpkins are safe to eat raw, though they’ll be crunchier.)
- Prepare the fillings. While the pumpkins are cooling, get your fillings ready. Cube the cheddar cheese into bite-sized pieces—about 1/2-inch cubes. Wash and slice the apples, then toss them in a little lemon juice to keep them from turning brown. Halve the grapes lengthwise so they’re easy for little hands to pick up. Measure out your pretzels, pumpkin seeds, and dried cranberries into separate small bowls.
- Assemble the cones. Once the pumpkins are cool, place each one on a small plate or napkin. Take a waffle cone and gently press it into the opening of the pumpkin, angled slightly to one side, so it looks like a handle. The cone should be snug but not forced. If the opening is too small, you can gently widen it with your fingers or a spoon.
- Fill the pumpkins. Now for the fun part! Start layering your fillings into the pumpkin around the cone. I like to put the cheese cubes in first, then the apple slices and grapes, and finish with the pretzels, pumpkin seeds, and dried cranberries on top. The goal is to create a colorful, inviting mix that spills out slightly. Don’t overpack it—you want the kids to be able to grab pieces easily.
- Serve immediately. These are best enjoyed right away, while the apples are crisp and the cone is crunchy. Place the little pumpkin tops next to the cones as a cute garnish, or let the kids use them as “lids” when they’re done eating.
One thing I learned the hard way: don’t fill the pumpkins too far in advance. The moisture from the fruit can make the waffle cone soggy after about 30 minutes. If you’re prepping for a party, you can bake the pumpkins and cut all the fillings ahead of time, then assemble everything right before serving.
Cooking Tips & Techniques
After making these Wholesome Mini Pumpkin Charcuterie Cones for Kids more times than I can count, I’ve picked up a few tricks that make the process smoother and the results better.
Choosing the right pumpkins. Not all mini pumpkins are created equal. Look for “sugar pumpkins” or “pie pumpkins” at the store—they’re smaller, sweeter, and have a thinner skin than the giant carving pumpkins. The decorative ones you see in bins at the grocery store are often edible, but I always check the label to be sure. If they’re labeled as “ornamental only,” skip them. I once bought a batch that was so tough I couldn’t cut through them with my best knife. Lesson learned.
Hollowing out efficiently. The stringy insides of a pumpkin can be stubborn. I’ve found that using a metal spoon with a sharp edge (like a grapefruit spoon) works better than a plastic one. Scrape the sides firmly but gently—you don’t want to puncture the wall of the pumpkin. If you accidentally do, don’t panic. Just patch it with a small piece of cheese or a grape to hide the hole.
Keeping apples from browning. This is a classic snack-time struggle. I toss my apple slices in a mixture of 1 tablespoon lemon juice and 1 tablespoon water. It adds a tiny bit of tartness that actually complements the sweet pumpkin and cheese. If you don’t have lemon juice, a splash of orange juice or even pineapple juice works too. Just don’t skip this step unless you want sad, brown apples.
Timing and multitasking. Here’s how I streamline the process: while the pumpkins are baking, I wash and cut all the fruit and cheese. That way, by the time the pumpkins are cool enough to handle, everything else is ready to go. It’s a small thing, but it makes the whole process feel effortless.
A mistake I made. The first time I made these, I didn’t let the pumpkins cool completely before adding the cones. The heat from the pumpkin softened the waffle cone instantly, and it collapsed into the filling. Now I always let them cool for at least 15 minutes. Patience is key with these little guys.
Variations & Adaptations
One of the best things about these Wholesome Mini Pumpkin Charcuterie Cones for Kids is how easily you can change them up. Here are some of my favorite variations:
Dietary Adaptations:
- Nut-Free: Swap the pumpkin seeds for sunflower seeds or omit them entirely. Most schools are nut-free, so this is a good option for classroom parties.
- Dairy-Free: Use dairy-free cheese cubes or skip the cheese altogether and add extra fruit and crunchy veggies like cucumber slices or bell pepper strips.
- Gluten-Free: Use gluten-free pretzels and check that your waffle cones are certified gluten-free. Many brands offer gluten-free options now.
Seasonal Variations:
- Fall: Add roasted chickpeas for extra crunch, or swap the grapes for pomegranate arils. The red seeds look gorgeous against the orange pumpkin.
- Winter: Use clementine segments and dark chocolate chips for a festive twist. The chocolate pairs surprisingly well with the pumpkin.
- Summer: Fill with fresh berries, melon balls, and a dollop of yogurt for a lighter version.
Flavor Twists:
- Sweet & Salty: Add a few mini marshmallows and a drizzle of honey over the top. It’s like a s’more meets a pumpkin.
- Savory: Fill with salami or turkey cubes, cherry tomatoes, and olives for a more grown-up version. I’ve made these for adult gatherings and they’re a hit.
- Breakfast Version: Use yogurt-dipped strawberries, granola, and a drizzle of peanut butter. Perfect for a lazy weekend morning.
My personal favorite variation is the one I made for a “Frozen”-themed birthday party: I used blueberry and white cheese cubes, added star-shaped apple slices (using a tiny cookie cutter), and called them “Elsa’s Pumpkins.” The kids lost their minds. It’s so easy to customize these for any theme or preference.
Serving & Storage Suggestions
These Wholesome Mini Pumpkin Charcuterie Cones for Kids are best served at room temperature, right after assembly. The contrast between the slightly warm pumpkin (if you baked it) and the cool, crisp fruit and cheese is absolutely delightful. I like to arrange them on a large wooden board or a platter, with the little pumpkin tops placed next to each cone as a garnish. It makes for a stunning presentation that looks way more impressive than the effort it took.
What to serve with them:
- A small cup of yogurt or hummus for dipping (the kids love dunking the pretzels)
- A side of veggie sticks (carrot and cucumber work well)
- A warm mug of apple cider or hot chocolate for a cozy fall treat
Storage instructions: These are really best eaten fresh, but if you have leftovers, you can store the components separately. Remove the waffle cone (it will get soggy) and store the filled pumpkin in an airtight container in the refrigerator for up to 24 hours. The pumpkin itself will soften more over time, but it’s still tasty. To re-crisp the cone, pop it in a 300°F oven for 2-3 minutes.
Make-ahead tips: You can bake the pumpkins up to two days in advance and store them in the fridge. Cut all your fruit and cheese the night before and keep them in separate containers. Then, on the day of your event, just assemble everything. It takes about five minutes. I’ve done this for Halloween parties and it’s a lifesaver.
One thing I’ve noticed is that the flavors actually meld together beautifully after about an hour in the fridge. The pumpkin absorbs a little bit of the cheese and fruit flavors, creating this subtle, savory-sweet taste that’s surprisingly complex. It’s not better than fresh, just different. Try it both ways and see what you prefer.
Nutritional Information & Benefits
I’m not a nutritionist, but I do pay attention to what goes into my kids’ bodies, and these Wholesome Mini Pumpkin Charcuterie Cones for Kids make me feel good. Here’s a rough estimate per serving (one filled pumpkin):
- Calories: Approximately 250-300
- Protein: 8-10g (from cheese and pumpkin seeds)
- Healthy Fats: 12-15g (from cheese, pumpkin seeds, and olive oil)
- Carbohydrates: 30-35g (from fruit, pretzels, and the cone)
- Fiber: 4-5g (from pumpkin and fruit)
- Sugar: 15-18g (mostly natural from fruit)
The real star here is the pumpkin itself. It’s packed with vitamin A (great for eye health) and fiber (keeps little tummies full). The apple slices add vitamin C, and the cheese provides calcium for growing bones. I love that this snack has protein, healthy fats, and carbs all in one cute package—it’s balanced enough to hold the kids over until dinner.
If you’re watching sugar intake, you can skip the dried cranberries or use unsweetened ones. The recipe is naturally gluten-free if you use gluten-free pretzels and cones. Potential allergens include dairy (cheese) and nuts (if you add them), so be mindful of your guests’ needs. For a nut-free version, just use sunflower seeds instead of pumpkin seeds.
Conclusion
These Wholesome Mini Pumpkin Charcuterie Cones for Kids have become a staple in our house, and I think they’ll become one in yours too. They’re proof that snack time doesn’t have to be a battle between what’s fun and what’s good for you. You can have both—and it can look this adorable.
I love this recipe because it’s forgiving. You can use whatever you have on hand, it comes together in minutes, and it makes the kids feel like they’re getting something special. Honestly, it’s the kind of recipe that makes me feel like a good mom, even on the days when I’m running on three hours of sleep and coffee. I hope you give it a try and make it your own. Swap in your kids’ favorite fruits, add a drizzle of something sweet, or go full savory mode.
I’d love to hear how it goes! Drop a comment below and tell me what fillings your family loved most. Did you try a fun variation? Share a photo and tag me—I can’t wait to see your creations. Happy snacking, friends!
Frequently Asked Questions
Can I eat the mini pumpkin after it’s been hollowed out?
Yes! The mini pumpkins are completely edible, especially if you use sugar pumpkins or pie pumpkins. The skin softens when baked and is perfectly safe to eat. Some people prefer to scoop out the pumpkin flesh and eat it separately, but I think it’s delicious right along with the fillings.
How far in advance can I make these?
You can bake the pumpkins and prep all the fillings up to two days ahead of time. Store everything separately in the fridge. Assemble the cones right before serving to keep the waffle cones crunchy. If you assemble them more than 30 minutes ahead, the cones may get soggy from the moisture in the fruit.
Can I use a different type of cone?
Absolutely! Mini waffle cones are my favorite because they’re sturdy and cute, but you can use sugar cones, cake cones, or even a rolled-up tortilla or crepe. For a gluten-free option, look for gluten-free waffle cones at your grocery store. Just make sure whatever you use is sturdy enough to hold up to the fillings.
What if my kids don’t like pumpkin?
No problem! You can use a small bell pepper (red or orange looks festive) or a hollowed-out apple as the base instead. The concept is the same—fill it with fun, healthy snacks. The pumpkin flavor in this recipe is very mild, especially if you bake it, so even picky eaters might surprise you.
Can I make these for a classroom party?
Yes, and they’re always a hit! Just keep a few things in mind: check for any nut or dairy allergies in the class, and make sure to use nut-free and dairy-free alternatives if needed. You can also pre-assemble them on a tray and transport them carefully. I recommend assembling them at the party if possible, to keep the cones fresh.
Pin This Recipe!

Wholesome Mini Pumpkin Charcuterie Cones for Kids

These adorable mini pumpkin charcuterie cones are filled with cheese, fruit, pretzels, and pumpkin seeds, making snack time a fun and healthy adventure. Perfect for Halloween, fall parties, or lunchboxes, they come together in under 15 minutes with no oven required.
- Prep Time: 15 minutes
- Cook Time: 12 minutes
- Total Time: 27 minutes
- Yield: 4-6 servings 1x
- Category: Snack
- Cuisine: American
Ingredients
- 4–6 mini pumpkins (sugar or pie pumpkins)
- 1 tablespoon olive oil
- Pinch of sea salt (optional)
- 1 cup sharp cheddar cheese, cut into small cubes
- 1/2 cup mozzarella pearls
- 1 cup red and green apple slices (tossed in lemon juice)
- 1/2 cup red seedless grapes, halved lengthwise
- 1/2 cup mini pretzel twists
- 1/4 cup pumpkin seeds (pepitas), toasted
- 1/4 cup dried cranberries or cherries
- 4–6 small waffle cones or sugar cones
Instructions
- Preheat your oven to 350°F (175°C). Line a baking sheet with parchment paper.
- Wash the mini pumpkins. Using a small sharp knife, cut off the top quarter of each pumpkin. Set tops aside. Use a melon baller or small spoon to scoop out seeds and stringy pulp. Rinse inside and pat dry.
- Lightly brush the outside (and inside if desired) of each pumpkin with olive oil. Sprinkle a tiny pinch of sea salt over the outside.
- Place hollowed pumpkins and tops on the prepared baking sheet. Bake for 10-12 minutes until slightly softened but still holding shape. Let cool completely.
- While pumpkins cool, prepare fillings: cube cheddar cheese, slice apples and toss in lemon juice, halve grapes, and measure out pretzels, pumpkin seeds, and dried cranberries into separate bowls.
- Once pumpkins are cool, place each on a small plate. Gently press a waffle cone into the opening of each pumpkin, angled to one side like a handle.
- Layer fillings into the pumpkin around the cone: start with cheese cubes, then apple slices and grapes, and finish with pretzels, pumpkin seeds, and dried cranberries on top. Do not overpack.
- Serve immediately. Place pumpkin tops next to cones as garnish or let kids use them as lids.
Notes
Do not fill pumpkins too far in advance; moisture from fruit can make cones soggy after 30 minutes. For make-ahead, bake pumpkins and prep fillings up to 2 days ahead, then assemble just before serving. If pumpkins are too tough, use sugar or pie pumpkins. For nut-free version, swap pumpkin seeds for sunflower seeds.
Nutrition
- Serving Size: 1 filled pumpkin
- Calories: 250300
- Sugar: 1518
- Sodium: 300400
- Fat: 1215
- Saturated Fat: 57
- Carbohydrates: 3035
- Fiber: 45
- Protein: 810
Keywords: mini pumpkin charcuterie cones, kids snack, Halloween snack, fall party snack, healthy snack, charcuterie for kids, pumpkin snack


