So my niece, Lily, who is nine and has Opinions about everything, asked why I couldn’t just stick the veggie tray in the freezer for ten minutes before arranging it. I started to explain why that wouldn’t work — something about condensation and limp celery, the usual hostess wisdom I’d collected over twenty years of dinner parties. Then I stopped. Honestly, I had no real reason except that I’d never tried it. So I let her do it. She popped the whole platter in there while I prepped the dip, and I stood there feeling like a fraud in my own kitchen. Ten minutes later, the carrots were stiff, the bell peppers were crisp, and the whole skeleton shape held together like it was made of LEGOs. I mean, I’ve been doing this for years, and a fourth-grader just showed me up. The humbling part? It worked so well that I’ve never arranged a veggie tray the same way since. That moment — standing there with a slightly frozen broccoli floret in my hand, muttering “of course” under my breath — is exactly why this Halloween Veggie Skeleton Tray became my go-to for every fall gathering. You know that feeling when someone suggests something so simple you almost dismiss it, and then it turns out to be genius? That’s this whole recipe.
Why You’ll Love This Halloween Veggie Skeleton Tray
This isn’t just another veggie platter that gets ignored at the party. This is the one that makes people stop, laugh, and actually eat their vegetables. Here’s why it’s become my most-requested Halloween dish:
- Incredibly Easy to Assemble: You don’t need any fancy tools or artistic talent. If you can place a cucumber slice and a baby carrot, you can build this skeleton. It comes together in about 15 minutes of active time.
- Simple, Affordable Ingredients: Everything is from the regular grocery store. No special “skeleton” cutters or edible eyeballs required — though you can add those if you want!
- Perfect for Halloween Gatherings: Whether it’s a kid’s party, a potluck, or a spooky dinner with friends, this tray steals the show. It’s the conversation piece that doubles as dinner.
- Crowd-Pleaser for All Ages: Kids love the skeleton shape, and adults appreciate having a healthy option that doesn’t feel like a sacrifice. I’ve seen picky eaters reach for broccoli they’d normally ignore just because it’s part of the “ribcage.”
- Unbelievably Photogenic: This thing was made for Instagram and Pinterest. The contrast of the white platter, the green veggies, and the bright orange skeleton bones is just stunning.
What makes this version different from other Halloween veggie trays? It’s the freezer trick. That one little step — chilling the empty tray before you start — makes the whole skeleton stay put. No sliding, no collapsing, no sad veggie pile an hour into the party. Plus, I’ve tested about six different skeleton layouts to find the one that looks most impressive with the least effort. This is that layout.
This recipe is the kind that makes you feel like a hosting hero without actually working that hard. It’s the dish that gets photographed, shared, and asked about for years. And honestly? It’s just vegetables. But the presentation makes people think you spent hours on it. Let them wonder.
What Ingredients You Will Need
This recipe uses simple, everyday vegetables to create a striking skeleton shape. Most of these are pantry staples in my house, especially during fall when I’m hosting constantly. Here’s what you’ll need:
For the Skeleton Body
- 1 large head of broccoli, cut into small florets (about 3 cups) — This forms the “body” or torso area. I prefer the florets to be roughly the same size for even coverage.
- 2 medium zucchini, sliced into ¼-inch rounds — These make the “ribcage.” Look for firm, straight zucchini for the cleanest slices.
- 1 large cucumber, sliced into ¼-inch rounds — These create the “spine” down the center. English cucumbers work best because they have fewer seeds.
- 1 bag of baby carrots (about 2 cups) — These become the “bones” of the arms and legs. I like the pre-peeled ones for convenience.
- 1 red bell pepper, cut into thin strips — This makes the “skull” shape at the top. The bright red contrasts beautifully with the green veggies.
- 1 cup cherry tomatoes, halved — These can be used for “joints” or “eyes” depending on your design. I use them for the skeleton’s knee and elbow joints.
- 1 cup sugar snap peas — These add texture and color, and they work well as “fingers” or “toes.”
- 1 cup cauliflower florets — Optional, but I like to add these for the “hands” or “feet” because they look like little bones.
For the Dip (Optional but Recommended)
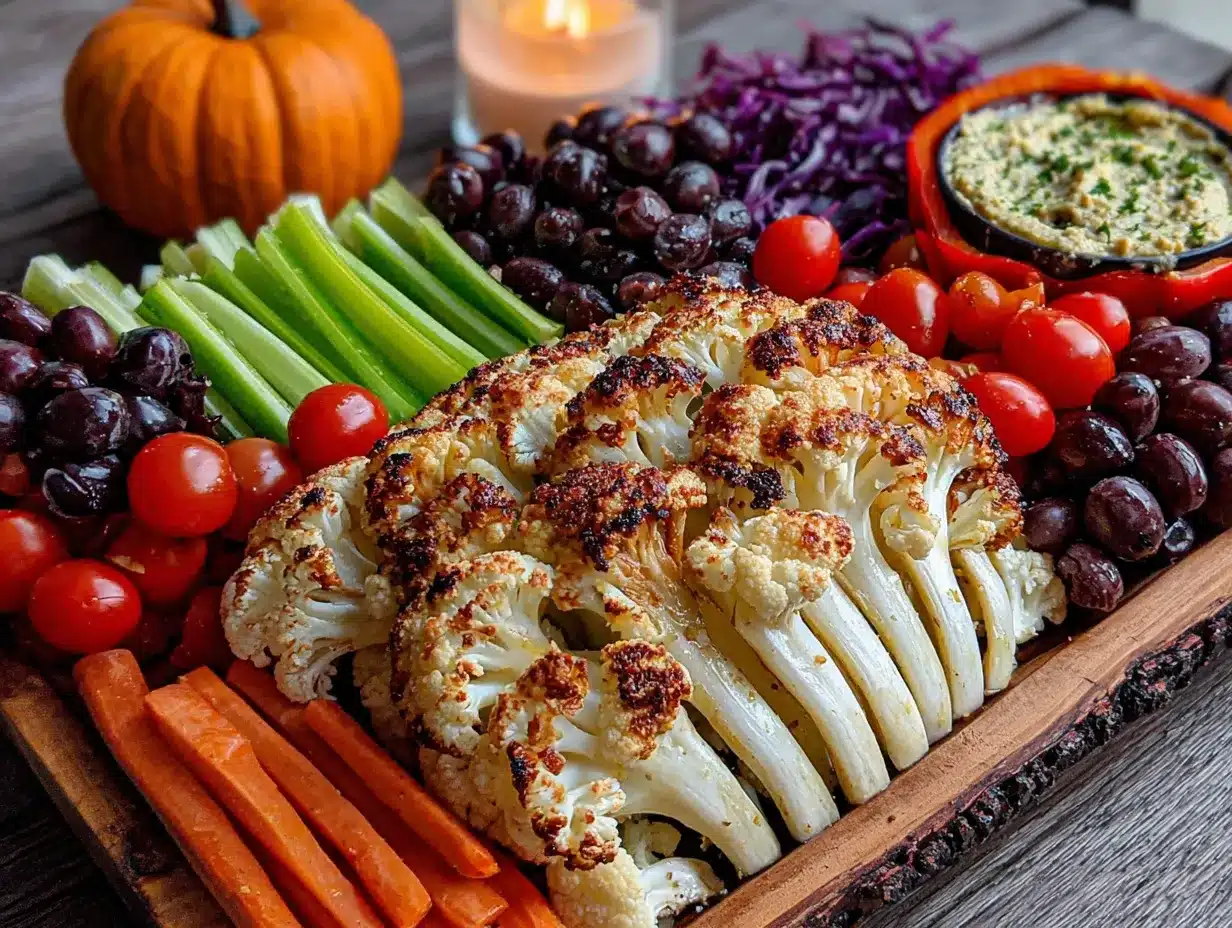
- 1 cup plain Greek yogurt — I prefer Fage for its thickness, but any full-fat Greek yogurt works.
- 1 packet ranch dressing mix — Hidden Valley is my go-to. You can also use homemade ranch seasoning.
- 1 tablespoon fresh chives, chopped — For garnish and flavor.
- 1 teaspoon garlic powder — Adds depth to the dip.
Substitution Notes
If you’re feeding a crowd with dietary restrictions, this is easy to adapt. Use dairy-free yogurt or sour cream for the dip. Swap broccoli for cauliflower if you’re not a broccoli fan. For a low-carb option, skip the carrots and use more cucumber and bell pepper. The skeleton shape works with pretty much any firm vegetable you have on hand.
Equipment Needed
You don’t need much for this one, which is part of the beauty. Here’s what I use:
- Large rectangular platter or cutting board — At least 16 inches long. I use a white ceramic platter because it makes the veggies pop, but any light-colored surface works.
- Sharp chef’s knife — For slicing zucchini, cucumber, and bell pepper. A dull knife will crush the veggies and make them weep.
- Cutting board — Preferably a large one so you have room to work.
- Small bowl — For the dip. I use a ramekin that fits inside the skeleton’s “chest” area, but you can place it off to the side.
- Measuring cups and spoons — For the dip ingredients.
- Paper towels — To pat the veggies dry. Wet veggies won’t hold their shape as well.
- Freezer space — You need room to chill the empty platter for 10 minutes before assembling.
I’ve made this with just a knife and a cookie sheet when I was at a friend’s cabin for Halloween weekend. It worked fine. The freezer trick is the only non-negotiable equipment piece — and even that you can skip if you’re in a rush, though the skeleton won’t hold as well.
Preparation Method
This is where the magic happens. Follow these steps, and you’ll have a skeleton that looks like it took an hour of careful arranging — but really took about 15 minutes.
- Prep your platter — Place your empty platter or cutting board in the freezer for exactly 10 minutes. Set a timer. This is Lily’s trick, and it makes everything stay put. The cold surface creates a slight grip for the veggies.
- Wash and dry all vegetables — Pat them completely dry with paper towels. Any moisture will make the veggies slide around on the cold platter. I learned this the hard way after my first skeleton slid into a pile during a party.
- Slice the zucchini and cucumber — Cut them into ¼-inch rounds. Try to make them as uniform as possible. If some are thicker, that’s fine — they’ll just look like “bigger bones.”
- Cut the broccoli into small florets — Aim for pieces about 1 inch across. The stems can be trimmed and used for other parts of the skeleton if you want.
- Prepare the bell pepper — Cut the top off the pepper, remove the seeds and membranes, then slice it into thin strips about 2 inches long. These will form the skull.
- Assemble the skeleton spine — Remove the cold platter from the freezer. Place a line of cucumber rounds down the center of the platter, starting about 3 inches from the top and ending about 4 inches from the bottom. This is the spine. Use about 8 to 10 slices, overlapping slightly.
- Build the ribcage — On each side of the spine, place zucchini rounds in a slightly angled line, like ribs. Start at the top and work your way down. Use about 5 to 6 slices per side. They should angle outward and slightly downward, like a real skeleton.
- Fill the torso with broccoli — Arrange the broccoli florets in the space between the ribs and the spine. Pack them in tightly — they’ll hold each other in place. This creates the “body” of the skeleton.
- Create the arms and legs — Use baby carrots for the long bones. For the arms, place two carrots on each side, angling them outward from the shoulders. For the legs, place two carrots on each side at the bottom, angling downward. Use cherry tomato halves for the joints (knees and elbows).
- Make the skull — At the top of the platter, arrange the bell pepper strips into a skull shape. I use two strips for the top of the head, two for the cheekbones, and one for the jaw. Add two cherry tomato halves for eyes and a small piece of cucumber for the mouth.
- Add the hands and feet — Use sugar snap peas for fingers and cauliflower florets for toes. Arrange them at the ends of the arms and legs. This is where you can get creative — make the skeleton waving or doing a little dance.
- Prepare the dip — In a small bowl, mix the Greek yogurt, ranch dressing mix, chives, and garlic powder. Stir until smooth. Place the bowl in the center of the skeleton’s chest, nestled among the broccoli florets.
- Final touch — Add any extra veggies around the edges of the platter for color. I like to scatter a few extra cherry tomatoes and cucumber slices to fill empty spaces. Serve immediately or refrigerate for up to 2 hours before serving.
Pro tip: If you’re making this for a party, do all the prep work — washing, slicing, and drying — the night before. Store each vegetable in a separate sealed bag in the fridge. Then assemble the skeleton right before guests arrive. The cold platter trick works best if you do it just before assembling.
Cooking Tips & Techniques
I’ve made this skeleton tray about a dozen times now, and I’ve made every mistake you can imagine. Here’s what I’ve learned:
The freezer trick is non-negotiable. I skipped it once because I was in a hurry, and the skeleton looked like it had been through a car accident within 20 minutes. The cold surface creates enough friction to hold everything in place. Don’t skip it.
Patience with the veggies. Wet veggies are the enemy. I once washed the broccoli and didn’t dry it well enough, and the whole torso area turned into a soggy mess. Take the extra 30 seconds to pat everything dry.
Uniform slices matter — but not that much. I used to stress about getting every zucchini slice exactly the same thickness. Then I realized that a slightly uneven skeleton looks more organic and charming. It’s a skeleton, not a geometry project.
Build from the inside out. Start with the spine and ribs, then fill in the torso. If you try to place the broccoli first and then add the ribs, you’ll end up with gaps. The ribs act as a frame for the broccoli.
Use the dip as an anchor. The bowl of dip in the center isn’t just for eating — it also helps hold the broccoli and ribs in place. Choose a bowl that’s heavy enough to stay put. I use a small ceramic ramekin.
Don’t overthink the skull. The bell pepper skull is the hardest part to get right. I’ve found that a simple oval shape with two eye holes and a mouth works better than trying to make it look anatomically correct. Think cartoon skeleton, not medical diagram.
Variations & Adaptations
One of the best things about this recipe is how customizable it is. Here are some variations I’ve tried and loved:
Dietary Adaptations
- Vegan Version: Use a dairy-free ranch dip made with cashew cream or vegan sour cream. The skeleton itself is already plant-based.
- Low-Carb/Keto: Skip the carrots and use more cucumber, zucchini, and bell pepper. Add some celery sticks for the long bones. The broccoli is already low-carb.
- Gluten-Free: This is naturally gluten-free as long as your ranch seasoning doesn’t contain wheat. Most brands are safe, but check the label.
Flavor Twists
- Spicy Skeleton: Add jalapeño slices for the skeleton’s “spine” and use a spicy chipotle ranch dip. The heat gives it a fun kick.
- Greek-Inspired: Use tzatziki as the dip and add olives and feta cheese (if not vegan) around the platter. The skeleton looks great with kalamata olives as eyes.
- Rainbow Skeleton: Use a mix of orange, yellow, and purple bell peppers for the skull. Add rainbow carrots for the bones. It’s less scary but more festive.
Seasonal Variations
- Thanksgiving Version: Swap the skeleton shape for a turkey shape using the same veggies. Use a bell pepper for the wattle and carrot sticks for tail feathers.
- Christmas Version: Use red and green bell peppers to create a wreath shape. The skeleton idea works year-round with different themes.
My personal favorite variation? I once made a “dancing skeleton” by angling the arms and legs in a funky pose. I used extra cucumber slices for the joints so the skeleton looked like it was doing the twist. It got more laughs than the traditional pose.
Serving & Storage Suggestions
This skeleton tray is best served cold, right out of the fridge. The veggies stay crisp, and the dip is nice and thick. Here’s how to handle it:
Serving Temperature: Serve the platter chilled, not at room temperature. If you’re setting it out for a party, keep it on a bed of ice or return it to the fridge every 30 minutes. Veggies start to wilt after an hour at room temperature.
Presentation Tips: Place the skeleton tray at eye level on the table — it’s a conversation piece, so you want people to see it. I like to put it on a slightly elevated cake stand so it stands out from the other dishes. Add a few battery-operated tea lights around the platter for a spooky glow.
What to Serve Alongside: This skeleton pairs beautifully with other Halloween dishes. I often serve it alongside a warm bowl of pumpkin soup, some spicy roasted pumpkin seeds, and a batch of ghost-shaped cookies for dessert. It also works great as a healthy option next to heavier dishes like mac and cheese or chili.
Storage Instructions: If you have leftovers (honestly, that rarely happens at my parties), store the veggies in an airtight container in the fridge for up to 3 days. The dip will keep for 5 days. Do not freeze the assembled tray — the veggies will turn to mush when thawed.
Reheating: You don’t reheat this. If the veggies have softened, just refresh them by soaking in ice water for 10 minutes, then pat dry. The dip can be served cold or at room temperature.
Flavor Development: The dip actually gets better after a day in the fridge — the flavors meld together. The veggies stay crisp for about 24 hours if stored properly. After that, they start to lose their crunch.
Nutritional Information & Benefits
This skeleton tray is a nutritional powerhouse disguised as a party trick. Here’s what you’re getting in a typical serving (about 1 cup of veggies with 2 tablespoons of dip):
- Calories: Approximately 120-150 per serving
- Protein: 6-8 grams (mostly from the Greek yogurt dip)
- Fiber: 4-5 grams (from the broccoli, carrots, and zucchini)
- Vitamin A: 120% of daily value (from the carrots and bell peppers)
- Vitamin C: 80% of daily value (from the broccoli and bell peppers)
- Calcium: 10% of daily value (from the yogurt dip)
Health Benefits: Broccoli is packed with sulforaphane, a compound linked to cancer prevention. Carrots are famous for eye health thanks to beta-carotene. Bell peppers have more vitamin C than oranges. And the Greek yogurt dip adds probiotics for gut health. This is one Halloween treat that actually makes you feel good after eating it.
Dietary Considerations: This recipe is naturally vegetarian, gluten-free, and can be made vegan with a dairy-free dip. It’s low in added sugars and contains no processed ingredients (except the ranch mix, which you can make from scratch if you prefer). The only potential allergen is dairy, which is easily swapped.
I love that I can serve this at a Halloween party and feel good about what my guests are eating. It’s the perfect balance of fun and nutrition — and honestly, the kids eat more veggies from this skeleton than they would from a regular bowl of salad.
Conclusion
This Halloween Veggie Skeleton Tray has become my signature party dish, and it all started with a nine-year-old’s suggestion that I almost dismissed. That’s the thing about cooking — sometimes the best ideas come from the most unexpected places. Lily still reminds me every Halloween about “the time I taught Aunt Sarah how to make a skeleton.” And she’s right. She did.
I hope you’ll try this recipe and make it your own. Maybe you’ll add your own twist — a different dip, a funny pose, or a spooky garnish. That’s the beauty of this dish. It’s a template for creativity, not a rigid formula. And if you’re hosting a Halloween gathering, this skeleton will be the star of the show. I promise.
If you make this, I’d love to hear about it. Drop a comment below and tell me how your skeleton turned out. Did your kids help? Did your guests take photos? Did anyone try to steal the skull? Share your stories — I read every single one. And if you’re looking for more Halloween inspiration, check out my easy Halloween party appetizers post for more crowd-pleasing ideas.
Happy Halloween, and happy snacking!
Frequently Asked Questions
How far in advance can I make this Halloween veggie skeleton tray?
You can prep all the vegetables up to 24 hours in advance. Store each type of veggie in a separate sealed bag in the fridge. Assemble the skeleton no more than 2 hours before serving for the best presentation. The freezer trick works best when done right before assembly.
Can I use different vegetables for the skeleton?
Absolutely! The skeleton shape works with any firm, colorful vegetables. Try yellow squash for the ribs, purple cauliflower for the body, or jicama sticks for the bones. Just make sure the veggies are dry and cut into uniform pieces so they hold their shape.
How do I keep the skeleton from falling apart during a party?
The freezer trick is your best friend. Chill the empty platter for 10 minutes before assembling. Also, pack the broccoli tightly in the torso area — the pressure from the surrounding veggies helps hold everything in place. If you’re really worried, you can use toothpicks to anchor the larger pieces, but I’ve never needed them.
What dip goes best with this Halloween veggie tray?
Classic ranch is always a hit, but I also love a roasted red pepper hummus or a creamy spinach dip. For a spooky twist, try a “blood-red” beet dip or a green “witch’s brew” avocado dip. The dip bowl can be placed in the center of the skeleton’s chest or off to the side.
Can I make this recipe for a non-Halloween party?
Definitely! The skeleton shape is fun for any occasion. For a Thanksgiving gathering, arrange the veggies into a turkey shape. For a summer barbecue, make a “dancing skeleton” with a fun pose. The technique of using a cold platter and packing veggies tightly works for any themed veggie tray.
Pin This Recipe!
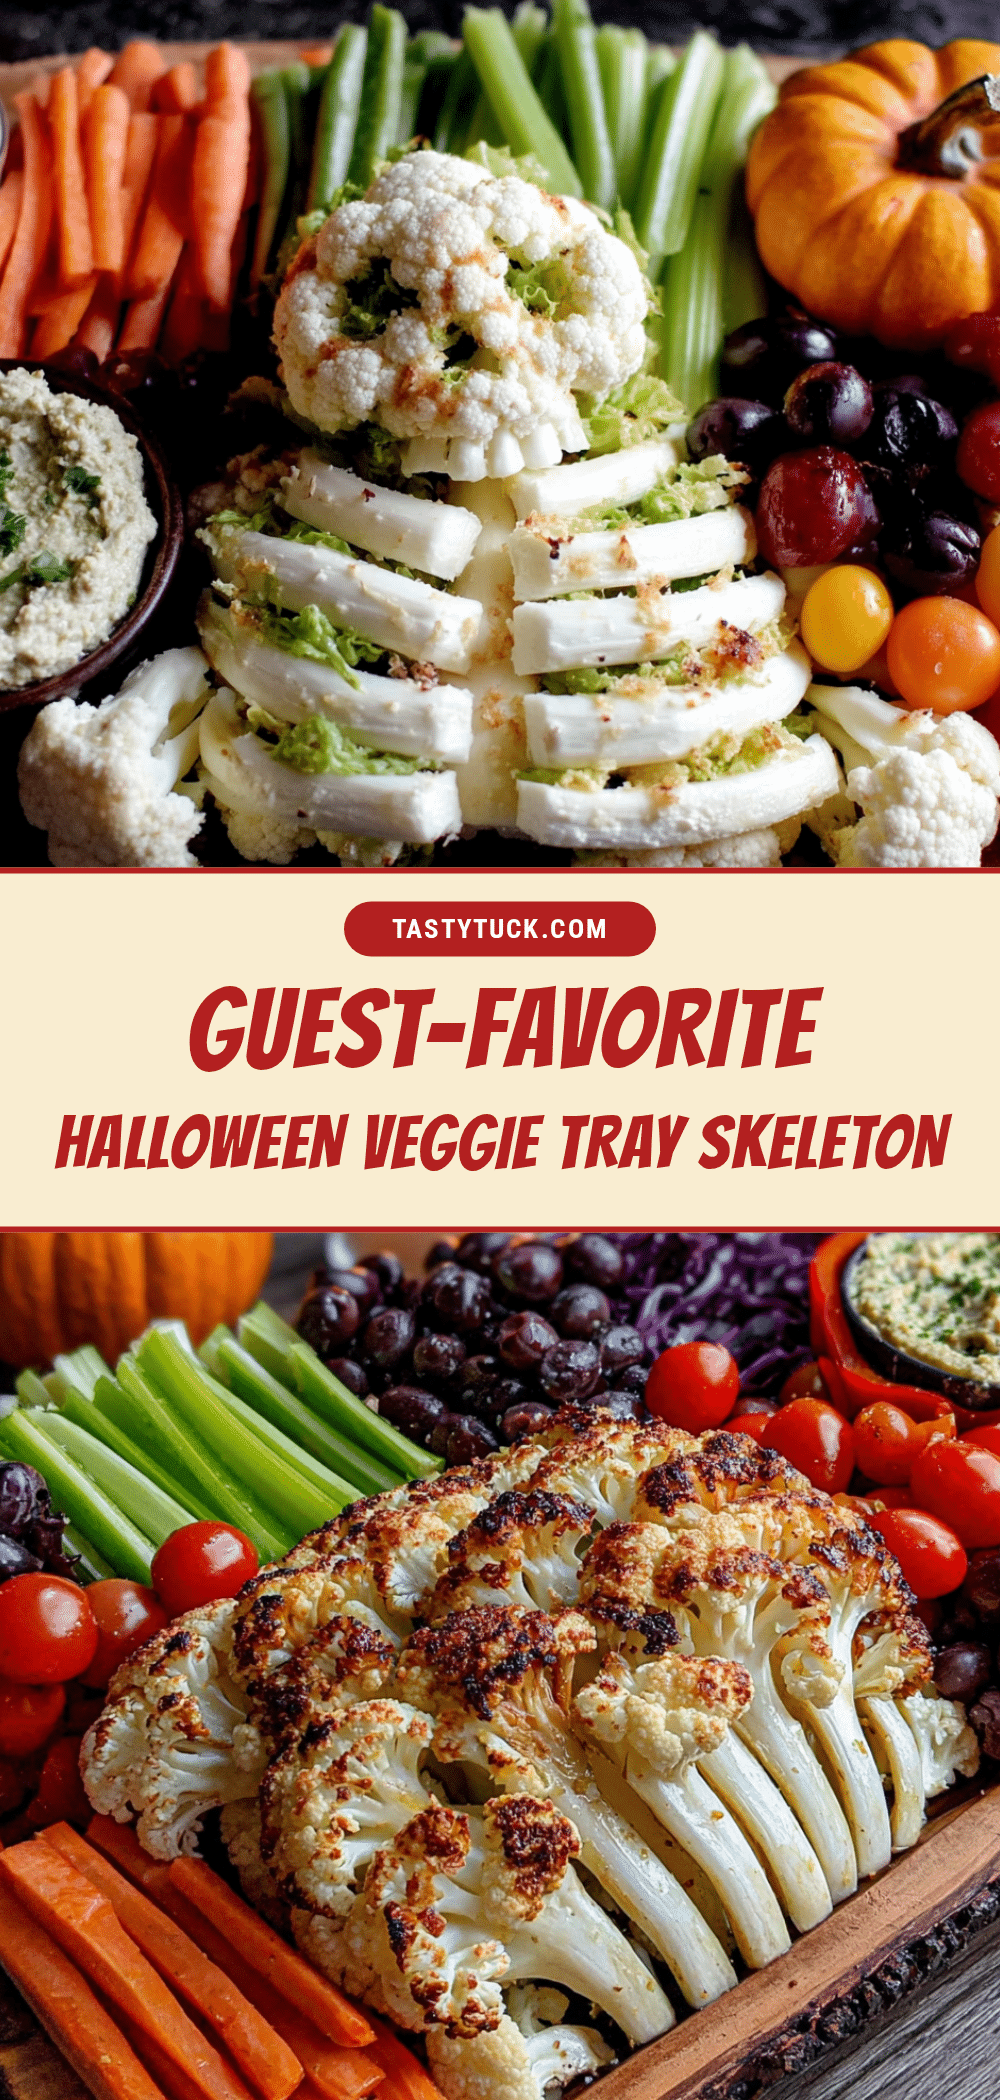
Easy Halloween Veggie Skeleton Tray: Guest Favorite
This Halloween Veggie Skeleton Tray is a fun, healthy, and easy-to-assemble appetizer that steals the show at any fall gathering. A clever freezer trick keeps the skeleton shape intact, making it a crowd-pleaser for all ages.
- Prep Time: 15 minutes
- Cook Time: 0 minutes
- Total Time: 25 minutes (including 10 minutes chilling)
- Yield: 8 servings 1x
- Category: Appetizer
- Cuisine: American
Ingredients
- 1 large head of broccoli, cut into small florets (about 3 cups)
- 2 medium zucchini, sliced into ¼-inch rounds
- 1 large cucumber, sliced into ¼-inch rounds
- 1 bag of baby carrots (about 2 cups)
- 1 red bell pepper, cut into thin strips
- 1 cup cherry tomatoes, halved
- 1 cup sugar snap peas
- 1 cup cauliflower florets (optional)
- 1 cup plain Greek yogurt
- 1 packet ranch dressing mix
- 1 tablespoon fresh chives, chopped
- 1 teaspoon garlic powder
Instructions
- Place your empty platter or cutting board in the freezer for exactly 10 minutes.
- Wash and dry all vegetables completely with paper towels.
- Slice the zucchini and cucumber into ¼-inch rounds.
- Cut the broccoli into small florets about 1 inch across.
- Cut the top off the bell pepper, remove seeds and membranes, then slice into thin strips about 2 inches long.
- Remove the cold platter from the freezer. Place a line of cucumber rounds down the center of the platter, starting about 3 inches from the top and ending about 4 inches from the bottom, using about 8 to 10 slices overlapping slightly.
- On each side of the spine, place zucchini rounds in a slightly angled line like ribs, using about 5 to 6 slices per side, angling outward and slightly downward.
- Arrange the broccoli florets in the space between the ribs and the spine, packing them tightly.
- Use baby carrots for the long bones: place two carrots on each side for arms angling outward from the shoulders, and two carrots on each side at the bottom for legs angling downward. Use cherry tomato halves for the joints (knees and elbows).
- At the top of the platter, arrange the bell pepper strips into a skull shape using two strips for the top of the head, two for the cheekbones, and one for the jaw. Add two cherry tomato halves for eyes and a small piece of cucumber for the mouth.
- Use sugar snap peas for fingers and cauliflower florets for toes, arranging them at the ends of the arms and legs.
- In a small bowl, mix the Greek yogurt, ranch dressing mix, chives, and garlic powder until smooth. Place the bowl in the center of the skeleton’s chest, nestled among the broccoli florets.
- Add any extra veggies around the edges of the platter for color. Serve immediately or refrigerate for up to 2 hours before serving.
Notes
The freezer trick is non-negotiable for keeping the skeleton shape intact. Pat all veggies completely dry to prevent sliding. Build from the inside out: start with spine and ribs, then fill with broccoli. The dip bowl helps anchor the center. For best results, prep veggies the night before and assemble just before serving.
Nutrition
- Serving Size: 1 cup of veggies wit
- Calories: 135
- Sugar: 8
- Sodium: 320
- Fat: 3
- Saturated Fat: 1
- Carbohydrates: 18
- Fiber: 5
- Protein: 7
Keywords: Halloween, veggie tray, skeleton, appetizer, healthy, party, fall, vegetarian, gluten-free


