It was 10:47 PM on a drizzly Wednesday in late October, and I had an unreasonable craving for something spooky but also, frankly, something I could eat while slumped on the couch in my sweatpants. I didn’t have a proper party platter to assemble or any guests to impress, but I had a bag of mini pretzels, a wedge of brie that was definitely past its prime, and this absolutely ridiculous plastic skull I’d impulse-bought at a discount store two years ago. The idea that arrived was weirdly specific: what if I made a charcuterie board, but the whole thing was just for me, and the centerpiece was this skull, and it felt less like a Halloween party and more like a cozy, slightly macabre night in? I honestly thought I was just being weird, but let me tell you, there’s something about the quiet of a late night that lets the best (and weirdest) ideas through. I started pulling things from the fridge—olives, some salami, a half-empty jar of hot honey—and arranged them around that skull like I was building a tiny, delicious kingdom. I mean, I spilled a whole pile of pepitas on the floor and just left them there for the cat, but the board itself? It was perfect. That night, eating my weird little skull board in the dark with a horror movie on low volume, I knew this wasn’t just a snack. It was a whole vibe. And honestly, maybe you’ve been there too—wanting the fun of Halloween without the party stress. This is for those nights.
Why You’ll Love This Cozy Halloween Skull Charcuterie Board
This isn’t your average Halloween snack platter. It’s designed to be as cozy as it is creepy, and I’ve tested it through multiple late-night sessions (and one very confused family gathering) to make sure it hits every note just right.
- Quick & Easy: You can throw this together in under 15 minutes. No cooking, no baking, just arranging. Perfect for a last-minute craving or a sudden wave of spooky inspiration.
- Simple Ingredients: No fancy grocery trips needed. You likely already have most of these items in your fridge and pantry. It’s about using what you have in a fun way.
- Perfect for Cozy Nights In: Great for a solo horror movie marathon, a quiet date night, or a small, low-key gathering. It’s the Halloween snack for people who’d rather stay in than go out.
- Crowd-Pleaser: Even the skeptics will be won over by the playful presentation and the classic, crave-worthy flavor combinations. Kids and adults both get a kick out of the skull.
- Unbelievably Delicious: The mix of salty, savory, sweet, and spicy is next-level comfort food. It’s the kind of snack that makes you close your eyes after the first bite.
What makes this recipe different from the rest is the focus on atmosphere over effort. It’s not about creating a perfect, Instagram-worthy spread (though it sure looks cool). It’s about capturing that specific feeling of Halloween coziness—the warmth of a blanket, the flicker of a candle, and the satisfaction of a perfectly curated snack board that feels like a secret just for you. I’ve personally tested the best way to arrange the elements so the skull stays the star without everything else looking like an afterthought. It’s comfort food reimagined for the spooky season, with the same soul-soothing satisfaction but zero stress.
What Ingredients You Will Need
This recipe uses simple, mostly store-bought ingredients to deliver a visually striking and deliciously satisfying board. The beauty is in the arrangement, not the complexity of the components. Here’s what I used for my go-to cozy board.
- For the Centerpiece:
- 1 plastic or ceramic skull (about 6-8 inches tall). This is non-negotiable for the vibe. I got mine at a craft store.
- For the Cheeses (the base of any good board):
- 4 oz Brie or Camembert (adds a creamy, rich element). Let it come to room temp for best spreadability.
- 4 oz Sharp Cheddar, cubed (for a classic, sharp bite). I prefer a white cheddar for a more “ghostly” look.
- 4 oz Smoked Gouda, sliced (adds a deep, savory, slightly sweet flavor that screams fall).
- For the Meats (the salty, savory backbone):
- 4 oz Prosciutto, torn into ribbons (delicate and salty).
- 4 oz Genoa Salami, sliced (for a firmer, more substantial bite).
- 4 oz Pepperoni, sliced (adds a little spicy kick and a classic pizza-night nostalgia).
- For the Crunchy & Salty Elements:
- 1 cup Pretzel sticks or mini pretzels (for the “bones” and “fingers” effect).
- 1/2 cup Roasted, salted pepitas (pumpkin seeds) (adds a great seasonal crunch).
- 1/2 cup Mixed olives (green and black) (for a briny, savory pop).
- For the Sweet & Spicy Accents:
- 1/4 cup Hot honey or regular honey (for drizzling over the brie and prosciutto). It’s the secret to the “cozy” part.
- 1/4 cup Dried cranberries or cherries (adds a chewy, tart sweetness).
- 1/4 cup Dark chocolate chips or a chopped dark chocolate bar (for a touch of indulgence).
- For the Fresh & Dippable Elements:
- 1 cup Red and green seedless grapes (for a fresh, juicy pop of color).
- 1 Apple, sliced (Granny Smith or Honeycrisp work great) (adds crunch and a touch of acidity).
- Fresh rosemary sprigs (for decoration, to look like little “trees” or “spooky fingers”).
Ingredient Tips & Swaps: I recommend getting a good quality brie, like a double or triple cream from a local brand—it makes a difference in the creamy texture. For the meats, feel free to swap in your favorites. If you don’t eat pork, use turkey pepperoni and prosciutto. For a vegetarian version, just load up on the cheeses, fruits, and nuts. The hot honey is a game-changer, but if you don’t have it, a drizzle of regular honey with a pinch of red pepper flakes works perfectly. In the summer, swap the apples for fresh figs or sliced peaches for a different vibe, but for fall, this combo is just right.
Equipment Needed
You don’t need much for this one, which is part of the charm. Here’s what I used.
- A Large Wooden Board or Slate Platter: This is your canvas. A round or rectangular board works best. I used a 16-inch round wooden board I found at a thrift store for $5. A large baking sheet lined with parchment paper works in a pinch.
- Small Ramekins or Bowls: For the honey, olives, and cranberries. This keeps the wet and sticky stuff from making everything else soggy. I used three tiny ceramic bowls I got from a flea market.
- A Sharp Knife: For slicing the cheese and apple. A good paring knife is all you need.
- A Small Spatula or Cheese Knife: For serving the brie. Not strictly necessary, but it looks nice.
- A Cutting Board (for prep): For slicing the cheese and apple before arranging.
Personal Tool Tip: I once tried to build this board on a flimsy plastic tray, and it was a disaster. The weight of the food made it slide around, and the skull kept tipping over. A heavy, stable board is your best friend here. If you don’t have a proper charcuterie board, a clean, flat cutting board is a perfect substitute. Just make sure it’s dry.
Preparation Method
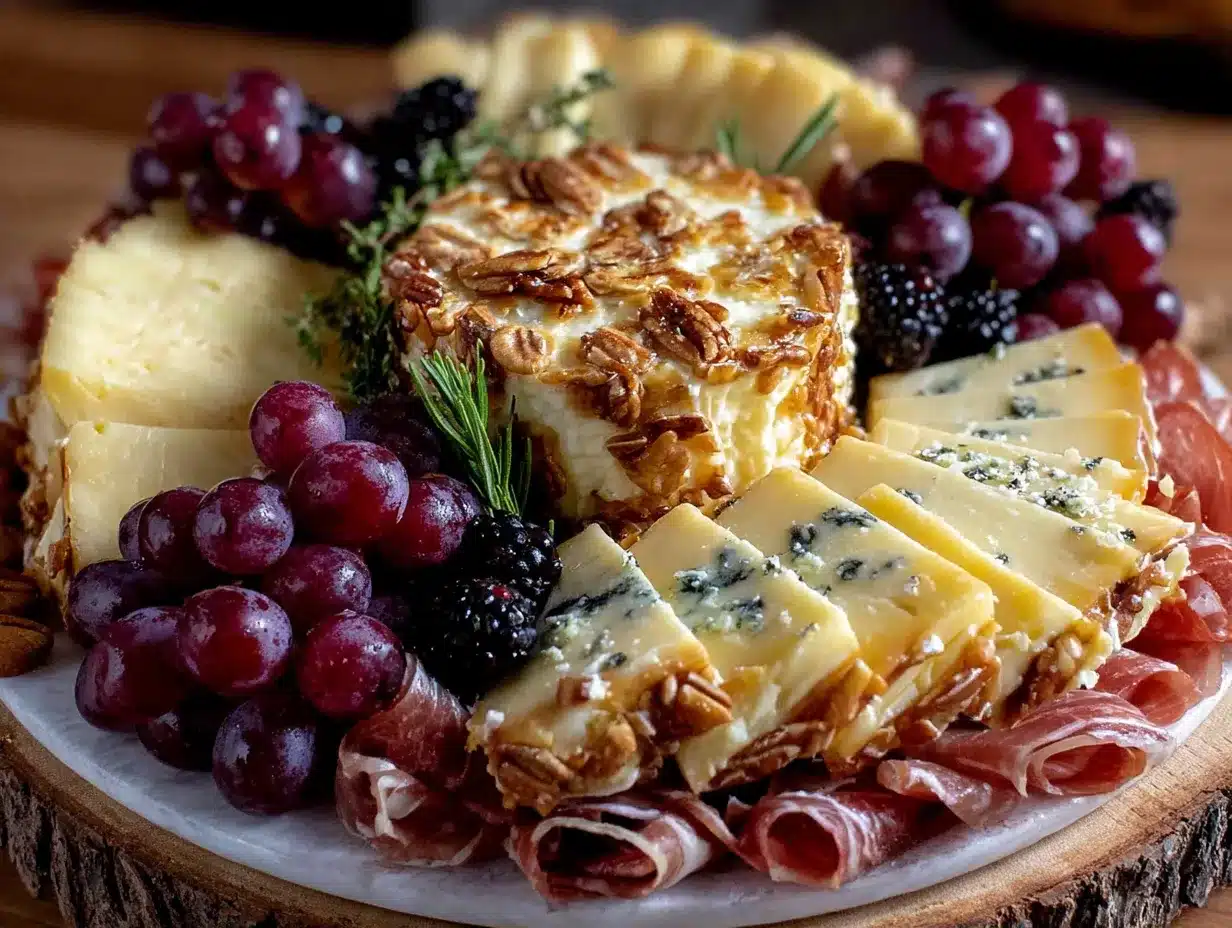
This is less about “cooking” and more about “curating.” The process is meditative and fun. Here’s how I do it step-by-step.
- Set the Stage (5 minutes): Place your large board on a flat surface. Take your plastic skull and place it slightly off-center. This creates a more dynamic, interesting layout than putting it dead center. Don’t worry if it looks a little lonely at first—we’re going to build around it.
- Add the Base Cheeses (3 minutes): Place the wedge of brie near the base of the skull, like it’s a little offering. Cube the cheddar and arrange the cubes in a small pile on one side of the board. Fan out the slices of smoked gouda in a small row on the opposite side. Think of these as the “anchors” of your board. I like to put the soft cheese closest to the skull for a soft, creamy contrast.
- Layer in the Meats (3 minutes): Take the prosciutto ribbons and gently crumple them into small, loose piles. Place one pile near the cheddar. Arrange the salami slices in a small, overlapping line. Fold the pepperoni slices in half and place them in a small pile. The key is to create texture and height—don’t just lay them flat. I learned this the hard way after a flat board looked sad and unappetizing.
- Fill in the Gaps with Crunch (2 minutes): Now, start filling the empty spaces. Pour the pretzel sticks into a pile that looks like a small pile of “bones.” Sprinkle the pepitas in a winding path around the skull, like a trail of tiny seeds. Add the mixed olives to one of your small ramekins and place it in a corner of the board.
- Add the Sweet & Spicy Accents (2 minutes): Place the ramekin of hot honey near the brie. Add the dried cranberries to another ramekin and place it near the gouda. Scatter the dark chocolate chips in a small, deliberate pile—don’t just toss them everywhere. A little goes a long way, and it looks more intentional.
- Incorporate the Fresh Elements (3 minutes): Arrange the grapes in a small cluster, like a little bunch of “eyeballs.” Fan out the apple slices in a small row. The fresh fruit adds a pop of color and a refreshing bite that cuts through all the rich, salty, and sweet flavors. Place a few sprigs of fresh rosemary around the base of the skull to look like tiny, spooky trees.
- The Final Check (1 minute): Step back and look at your board. Are there any big, empty gaps? Fill them with a few extra pretzels, a handful of pepitas, or an extra slice of cheese. The goal is for it to look abundant and inviting, not sparse. I always end up adding a few more chocolate chips because, well, it’s Halloween.
Troubleshooting Tip: If your skull keeps tipping over, place a small, flat piece of cheese or a slice of apple underneath it to act as a “foot” and keep it stable. I’ve done this more times than I can count.
Cooking Tips & Techniques
This board is all about the art of arrangement. Here are a few things I’ve learned from my late-night experiments.
- The “Three-Bite” Rule: A good charcuterie board has something for every stage of a bite. You want a salty element (meat), a creamy element (cheese), a crunchy element (pretzel), and a sweet element (honey or fruit). Make sure each section of your board has a little of everything. I once made a board where all the sweet stuff was on one side, and it was a logistical nightmare.
- Don’t Overcrowd the Skull: The skull is the star. Leave a little breathing room around it so it doesn’t get lost in the food. A little negative space makes the board look more intentional and less chaotic. I learned this after my first attempt where the skull looked like it was being swallowed by a wave of salami.
- Room Temperature is Key: This is a big one. Take your cheeses out of the fridge about 30 minutes before you plan to serve. Cold cheese is flavorless and hard to spread. The same goes for the prosciutto. A little time at room temp makes everything taste so much better.
- Build in Layers, Not a Flat Map: Think of your board as a 3D landscape. Use the ramekins for height. Crumple the meats. Stack the cheese cubes. A flat board is a boring board. I once made a board that looked like a sad, flat map of a country. Never again.
- Embrace the Imperfection: This is the most important tip. Your board doesn’t have to be perfect. A few stray pepitas, a slightly crooked slice of apple—it’s charming. It makes it look real and handmade. The whole point is cozy, not curated.
Variations & Adaptations
This board is endlessly adaptable. Here are a few of my favorite ways to change it up.
- The “Gourmet” Version: Swap the cheddar for a creamy goat cheese log, add some truffle salami, and use fig jam instead of hot honey. It feels fancier but is just as easy.
- The “All-Veggie” Board: Skip the meats and double up on the cheeses. Add marinated artichoke hearts, roasted red peppers, and some grilled asparagus spears for a “spooky fingers” effect. It’s just as satisfying.
- The “Spicy Fiesta” Board: Use pepper jack cheese, chorizo slices, and add some jalapeño-stuffed olives. Drizzle with a chipotle honey. It’s for when you want a little heat with your cozy.
- The “Sweet Tooth” Board: Replace most of the savory items with more sweets. Use a wheel of brie topped with cranberry sauce, add chocolate-covered pretzels, marshmallows, and some caramel dip. It’s a dessert charcuterie board in disguise.
- The “Kid-Friendly” Board: Use mild cheddar, turkey pepperoni, and add some “spider” crackers (use black icing to draw legs on round crackers). Use a dollop of peanut butter or Nutella for dipping. My niece loved this one.
I personally love the “Gourmet” version for a date night. It feels special without a lot of extra work. The key is to just swap out a few key ingredients and suddenly the whole vibe changes.
Serving & Storage Suggestions
This board is best served immediately, at room temperature. The contrast of the cold fruit and the soft, creamy cheese is perfect. It’s a hands-on experience, so make sure to have small plates or napkins nearby.
Serving Temperature: Serve the board at room temperature. Take it out of the fridge about 20 minutes before you’re ready to eat. The cheese will be softer, the meats will be more flavorful, and the whole experience will feel more relaxed.
What to Serve With It: This board is a meal in itself, but it pairs beautifully with a glass of dry red wine (like a Pinot Noir or a Zinfandel) or a crisp apple cider. For a non-alcoholic option, a sparkling water with a splash of cranberry juice is festive and refreshing.
Storage: If you have leftovers (which is rare, but happens), store the components separately. Wrap the cheeses in wax paper, put the meats in a sealed container, and store the fruit and pretzels in separate bags. The board itself can be wiped clean with a damp cloth. I’ve found that the flavors actually meld together a bit if you leave the board out for a few hours, but for food safety, it’s best to refrigerate after 2 hours.
Reheating: This board is served cold or at room temperature, so no reheating is needed. If you want to warm up the brie for a gooey, melted center, you can pop it in a 350°F oven for 5-7 minutes before adding it to the board. It’s a game-changer.
How the Flavors Develop: Honestly, this board is best the night you make it. The pretzels stay crunchy, the fruit stays fresh, and the cheese is at its peak. The leftovers are still good, but the magic of the fresh assembly is hard to beat.
Nutritional Information & Benefits
This is a treat, not a health food, but it does have some redeeming qualities. The exact numbers will vary based on what you use, but here’s a rough estimate for a serving (about 1/4 of the board).
Estimated Nutritional Values (per serving):
- Calories: 450-550
- Protein: 20-25g
- Fat: 30-35g
- Carbohydrates: 25-30g
- Fiber: 3-5g
- Sugar: 15-20g
Health Benefits of Key Ingredients:
- Cheese: A good source of calcium and protein. The probiotics in brie can also be good for gut health.
- Nuts & Seeds (Pepitas): Packed with healthy fats, magnesium, and zinc. They help keep you full and satisfied.
- Fruit (Grapes & Apples): Provide natural sweetness, fiber, and antioxidants. They help balance out the richness of the cheese and meat.
Dietary Considerations: This recipe can easily be made gluten-free by using gluten-free pretzels and crackers. It’s naturally low in added sugar (other than the honey and chocolate). It contains dairy (cheese) and common allergens (gluten from pretzels). For a dairy-free version, use vegan cheese and skip the brie.
Personal Wellness Perspective: I see this as a “soul food” kind of snack. It’s not about the macros; it’s about the experience. Taking a moment to create something beautiful and fun for yourself is a form of self-care. One night of a cozy, indulgent board is not going to derail any health goals. It’s about balance and joy.
Conclusion
This Cozy Halloween Skull Charcuterie Board is more than just a snack. It’s a whole experience. It’s the perfect way to celebrate the spooky season without any of the stress. It’s quick, it’s easy, and it’s incredibly satisfying to eat. I love that I can make it for a quiet night in or for a small gathering, and it always feels special. The skull adds a touch of playful spookiness, and the combination of flavors is just pure comfort.
I really hope you give this a try. Don’t be afraid to customize it based on what you have in your fridge. That’s the whole point! Use your favorite cheeses, your favorite meats, and make it your own. The best part is the process of arranging it all and then enjoying the fruits (and cheeses) of your labor.
If you make this, I’d love to hear about it! Leave a comment below and tell me what your favorite combination was. Did you use a different skull? Did you add something weird and wonderful? Let’s share our cozy, spooky creations. Happy Halloween, and happy snacking!
Frequently Asked Questions
Can I use a different centerpiece instead of a skull?
Absolutely! The skull is just for the spooky vibe. You can use a small pumpkin, a gourd, or even a decorative candle holder. The key is to have a central, eye-catching element. I’ve used a small ceramic ghost before, and it worked great.
How far in advance can I make this board?
You can prep the ingredients up to a day in advance. Slice the cheese, wash the fruit, and store everything separately in the fridge. Assemble the board no more than 30 minutes before you plan to serve it. This keeps the pretzels crunchy and the fruit fresh.
What if I don’t have a large board?
No problem! You can use a large baking sheet, a clean cutting board, or even a flat serving tray. If you use a baking sheet, line it with parchment paper for a cleaner look. You can also use a large, flat plate and just make a smaller, more intimate board.
Can I make this vegetarian or vegan?
Yes, easily! For a vegetarian version, just load up on the cheeses and skip the meats. For a vegan version, use your favorite vegan cheeses, add more nuts, fruits, and vegetables like roasted red peppers and artichoke hearts. The presentation will still be stunning.
How do I keep the apple slices from turning brown?
Toss the apple slices in a little bit of lemon juice or lime juice right after you slice them. This will prevent them from oxidizing and turning brown for a few hours. It adds a tiny bit of tartness, which actually pairs well with the cheese and honey.
Pin This Recipe!
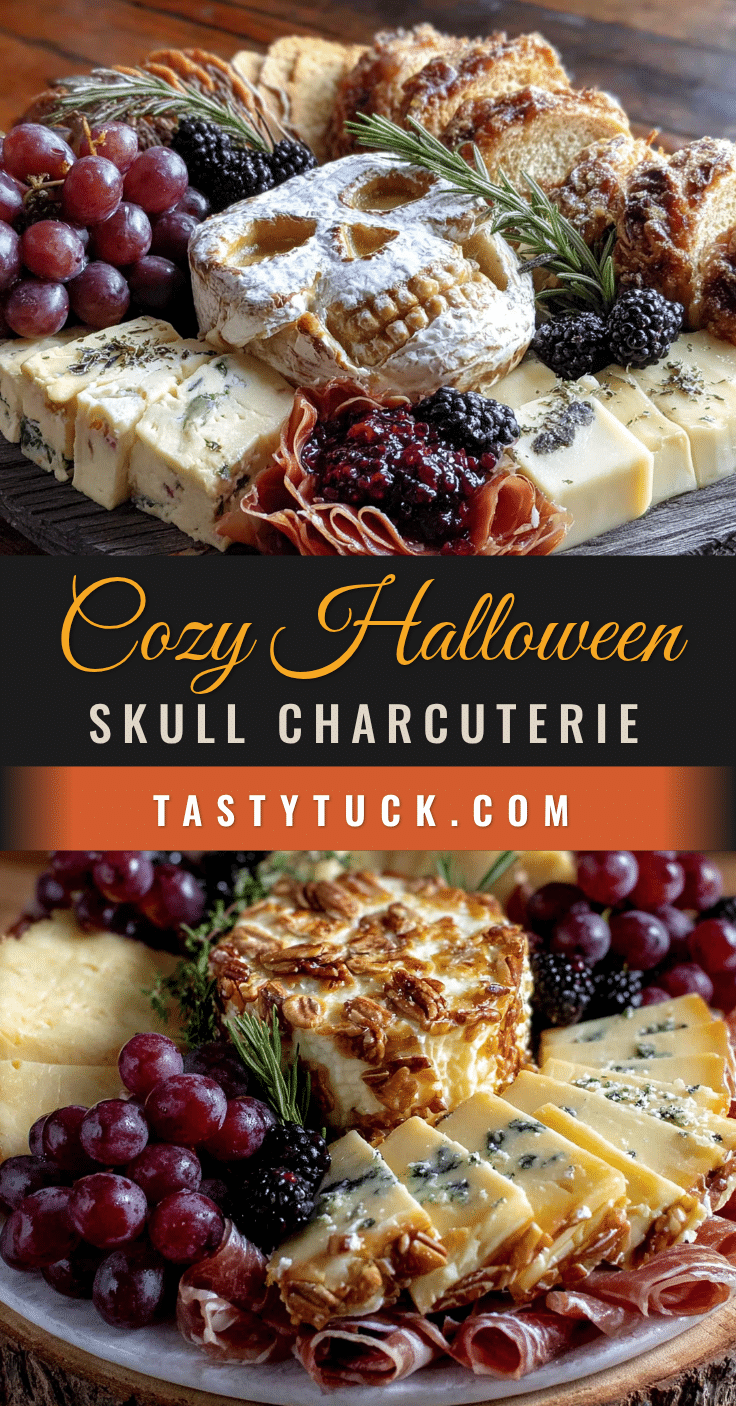
Cozy Halloween Skull Charcuterie Board
A quick and easy Halloween snack board featuring a spooky skull centerpiece, perfect for a cozy night in with a horror movie. This no-cook recipe combines salty, savory, sweet, and spicy flavors for a crowd-pleasing treat.
- Prep Time: 15 minutes
- Cook Time: 0 minutes
- Total Time: 15 minutes
- Yield: 4 servings 1x
- Category: Appetizer
- Cuisine: American
Ingredients
- 1 plastic or ceramic skull (about 6–8 inches tall)
- 4 oz Brie or Camembert
- 4 oz Sharp Cheddar, cubed
- 4 oz Smoked Gouda, sliced
- 4 oz Prosciutto, torn into ribbons
- 4 oz Genoa Salami, sliced
- 4 oz Pepperoni, sliced
- 1 cup Pretzel sticks or mini pretzels
- 1/2 cup Roasted, salted pepitas (pumpkin seeds)
- 1/2 cup Mixed olives (green and black)
- 1/4 cup Hot honey or regular honey
- 1/4 cup Dried cranberries or cherries
- 1/4 cup Dark chocolate chips or chopped dark chocolate bar
- 1 cup Red and green seedless grapes
- 1 Apple, sliced (Granny Smith or Honeycrisp)
- Fresh rosemary sprigs (for decoration)
Instructions
- Place your large board on a flat surface. Position the plastic skull slightly off-center.
- Place the wedge of brie near the base of the skull. Cube the cheddar and arrange the cubes in a small pile on one side. Fan out the slices of smoked gouda in a small row on the opposite side.
- Take the prosciutto ribbons and gently crumple them into small, loose piles. Place one pile near the cheddar. Arrange the salami slices in a small, overlapping line. Fold the pepperoni slices in half and place them in a small pile.
- Pour the pretzel sticks into a pile that looks like a small pile of ‘bones.’ Sprinkle the pepitas in a winding path around the skull. Add the mixed olives to a small ramekin and place it in a corner of the board.
- Place the ramekin of hot honey near the brie. Add the dried cranberries to another ramekin and place it near the gouda. Scatter the dark chocolate chips in a small, deliberate pile.
- Arrange the grapes in a small cluster. Fan out the apple slices in a small row. Place a few sprigs of fresh rosemary around the base of the skull.
- Step back and look at your board. Fill any big, empty gaps with a few extra pretzels, a handful of pepitas, or an extra slice of cheese.
Notes
For best flavor, let cheeses come to room temperature for 30 minutes before serving. If the skull tips over, place a small, flat piece of cheese or apple slice underneath it for stability. Toss apple slices in lemon juice to prevent browning. The board is best assembled no more than 30 minutes before serving to keep pretzels crunchy and fruit fresh.
Nutrition
- Serving Size: 1/4 of the board
- Calories: 500
- Sugar: 17.5
- Sodium: 1200
- Fat: 32.5
- Saturated Fat: 15
- Carbohydrates: 27.5
- Fiber: 4
- Protein: 22.5
Keywords: Halloween charcuterie board, skull charcuterie board, easy Halloween snack, spooky snack board, cozy Halloween recipe, no-cook appetizer, party platter


