This was supposed to be a black bean dip. I had the cans lined up, the cumin measured, the lime ready to squeeze. But somewhere between the grocery store and my kitchen, the black beans got replaced by a block of cream cheese. I didn’t realize until I was standing there, knife in hand, staring at the wrong ingredient like it had personally betrayed me. The party was in three hours. The kids were already buzzing about costumes. And I had exactly zero backup plans.
So I did what any reasonable person would do when the universe throws a curveball. I started throwing things together. Cream cheese, cheddar, some spices I grabbed without thinking. It looked like a sad, lumpy mess at first. I mean, honestly, it was not pretty. I almost tossed the whole bowl in the trash and ordered pizza. But then I remembered the bag of black olives sitting in the fridge, and something clicked. Spiders. I could make spiders. What came out of that frantic, slightly panicked kitchen session was nothing like the plan — and better. Way better.
That first bite had this unexpected creamy, savory punch that made me stop mid-chew. My neighbor Maria, who stopped by to borrow a pumpkin carving knife, ended up eating half the thing on my counter. She didn’t even pretend to be polite about it. You know that feeling when you accidentally stumble onto something so good that you almost feel guilty it wasn’t intentional? That was this cheese ball. It became the hit of the party, and I’ve been making it every Halloween since. Maybe you’ve been there — staring at a kitchen failure that turns into your most requested recipe. This is that story, but with more spider legs.
Why You’ll Love This Recipe
Let me tell you why this Quick Spooky Spider Cheese Ball has earned a permanent spot in my Halloween rotation. First off, it comes together in under 15 minutes of active prep time. I tested this after a full day of work and costume chaos, and it still felt easy. That matters when you’re juggling a million things before the doorbell starts ringing with trick-or-treaters.
- Quick & Easy: From fridge to table in about 20 minutes total. No baking, no complicated techniques. Just mix, shape, and decorate.
- Simple Ingredients: You likely already have cream cheese, cheddar, and seasoning in your kitchen. The only special purchase is black olives for the spider legs, and those are cheap.
- Perfect for Halloween Parties: This thing looks like a giant spider sitting on your platter. Kids scream, adults laugh, and everyone eats it up. It’s the conversation starter you didn’t know you needed.
- Crowd-Pleaser: I’ve brought this to three different Halloween gatherings now, and it disappears every single time. Even people who claim they don’t like cheese balls go back for seconds.
- Unbelievably Delicious: The texture is creamy but firm enough to hold its shape. The flavor combo of sharp cheddar, garlic, and a hint of ranch seasoning is next-level comfort food.
What makes this recipe different from the other cheese balls out there is the texture trick. I let the cream cheese sit out for exactly 20 minutes before mixing — not too soft, not too cold. That Goldilocks timing gives you a cheese ball that shapes beautifully without turning into a sticky mess. I learned this after my first attempt ended up looking like a lopsided blob. Trust me, the timing matters.
This recipe isn’t just good — it is the kind that makes people close their eyes after the first bite. It’s comfort food reimagined for Halloween, with the same soul-soothing satisfaction but way more creepy-crawly fun. Perfect for impressing guests without stress, or turning a simple snack into something memorable.
What Ingredients You Will Need
This Quick Spooky Spider Cheese Ball uses simple, everyday ingredients to deliver bold flavor and that satisfying creamy texture. You won’t need any fancy grocery store trips for this one. Most of these are pantry or fridge staples you probably already have on hand.
For the Cheese Ball Base
- Cream Cheese: 16 ounces (two 8-ounce blocks), softened to room temperature. I recommend Philadelphia brand for the smoothest texture. Let it sit out for about 20-25 minutes before starting.
- Sharp Cheddar Cheese: 1 ½ cups (about 6 ounces), finely shredded. Pre-shredded works in a pinch, but freshly shredded gives you better flavor and creaminess. I use Cabot or Tillamook.
- Ranch Seasoning Mix: 1 tablespoon (half a packet). This is the secret weapon for that savory, addictive flavor. Hidden Valley is my go-to.
- Garlic Powder: ½ teaspoon. Not garlic salt — we’re controlling the sodium ourselves here.
- Onion Powder: ¼ teaspoon. Adds a subtle depth that rounds out the flavor.
- Worcestershire Sauce: 1 teaspoon. This is optional but highly recommended. It adds that umami punch that makes people ask, “What’s in this?”
- Salt: ¼ teaspoon, or to taste. Go easy here since the ranch mix has salt already.
- Black Pepper: ⅛ teaspoon, freshly ground if possible.
For the Spider Decoration
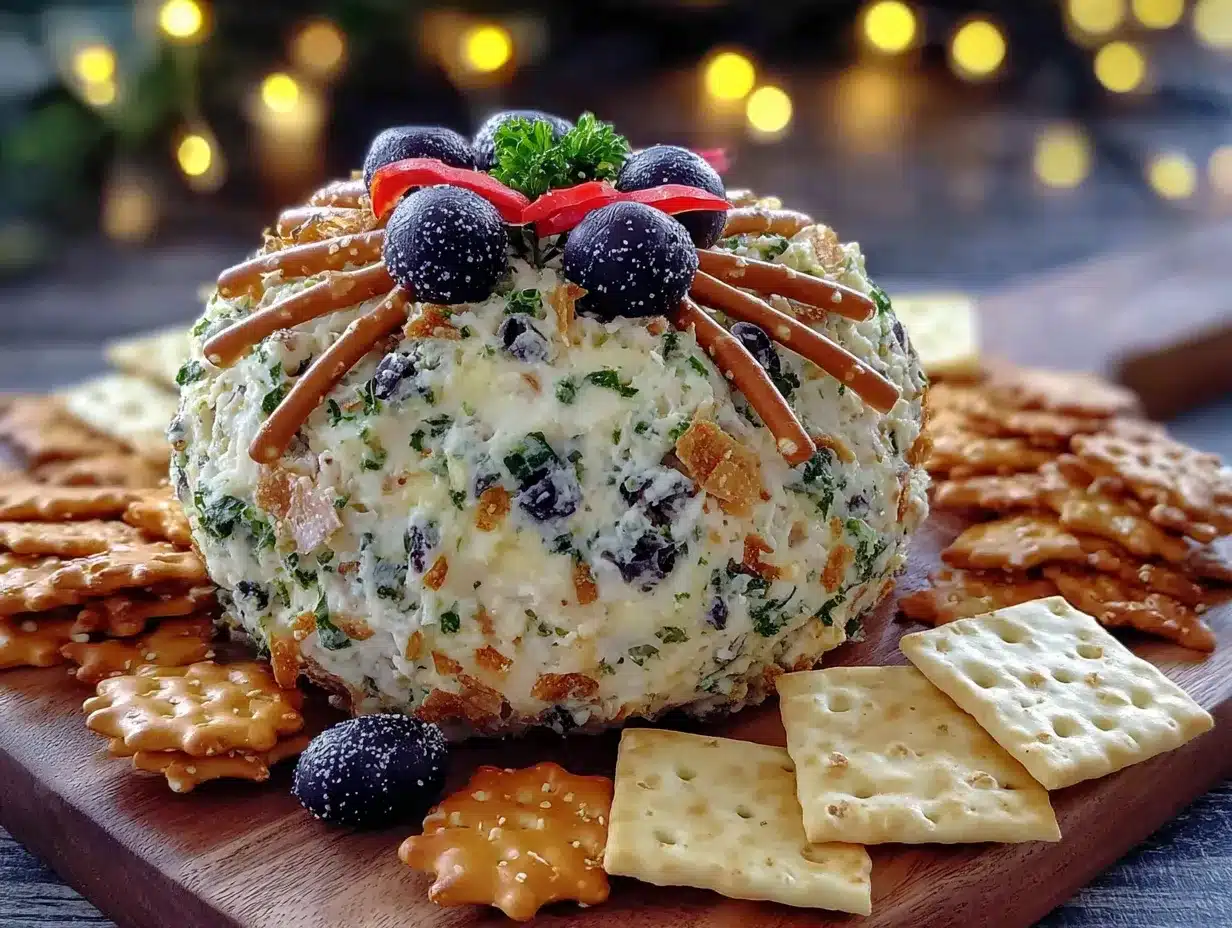
- Black Olives: 1 can (6 ounces), pitted. You’ll need them for the spider body and legs. Look for large, firm olives for the best presentation.
- Red Bell Pepper: 1 small piece, about 1 inch square. This becomes the spider eyes. You could also use pimento strips if you have them.
- Pretzel Sticks: 8 pieces, broken in half. These become the spider legs. They add a nice salty crunch contrast to the creamy cheese.
For Serving
- Crackers: About 40-50 crackers for serving. I like buttery Ritz crackers or sturdy wheat crackers. Pretzel crisps also work great.
- Fresh Vegetables: Optional, but carrot sticks, celery, and bell pepper strips add color and a healthier option.
For the ranch seasoning, you can make your own blend if you prefer: mix 1 tablespoon dried parsley, 1 teaspoon dried dill, 1 teaspoon garlic powder, ½ teaspoon onion powder, and ¼ teaspoon black pepper. It works beautifully and lets you control the salt level.
Equipment Needed
You don’t need a professional kitchen to pull this off. Here’s what you’ll actually use:
- Large Mixing Bowl: Any medium-to-large bowl works. Glass or stainless steel is best because it doesn’t absorb odors.
- Hand Mixer or Stand Mixer: A hand mixer makes the blending effortless. I’ve made this with a wooden spoon too, and it works — just takes more elbow grease and a few extra minutes.
- Rubber Spatula: For scraping down the sides and getting every last bit of cheese mixture. Don’t skip this, or you’ll waste precious cheese.
- Plastic Wrap: You need this to shape the cheese ball and keep it from drying out in the fridge. I use the press-and-seal kind for extra security.
- Small Knife and Cutting Board: For slicing olives and cutting the bell pepper. A paring knife works perfectly.
- Serving Platter: A flat plate or wooden board works best. Dark-colored platters make the spider pop visually.
- Toothpicks: Optional, but helpful for securing the olive body to the cheese ball if it feels wobbly.
If you don’t have a hand mixer, you can absolutely do this by hand. Just make sure your cream cheese is fully softened — leave it out for 30 minutes instead of 20. Your arm will thank you.
Preparation Method
Let me walk you through this step by step. I’ve made this cheese ball at least a dozen times now, so I know exactly where things can go sideways and how to fix them.
- Soften the cream cheese: Take both blocks of cream cheese out of the fridge and let them sit on the counter for exactly 20 minutes. Set a timer. I’m serious. If it’s too cold, your mixture will be lumpy. Too warm, and you won’t be able to shape it. Twenty minutes is the sweet spot.
- Mix the base: In your large mixing bowl, combine the softened cream cheese, shredded cheddar, ranch seasoning mix, garlic powder, onion powder, Worcestershire sauce, salt, and pepper. Using your hand mixer on medium speed, beat everything together for about 2 minutes until smooth and well combined. Scrape down the sides and bottom with your spatula at least once. The mixture should look uniform with no white streaks of plain cream cheese.
- Chill the mixture: This step is crucial. Cover the bowl with plastic wrap and refrigerate for at least 30 minutes, or up to 24 hours. Chilling makes the mixture firm enough to shape into a ball. I once skipped this step and ended up with a flat, sad pancake instead of a round spider body. Learn from my mistake.
- Shape the cheese ball: Lay a large piece of plastic wrap on your counter. Scoop the chilled cheese mixture onto the center of the plastic wrap. Gather the edges of the wrap and twist to form a tight ball. Use your hands through the plastic to shape it into a smooth, round sphere. Don’t worry about perfection — the spider decoration will cover any imperfections. Twist the plastic wrap closed and refrigerate for another 20 minutes to set the shape.
- Prepare the spider decorations: While the cheese ball sets, slice your olives. Cut 8 olives in half lengthwise — these become the spider body segments. From the remaining olives, slice 16 thin rounds for the legs. You want them about ¼-inch thick. Cut your small piece of red bell pepper into two tiny triangles or circles for the eyes. Set everything aside on a small plate.
- Assemble the spider: Unwrap your chilled cheese ball and place it in the center of your serving platter. Now for the fun part. Arrange the 8 pretzel sticks around the cheese ball like spider legs — 4 on each side, slightly angled outward. Place the 8 olive halves on top of the cheese ball to create the spider’s back, overlapping them slightly. Position the two red pepper eyes at the front. If your olive body feels unstable, use a toothpick to secure it to the cheese ball.
- Final chill: Pop the assembled spider back in the fridge for 10-15 minutes before serving. This helps everything set together. The cheese ball should be firm but spreadable — not rock hard.
- Serve and watch it disappear: Arrange your crackers and veggies around the spider on the platter. I like to place them in a circle so it looks like the spider is sitting in the middle of its web. Serve immediately or keep refrigerated until guests arrive.
One thing I want you to notice: the texture of the mixture after you’ve mixed it should be smooth and slightly sticky, but not wet. If it feels greasy, you might have over-mixed it, but honestly, it’ll still taste great. The color should be a pale orange from the cheddar — if it’s too white, add a pinch of paprika for color.
Cooking Tips & Techniques
After making this Quick Spooky Spider Cheese Ball more times than I care to count, I’ve collected some hard-won wisdom. Let me share the good stuff.
The cream cheese temperature trap: This is the number one mistake I see. People either use cold cream cheese straight from the fridge or they microwave it to soften it. Microwaving creates hot spots that can break the emulsion, leaving you with a grainy texture. Just let it sit on the counter. I keep a little kitchen timer right next to my cream cheese blocks so I don’t forget.
Shredding your own cheese: I know, I know — pre-shredded cheese is convenient. But it’s coated with cellulose (that’s wood fiber, basically) to prevent clumping, which also prevents it from blending smoothly into your cheese ball. Freshly shredded cheddar melts into the cream cheese like a dream. The extra three minutes of shredding is absolutely worth it.
The olive placement puzzle: Here’s a trick I figured out after my first spider looked more like a lumpy caterpillar. Arrange the olive halves from back to front, starting with the largest pieces at the rear. This creates a tapering effect that actually looks like a spider’s body. And don’t press them too deep into the cheese — they should sit on top, not disappear into it.
Make-ahead magic: You can prepare the cheese mixture up to 48 hours in advance and keep it wrapped in the fridge. Just shape it and add the decorations the day of your party. This saved me last year when I had back-to-back Halloween events. The flavor actually gets better after a day in the fridge — the seasonings meld together beautifully.
The pretzel leg problem: Pretzel sticks can get soft after sitting on the cheese ball for too long. If you’re making this more than an hour before serving, insert the pretzel legs right before guests arrive. Or use thin breadsticks instead — they hold up better. I learned this the hard way when my spider looked like it had noodle legs after two hours on the table.
Variations & Adaptations
One of the best things about this recipe is how flexible it is. Here are some variations I’ve tried and loved.
Spicy Southwest Spider: Add ½ teaspoon cumin, ¼ teaspoon cayenne pepper, and 2 tablespoons finely chopped pickled jalapeños to the cheese mixture. Swap the ranch seasoning for taco seasoning. The spicy kick is perfect for adult parties where you want a little heat with your Halloween fun.
Bacon Lover’s Nightmare: Cook 4 strips of bacon until crispy, crumble them, and mix into the cheese along with 2 tablespoons of chopped fresh chives. The smoky bacon flavor pairs incredibly with the creamy cheddar. Just warn your vegetarian friends before they dive in.
Gluten-Free Version: This one’s easy. Use gluten-free pretzel sticks or replace them with carrot sticks for the spider legs. The cheese mixture itself is naturally gluten-free as long as you check your ranch seasoning label. I’ve found that Simple Mills almond flour crackers make an excellent gluten-free serving option.
Dairy-Free Adaptation: I tested this for a friend who’s lactose intolerant. Use dairy-free cream cheese (Kite Hill works well) and nutritional yeast instead of cheddar. The texture is slightly softer, so chill it an extra 15 minutes before shaping. It’s not exactly the same, but honestly, it’s still pretty darn good.
Mini Spider Bites: Instead of one big spider, make 8-10 mini cheese balls. Use small olive slices for the body and broken pretzel pieces for legs. These are perfect for individual servings at a party — no double-dipping worries. Plus, they look adorable lined up on a platter.
I tried the bacon version for a Halloween potluck last year, and a coworker asked me for the recipe before she even finished her first bite. That’s the kind of reaction that makes all the testing worth it.
Serving & Storage Suggestions
This Quick Spooky Spider Cheese Ball is best served cold, straight from the fridge. The texture is perfect when it’s been chilled for at least 30 minutes after assembly. If it sits out at room temperature for more than an hour, it starts to get soft and loses its spider shape. I’ve found that setting the platter on a small bed of ice helps keep it firm during longer parties.
What to serve with it: Buttery crackers are my top choice — they complement the creamy cheese without overpowering it. Ritz, Club crackers, or even simple water biscuits work great. For a healthier option, try cucumber rounds, bell pepper strips, or celery sticks. The crunch of fresh veggies contrasts beautifully with the smooth cheese. And if you really want to lean into the Halloween theme, serve it with black sesame rice crackers or squid ink crackers for an extra spooky look.
Storage: Leftovers keep well in the refrigerator for up to 5 days. Wrap the cheese ball tightly in plastic wrap or store it in an airtight container. The pretzel legs will get soft, so remove them before storing. You can refresh the legs with new pretzels when you serve it again. I don’t recommend freezing this — the texture becomes grainy and watery when thawed. Trust me, I tried it once and ended up with a sad, weepy mess.
Reheating: You don’t actually reheat a cheese ball. Just let it sit at room temperature for about 10-15 minutes before serving to take the chill off. This makes it spreadable without being runny.
One thing I love about this recipe is how the flavors develop overnight. The garlic and ranch seasoning meld into the cream cheese, creating a deeper, more complex taste. I actually prefer it on day two. If you can resist eating it all at once, you’re in for a treat.
Nutritional Information & Benefits
Let’s be real — this is a treat, not a health food. But here’s what you’re looking at per serving (about 2 tablespoons of cheese mixture, not including crackers):
| Nutrient | Amount Per Serving |
|---|---|
| Calories | 120 |
| Total Fat | 10g |
| Saturated Fat | 6g |
| Cholesterol | 30mg |
| Sodium | 220mg |
| Total Carbohydrates | 3g |
| Protein | 5g |
| Calcium | 80mg |
The cream cheese provides a good amount of calcium and protein, while the cheddar adds more calcium and a bit of vitamin A. The olives contribute healthy monounsaturated fats and antioxidants. Is this going to replace your green smoothie? No. But as a Halloween indulgence, it’s reasonably balanced.
For those watching their sodium, you can use low-sodium cream cheese and skip the added salt. The ranch seasoning already brings plenty of flavor. This recipe is naturally low-carb and keto-friendly, with only about 3 grams of carbs per serving. It’s also vegetarian as written, though obviously not vegan.
FAQs
Can I make this cheese ball a day ahead?
Absolutely. In fact, I recommend it. Make the cheese mixture, shape it into a ball, and wrap it tightly in plastic wrap. Refrigerate for up to 48 hours. Add the olive and pretzel decorations the day you plan to serve it for the best presentation.
My cheese mixture is too soft to shape. What did I do wrong?
Your cream cheese was probably too warm when you mixed it, or you didn’t chill it long enough. Pop the mixture back in the fridge for another 30-45 minutes. If it’s still too soft, add a few tablespoons of extra shredded cheddar to firm it up.
Can I use low-fat cream cheese?
You can, but the texture will be softer and less stable. Low-fat cream cheese has more water content, which makes it harder to shape into a ball. If you use it, plan to chill the mixture for an extra 30 minutes and expect a slightly looser final product.
How do I get the spider legs to stay in place?
Insert the pretzel sticks at a slight downward angle into the cheese ball, pushing them about halfway in. If they still feel loose, use a dab of cream cheese as “glue” where the pretzel meets the cheese ball. For a sturdier option, use thin breadsticks instead of pretzels.
Can I use different olives for the spider body?
Sure. Kalamata olives add a more intense flavor and darker color. Green olives work too, but they’re lighter and don’t look as spider-like. Stuffed olives (with pimento or garlic) are fine, just slice them in half and remove the stuffing first.
Conclusion
Look, I know there are a million Halloween appetizer recipes out there. But this Quick Spooky Spider Cheese Ball is the one that keeps showing up at my parties year after year because it actually works. It’s fun without being fussy, impressive without being complicated, and delicious without requiring a trip to a specialty grocery store. That accidental discovery in my kitchen — the one that started with a missing can of black beans — turned into something I genuinely look forward to making every October.
I want you to take this recipe and make it your own. Add more spice if you like heat. Swap the crackers for veggies if you’re watching carbs. Use different olives or skip the pretzels entirely. The spider shape is just the starting point — what matters is that you’re creating something that makes people smile when they walk into your kitchen. And honestly? That’s the whole point of Halloween entertaining.
If you make this, I’d love to hear about it. Drop a comment below and tell me how your spider turned out, or share a photo of your creation. Did you add your own twist? Did your kids help with the olive placement? Did your guests actually scream when they saw it? (That’s my favorite reaction, by the way.) Let’s keep this conversation going — because the best recipes are the ones we share and adapt together.
Now go make that spider. Your Halloween party is waiting.
Pin This Recipe!
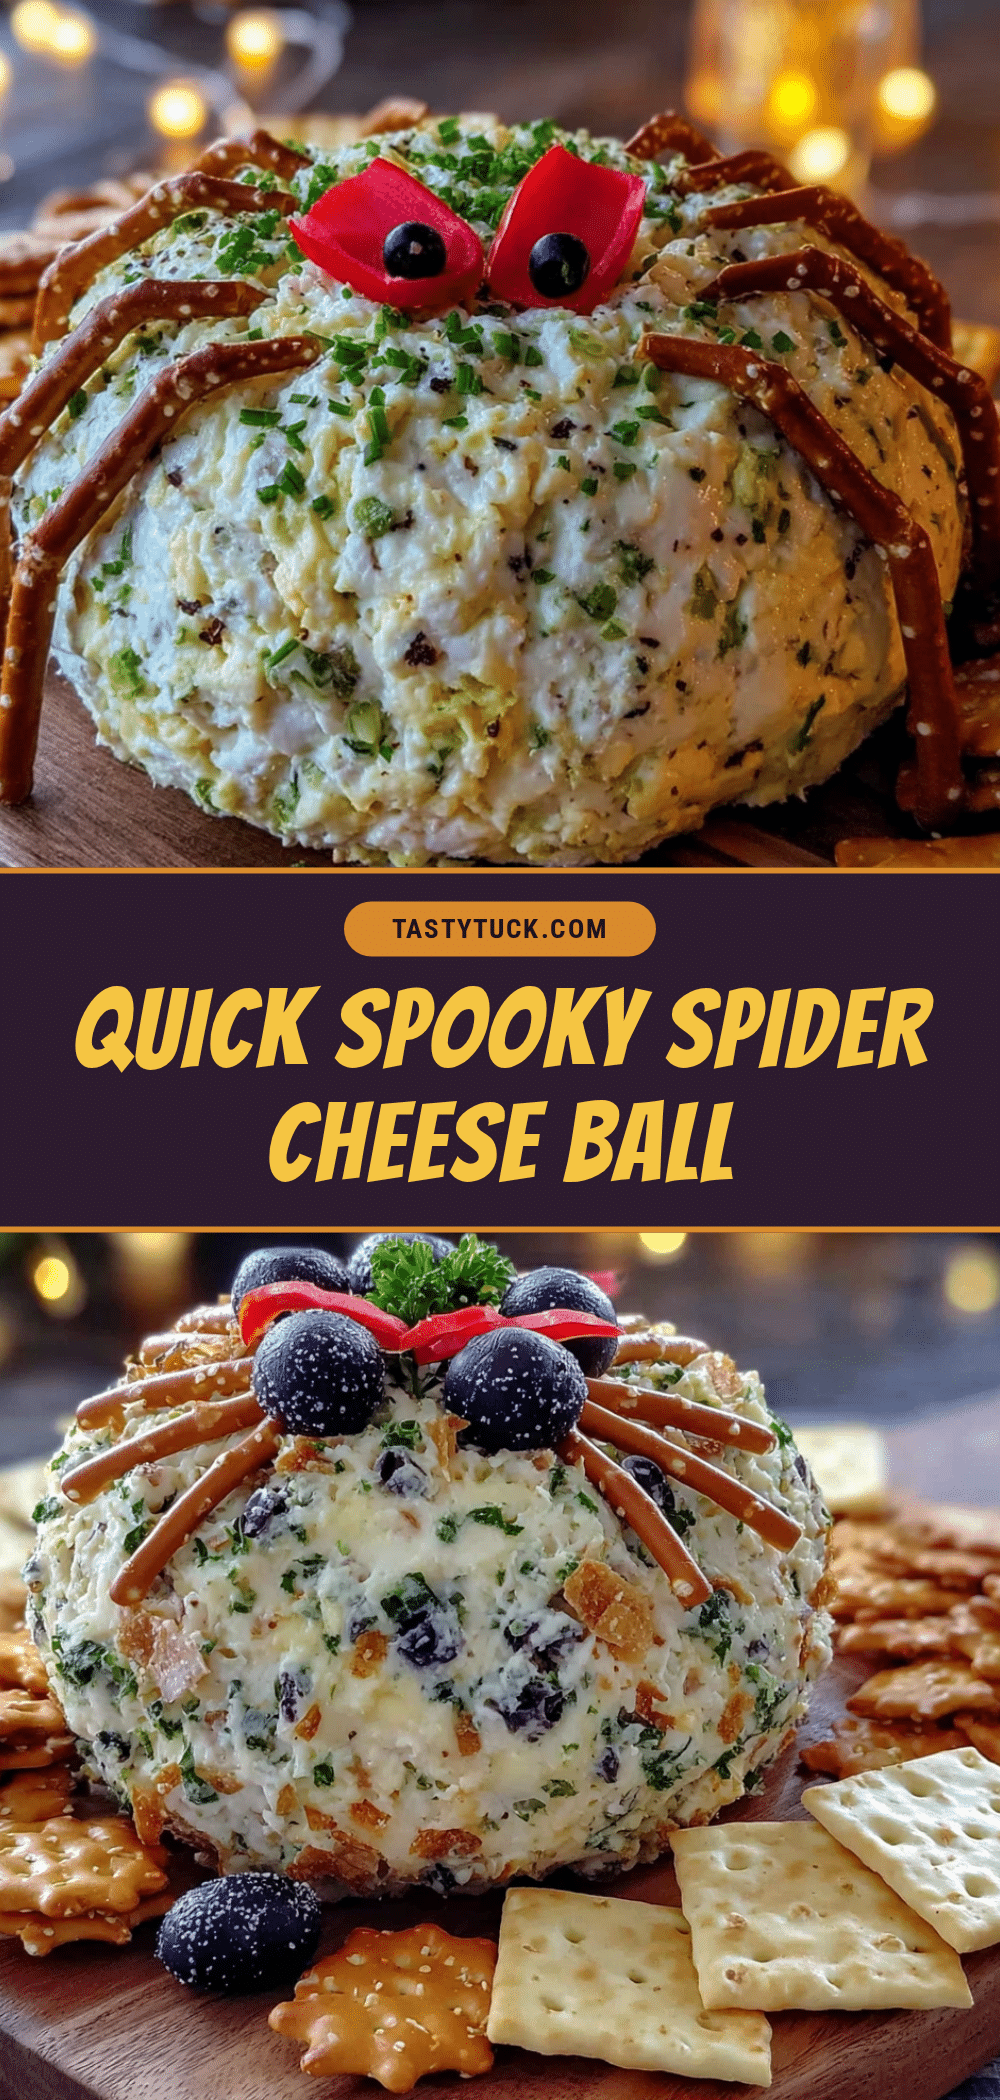
Quick Spooky Spider Cheese Ball: Easy Halloween Appetizer
This Quick Spooky Spider Cheese Ball is a creamy, savory Halloween appetizer that comes together in under 20 minutes. Made with cream cheese, sharp cheddar, and ranch seasoning, it’s shaped like a spider with olive and pretzel legs—perfect for parties and guaranteed to be a crowd-pleaser.
- Prep Time: 15 minutes
- Cook Time: 0 minutes
- Total Time: 20 minutes (plus chilling time)
- Yield: 8 servings 1x
- Category: Appetizer
- Cuisine: American
Ingredients
- 16 ounces cream cheese (two 8-ounce blocks), softened to room temperature
- 1 ½ cups (about 6 ounces) sharp cheddar cheese, finely shredded
- 1 tablespoon ranch seasoning mix (half a packet)
- ½ teaspoon garlic powder
- ¼ teaspoon onion powder
- 1 teaspoon Worcestershire sauce (optional)
- ¼ teaspoon salt (or to taste)
- ⅛ teaspoon black pepper, freshly ground
- 1 can (6 ounces) black olives, pitted
- 1 small piece red bell pepper (about 1 inch square), for eyes
- 8 pretzel sticks, broken in half
- 40–50 crackers for serving (e.g., Ritz or sturdy wheat crackers)
- Fresh vegetables for serving (optional, e.g., carrot sticks, celery, bell pepper strips)
Instructions
- Soften the cream cheese: Take both blocks of cream cheese out of the fridge and let them sit on the counter for exactly 20 minutes.
- Mix the base: In a large mixing bowl, combine the softened cream cheese, shredded cheddar, ranch seasoning mix, garlic powder, onion powder, Worcestershire sauce, salt, and pepper. Using a hand mixer on medium speed, beat everything together for about 2 minutes until smooth and well combined. Scrape down the sides and bottom with a spatula at least once.
- Chill the mixture: Cover the bowl with plastic wrap and refrigerate for at least 30 minutes, or up to 24 hours.
- Shape the cheese ball: Lay a large piece of plastic wrap on your counter. Scoop the chilled cheese mixture onto the center of the plastic wrap. Gather the edges of the wrap and twist to form a tight ball. Use your hands through the plastic to shape it into a smooth, round sphere. Twist the plastic wrap closed and refrigerate for another 20 minutes to set the shape.
- Prepare the spider decorations: While the cheese ball sets, slice your olives. Cut 8 olives in half lengthwise—these become the spider body segments. From the remaining olives, slice 16 thin rounds for the legs (about ¼-inch thick). Cut the red bell pepper into two tiny triangles or circles for the eyes. Set everything aside on a small plate.
- Assemble the spider: Unwrap your chilled cheese ball and place it in the center of your serving platter. Arrange the 8 pretzel sticks around the cheese ball like spider legs—4 on each side, slightly angled outward. Place the 8 olive halves on top of the cheese ball to create the spider’s back, overlapping them slightly. Position the two red pepper eyes at the front. If the olive body feels unstable, use a toothpick to secure it to the cheese ball.
- Final chill: Pop the assembled spider back in the fridge for 10-15 minutes before serving.
- Serve and watch it disappear: Arrange your crackers and veggies around the spider on the platter. Serve immediately or keep refrigerated until guests arrive.
Notes
For best texture, let cream cheese sit out for exactly 20 minutes before mixing. Freshly shredded cheddar blends better than pre-shredded. The cheese mixture can be made up to 48 hours in advance; add decorations just before serving. Pretzel legs may soften if left on too long—insert them right before serving or use thin breadsticks instead.
Nutrition
- Serving Size: 2 tablespoons of che
- Calories: 120
- Sugar: 1
- Sodium: 220
- Fat: 10
- Saturated Fat: 6
- Carbohydrates: 3
- Protein: 5
Keywords: Halloween appetizer, cheese ball, spider cheese ball, easy appetizer, party snack, cream cheese, spooky snack


