My neighbor, a woman named Brenda I barely knew, wasn’t trying to impress anyone. I’d stopped by to grab a package that had been mistakenly delivered to her house, and the smell of vanilla and sugar hit me before I even got to her screen door. It was a Tuesday afternoon in late October, and she was in her kitchen, piping little white blobs onto a baking sheet. She waved me in with a flour-dusted hand, completely unbothered by the interruption. “Just getting a head start on the kids’ school party,” she said, shrugging like she was folding laundry.
I, of course, stood there, transfixed. These weren’t just blobs; they were tiny, perfect ghosts, each with a slightly different, goofy little face. She was using a plastic sandwich bag with the corner snipped off—no fancy piping equipment, no stress, no fuss. She handed me a toothpick and told me to “make them look scared or happy, it doesn’t matter.” Honestly, that casualness is the whole point of this recipe. It wasn’t a performance; it was just Tuesday.
Maybe you’ve been there, scrolling through Pinterest looking for a Halloween treat that doesn’t require a trip to a specialty baking store or a degree in pastry arts. That’s exactly what these easy ghost meringue cookies are. They are light, crunchy, and melt-in-your-mouth sweet, but the real magic is how ridiculously simple they are to pull off. I’ve made them every year since that afternoon at Brenda’s, and they never fail to get a laugh and a “wait, you made these?” from everyone who sees them. Let’s just say, this recipe stayed with me because it proved that sometimes the best things come from not trying so hard.
Why You’ll Love This Recipe
Let’s face it, Halloween can be a lot. Between the costumes, the decorations, and the sugar rush, the last thing you need is a complicated baking project. These ghost meringue cookies are my secret weapon for a reason. They look like you spent hours, but they come together in a flash with ingredients you probably already have in your pantry. I’ve been making these for years, testing different temperatures and sugar ratios, and this version is the one that works every single time—no weeping, no cracking, just perfect little spooks.
- Quick & Easy: From start to finish, you’re looking at about 15 minutes of active prep time. The oven does the rest of the work while you get on with your day.
- Simple Ingredients: You only need four basic things: egg whites, sugar, vanilla, and a pinch of salt. No fancy extracts, no food coloring required.
- Perfect for Halloween: These are the ultimate treat for school parties, office potlucks, or just a fun afternoon activity with the kids. They’re naturally gluten-free, too.
- Crowd-Pleaser: I’ve yet to meet a kid or adult who can resist the charm of a tiny, smiling ghost. They always disappear first from the dessert table.
- Unbelievably Delicious: That light, airy texture that shatters when you bite into it? Pure magic. It’s like a sweet little cloud that melts away.
What makes this recipe different from the hundreds of other meringue recipes out there is the technique. We’re using a stable, foolproof Swiss meringue method that heats the sugar with the egg whites first. This eliminates the risk of a gritty texture and ensures your ghosts hold their shape perfectly. It’s not just another version—it’s the best version, born from a neighbor’s casual genius and perfected in my own kitchen.
What Ingredients You Will Need
This recipe uses the simplest of ingredients to create something truly magical. You don’t need a grocery list longer than your arm, which is exactly the point. These are pantry staples that come together to deliver a light, crisp, and delightfully spooky treat.
- 3 large egg whites (room temperature is best—they whip up fluffier and more stable)
- ¾ cup (150g) granulated sugar (regular white sugar works perfectly; avoid superfine as it can dissolve too quickly)
- 1 teaspoon vanilla extract (pure vanilla extract gives the best flavor, but imitation works in a pinch)
- ⅛ teaspoon cream of tartar (this stabilizes the egg whites and helps them hold their shape; you can substitute with a squeeze of lemon juice)
- Mini chocolate chips (for the eyes and mouth—about ¼ cup, but you’ll have leftovers)
I personally recommend using large, fresh eggs for the best volume. Older egg whites can be a bit runny and won’t whip up as well. If you can, buy a brand like Eggland’s Best or any local farm-fresh eggs—the difference in the structure of the meringue is noticeable. Also, make sure your bowl and whisk are completely clean and free of any grease. A tiny bit of fat can prevent your egg whites from whipping up at all. Trust me, I learned that the hard way on a particularly frustrating afternoon.
For the chocolate chips, I like using Ghirardelli mini chips because they are small enough to stick to the meringue without falling off. You could also use a tiny bit of melted dark chocolate in a piping bag if you’re feeling fancy, but honestly, the mini chips are so much easier and give the ghosts a cute, slightly chunky look. No substitutions are needed for this simple list—just good, honest ingredients.
Equipment Needed
The beauty of this recipe is that it doesn’t require a lot of fancy gear. You probably have most of this stuff in your kitchen already. Here’s what you’ll need to get the job done.
- Electric mixer (a stand mixer with a whisk attachment is ideal, but a hand-held electric mixer works just fine—it’ll just take a little longer)
- Large heatproof mixing bowl (glass or metal is best; avoid plastic as it can hold onto grease)
- Saucepan (for creating a double boiler to heat the egg whites and sugar)
- Baking sheet (a standard half-sheet pan works perfectly)
- Parchment paper (this is non-negotiable; the meringues will stick to a greased pan)
- Piping bag or large zip-top bag (a disposable piping bag is nice, but a sturdy zip-top bag with the corner snipped off works like a charm—Brenda style!)
- Rubber spatula (for scraping down the sides of the bowl)
- Toothpick (for placing the chocolate chip eyes and mouth)
If you don’t have a double boiler, don’t worry. You can easily create one by placing your heatproof bowl over a saucepan of simmering water. Just make sure the bottom of the bowl doesn’t touch the water. For a budget-friendly piping option, a simple zip-top bag is all you need. I’ve been using the same method for years, and it’s never let me down. Just make sure the bag is dry inside before you add the meringue.
Preparation Method
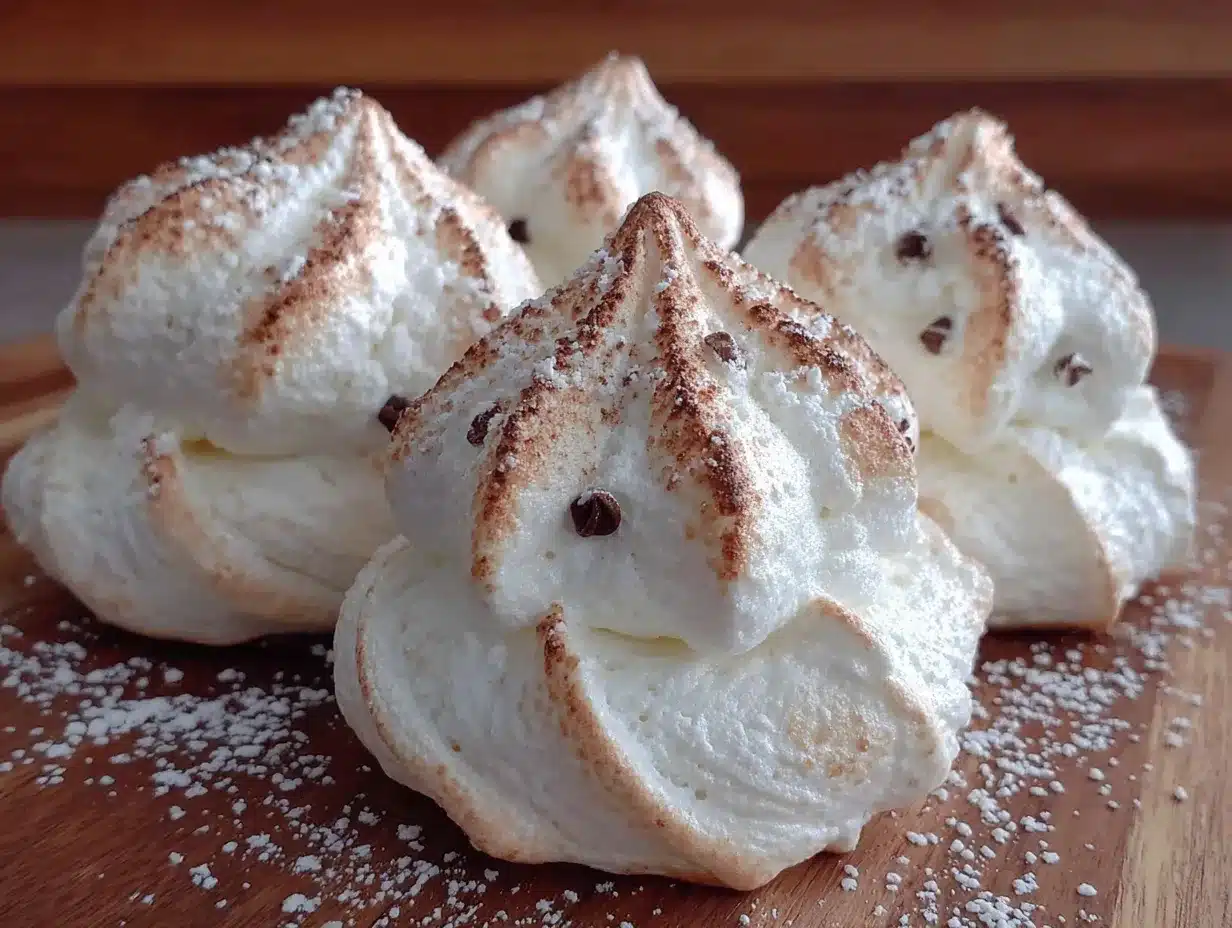
Alright, let’s get to the fun part. This process is surprisingly meditative, and the payoff is huge. Follow these steps, and you’ll have a tray of adorable ghost cookies in no time.
- Preheat and prepare. Preheat your oven to 200°F (95°C). Yes, that’s low and slow—we’re drying the meringues, not baking them. Line your baking sheet with parchment paper and set it aside.
- Create the Swiss meringue base. In your heatproof bowl, combine the egg whites, granulated sugar, and cream of tartar. Whisk them together by hand until just combined. Place the bowl over your saucepan of simmering water (the water should not touch the bottom of the bowl). Whisk constantly for about 3-4 minutes, until the sugar is completely dissolved and the mixture feels hot to the touch. You can test this by rubbing a tiny bit between your fingers—it should feel smooth, not gritty.
- Whip it good. Remove the bowl from the heat and attach it to your electric mixer. Start on low speed and gradually increase to medium-high. Whip the mixture until it forms stiff, glossy peaks. This will take about 5-7 minutes with a stand mixer, or 8-10 minutes with a hand mixer. The bowl should feel cool to the touch by the time you’re done. You’ll know it’s ready when you lift the whisk and the meringue stands up in a firm peak that doesn’t droop.
- Add the flavor. With the mixer still running on low, add the vanilla extract. Mix for just another 10 seconds until it’s fully incorporated. Be careful not to overmix at this stage, or you’ll deflate your beautiful, fluffy meringue.
- Pipe the ghosts. Spoon the meringue into your piping bag or zip-top bag. If using a zip-top bag, snip about ½ inch off one corner. Hold the bag straight up and down over your prepared baking sheet. Squeeze out a small mound of meringue, about 1.5 inches wide, then pull the bag straight up to create a little peak on top. Don’t worry if they look uneven—ghosts are supposed to be a little wonky! Space them about an inch apart, as they won’t spread much.
- Add the faces. Here’s where the personality comes in. Working quickly before the meringue starts to set, use a toothpick to gently press two mini chocolate chips into each ghost for eyes, and one for a mouth. You can make them look happy, scared, or surprised—it’s completely up to you. I always make a few that look like they’re screaming, just for fun.
- Bake low and slow. Place the baking sheet in the preheated oven and bake for 60-75 minutes. The meringues are done when they are dry to the touch and easily peel off the parchment paper. They should not be browned at all—if they start to color, your oven is too hot. Turn off the oven and leave the meringues inside to cool completely for at least an hour. This helps them dry out completely and ensures that perfect, crunchy texture.
A quick note: if your kitchen is humid, the meringues might take a little longer to dry out. That’s totally normal. Just be patient and let them hang out in the turned-off oven until they are completely crisp. I once tried to rush this step on a rainy day and ended up with chewy ghosts—not the vibe we’re going for.
Cooking Tips & Techniques
Over the years, I’ve had my fair share of meringue mishaps. A batch that never got stiff, another that wept little sugary tears in the oven, and one particularly tragic batch that deflated into sad, flat puddles. Here are the lessons I learned the hard way so you don’t have to.
Room temperature egg whites are non-negotiable. Cold egg whites take forever to whip up and won’t hold as much air. Separate your eggs when they’re cold (it’s easier), then let the whites sit on the counter for about 30 minutes before you start. This small step makes a world of difference in volume and stability.
Don’t skip the cream of tartar. This acidic ingredient is like insurance for your meringue. It stabilizes the egg white proteins and helps them hold their shape, especially in a humid environment. If you don’t have any, a few drops of lemon juice or white vinegar will do the same job.
Patience is key with the sugar. When you’re heating the egg whites and sugar over the double boiler, make sure every single grain of sugar is dissolved before you start whipping. If you don’t, your meringue will be gritty and might even weep in the oven. Rub a bit between your fingers—if it feels smooth, you’re good to go.
Low and slow is the only way. I cannot stress this enough. Baking meringues at a high temperature will cause them to crack, brown, or even collapse. We are drying them out, not baking them. If your oven runs hot, consider using an oven thermometer to make sure it’s accurate. My old oven used to run 25 degrees hot, and it took me three batches to figure out why my ghosts were looking tan instead of pale white.
Multitasking tip: While your meringue is whipping, you can line your baking sheets and get your piping bag ready. This saves a few minutes and keeps the workflow smooth. Also, make sure your chocolate chips are ready to go in a small bowl—fumbling for them while trying to pipe faces is a recipe for disaster.
Variations & Adaptations
Once you’ve mastered the basic ghost, the possibilities are honestly endless. This recipe is a great canvas for a little creativity. Here are a few ways I’ve adapted it over the years.
Flavor variations: Swap the vanilla extract for peppermint extract for a cool, minty ghost. Or try almond extract for a subtle, nutty flavor that pairs beautifully with the sweet meringue. For a fun twist, add a drop of orange extract and a tiny pinch of orange zest for a creamsicle-inspired Halloween treat.
Dietary adaptations: This recipe is naturally gluten-free and dairy-free, which makes it a winner for parties with dietary restrictions. For a lower-sugar version, you can try using a sugar substitute like Swerve or monk fruit sweetener, but keep in mind that the texture might be slightly different. I’ve tried it with coconut sugar, and while it tastes good, the ghosts turn a rather unappealing brown color.
Spooky color options: If you want to get a little more festive, you can tint your meringue with gel food coloring. A tiny drop of purple or orange gel color swirled into the meringue before piping creates a marbled, tie-dye effect that looks really cool. Just be careful not to overmix, or you’ll lose the swirl.
Different shapes: Who says you have to make ghosts? You can pipe the same meringue into little pumpkins (use a star tip and top with a tiny piece of green candy), bats (pipe two small triangles for wings), or even witches’ hats (pipe a flat disc and a small cone on top). I did a whole army of tiny pumpkins one year, and they were a huge hit.
Personal variation: My absolute favorite twist is to dip the bottom of each finished ghost in a thin layer of melted dark chocolate. Once the chocolate sets, you have a ghost with a chocolate skirt. The combination of the light, airy meringue and the rich, bitter chocolate is absolutely divine. Just make sure the meringues are completely cool before you dip them.
Serving & Storage Suggestions
These little ghosts are best served at room temperature, and they are the star of any Halloween spread. I like to pile them high on a vintage cake stand or arrange them in a glass jar for a fun, whimsical centerpiece. They look amazing next to a bowl of candy corn or nestled among some fake spider webs.
For a Halloween party, I’ve also used them as cupcake toppers. Just stick one gently into the frosting of a chocolate cupcake, and you have an instant, impressive decoration. They also make a great topping for a bowl of ice cream or a mug of hot chocolate—they’ll float on top like little marshmallow ghosts.
As for storage, these meringues are surprisingly resilient when kept dry. Store them in an airtight container at room temperature for up to two weeks. I like to layer them between sheets of parchment paper to prevent them from bumping into each other and breaking. Do not store them in the refrigerator—the moisture will make them sticky and soft.
You can also freeze the baked meringues for up to three months. Place them in a single layer in a freezer-safe container, with parchment between layers. To thaw, just let them sit at room temperature for about 15 minutes. They won’t lose their crunch at all. I often make a double batch and freeze half for a last-minute Halloween emergency—you know, like when you realize you need a treat for the school party at 9 PM the night before.
Nutritional Information & Benefits
While these are definitely a treat, they are surprisingly light compared to a lot of Halloween cookies and candies. Here’s a rough estimate of the nutritional value per ghost (assuming you get about 24 ghosts from the batch).
| Nutrient | Amount Per Ghost |
|---|---|
| Calories | 25 |
| Fat | 0g |
| Carbohydrates | 6g |
| Sugar | 6g |
| Protein | 0.5g |
From a wellness perspective, these are a great option if you’re looking for a treat that’s free of gluten, dairy, and nuts. They are also very low in fat and calories compared to a standard cookie. The main ingredient, egg whites, is a good source of protein and contains no cholesterol. Of course, they are still a sugar-based treat, so enjoy them in moderation—but honestly, who can eat just one?
Potential allergens: This recipe contains eggs. It is naturally free of gluten, dairy, soy, and nuts, but always check your chocolate chip labels to be sure they are processed in a nut-free facility if that’s a concern.
Conclusion
These easy ghost meringue cookies are everything a Halloween treat should be: fun, simple, and genuinely delicious. They prove that you don’t need a lot of fancy ingredients or hours of free time to make something that looks and tastes amazing. Whether you’re making them for a kids’ party, a work gathering, or just a fun afternoon with your own family, they are guaranteed to bring a smile to everyone’s face.
I love this recipe because it reminds me that the best things in life are often the simplest. It’s a little piece of that Tuesday afternoon at Brenda’s house, captured in a light, crunchy, vanilla-scented cookie. So go ahead, grab your whisk, and give these a try. Don’t be afraid to let your ghosts have a little personality—the wonkier, the better. I’d love to hear how yours turn out! Drop a comment below and tell me what kind of faces your ghosts made, or share a photo of your spooky creations. Happy Halloween, and happy baking!
Frequently Asked Questions
Can I make these meringue ghosts without a stand mixer?
Absolutely! A hand-held electric mixer works perfectly fine. It will just take a little longer to whip the meringue to stiff peaks—probably around 8-10 minutes instead of 5-7. Just be patient and keep mixing until the mixture is glossy and holds a firm peak.
Why did my meringue turn out sticky or chewy?
This usually happens for one of two reasons: either the meringues were not baked long enough to dry out completely, or they were stored in a humid environment. Make sure you bake them for the full 60-75 minutes, and let them cool completely in the turned-off oven. Store them in an airtight container at room temperature, not in the fridge.
Can I use liquid food coloring for colored ghosts?
I would recommend using gel food coloring instead of liquid. Liquid coloring can add too much moisture to the meringue, which can cause it to deflate or become sticky. A tiny drop of gel color is all you need, and it won’t affect the texture.
How do I know when the sugar is fully dissolved?
The best test is the “finger test.” After you’ve heated the egg white and sugar mixture over the double boiler, dip a clean finger into the mixture and rub a tiny bit between your thumb and finger. If it feels smooth and you can’t feel any sugar grains, it’s ready. If it feels gritty, keep whisking over the heat for another minute.
Can I pipe these into different shapes for other holidays?
Yes, this recipe is incredibly versatile! For Christmas, pipe them into little trees or snowmen. For Valentine’s Day, make small hearts. For Easter, pipe tiny eggs or bunnies. The same meringue recipe works for any shape—just adjust the baking time slightly for smaller or larger cookies.
Pin This Recipe!
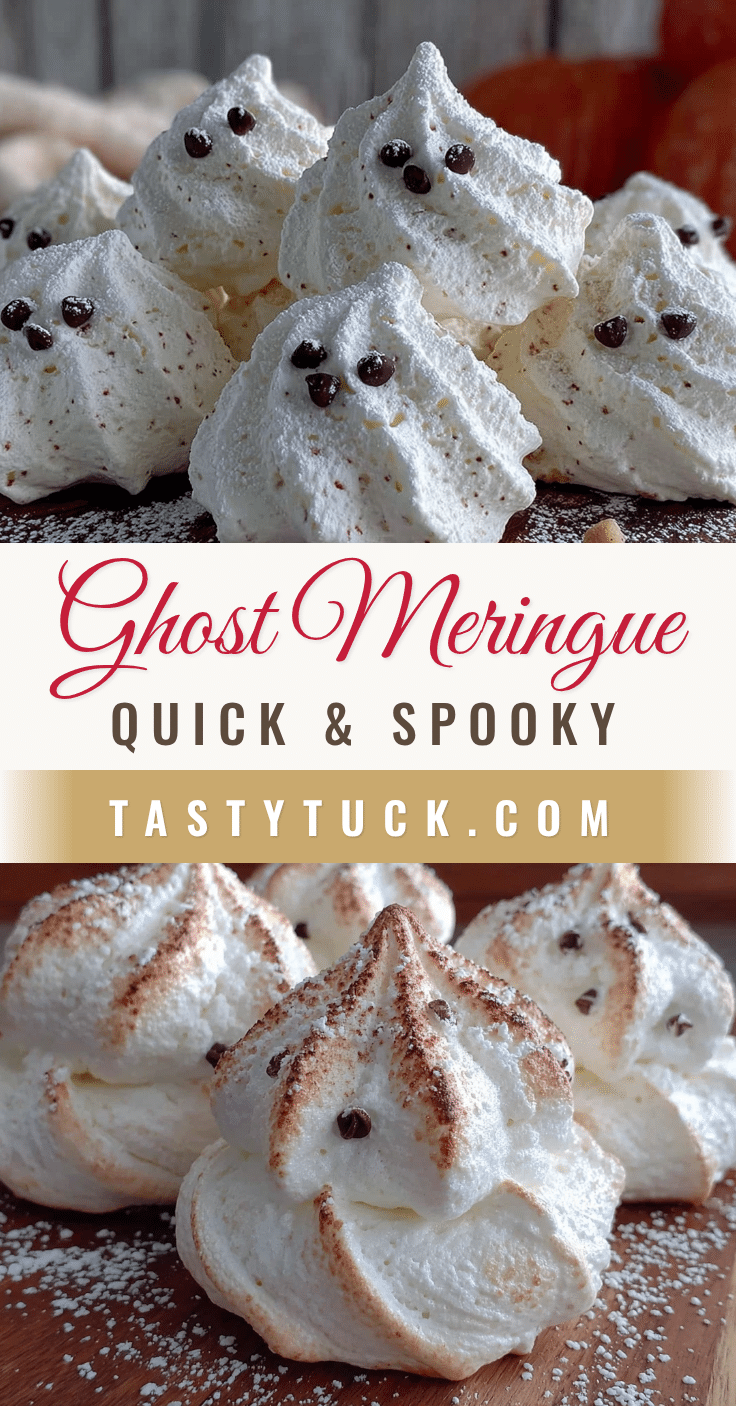
Easy Ghost Meringue Cookies: Best Quick Halloween Treat
These light, crunchy, and melt-in-your-mouth ghost meringue cookies are the perfect Halloween treat. Made with just four simple ingredients, they come together in minutes and are naturally gluten-free.
- Prep Time: 15 minutes
- Cook Time: 60-75 minutes
- Total Time: 1 hour 30 minutes
- Yield: 24 servings 1x
- Category: Dessert
- Cuisine: American
Ingredients
- 3 large egg whites (room temperature)
- ¾ cup (150g) granulated sugar
- 1 teaspoon vanilla extract
- ⅛ teaspoon cream of tartar
- ¼ cup mini chocolate chips (for eyes and mouth)
Instructions
- Preheat your oven to 200°F (95°C). Line a baking sheet with parchment paper and set aside.
- In a heatproof bowl, combine the egg whites, granulated sugar, and cream of tartar. Whisk together by hand until just combined.
- Place the bowl over a saucepan of simmering water (the water should not touch the bottom of the bowl). Whisk constantly for about 3-4 minutes, until the sugar is completely dissolved and the mixture feels hot to the touch. Test by rubbing a tiny bit between your fingers—it should feel smooth, not gritty.
- Remove the bowl from the heat and attach it to your electric mixer. Start on low speed and gradually increase to medium-high. Whip the mixture until it forms stiff, glossy peaks, about 5-7 minutes with a stand mixer or 8-10 minutes with a hand mixer. The bowl should feel cool to the touch.
- With the mixer still running on low, add the vanilla extract. Mix for just another 10 seconds until fully incorporated.
- Spoon the meringue into a piping bag or a large zip-top bag. If using a zip-top bag, snip about ½ inch off one corner. Hold the bag straight up and down over the prepared baking sheet. Squeeze out small mounds of meringue, about 1.5 inches wide, then pull the bag straight up to create a little peak on top. Space them about an inch apart.
- Working quickly before the meringue sets, use a toothpick to gently press two mini chocolate chips into each ghost for eyes and one for a mouth.
- Bake for 60-75 minutes, until the meringues are dry to the touch and easily peel off the parchment paper. They should not be browned.
- Turn off the oven and leave the meringues inside to cool completely for at least an hour.
Notes
For best results, use room temperature egg whites and ensure your bowl and whisk are completely clean and free of grease. If your kitchen is humid, the meringues may take longer to dry out. Store in an airtight container at room temperature for up to two weeks. Do not refrigerate.
Nutrition
- Serving Size: 1 ghost cookie
- Calories: 25
- Sugar: 6
- Sodium: 10
- Carbohydrates: 6
- Protein: 0.5
Keywords: Halloween cookies, meringue cookies, ghost cookies, easy Halloween treats, gluten-free cookies, kid-friendly Halloween


