There used to be this tiny bakery tucked away on a side street in Portland called The Witching Hour that made the most incredible black cat sugar cookies. When they closed their doors three years ago—just packed up and vanished one October morning—I honestly felt a little lost. Those cookies were my unofficial kickoff to Halloween season every single year, and I’d been buying them since my first apartment. After about fifteen tries—some of which looked more like gremlins than cats, let me tell you—I finally cracked the code.
The secret wasn’t in some fancy technique. It was in getting the balance right between a cookie that holds its shape and one that actually tastes good. Because let’s face it, nobody wants a rock-hard cookie that looks cute but breaks a tooth. I spent one whole weekend just testing different butter ratios and chilling times, and my kitchen looked like a cat cookie graveyard by Sunday night. But when I pulled that final batch out of the oven and saw those perfect little black cat faces staring back at me, I actually teared up a little. Maybe you’ve been there—that feeling when you finally nail a recipe that meant something to you.
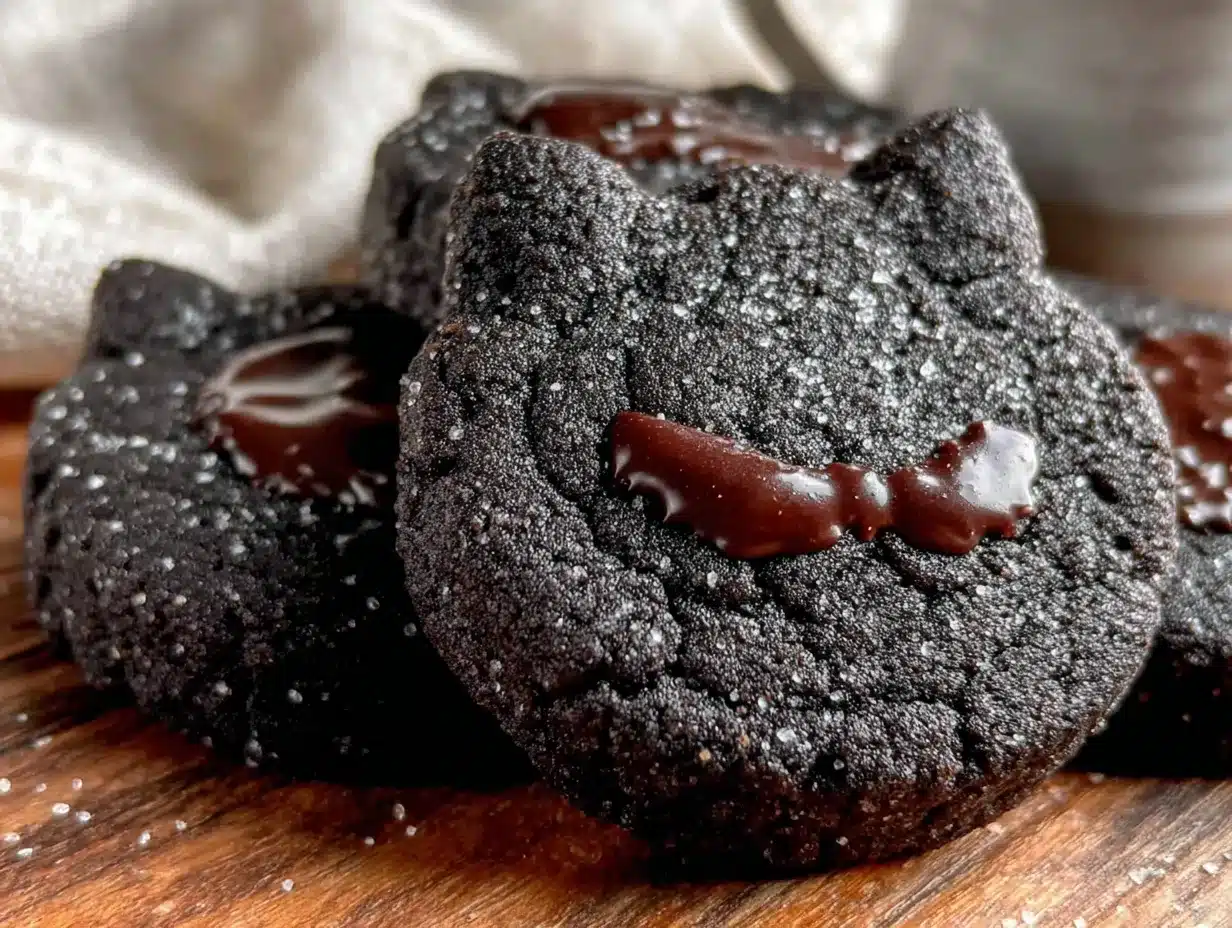
These spooky black cat sugar cookies have that same buttery, slightly crisp edge with a soft center that the original had. The black cocoa powder gives them that deep, dark color without tasting artificial, and the royal icing eyes are just creepy enough to be fun. I keep making them because they bring back that bakery memory, sure, but also because watching kids’ faces light up when they see these little guys is pure magic. Halloween just isn’t the same without them.
Why You’ll Love This Recipe
I’ve tested this recipe more times than I care to count, and I can tell you with confidence—this is the one. These black cat sugar cookies check every box you could want for Halloween baking.
- Perfectly Spooky Appearance : The black cocoa powder creates that deep, midnight-black color that looks professional without any artificial food coloring. Your cookies will actually look like little black cats, not gray blobs.
- Holds Shape Beautifully : No more cookies that spread into unrecognizable puddles. This dough keeps its shape during baking, so your cat outlines stay crisp and defined. That’s a game-changer for cut-out cookies.
- Amazing Texture : You get that satisfying snap when you bite into the edge, but the center stays tender and buttery. It’s the texture sweet spot that most sugar cookies miss.
- Simple Ingredients : Everything in this recipe is a pantry staple. No weird extracts or specialty items except maybe the black cocoa powder, which is easy to find online or at well-stocked grocery stores.
- Kid-Friendly Activity : This is the kind of baking project that gets everyone involved. Kids love cutting out the cat shapes and piping on the faces. It’s messy, it’s fun, and it creates Halloween memories.
- Make-Ahead Friendly : The dough freezes beautifully, and the baked cookies stay fresh for over a week. You can prep everything ahead and focus on decorating when you’re ready.
What makes this recipe different from every other black cat cookie out there is the chilling method. I figured out that a 30-minute freeze before baking locks in those cat shapes perfectly. Plus, the royal icing recipe I’m sharing dries hard but doesn’t crack—a problem I fought with for way too long. This isn’t just another sugar cookie recipe. It’s the one that made me stop looking for alternatives.
What Ingredients You Will Need
This recipe uses simple, wholesome ingredients that come together to create something truly special. Most of these are probably already in your kitchen, which makes this a great last-minute Halloween project.
For the Cookie Dough
- 1 cup (226g) unsalted butter , softened to room temperature (I use Kerrygold for the best flavor, but any good butter works). Make sure it’s truly softened—not melted—or your dough will spread.
- 1 cup (200g) granulated sugar . Regular white sugar gives these cookies that classic sweetness and helps with the crisp edges.
- 1 large egg , at room temperature. Cold eggs can make the dough seize up, so let yours sit out for about 30 minutes first.
- 1 teaspoon vanilla extract . Pure vanilla makes a difference here, but imitation works in a pinch. I like Nielsen-Massey for its rich flavor.
- 2 ½ cups (312g) all-purpose flour . Spoon and level your flour—don’t scoop straight from the bag or you’ll end up with dry cookies.
- ½ cup (50g) black cocoa powder . This is the star ingredient. Black cocoa is different from regular cocoa—it’s more alkalized and gives that intense dark color. I recommend Rodelle or King Arthur brands.
- ½ teaspoon baking powder . Helps the cookies rise just slightly without losing their shape.
- ¼ teaspoon salt . Balances the sweetness and enhances the chocolate flavor. Fine sea salt works best here.
For the Royal Icing
- 2 cups (240g) powdered sugar , sifted. Sifting prevents lumps that can clog your piping tip.
- 2 tablespoons meringue powder . This stabilizes the icing and helps it dry hard. I use Wilton brand.
- 3-4 tablespoons water , plus more as needed. Add slowly—you want a consistency that holds its shape but flows smoothly.
- Black gel food coloring (optional, for darker icing). The royal icing won’t be as dark as the cookies naturally, so a tiny bit of black gel helps.
- Yellow or white gel food coloring , for the eyes.
If you can’t find black cocoa powder, you can substitute Dutch-process cocoa mixed with a tiny bit of black gel food coloring. The color won’t be quite as intense, but it’ll still look great. For a dairy-free version, swap the butter with a high-quality vegan butter stick—I’ve had good results with Earth Balance. Just make sure it’s the stick form, not the spreadable kind in a tub.
Equipment Needed
You don’t need a professional bakery setup for these cookies, but a few key tools make the process much smoother.
- Cat-shaped cookie cutter . This is non-negotiable. I found mine on Amazon for about eight dollars, and it’s about 4 inches tall. You can also find them at craft stores during Halloween.
- Stand mixer or hand mixer . Creaming the butter and sugar properly is crucial, and doing it by hand is exhausting. A stand mixer with the paddle attachment is ideal.
- Rolling pin with thickness guides . Even thickness means even baking. I love my adjustable rolling pin with removable rings—it takes the guesswork out.
- Parchment paper or silicone baking mats . Silpat mats are my preference because they conduct heat evenly and nothing sticks.
- Baking sheets . Light-colored, rimmed baking sheets work best. Dark sheets can over-brown the bottoms.
- Piping bags and small round tips . A #2 or #3 tip works perfectly for the eyes and details. Disposable piping bags are easiest for cleanup.
- Cooling racks . Wire racks allow air to circulate so your cookies cool completely without getting soggy bottoms.
- Sharp knife or bench scraper . For transferring cut-out shapes to the baking sheet without distorting them.
If you don’t have a stand mixer, a hand mixer works fine—just cream the butter and sugar for the full 3 minutes. And if you’re short on piping bags, a small zip-top bag with the corner snipped off does the job in a pinch. I’ve been there, and honestly, it works better than you’d think.
Preparation Method
Let me walk you through this step by step. Trust me on the chilling times—they’re what make these cookies work.
- Cream the butter and sugar . In your stand mixer fitted with the paddle attachment, beat the softened butter and granulated sugar together on medium speed for about 3 minutes. You want it light and fluffy—almost pale in color. Scrape down the sides and bottom of the bowl halfway through. Don’t rush this step; proper creaming creates the right texture.
- Add the egg and vanilla . Beat in the room-temperature egg and vanilla extract on low speed until just combined. The mixture might look slightly curdled at this point, and that’s totally normal. Don’t overmix here—you just want everything incorporated.
- Mix the dry ingredients . In a separate bowl, whisk together the all-purpose flour, black cocoa powder, baking powder, and salt. Whisking aerates the mixture and ensures the baking powder is evenly distributed. You’ll notice the cocoa powder might clump—break those up with your whisk.
- Combine wet and dry . Add the dry ingredients to the wet mixture in two additions, mixing on low speed after each. Stop as soon as the flour disappears. The dough will look crumbly at first, but keep mixing and it’ll come together. If it seems too dry, add a teaspoon of milk. If it’s sticky, add a tablespoon more flour.
- Divide and chill . Turn the dough out onto a lightly floured surface and divide it in half. Flatten each half into a disc about 1-inch thick, wrap tightly in plastic wrap, and refrigerate for at least 2 hours. I’ve skipped this step before out of impatience, and the cookies spread into sad, shapeless blobs. Don’t be like me—chill the dough.
- Preheat and prep . When you’re ready to bake, preheat your oven to 350°F (175°C). Line two baking sheets with parchment paper or silicone mats. Take one disc of dough out of the fridge and let it sit for 5 minutes—it’ll be easier to roll without cracking.
- Roll and cut . On a lightly floured surface, roll the dough to about ¼-inch thickness. Use your thickness guides if you have them. Cut out cat shapes using your cookie cutter, and use a bench scraper or thin spatula to transfer them to the prepared baking sheets, spacing them about 2 inches apart. Gather the scraps, re-roll, and cut more cookies.
- Freeze before baking . Here’s the trick: place the baking sheet with the cut-out cookies in the freezer for 30 minutes. This solidifies the butter and guarantees those cat shapes stay perfect. I learned this after my third failed batch—it’s absolutely worth the wait.
- Bake . Bake the frozen cookies for 10-12 minutes. The edges should look set but not browned. Black cocoa makes it hard to see doneness, so watch for the edges to look slightly dry. Let the cookies cool on the baking sheet for 5 minutes, then transfer to a wire rack to cool completely. They’ll firm up as they cool.
- Make the royal icing . While the cookies cool, whisk together the powdered sugar and meringue powder in a bowl. Add 3 tablespoons of water and beat on medium speed for 4 minutes until glossy and thick. Add more water a teaspoon at a time until it reaches a consistency that holds a ribbon for 10 seconds when you lift the whisk. Stir in a tiny dab of black gel food coloring if desired.
- Pipe the faces . Transfer the royal icing to a piping bag fitted with a #2 tip. Pipe two small oval or round shapes for the eyes, then fill them in. Add a tiny dot of yellow or white gel food coloring in the center of each eye for that glowing effect. Let the icing dry completely—about 2 hours at room temperature.
Cooking Tips & Techniques
After making these cookies more times than I’d like to admit, I’ve collected some hard-won wisdom that’ll save you from my mistakes.
Temperature is everything. I cannot stress this enough. If your butter is too warm, your cookies will spread. If your dough isn’t chilled long enough, same problem. I once tried to rush the process and ended up with cookies that looked like abstract art rather than cats. The 30-minute freeze before baking is non-negotiable—I’ve tested it with shorter times and the difference is dramatic.
Watch your oven like a hawk. Because black cocoa is so dark, you can’t rely on visual cues like browning to tell when cookies are done. I burned an entire batch because I thought they looked underbaked. Set your timer for 10 minutes and check by gently touching the edge of a cookie—it should feel set but still slightly soft in the center. They’ll continue baking on the hot sheet for those 5 minutes after you pull them out.
Rolling consistency matters. If some cookies are thicker than others, they’ll bake unevenly. Use those thickness guides—they’re cheap and they make a real difference. I used to eyeball it and always ended up with a few overbaked cookies. Now I roll once, check the thickness, and adjust before cutting.
Don’t overwork the dough. When you re-roll scraps, handle them as little as possible. The more you work the dough, the tougher the cookies get. I usually get about 18-20 cookies from the first roll and maybe 6-8 from the scraps, depending on your cutter size.
Royal icing consistency is tricky. If it’s too thick, it won’t smooth out. Too thin, and it’ll run right off the cookie. The perfect consistency is like slightly runny honey—it should hold its shape for a moment before slowly settling. I test by lifting my spatula and watching the ribbon of icing fall back into the bowl. If it disappears in 10 seconds, you’re good.
Plan your decorating workflow. Pipe all the eyes on every cookie first, then go back and fill them in. This way the icing has a consistent drying time. I learned this the hard way when my first cookie was dry and the last one was still wet, leading to a smudged mess.
Variations & Adaptations
One of the best things about this recipe is how adaptable it is. Here are some variations I’ve tried and loved.
Gluten-Free Version : Substitute the all-purpose flour with a good 1:1 gluten-free baking flour blend. I’ve used Bob’s Red Mill with great results. Add an extra tablespoon of flour to the dough since gluten-free flour absorbs moisture differently. The texture will be slightly more tender, but the shape holds just as well.
Orange Cats for Fall : Skip the black cocoa powder and use regular cocoa powder instead, then add orange gel food coloring to the dough. You’ll get adorable orange cats that feel more like traditional Halloween jack-o-lantern vibes. The flavor will be milder and more like a classic chocolate sugar cookie.
Ghost and Pumpkin Shapes : Use the same dough recipe but swap your cookie cutter for ghost or pumpkin shapes. The black cocoa works beautifully for any Halloween shape. I made a batch of ghosts last year and piped little “boo” faces on them—they were a huge hit at my niece’s Halloween party.
Vegan Adaptation : Replace the butter with vegan butter sticks and use a flax egg (1 tablespoon ground flaxseed mixed with 3 tablespoons water, let sit for 5 minutes). The texture will be slightly more crumbly, but the flavor is still fantastic. I tested this for a friend with dairy allergies and was pleasantly surprised.
Spiced Version : Add 1 teaspoon of pumpkin pie spice or cinnamon to the dry ingredients. The warm spices pair beautifully with the black cocoa and give the cookies a cozy fall flavor. This is my personal favorite variation—it smells like October in my kitchen.
Different Icing Colors : Instead of black icing for the faces, try white or bright green for a more whimsical look. I’ve done neon green eyes that glow under blacklight, which was a fun touch for a Halloween party. The kids went crazy for them.
Serving & Storage Suggestions
These cookies are best served at room temperature, and they actually taste even better the day after baking. The flavors meld together and the royal icing sets completely, giving you that perfect snap when you bite in.
Presentation ideas : Arrange the cookies on a black or orange platter for maximum Halloween impact. I like to display them on a cake stand with some fake spider webs and plastic spiders scattered around. For parties, place them in clear cellophane bags tied with orange ribbon—they make great party favors.
Pairing suggestions : These cookies pair beautifully with a glass of cold milk, a warm apple cider, or even a pumpkin spice latte. For adult gatherings, they’re fantastic with a dark stout beer or a bourbon old fashioned. The bitterness of the black cocoa complements the sweetness of the drinks.
Storage instructions : Store the decorated cookies in an airtight container at room temperature for up to 10 days. Layer them between sheets of parchment paper to prevent the icing from sticking. Do not refrigerate—the moisture in the fridge can make the royal icing soft and sticky.
Freezing instructions : You can freeze the unbaked cut-out cookies (before the 30-minute freeze) for up to 3 months. Just place them on a baking sheet in the freezer until solid, then transfer to a freezer bag. Bake directly from frozen, adding 2-3 minutes to the baking time. Baked and decorated cookies can also be frozen for up to 2 months—just wrap them individually in plastic wrap before placing in a freezer bag.
Flavor development : Honestly, these cookies get better after a day or two. The black cocoa flavor deepens and the texture becomes perfectly tender. If you can resist eating them all immediately, you’ll be rewarded with an even better cookie.
Nutritional Information & Benefits
Per cookie (based on 24 cookies), here’s the approximate nutritional breakdown:
- Calories : 165
- Total Fat : 8g
- Saturated Fat : 5g
- Carbohydrates : 22g
- Sugar : 12g
- Protein : 2g
- Fiber : 1g
- Sodium : 45mg
While these are definitely a treat, black cocoa powder does offer some health benefits. It’s rich in antioxidants called flavonoids, which can help reduce inflammation and support heart health. The butter provides vitamin A and healthy fats, and the egg adds a small amount of protein.
For those with dietary concerns, this recipe contains gluten and dairy. The vegan and gluten-free variations I shared above work well for most restrictions. These cookies are also nut-free as written, making them a safe option for school parties and gatherings where allergies are a concern.
I personally believe that treats like these have a place in a balanced lifestyle. Halloween comes once a year, and sharing homemade cookies with loved ones is good for the soul—even if it’s not exactly a health food. Everything in moderation, right?
Conclusion
These spooky black cat sugar cookies are more than just a Halloween treat—they’re a little piece of nostalgia that you can recreate in your own kitchen. After that bakery closed, I honestly thought I’d never taste those cookies again. But now, every October when I pull a batch out of the oven, I feel like I’ve brought a little bit of that magic back.
The best part is that you can make them your own. Change the shapes, switch up the colors, add your favorite spices—this recipe is a starting point for your own Halloween tradition. I’d love to hear how yours turn out. Did you try a fun variation? Did your kids have a blast decorating? Drop a comment below and let me know. And if you share them on social media, tag me—I want to see your spooky creations!
So go ahead, preheat that oven, and get ready to make some memories. These cookies have a way of bringing people together, and honestly, that’s what Halloween is all about. Happy baking, and may your cookies always be perfectly spooky!
Frequently Asked Questions
Can I use regular cocoa powder instead of black cocoa?
You can, but the color won’t be as dark. Regular cocoa powder will give you a brown cookie rather than a black one. If you can’t find black cocoa, add a tiny bit of black gel food coloring to regular cocoa powder to darken it. The flavor will be different too—black cocoa has a milder, more Oreo-like taste.
Why did my cookies spread during baking?
This usually happens when the dough isn’t chilled enough. Make sure you refrigerate the dough for at least 2 hours before rolling, and freeze the cut-out cookies for 30 minutes before baking. If your kitchen is warm, pop the baking sheet back in the fridge between batches.
How long does royal icing take to dry?
Royal icing typically takes 2-4 hours to dry completely at room temperature, depending on humidity. For best results, let the cookies sit uncovered overnight. Don’t stack them until the icing is fully hard to the touch—otherwise you’ll end up with smudged faces.
Can I make the dough ahead of time?
Absolutely! The dough can be refrigerated for up to 3 days or frozen for up to 3 months. Just wrap it tightly in plastic wrap and place it in a freezer bag. When you’re ready to use it, thaw it in the refrigerator overnight and let it sit at room temperature for 10 minutes before rolling.
My cookies are too hard. What went wrong?
Overbaking is the most common culprit. Remember that black cocoa makes it hard to see doneness, so rely on your timer and the touch test. Also, overworking the dough when re-rolling scraps can make cookies tough. Handle the dough as little as possible, and consider using the scraps for a smaller batch of softer cookies.
Pin This Recipe!
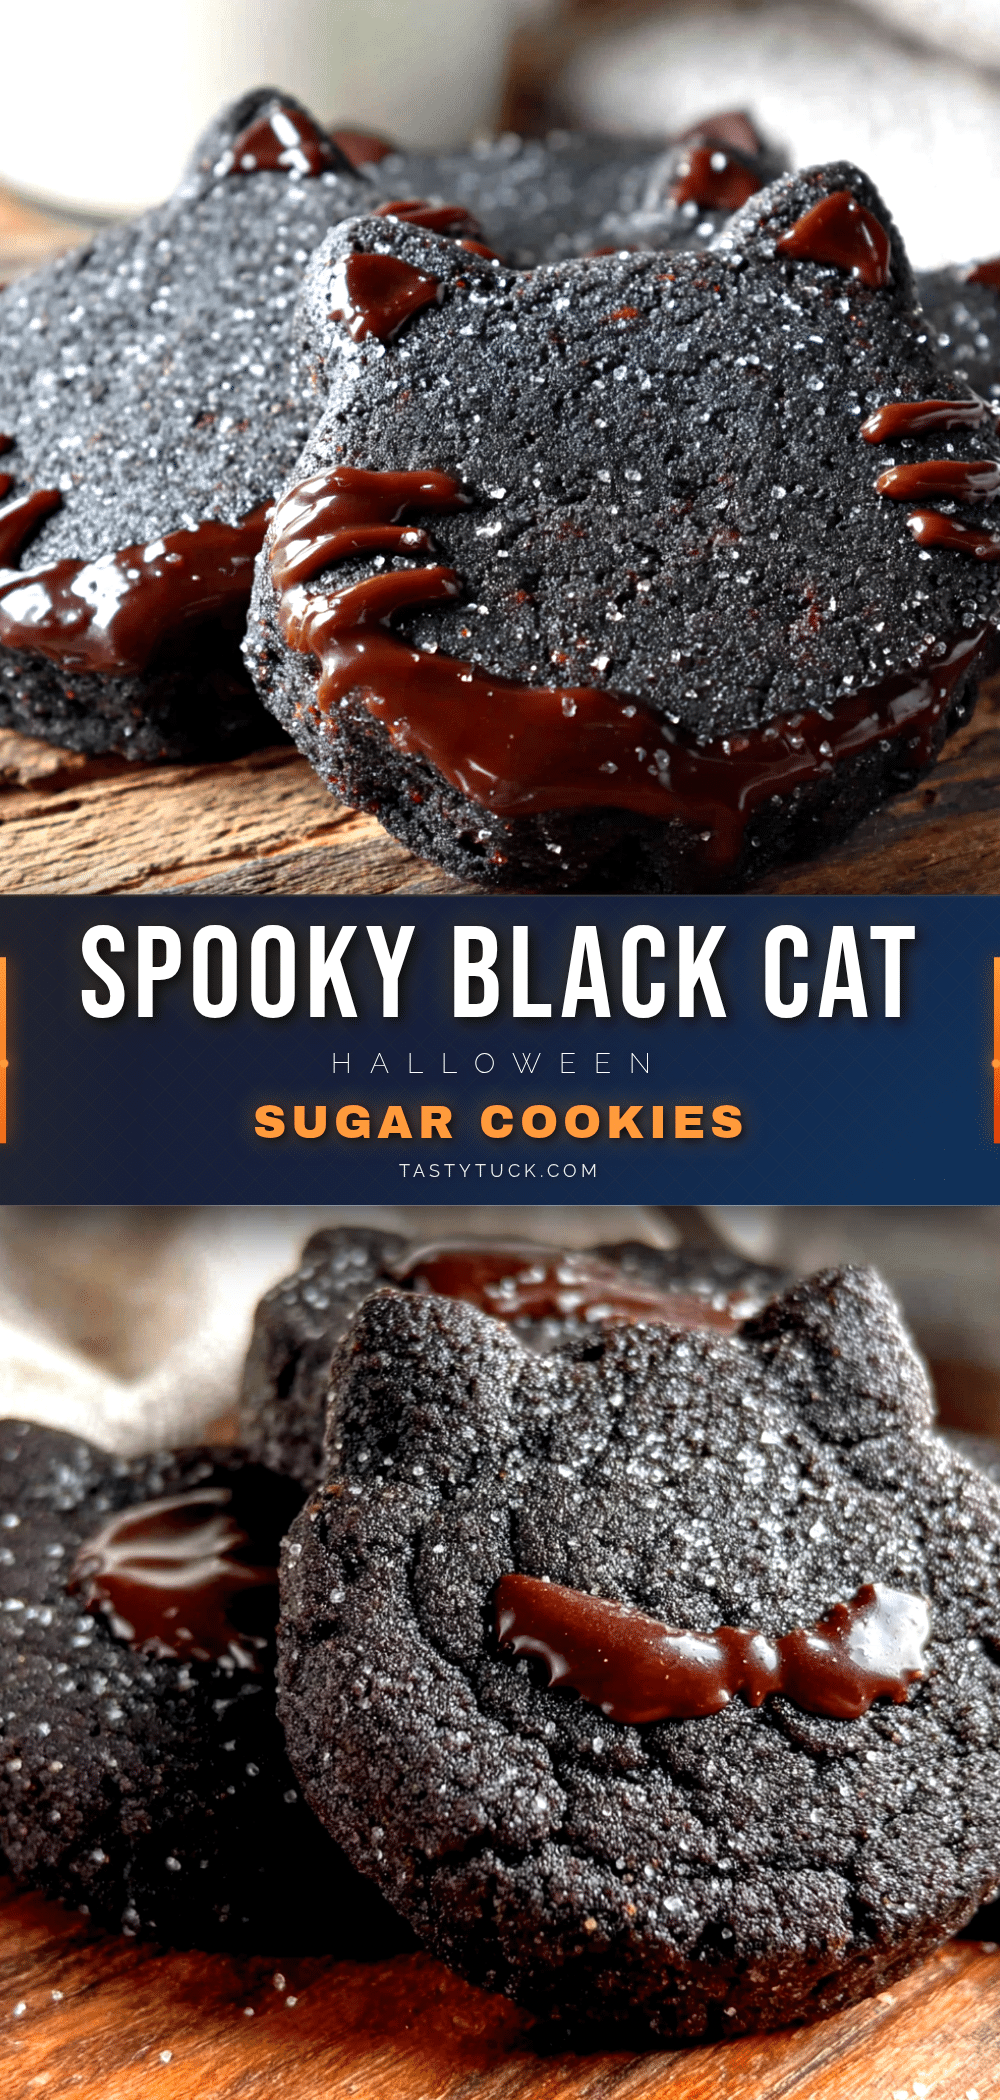
Best Easy Black Cat Sugar Cookies for Halloween Baking
These spooky black cat sugar cookies have a buttery, slightly crisp edge with a soft center. The black cocoa powder gives them a deep, dark color without artificial taste, and the royal icing eyes are just creepy enough to be fun.
- Prep Time: 30 minutes
- Cook Time: 12 minutes
- Total Time: 2 hours 42 minutes (includes chilling and drying time)
- Yield: 24 cookies 1x
- Category: Dessert
- Cuisine: American
Ingredients
- 1 cup (226g) unsalted butter, softened to room temperature
- 1 cup (200g) granulated sugar
- 1 large egg, at room temperature
- 1 teaspoon vanilla extract
- 2 ½ cups (312g) all-purpose flour
- ½ cup (50g) black cocoa powder
- ½ teaspoon baking powder
- ¼ teaspoon salt
- 2 cups (240g) powdered sugar, sifted
- 2 tablespoons meringue powder
- 3–4 tablespoons water, plus more as needed
- Black gel food coloring (optional)
- Yellow or white gel food coloring
Instructions
- Cream the butter and sugar: In a stand mixer fitted with the paddle attachment, beat the softened butter and granulated sugar together on medium speed for about 3 minutes until light and fluffy. Scrape down the sides and bottom of the bowl halfway through.
- Add the egg and vanilla: Beat in the room-temperature egg and vanilla extract on low speed until just combined. The mixture might look slightly curdled, which is normal.
- Mix the dry ingredients: In a separate bowl, whisk together the all-purpose flour, black cocoa powder, baking powder, and salt. Break up any cocoa clumps with the whisk.
- Combine wet and dry: Add the dry ingredients to the wet mixture in two additions, mixing on low speed after each. Stop as soon as the flour disappears. If the dough seems too dry, add a teaspoon of milk; if sticky, add a tablespoon more flour.
- Divide and chill: Turn the dough out onto a lightly floured surface and divide it in half. Flatten each half into a 1-inch thick disc, wrap tightly in plastic wrap, and refrigerate for at least 2 hours.
- Preheat and prep: When ready to bake, preheat oven to 350°F (175°C). Line two baking sheets with parchment paper or silicone mats. Take one disc of dough out of the fridge and let it sit for 5 minutes.
- Roll and cut: On a lightly floured surface, roll the dough to about ¼-inch thickness. Cut out cat shapes using a cookie cutter, and transfer them to the prepared baking sheets, spacing about 2 inches apart. Gather scraps, re-roll, and cut more cookies.
- Freeze before baking: Place the baking sheet with cut-out cookies in the freezer for 30 minutes.
- Bake: Bake the frozen cookies for 10-12 minutes. The edges should look set but not browned. Let cookies cool on the baking sheet for 5 minutes, then transfer to a wire rack to cool completely.
- Make the royal icing: Whisk together the powdered sugar and meringue powder in a bowl. Add 3 tablespoons of water and beat on medium speed for 4 minutes until glossy and thick. Add more water a teaspoon at a time until it reaches a consistency that holds a ribbon for 10 seconds. Stir in a tiny dab of black gel food coloring if desired.
- Pipe the faces: Transfer the royal icing to a piping bag fitted with a #2 tip. Pipe two small oval or round shapes for the eyes, then fill them in. Add a tiny dot of yellow or white gel food coloring in the center of each eye. Let the icing dry completely, about 2 hours at room temperature.
Notes
The 30-minute freeze before baking is crucial for maintaining cookie shape. Black cocoa makes it hard to see doneness, so rely on the timer and touch test. Royal icing should be like slightly runny honey; test by lifting the spatula and watching the ribbon fall back into the bowl—if it disappears in 10 seconds, it’s perfect. Cookies taste even better the day after baking as flavors meld.
Nutrition
- Serving Size: 1 cookie
- Calories: 165
- Sugar: 12
- Sodium: 45
- Fat: 8
- Saturated Fat: 5
- Carbohydrates: 22
- Fiber: 1
- Protein: 2
Keywords: black cat sugar cookies, Halloween cookies, sugar cookies, black cocoa cookies, Halloween baking, spooky cookies, cut-out cookies


