I was standing in the grocery store parking lot last October when the smell hit me — that weirdly specific scent of warm cinnamon and cold apples mixing with the damp autumn air. And suddenly I was seven years old again, sitting on my aunt Maggie’s cracked vinyl kitchen stool, watching her slice apples so thin you could practically see through them. She’d lay them out in a perfect spiral on a wooden board, drizzle caramel in zigzags, and let us kids go at it like it was the most natural thing in the world. She never called it a charcuterie board — she called it “the mess,” and honestly, that was more accurate.
Aunt Maggie passed about five years back, and I still haven’t gotten over the way she made something so simple feel like a celebration. I’ve been trying to recreate that feeling ever since, especially now that I’m feeding my own crew of picky eaters who’d rather snack than sit down for a proper meal. This kid-friendly caramel apple charcuterie board is my best attempt yet — and let me tell you, it took a few tries. The first time, I used fancy caramel that hardened into a rock-hard mess. The kids just stared at me. The dog got most of it.
But I kept at it, because that’s what you do when you’re chasing a memory you can almost taste. This version? It works. The apples stay crisp, the caramel stays soft enough to dip but firm enough not to drip everywhere, and the whole thing comes together in about fifteen minutes — which is about the length of time my youngest will tolerate before asking for a snack. Maybe you’ve been there, standing in your kitchen wondering how to make something special without spending all day. This board is for you. It’s for the nights when you want to treat your family without treating yourself to a headache.
Why You’ll Love This Recipe
I’ve tested this board more times than I care to admit — through soggy apples, runny caramel, and one particularly tragic incident involving a toddler and a jar of sprinkles. What I landed on is a recipe that actually works for real families with real budgets and real messes. Here’s why this one’s different:
- Quick & Easy: You can throw this together in under 15 minutes. No baking, no boiling, no fancy techniques. Just slice, arrange, and let the kids go wild.
- Simple Ingredients: Everything on this board comes from your regular grocery store. No specialty shops, no expensive imports, no ingredients you’ll use once and forget about.
- Perfect for Family Nights: Movie night, game night, Tuesday night — this board fits any occasion where you want something special without the stress.
- Crowd-Pleaser: I’ve served this at playdates, birthday parties, and even a grown-up gathering where the adults ate more than the kids. It disappears every single time.
- Unbelievably Delicious: The combination of crisp apples, creamy caramel, crunchy nuts, and sweet toppings is the kind of comfort food that makes everyone go quiet for a minute. Then they start reaching for seconds.
What makes this recipe different from the dozens of other apple boards out there is the caramel situation. I spent weeks testing different caramel options — from scratch, store-bought, even those little caramel candies melted down. The trick is using a high-quality store-bought caramel dip that stays soft at room temperature. It’s not fancy, but it works. And honestly, when you’re feeding kids, “works” is better than “fancy” every single time.
This isn’t just another snack board. It’s the kind that makes you close your eyes after the first bite because it tastes exactly like fall should taste. It’s comfort food reimagined — faster, simpler, but with the same soul-soothing satisfaction that makes you want to curl up on the couch and stay there.
What Ingredients You Will Need
This recipe uses simple, wholesome ingredients that come together to create something truly special. Most of these are pantry staples or easily found at any grocery store, which is exactly what you want when you’re feeding a family on a budget.
For the Apples
- 4-5 medium apples — I recommend a mix of sweet and tart varieties like Honeycrisp, Granny Smith, and Fuji. The contrast in flavors makes the board more interesting. (Look for firm apples without soft spots — they’ll hold up better on the board.)
- 1 lemon — You’ll use the juice to keep the apples from browning. Trust me on this one. (A little goes a long way — just a squeeze over the sliced apples is enough.)
For the Caramel
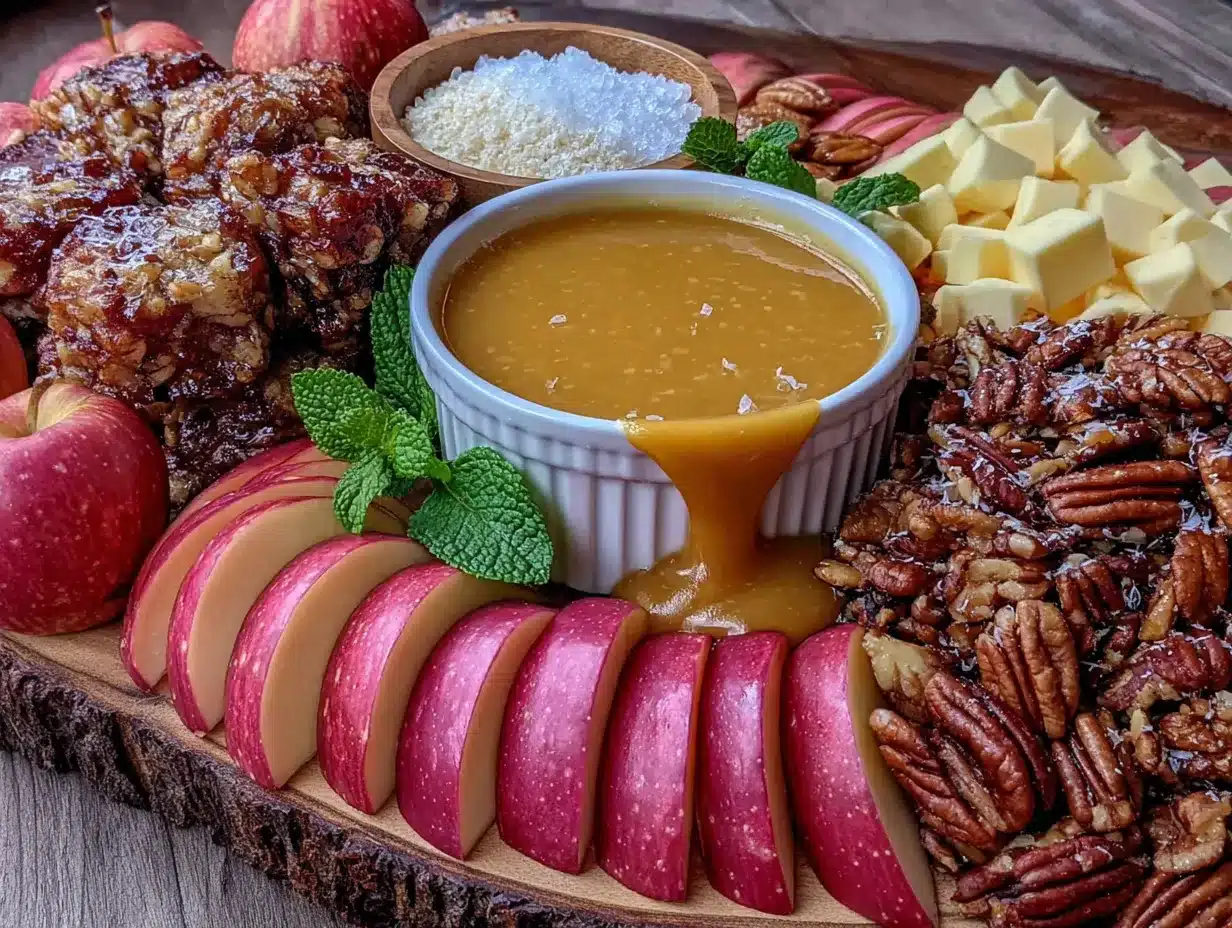
- 1 cup (240ml) caramel dip — I use the Marzetti brand caramel dip because it stays soft at room temperature and doesn’t harden into a sticky mess. (Store-bought is fine — no need to make your own unless you really want to.)
- 2 tablespoons (30ml) heavy cream — This thins the caramel just enough for easy dipping without making it runny. (You can skip this if your caramel is already thin enough.)
For the Toppings & Dippers
- 1/2 cup (60g) chopped peanuts — Crunchy, salty, and perfect for sprinkling over the caramel-covered apples. (Toast them lightly for extra flavor.)
- 1/2 cup (60g) mini chocolate chips — Because everything is better with chocolate. (Use milk chocolate for kids, dark chocolate for a grown-up twist.)
- 1/4 cup (30g) rainbow sprinkles — The kids will go crazy for these. (Optional, but highly recommended for the fun factor.)
- 1/4 cup (30g) crushed graham crackers — Adds a subtle crunch and a hint of sweetness. (You can substitute with crushed vanilla wafers.)
- 1/4 cup (30g) shredded coconut — Toasted or untoasted, your choice. (I like it toasted for extra flavor.)
- 1/4 cup (30g) mini marshmallows — Because who doesn’t love marshmallows with apples? (They also make the board look adorable.)
For the Extras (Optional but Recommended)
- 1/2 cup (60g) pretzel sticks — Salty crunch that pairs perfectly with sweet caramel. (Break them in half for easier dipping.)
- 1/4 cup (30g) dried cranberries — Adds a tart pop that cuts through the sweetness. (You can substitute with raisins or dried cherries.)
- 1/4 cup (30g) white chocolate chips — For drizzling over the top if you’re feeling fancy. (Melt them in the microwave in 30-second bursts.)
Equipment Needed
You don’t need much to put this board together, which is part of its charm. Here’s what you’ll need:
- A large wooden board or serving platter — I use a 12×18 inch wooden board I picked up at a thrift store for five dollars. Any large, flat surface will work — a cutting board, a baking sheet, even a clean pizza pan. (Just make sure it’s big enough to hold everything without everything touching.)
- A sharp knife — A good chef’s knife makes slicing apples a breeze. (I learned the hard way that dull knives crush apples instead of slicing them. Not pretty.)
- A small bowl for the caramel — A ramekin or small dipping bowl works perfectly. (I use a little ceramic dish that was my grandmother’s — it makes me happy every time I see it on the board.)
- Small bowls or ramekins for toppings — You’ll need 3-4 small dishes for the sprinkles, chocolate chips, nuts, and other toppings. (Mason jars work great too, and they look cute.)
- A citrus juicer or your hands — For squeezing the lemon juice over the apples. (Honestly, your hands work fine — just squeeze and stir.)
- Paper towels — For drying the apples after washing. (Wet apples make the caramel slide right off.)
If you don’t have a wooden board, don’t stress. I’ve used a cookie sheet in a pinch, and it worked just fine. The kids didn’t care, and neither should you. The whole point is to make something special without making yourself crazy.
Preparation Method
This comes together fast, so I like to have everything prepped and ready before I start arranging. Here’s how I do it:
- Wash and dry the apples (2 minutes) — Give the apples a good rinse under cold water, then dry them thoroughly with paper towels. This is important — wet apples won’t hold the caramel or toppings well. (I learned this the hard way when my first attempt turned into a slippery disaster.)
- Squeeze the lemon juice (1 minute) — Cut the lemon in half and squeeze the juice into a small bowl. You’ll need about 1-2 tablespoons. (Roll the lemon on the counter before cutting — it releases more juice.)
- Slice the apples (5 minutes) — Cut each apple in half through the core, then slice each half into 4-6 wedges, depending on the size of the apple. Remove the core and seeds from each wedge. (I leave the skin on — it adds color and fiber, and the kids don’t mind.) Toss the slices gently with the lemon juice to prevent browning.
- Prepare the caramel (2 minutes) — Spoon the caramel dip into a small bowl. If it’s too thick, stir in the heavy cream a little at a time until it reaches a dippable consistency. (You want it thick enough to cling to the apples but thin enough to actually dip.)
- Set up the toppings (3 minutes) — Pour each topping into its own small bowl or ramekin. Arrange them in a row or cluster on the board so they’re easy to reach. (If you’re using crushed graham crackers, crush them in a zip-top bag with a rolling pin — it’s faster than chopping.)
- Arrange the apples (3 minutes) — Fan the apple slices out in a decorative pattern around the board. Leave space in the center or at one end for the caramel bowl. (I like to create little clusters of each apple variety so the colors pop.)
- Add the caramel and toppings (2 minutes) — Place the caramel bowl in the center or at one end of the board. Arrange the topping bowls around the apples. If you’re feeling fancy, drizzle a little extra caramel over the apple slices and sprinkle some toppings directly on the board. (This makes it look gorgeous and gives the kids something to nibble on right away.)
- Add the extras (2 minutes) — Tuck the pretzel sticks, dried cranberries, or other extras into any empty spaces on the board. (Don’t overcrowd — you want the board to look abundant but not chaotic.)
- Serve immediately (0 minutes) — Set the board out and let everyone dig in. The apples will start to brown after about an hour, so this is best enjoyed right away. (If you need to prep ahead, slice the apples and toss them with lemon juice, then store them in an airtight container in the fridge for up to 4 hours.)
Cooking Tips & Techniques
After making this board more times than I can count, I’ve picked up a few tricks that make a real difference. Here’s what I’ve learned:
The apple situation. Not all apples are created equal for this board. Granny Smith apples hold up beautifully and their tartness cuts through the sweet caramel. Honeycrisp apples are sweet and crisp, which makes them a crowd favorite. Avoid Red Delicious — they turn mealy and sad within minutes. (I made this mistake once. Never again.)
The caramel trick. If your caramel dip is too thick to work with, don’t panic. Just stir in a splash of heavy cream or milk until it loosens up. But go slowly — you can always add more, but you can’t take it out. I’ve ruined a batch by adding too much cream and ending up with caramel soup. (It still tasted good, but it was a mess.)
The browning battle. Lemon juice is your best friend here, but don’t overdo it. Too much and your apples will taste like lemonade. Just a light toss is enough. If you don’t have a lemon, a splash of pineapple juice or even a little Sprite works in a pinch. (I’ve tried both, and they work surprisingly well.)
The timing game. This board is best assembled right before serving. The apples will start to brown after about an hour, and the caramel can get a little stiff if it sits too long. But you can prep everything ahead — slice the apples, toss them with lemon juice, and store them in the fridge. Then just arrange and serve when you’re ready. (I do this all the time for playdates and it saves my sanity.)
The kid factor. Let the kids help! My youngest loves arranging the toppings in little piles, and my older one takes pride in fanning out the apple slices. It keeps them busy, gives them ownership over the meal, and honestly, they eat more when they’ve helped make it. (Plus, it keeps them out of my hair for a solid ten minutes. Win-win.)
Variations & Adaptations
One of the best things about this board is how flexible it is. Here are some ways to switch it up:
- Nut-Free Version: Skip the peanuts and use sunflower seeds or pumpkin seeds instead. (I do this for school events where allergies are a concern.)
- Dairy-Free Version: Use a dairy-free caramel dip and skip the white chocolate. Most store-bought caramel dips are naturally dairy-free, but check the label to be sure.
- Chocolate Lover’s Version: Swap the caramel for melted chocolate or chocolate-hazelnut spread. (I’ve done this for birthday parties and it’s always a hit.)
- Seasonal Twist: In the fall, add pumpkin seeds and cinnamon-sugar. In the summer, swap apples for pear slices and add fresh berries. (The board adapts to whatever’s in season.)
- Savory-Sweet Version: Add a small bowl of sharp cheddar cheese cubes or slices. The combination of apple, caramel, and cheddar is surprisingly amazing. (Don’t knock it till you try it.)
- Low-Sugar Version: Use a no-sugar-added caramel dip and skip the sprinkles and chocolate chips. Add extra nuts and seeds for crunch. (I’ve made this for myself when I’m watching my sugar intake, and it still satisfies the craving.)
My personal favorite variation? I add a small bowl of crispy bacon bits. The salty, smoky crunch against the sweet apple and caramel is next-level. I first tried this at a friend’s Thanksgiving party and I’ve never looked back. (Just make sure the bacon is cooked extra crispy so it crumbles nicely.)
Serving & Storage Suggestions
This board is best served at room temperature, right after assembly. The apples stay crisp, the caramel is soft and dippable, and the toppings are fresh and crunchy. I like to set it out on the coffee table for movie nights or on the kitchen island for after-school snacks.
For presentation, I arrange the apple slices in a fan pattern around the caramel bowl, then cluster the topping bowls in the center or along one side. I tuck the pretzel sticks and other extras into any empty spaces. A few fresh mint leaves or edible flowers make it look extra special, but honestly, the kids don’t care about that — they just want the caramel.
If you have leftovers (unlikely, but possible), store the apple slices separately from the caramel and toppings. The apples will keep in an airtight container in the fridge for up to 2 days, though they’ll start to soften. The caramel can be stored in the fridge for up to a week. The toppings can be stored in their original containers or zip-top bags.
To reheat the caramel, microwave it in 15-second bursts, stirring between each, until it’s soft and dippable again. (Don’t overheat it or it’ll get too thin.) The apples are best eaten cold or at room temperature — no need to reheat them.
One thing I love about this board is that the flavors actually get better as they sit. The caramel soaks into the apple slices just a little bit, and the toppings meld together in a way that’s really satisfying. If you have leftovers, try chopping everything up and mixing it into yogurt or oatmeal the next morning. It’s a game-changer.
Nutritional Information & Benefits
While this board is definitely a treat, it’s not without its redeeming qualities. Here’s a rough nutritional breakdown for one serving (about 1 apple with 2 tablespoons of caramel and a sprinkle of toppings):
- Calories: 250-300
- Total Fat: 10-12g
- Saturated Fat: 4-5g
- Carbohydrates: 40-45g
- Fiber: 4-5g
- Sugar: 28-32g
- Protein: 3-4g
Apples are packed with fiber and vitamin C, and they’re naturally low in calories. The nuts add healthy fats and protein, which help keep everyone full and satisfied. The caramel and chocolate are the indulgent parts, but a little goes a long way — especially when paired with the natural sweetness of the apples.
For dietary considerations: this board can be made gluten-free (just check your caramel label and skip the graham crackers), dairy-free (use a dairy-free caramel), or nut-free (skip the peanuts and use seeds). It’s naturally vegetarian and can be made vegan with a few swaps.
I’m not a nutritionist, but I do know that making something special for your family doesn’t have to mean sacrificing nutrition entirely. This board is a balanced treat — it satisfies the sweet tooth while sneaking in some real food. And honestly, the joy on my kids’ faces when they see this board is worth every calorie.
Conclusion
This kid-friendly caramel apple charcuterie board is more than just a snack — it’s a way to make ordinary moments feel special without spending hours in the kitchen or a fortune at the grocery store. It’s the kind of thing that brings everyone to the table (or the coffee table, let’s be real) and makes them smile.
I love this recipe because it’s forgiving. You can swap ingredients, change up the toppings, and adjust it to fit your family’s tastes and needs. The first time I made it, I used pears instead of apples because that’s what I had. It worked. The second time, I forgot the lemon juice and the apples turned brown. The kids didn’t care. That’s the beauty of this board — it’s hard to mess up, and even when you do, it’s still delicious.
So go ahead and make this board your own. Add your family’s favorite toppings, use whatever apples are on sale, and don’t stress about making it look perfect. The mess is part of the charm — just ask Aunt Maggie.
I’d love to hear how yours turns out! Drop a comment below and let me know what toppings your family loved, or tag me in your photos on social media. And if you have a variation that blew your mind, share it — I’m always looking for new ideas. Happy snacking!
Frequently Asked Questions
Can I make this board ahead of time?
You can prep the ingredients ahead, but it’s best to assemble the board right before serving. Slice the apples, toss them with lemon juice, and store them in an airtight container in the fridge for up to 4 hours. Prep the toppings and caramel ahead too, then just arrange everything when you’re ready.
How do I keep the apples from turning brown?
The lemon juice trick works like a charm. Just toss the sliced apples with a tablespoon or two of fresh lemon juice. If you don’t have a lemon, a splash of pineapple juice or even a little Sprite will work in a pinch. (I’ve done both, and they work great.)
Can I use a different fruit instead of apples?
Absolutely! Pears are a great substitute — they have a similar texture and sweetness. You can also use firm peaches or nectarines in the summer. Just make sure the fruit is firm enough to hold up to dipping.
What if my caramel is too thick?
Stir in a splash of heavy cream or milk, a little at a time, until it reaches a dippable consistency. You can also microwave it for 10-15 seconds to loosen it up. Just don’t overheat it or it’ll get too thin.
How long does this board last?
The apples will start to brown after about an hour, so it’s best enjoyed within 30-60 minutes of assembly. If you have leftovers, store the apples separately from the caramel and toppings. The apples will keep in the fridge for up to 2 days, though they’ll soften over time.
Pin This Recipe!

Kid-Friendly Caramel Apple Charcuterie Board: Easy Fall Dessert

A quick and easy fall dessert board featuring crisp apples, soft caramel dip, and a variety of sweet and crunchy toppings. Perfect for family nights, playdates, or any occasion where you want something special without spending hours in the kitchen.
- Prep Time: 15 minutes
- Cook Time: 0 minutes
- Total Time: 15 minutes
- Yield: 4-6 servings 1x
- Category: Dessert
- Cuisine: American
Ingredients
- 4–5 medium apples (mix of Honeycrisp, Granny Smith, and Fuji)
- 1 lemon (juiced)
- 1 cup (240ml) caramel dip (e.g., Marzetti brand)
- 2 tablespoons (30ml) heavy cream
- 1/2 cup (60g) chopped peanuts
- 1/2 cup (60g) mini chocolate chips
- 1/4 cup (30g) rainbow sprinkles
- 1/4 cup (30g) crushed graham crackers
- 1/4 cup (30g) shredded coconut (toasted or untoasted)
- 1/4 cup (30g) mini marshmallows
- 1/2 cup (60g) pretzel sticks
- 1/4 cup (30g) dried cranberries
- 1/4 cup (30g) white chocolate chips (optional)
Instructions
- Wash and dry the apples thoroughly with paper towels.
- Cut the lemon in half and squeeze 1-2 tablespoons of juice into a small bowl.
- Slice each apple in half through the core, then cut each half into 4-6 wedges. Remove the core and seeds. Toss the slices gently with the lemon juice to prevent browning.
- Spoon the caramel dip into a small bowl. If too thick, stir in heavy cream a little at a time until dippable.
- Pour each topping (peanuts, chocolate chips, sprinkles, graham crackers, coconut, marshmallows) into its own small bowl or ramekin.
- Arrange the apple slices in a decorative fan pattern on a large wooden board or serving platter, leaving space for the caramel bowl.
- Place the caramel bowl in the center or at one end of the board. Arrange the topping bowls around the apples.
- Tuck pretzel sticks, dried cranberries, and any other extras into empty spaces on the board.
- Serve immediately. If prepping ahead, slice apples and toss with lemon juice, then store in an airtight container in the fridge for up to 4 hours.
Notes
Use firm apples like Granny Smith or Honeycrisp; avoid Red Delicious. Lemon juice prevents browning—don’t overdo it. Caramel dip should be soft at room temperature; thin with cream if needed. Best assembled just before serving; apples brown after about an hour. Let kids help arrange toppings for fun.
Nutrition
- Serving Size: 1 apple with 2 table
- Calories: 250300
- Sugar: 2832
- Fat: 1012
- Saturated Fat: 45
- Carbohydrates: 4045
- Fiber: 45
- Protein: 34
Keywords: caramel apple charcuterie board, fall dessert, kid-friendly snack, easy apple board, caramel dip, apple slices, party snack


