I was elbow-deep in potting soil on a rainy Tuesday afternoon, trying to save a half-dead fern that honestly looked beyond help, when my neighbor’s teenage daughter knocked on the back door. She wasn’t there to borrow sugar or ask about a lost cat — she was holding a crumpled piece of notebook paper covered in chocolatey fingerprints. “My mom said you’d know if this recipe is any good,” she said, looking skeptical. “It’s for pumpkin muffins, but we’re not really pumpkin people.”
I wiped my hands on my jeans and took that sad little paper, expecting some generic dessert that would fall flat. But the ingredient list caught my eye — it was handwritten in loopy cursive, with notes like “add more chips, trust me” scribbled in the margins. The recipe had come from her grandmother, who ran a small daycare for thirty years and apparently fed a hundred picky kids without ever hearing a single complaint. That’s the kind of cooking credential that gets my attention, you know?
I made those muffins that same afternoon, partly because I needed a break from my failing fern and partly because I was genuinely curious. The batter came together in one bowl — no fussing with separate dry and wet ingredients — and the smell that filled my kitchen was pure autumn comfort. When I pulled them out of the oven, they were perfectly domed, speckled with melted chocolate, and so tender they practically fell apart in my hands. I brought a batch over to my neighbor later that evening, and her daughter, the self-proclaimed non-pumpkin person, ate three before I could even say goodbye.
These Kid-Approved Pumpkin Chocolate Chip Muffins have been in regular rotation at my house ever since that rainy Tuesday. They’re the kind of recipe that makes you wonder why you ever bothered with complicated bakery versions. Maybe you’ve been there — scrolling through fussy muffin recipes that call for buttermilk and stand mixers and ingredients you don’t have. This one is different. It’s honest, it’s forgiving, and it actually tastes better the next day. Let me tell you why it stuck with me.
Why You’ll Love This Recipe
I’ve tested a lot of pumpkin muffin recipes over the years, and honestly, most of them fall into two camps: either they taste like spiced cardboard, or they’re so sweet they could pass for cupcakes. These muffins hit that perfect middle ground where the pumpkin flavor actually shines through, and the chocolate chips feel like a reward, not a distraction.
- Quick & Easy: You can have these on the table in under 35 minutes, start to finish. No stand mixer needed, no chilling the dough, no complicated steps that make you question your life choices.
- Simple Ingredients: Everything comes from your regular grocery store. Canned pumpkin, basic pantry staples, and a bag of chocolate chips. No fancy extracts or specialty flours required.
- Perfect for Busy Mornings: These muffins freeze beautifully, which means you can make a double batch on Sunday and have breakfast sorted for two weeks. My kids grab them from the freezer and they’re thawed by the time they finish their cereal.
- Crowd-Pleaser: I’ve served these at school bake sales, playdates, and holiday brunches. They disappear faster than anything else on the table. Even adults who swear they don’t like pumpkin end up reaching for seconds.
- Unbelievably Moist: The secret is using a full can of pumpkin puree — not just half — which keeps these muffins tender for days. They don’t dry out like some pumpkin baked goods tend to do.
What makes this recipe different from every other pumpkin muffin out there is the texture. I spent months tweaking the flour-to-pumpkin ratio until I got that perfect crumb — sturdy enough to hold a generous handful of chocolate chips, but light enough that you don’t feel like you’re eating a brick. The pumpkin keeps everything moist without making it gummy, and the chocolate chips add little pockets of melted goodness in every bite.
This is the kind of recipe that makes you feel like a hero parent without any actual effort. It’s comfort food that comes together in one bowl, fills your house with that cozy fall smell, and puts a smile on even the grumpiest morning face. Honestly, that’s the best kind of cooking.
What Ingredients You Will Need
This recipe uses simple, wholesome ingredients to deliver bold flavor and satisfying texture without the fuss. Most of these are pantry staples, which means you can whip up a batch anytime the craving hits.
For the Muffins
- 1 ¾ cups (220g) all-purpose flour — Standard all-purpose works perfectly here. I’ve tested this with King Arthur Flour and Gold Medal, both give great results. If you want a whole wheat option, swap half the flour for white whole wheat.
- 1 cup (200g) granulated sugar — Regular white sugar keeps these light. You can reduce it to ¾ cup if you prefer less sweet muffins, but don’t go lower or the texture changes.
- 1 teaspoon baking soda — Make sure it’s fresh! Old baking soda is the number one reason muffins don’t rise properly.
- 2 teaspoons pumpkin pie spice — I use the store-bought blend for convenience, but you can make your own with 1 teaspoon cinnamon, ½ teaspoon ginger, ¼ teaspoon nutmeg, and ¼ teaspoon cloves.
- ½ teaspoon salt — Just enough to balance the sweetness and bring out the pumpkin flavor.
- 1 can (15 oz) pumpkin puree — Not pumpkin pie filling! Make sure you grab 100% pure pumpkin. Libby’s is my go-to brand because it’s consistently thick and not watery.
- ½ cup (120ml) vegetable oil — Canola or grapeseed oil work great too. The oil keeps these muffins incredibly moist. Melted coconut oil works if you want a subtle coconut flavor.
- 2 large eggs — Room temperature eggs incorporate more evenly. If you forgot to take them out of the fridge, place them in warm water for 5 minutes.
- ¼ cup (60ml) milk — Any milk works here. I usually use whole milk, but I’ve made these with almond milk and oat milk with no issues.
- 1 teaspoon vanilla extract — Pure vanilla extract adds depth, but imitation vanilla works fine in a pinch.
- 1 cup (175g) semi-sweet chocolate chips — I prefer Ghirardelli or Guittard for the best melt. If you’re using milk chocolate chips, you might want to reduce the sugar to ¾ cup since they’re sweeter.
Optional Add-Ins
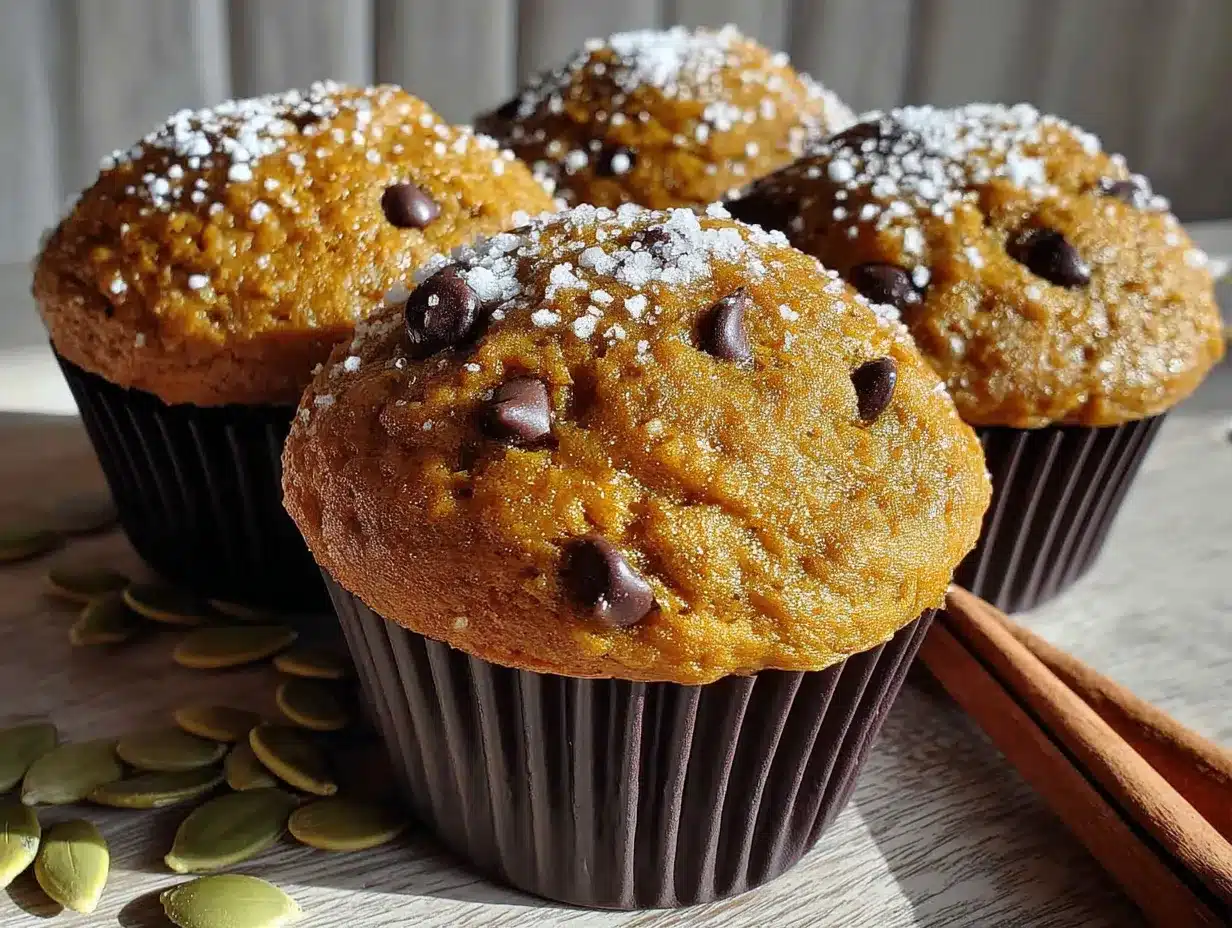
- ¼ cup chopped pecans or walnuts — Adds a nice crunch if your kids don’t mind texture. Toast them first for extra flavor.
- 2 tablespoons pumpkin seeds (pepitas) — Sprinkle on top before baking for a pretty presentation and a little extra nutrition.
One thing I learned the hard way — don’t skip the salt. I did that once thinking it wouldn’t matter, and the muffins tasted flat and one-dimensional. Salt is what makes the chocolate chips pop and the pumpkin spice sing. Trust me on this one.
Equipment Needed
You don’t need a fancy kitchen to make these muffins. Here’s what you’ll actually use:
- One large mixing bowl — Any medium-to-large bowl works. I use a ceramic one because it doesn’t slide around on the counter.
- Whisk or wooden spoon — A whisk works best for smoothing out the pumpkin, but a sturdy spoon gets the job done.
- 12-cup muffin tin — Standard size. If you only have a 6-cup tin, just bake in batches.
- Paper liners or cooking spray — I prefer parchment paper liners because nothing sticks to them. If you go with spray, use one that has flour in it for the best release.
- Measuring cups and spoons — Dry measuring cups for flour and sugar, liquid measuring cup for the oil and milk.
- Cooling rack — Essential for getting that perfect texture. If you leave muffins in the pan too long, they get soggy on the bottom.
- Cookie scoop or ice cream scoop — Not mandatory, but it makes filling the muffin cups so much cleaner and gives you uniform muffins.
I bought a cheap muffin tin from the grocery store years ago, and honestly, it works just fine. You don’t need the expensive non-stick ones. Just make sure to grease it well, and you’re golden.
Preparation Method
Let me walk you through this step by step. I’ve made these muffins dozens of times, so I’ll point out the little things that make a big difference.
- Preheat your oven to 350°F (175°C). Line your muffin tin with paper liners or spray generously with cooking spray. Do this first so the oven is ready when your batter is done.
- In your large mixing bowl, whisk together the flour, sugar, baking soda, pumpkin pie spice, and salt. Whisk for about 30 seconds to make sure everything is evenly distributed. This is important — if the baking soda isn’t mixed in well, you’ll get bitter spots in your muffins. I learned that the hard way.
- Make a well in the center of the dry ingredients. Pour in the pumpkin puree, vegetable oil, eggs, milk, and vanilla extract. Don’t stir yet — just let everything sit there for a second.
- Stir everything together with a wooden spoon or spatula. Use a gentle folding motion, scraping the bottom of the bowl to incorporate all the flour. Stop as soon as you don’t see any more dry streaks. Overmixing is the enemy here — it develops the gluten and makes muffins tough and rubbery. The batter should be thick and slightly lumpy. That’s exactly what you want.
- Fold in the chocolate chips. Reserve about 2 tablespoons to sprinkle on top later. Gently fold them in with just a few strokes. If you overmix at this stage, the chocolate will melt into the batter and you’ll lose those pretty chocolate pockets.
- Fill each muffin cup about ¾ full. A cookie scoop makes this so much easier — it gives you perfectly even portions and keeps your hands clean. If you don’t have one, use two spoons: one to scoop and one to scrape the batter into the cup.
- Sprinkle the reserved chocolate chips on top of each muffin. This is my favorite trick — it makes every muffin look bakery-perfect and ensures you get chocolate in every bite, not just the ones that sank to the bottom.
- Bake for 18-22 minutes. Start checking at 18 minutes. The muffins are done when a toothpick inserted in the center comes out clean or with just a few moist crumbs. If you hit a chocolate chip, try another spot — melted chocolate on the toothpick doesn’t mean the muffin is raw.
- Let the muffins cool in the pan for 5 minutes. This is crucial — they need that time to set up. If you try to take them out immediately, they’ll fall apart. After 5 minutes, transfer them to a wire rack to cool completely.
- If you’re eating them warm, wait at least 10 minutes. I know it’s hard, but the chocolate chips need time to cool down so you don’t burn your mouth. Trust me, I’ve made that mistake more times than I’d like to admit.
The smell that fills your kitchen during those last few minutes of baking is absolutely intoxicating. It’s like autumn in a pan — warm pumpkin, cinnamon, and chocolate all mingling together. My kids start hovering around the oven about 15 minutes in, and honestly, I don’t blame them.
Cooking Tips & Techniques
After making these muffins more times than I can count, I’ve picked up a few tricks that make a real difference. Let me share the ones that matter most.
Don’t overmix the batter. I cannot stress this enough. Stir just until the flour disappears. A few lumps are perfectly fine — they’ll bake out in the oven. Overmixed muffins are dense and tough, and nobody wants that. I once got distracted and kept stirring while helping my daughter with homework, and those muffins came out like hockey pucks. Learn from my mistake.
Use room temperature ingredients. Cold eggs and cold milk can make the batter seize up, especially when they hit the oil. Take your eggs and milk out of the fridge about 30 minutes before you start. If you forgot, place the eggs in a bowl of warm water for 5 minutes, and microwave the milk for 15 seconds.
Measure your flour correctly. The number one mistake home bakers make is scooping flour directly from the bag with the measuring cup. This packs the flour down and you end up with way too much. Instead, fluff the flour with a spoon, then spoon it into your measuring cup and level it off with a knife. This simple trick will give you consistently tender muffins every time.
Rotate your pan halfway through baking. Ovens have hot spots, and the back of the oven is usually hotter than the front. At the 10-minute mark, turn the pan around so everything bakes evenly. This is especially important if you’re baking a double batch on two racks — swap the pans top to bottom and front to back.
Let the muffins cool completely before storing. If you put warm muffins in a container, the steam gets trapped and makes the tops soggy. I know it’s tempting to pack them up right away, but give them at least 30 minutes on the cooling rack. Your future self will thank you.
Variations & Adaptations
One of the best things about this recipe is how flexible it is. Here are some variations I’ve tried that turned out great:
Gluten-Free Version: Swap the all-purpose flour for a 1:1 gluten-free baking flour blend. I’ve used Bob’s Red Mill and King Arthur’s gluten-free flour with excellent results. Add an extra tablespoon of milk since gluten-free flours tend to absorb more liquid. The texture is slightly more delicate, but honestly, my kids couldn’t tell the difference.
Dairy-Free Version: Use almond milk, oat milk, or any plant-based milk in place of regular milk. The oil already makes these dairy-free, so you just need to swap the milk. If you’re using dairy-free chocolate chips, look for Enjoy Life or Pascha brands — they melt beautifully and taste just like the real thing.
Lower Sugar Option: Cut the sugar down to ¾ cup without any issues. You can also use coconut sugar for a less refined option, though the muffins will be slightly darker and have a subtle caramel flavor. If you’re using very dark chocolate chips (70% cacao or higher), you might even want to keep the full cup of sugar to balance the bitterness.
Pumpkin Spice Muffins (No Chocolate): If you have a kid who doesn’t like chocolate — I know, it’s rare, but it happens — just leave out the chips and add an extra ¼ cup of flour. You can also stir in ½ cup of raisins or dried cranberries for a different kind of sweetness.
Mini Muffins: These bake beautifully as minis. Fill the mini muffin cups about ¾ full and bake for 10-12 minutes. You’ll get about 36 mini muffins from one batch. They’re perfect for lunchboxes or toddler snacks.
I once tried adding shredded zucchini to these muffins — about ½ cup, squeezed dry — and it worked surprisingly well. The kids didn’t notice, and I felt like a sneaky vegetable genius. Just saying, if you’re looking to boost the nutrition, that’s an easy win.
Serving & Storage Suggestions
These muffins are incredibly versatile when it comes to serving. Here’s how I handle them:
At Room Temperature: They’re perfect as-is for breakfast, snack time, or lunchboxes. I usually pack one in each kid’s lunch with a small container of apple slices, and they come home with empty lunchboxes every time.
Warm with Butter: Split a muffin in half, toast it lightly in a skillet or toaster oven, and spread with a pat of salted butter. The contrast between the warm, tender muffin and the cold butter is absolutely heavenly. This is my personal favorite way to eat them.
With a Glass of Milk: There’s something about the combination of pumpkin, chocolate, and cold milk that just works. My kids dip their muffins in milk like they’re cookies, and honestly, I’ve joined them more than once.
Storage: Keep muffins in an airtight container at room temperature for up to 4 days. I line the container with a paper towel on the bottom and another on top to absorb excess moisture. If you stack them, put a piece of parchment paper between layers so the chocolate chips don’t stick together.
Freezing: These muffins freeze like a dream. Let them cool completely, then place them in a single layer on a baking sheet and freeze for 1 hour. Once they’re solid, transfer them to a freezer bag or container. They’ll keep for up to 3 months. To thaw, just leave one out on the counter for 30 minutes, or microwave for 20-30 seconds.
Reheating: For that fresh-from-the-oven taste, warm a muffin in the microwave for 15-20 seconds, or pop it in a 300°F oven for 5 minutes. The chocolate chips get all melty again, and the muffin softens up beautifully.
One thing I love about this recipe is that the flavors actually get better after a day. The pumpkin and spice have time to meld together, and the muffins become even more moist. So don’t worry if you make them a day ahead — they’ll taste even better.
Nutritional Information & Benefits
Here’s the approximate nutritional breakdown for one muffin (based on 12 muffins using the standard recipe):
- Calories: 285
- Total Fat: 13g
- Saturated Fat: 3.5g
- Cholesterol: 31mg
- Sodium: 220mg
- Total Carbohydrates: 40g
- Dietary Fiber: 2g
- Sugars: 24g
- Protein: 4g
These numbers are estimates and will vary based on your specific ingredients and any substitutions you make.
From a health perspective, pumpkin is a nutritional powerhouse. It’s packed with vitamin A (great for eye health), vitamin C, and fiber. Plus, it’s naturally low in calories and fat. The chocolate chips add a little antioxidant boost from the cocoa, and the eggs provide protein to help keep everyone full until lunchtime.
If you’re watching sugar intake, you can easily cut the sugar to ¾ cup, which brings each muffin down to about 20g of sugar. And if you swap in whole wheat flour, you’ll add an extra gram of fiber per muffin. Every little bit helps, right?
These muffins are a great option for school snacks, after-school treats, or even a quick breakfast on busy mornings. They’re not health food, but they’re certainly a better choice than most store-bought muffins or pastries.
Conclusion
These Kid-Approved Pumpkin Chocolate Chip Muffins have become a staple in my kitchen for good reason. They’re simple, forgiving, and absolutely delicious — the kind of recipe that makes you look like a baking pro without any of the stress. Whether you’re feeding a crowd of picky eaters, packing school lunches, or just craving something cozy on a fall morning, these muffins deliver every single time.
What I love most about this recipe is how adaptable it is. You can tweak the spices, swap the chocolate chips for nuts or dried fruit, or make them gluten-free — and they still turn out perfectly. It’s the kind of recipe that grows with your family and fits whatever ingredients you have on hand.
I’d love to hear how these turn out for you! Did your kids gobble them up? Did you try a fun variation? Drop a comment below and let me know — I read every single one, and your feedback helps me create better recipes for all of us. And if you loved this recipe, please share it with a friend who could use a little pumpkin magic in their life.
Happy baking, friends. May your muffins always be moist and your chocolate chips plentiful.
Frequently Asked Questions
Can I use fresh pumpkin instead of canned?
Yes, you can! If you’re using fresh pumpkin puree, make sure to drain it well after blending. Fresh pumpkin tends to be more watery than canned, so you might need to reduce the milk by a tablespoon or two. Roast your pumpkin at 400°F until tender, then blend until smooth. One small sugar pumpkin yields about 1½ cups of puree.
Why did my muffins turn out dense and heavy?
This usually happens from overmixing the batter. Remember to stir just until the flour disappears — a few lumps are perfectly fine. Another common culprit is using too much flour. Make sure you’re spooning the flour into your measuring cup and leveling it off, not scooping directly from the bag.
Can I make these muffins ahead of time?
Absolutely! These muffins actually taste better the next day. You can make them up to 4 days ahead and store them in an airtight container at room temperature. They also freeze beautifully for up to 3 months. Just thaw at room temperature or microwave for 20 seconds when you’re ready to eat.
Can I use pumpkin pie filling instead of pumpkin puree?
I wouldn’t recommend it. Pumpkin pie filling has added sugar and spices, which will throw off the balance of this recipe. Stick with 100% pure pumpkin puree for the best results. If you accidentally bought pie filling, you can still use it, but reduce the sugar to ½ cup and skip the pumpkin pie spice.
How do I keep the chocolate chips from sinking to the bottom?
This is a common issue, and the fix is simple. Toss your chocolate chips with about a tablespoon of flour before folding them into the batter. The flour coating helps suspend the chips throughout the muffin instead of letting them sink. Also, make sure your batter is thick enough — if it’s too thin, everything sinks to the bottom.
Pin This Recipe!
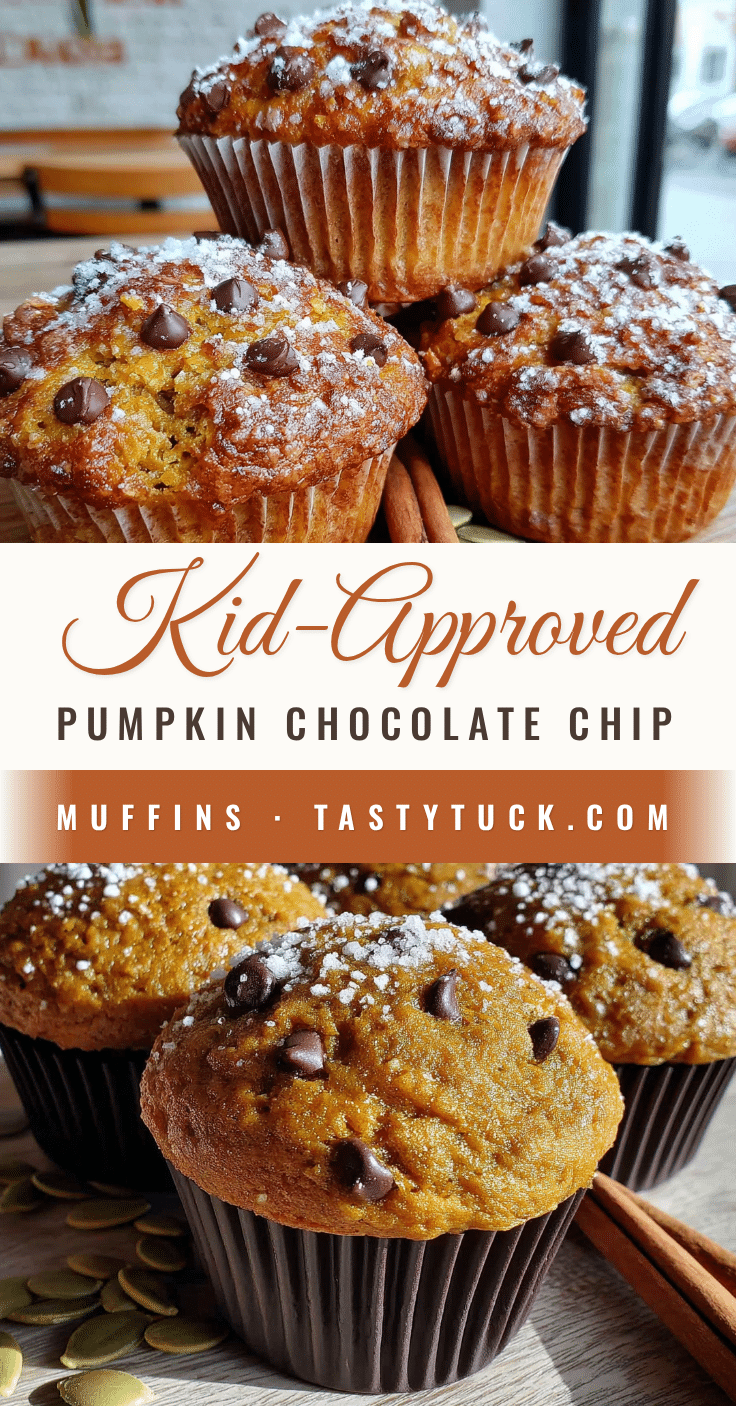
Kid-Approved Pumpkin Chocolate Chip Muffins: Easy Homemade Recipe

These Kid-Approved Pumpkin Chocolate Chip Muffins are quick, easy, and incredibly moist. Made with simple ingredients in one bowl, they’re perfect for busy mornings, school lunches, or cozy fall baking.
- Prep Time: 10 minutes
- Cook Time: 20 minutes
- Total Time: 30 minutes
- Yield: 12 muffins 1x
- Category: Dessert
- Cuisine: American
Ingredients
- 1 ¾ cups (220g) all-purpose flour
- 1 cup (200g) granulated sugar
- 1 teaspoon baking soda
- 2 teaspoons pumpkin pie spice
- ½ teaspoon salt
- 1 can (15 oz) pumpkin puree (not pumpkin pie filling)
- ½ cup (120ml) vegetable oil
- 2 large eggs, room temperature
- ¼ cup (60ml) milk (any kind)
- 1 teaspoon vanilla extract
- 1 cup (175g) semi-sweet chocolate chips
- Optional: ¼ cup chopped pecans or walnuts
- Optional: 2 tablespoons pumpkin seeds (pepitas) for topping
Instructions
- Preheat your oven to 350°F (175°C). Line a 12-cup muffin tin with paper liners or spray generously with cooking spray.
- In a large mixing bowl, whisk together the flour, sugar, baking soda, pumpkin pie spice, and salt for about 30 seconds until evenly distributed.
- Make a well in the center of the dry ingredients. Pour in the pumpkin puree, vegetable oil, eggs, milk, and vanilla extract. Do not stir yet.
- Stir everything together with a wooden spoon or spatula using a gentle folding motion, scraping the bottom of the bowl. Stop as soon as no dry streaks remain. The batter should be thick and slightly lumpy. Do not overmix.
- Fold in the chocolate chips, reserving about 2 tablespoons to sprinkle on top later. Fold gently with just a few strokes.
- Fill each muffin cup about ¾ full. A cookie scoop works well for even portions.
- Sprinkle the reserved chocolate chips on top of each muffin.
- Bake for 18-22 minutes, starting to check at 18 minutes. Muffins are done when a toothpick inserted in the center comes out clean or with a few moist crumbs.
- Let the muffins cool in the pan for 5 minutes, then transfer to a wire rack to cool completely.
- If eating warm, wait at least 10 minutes before serving to avoid burning your mouth on hot chocolate chips.
Notes
Don’t overmix the batter to avoid dense muffins. Use room temperature ingredients for best results. Measure flour correctly by spooning it into the cup and leveling off. Rotate the pan halfway through baking for even cooking. Let muffins cool completely before storing to prevent soggy tops. Muffins taste even better the next day.
Nutrition
- Serving Size: 1 muffin
- Calories: 285
- Sugar: 24
- Sodium: 220
- Fat: 13
- Saturated Fat: 3.5
- Carbohydrates: 40
- Fiber: 2
- Protein: 4
Keywords: pumpkin chocolate chip muffins, easy pumpkin muffins, kid-friendly muffins, fall baking, one bowl muffins, pumpkin muffins recipe


