My neighbor, a retired librarian named Carol, wasn’t trying to impress anyone that Tuesday afternoon. I’d stopped by to borrow a bundt pan for a recipe I was testing, and the smell hit me before I even got through the screen door. It wasn’t the usual Tuesday afternoon smell of coffee and toast. It was warm, spiced, and sweet — like autumn had decided to move into her kitchen and set up camp. I stood there in the doorway, holding my empty coffee mug, completely derailed from my original mission.
“Oh, those are just pumpkin scones,” she said, waving her hand like she’d made toast. Just pumpkin scones. She had a smear of flour on her cheek and was wearing an old cardigan with a hole in the elbow. She wasn’t photographing them for Instagram. She wasn’t testing the recipe for the third time. She was just making scones because she felt like it, and honestly, that casual confidence made me more curious than any perfectly styled food photo ever could.
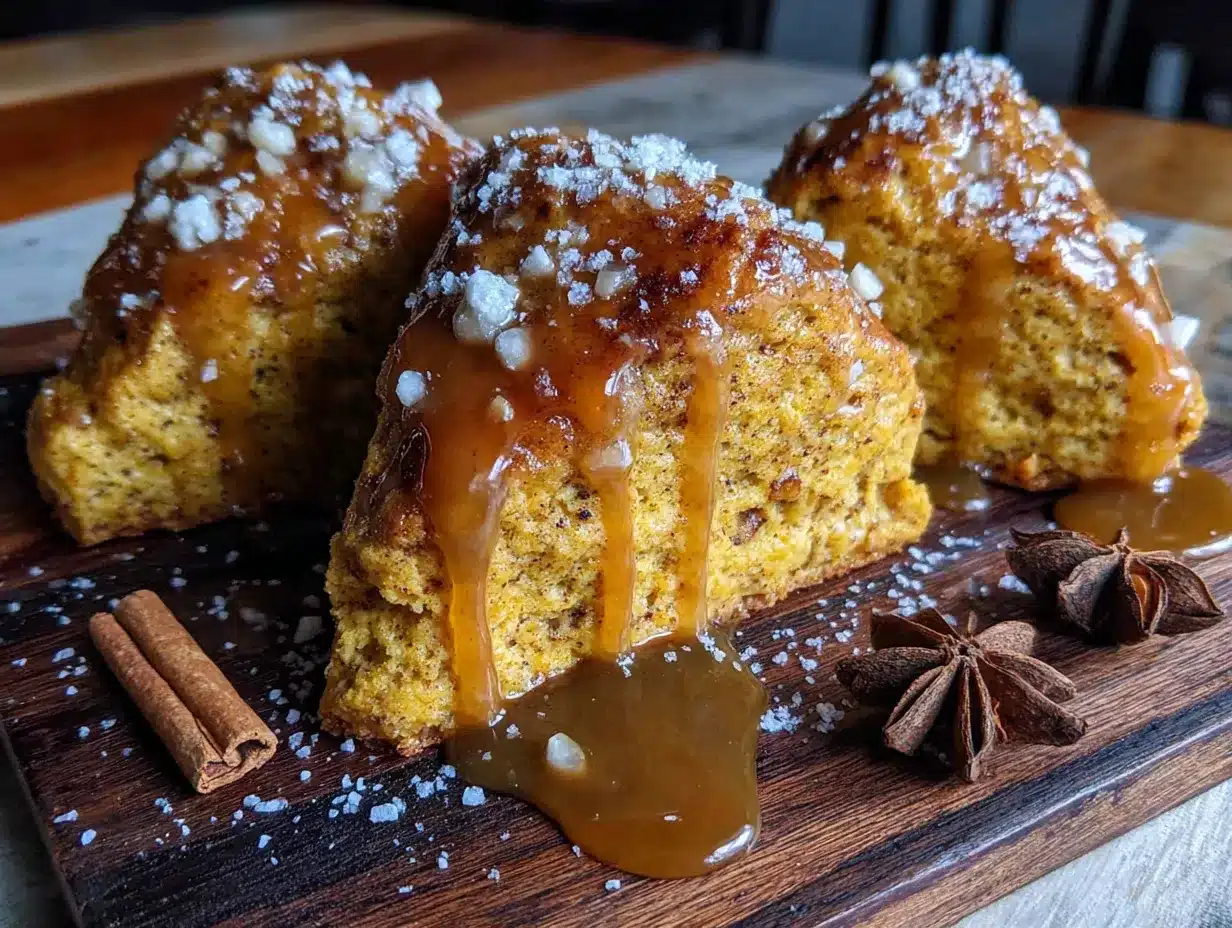
I watched her pull a tray from the oven, and the golden domes with their crackly tops looked nothing like the dense, dry triangles I’d bought from coffee shops. These were tall, tender, and practically glowing. She drizzled a maple glaze over them while they were still warm, and the glaze melted into the cracks like it belonged there. She handed me one on a napkin, still warm, and I took a bite that genuinely made me close my eyes. It was soft, almost pillowy inside, with just enough spice to taste like fall without tasting like a candle. The maple glaze was the perfect finishing touch — not too sweet, just enough to make it feel special.
I asked her for the recipe, and she shrugged and scribbled it on a sticky note. That sticky note is now taped inside my kitchen cabinet, smudged and splattered, and I’ve made these scones more times than I can count. They’ve become my go-to for fall mornings, cozy weekend breakfasts, and even holiday brunches. Maybe you’ve been there — you taste something that’s so much better than it has any right to be, and you can’t stop thinking about it. That’s this recipe. It’s the one that made me realize the best food doesn’t come from fancy techniques or complicated steps. It comes from someone who just knows what tastes good and doesn’t overthink it.
Why You’ll Love This Recipe
These light and fluffy pumpkin scones are the kind of recipe that makes you look like a baking pro without actually having to be one. I’ve tested this recipe more times than I can count, tweaking the ratios and the mixing method until I got that perfect balance of tender crumb and bold pumpkin flavor. Here’s why I keep coming back to it — and why I think you will too.
- Quick & Easy: From start to finish, these scones come together in about 30 minutes. No chilling the dough, no complicated folding. Just mix, shape, bake, and glaze.
- Simple Ingredients: You probably already have most of these in your pantry. Canned pumpkin puree, basic baking staples, and maple syrup for the glaze. No fancy grocery runs required.
- Perfect for Fall Mornings: These scones are made for cozy weekend breakfasts, Thanksgiving brunch, or even a weekday treat when you need a little seasonal cheer.
- Crowd-Pleaser: I’ve brought these to potlucks, book club meetings, and family gatherings, and they always disappear first. Kids love the maple glaze, and adults appreciate that they’re not overly sweet.
- Unbelievably Delicious: The texture is what sets these apart. They’re light, fluffy, and almost biscuit-like on the inside, with a slightly crisp exterior. The pumpkin flavor is present but not overwhelming, and the maple glaze adds just the right amount of sweetness.
What makes this recipe different from the rest is the technique. Most pumpkin scones turn out dense and gummy because pumpkin puree adds so much moisture. But I’ve found that using cold butter and handling the dough as little as possible keeps the scones tender and flaky. Plus, the maple glaze is made with real maple syrup, not powdered sugar and extract, which gives it a deeper, more authentic flavor. This isn’t just another pumpkin scone recipe — it’s the one that actually delivers on the promise of light and fluffy.
Honestly, this recipe is comfort food reimagined. It’s the kind of scone that makes you close your eyes after the first bite, the kind that turns a regular Tuesday into something worth remembering. And the best part? You don’t need to be a pastry chef to pull it off.
What Ingredients You Will Need
This recipe uses simple, wholesome ingredients to create scones that are light, tender, and full of fall flavor. Most of these are pantry staples, and the few specialty items are easy to find at any grocery store. Here’s what you’ll need, along with a few notes on why each ingredient matters.
For the Scones
- All-purpose flour, 2 cups (250g) — Provides structure without making the scones too dense. I use King Arthur Flour for consistent results, but any good brand works.
- Granulated sugar, 1/3 cup (65g) — Adds just enough sweetness to balance the pumpkin and spices.
- Baking powder, 1 tablespoon — The main leavening agent. Make sure it’s fresh for the best rise.
- Pumpkin pie spice, 1 teaspoon — You can use store-bought or make your own with cinnamon, nutmeg, ginger, and cloves.
- Ground cinnamon, 1/2 teaspoon — Adds warmth and depth.
- Salt, 1/2 teaspoon — Enhances all the flavors and balances the sweetness.
- Unsalted butter, 6 tablespoons (85g), cold and cubed — Cold butter is the secret to flaky scones. It creates steam pockets as it melts in the oven, giving you that light, tender texture.
- Pumpkin puree, 1/2 cup (120g) — Use canned pumpkin puree, not pumpkin pie filling. I prefer Libby’s for its consistent texture and flavor.
- Heavy cream, 1/4 cup (60ml), plus more for brushing — Adds richness and helps create a tender crumb. You can substitute whole milk in a pinch.
- Vanilla extract, 1 teaspoon — Rounds out the flavors and adds a subtle warmth.
For the Maple Glaze
- Powdered sugar, 1 cup (120g) — Creates a smooth, pourable glaze that sets nicely.
- Pure maple syrup, 2 tablespoons — Use the real stuff, not pancake syrup. It makes a huge difference in flavor.
- Heavy cream or milk, 1-2 tablespoons — Adjusts the consistency. Start with 1 tablespoon and add more if needed.
- Vanilla extract, 1/2 teaspoon — Optional, but it adds a nice depth to the glaze.
When selecting your pumpkin puree, look for one that’s smooth and not watery. If your puree seems very wet, you can blot it with a paper towel to remove excess moisture. This helps prevent the scones from becoming gummy. For the butter, make sure it’s truly cold — I like to pop it in the freezer for 10 minutes before cutting it into the flour. And if you’re out of heavy cream, whole milk or even half-and-half works, but the scones won’t be quite as rich.
Equipment Needed
You don’t need a lot of fancy equipment to make these scones, which is one of the reasons I love this recipe. Here’s what you’ll need:
- Mixing bowls — One large bowl for the dry ingredients and one medium bowl for the wet ingredients.
- Pastry cutter or two forks — For cutting the cold butter into the flour. If you don’t have a pastry cutter, two forks work surprisingly well. You can also use your fingertips, but work quickly so the butter doesn’t warm up.
- Baking sheet — Line it with parchment paper for easy cleanup. I prefer light-colored baking sheets for even browning.
- Parchment paper — Prevents sticking and makes transferring the scones a breeze.
- Bench scraper or sharp knife — For cutting the dough into wedges. A bench scraper is my go-to because it doesn’t drag through the dough.
- Pastry brush — For brushing the tops with cream before baking. A silicone brush works great and is easy to clean.
- Cooling rack — Allows air to circulate around the scones so they cool evenly without getting soggy on the bottom.
- Whisk — For mixing the glaze until smooth.
If you don’t have a pastry cutter, don’t stress. I’ve made these scones using two butter knives in a crisscross motion, and they turned out just as good. The key is to keep the butter cold, not to have the perfect tool. And if you don’t have a bench scraper, a sharp chef’s knife works fine — just make sure to cut straight down without sawing.
Preparation Method
Making these scones is simpler than you might think. The key is to keep everything cold and handle the dough as little as possible. Here’s how to do it, step by step.
- Preheat your oven to 400°F (200°C) and line a baking sheet with parchment paper. Getting the oven hot before you start ensures the scones get that initial burst of heat for a good rise.
- In a large mixing bowl, whisk together the 2 cups of all-purpose flour, 1/3 cup of granulated sugar, 1 tablespoon of baking powder, 1 teaspoon of pumpkin pie spice, 1/2 teaspoon of ground cinnamon, and 1/2 teaspoon of salt. Make sure the baking powder is evenly distributed — you don’t want one scone to rise more than another.
- Add the cold, cubed butter to the flour mixture. Using a pastry cutter or two forks, cut the butter into the flour until the mixture resembles coarse meal with pea-sized butter pieces. Don’t overdo it — those small bits of butter are what create the flaky layers. I usually stop when I can see visible butter pieces throughout the mixture. If you’re using your fingers, work quickly so the butter stays cold.
- In a separate small bowl, whisk together the 1/2 cup of pumpkin puree, 1/4 cup of heavy cream, and 1 teaspoon of vanilla extract until smooth. The mixture should be a uniform orange color. If your pumpkin puree seems very thick, that’s fine — it will combine with the cream nicely.
- Pour the wet ingredients into the dry ingredients and stir with a fork or spatula just until the dough comes together. It will look shaggy and there might be some dry spots — that’s totally fine. Overmixing will make the scones tough, so stop as soon as you can’t see any more dry flour. If the dough seems too dry, add another tablespoon of cream. If it seems too wet, add a tablespoon of flour.
- Turn the dough out onto a lightly floured surface and gently bring it together with your hands. Pat it into a circle about 3/4-inch thick. Don’t use a rolling pin — the heat from your hands is enough, and patting keeps the dough tender. The circle should be about 7 to 8 inches in diameter.
- Using a bench scraper or sharp knife, cut the circle into 8 wedges like you’re cutting a pizza. Cut straight down without twisting the knife — twisting seals the edges and prevents the scones from rising properly. Transfer the wedges to the prepared baking sheet, spacing them about 2 inches apart.
- Brush the tops of the scones with a little extra heavy cream. This helps them develop a golden, slightly crisp crust. If you want a little extra sparkle, you can sprinkle them with a pinch of coarse sugar before baking.
- Bake for 14 to 16 minutes, or until the scones are golden brown on the bottom and the tops are firm to the touch. The kitchen should smell amazing at this point — warm pumpkin and spices. Let the scones cool on the baking sheet for 5 minutes, then transfer them to a wire rack to cool completely before glazing.
- While the scones cool, make the maple glaze. In a small bowl, whisk together 1 cup of powdered sugar, 2 tablespoons of pure maple syrup, 1/2 teaspoon of vanilla extract, and 1 tablespoon of heavy cream. Whisk until smooth. If the glaze is too thick, add another tablespoon of cream. If it’s too thin, add a little more powdered sugar. The glaze should be thick enough to coat the back of a spoon but still pourable.
- Drizzle the glaze over the cooled scones. You can use a spoon to drizzle it back and forth, or transfer the glaze to a small zip-top bag, snip off a corner, and pipe it over the scones. Let the glaze set for about 10 minutes before serving.
One thing I learned the hard way — don’t skip the cooling step before glazing. If the scones are too warm, the glaze will melt right off and pool on the rack. Trust me, I’ve made that mistake more than once. Let them cool completely, and the glaze will sit beautifully on top.
Cooking Tips & Techniques
After making these scones more times than I care to count, I’ve picked up a few tricks that make a real difference. Here are my best tips for getting perfect light and fluffy pumpkin scones every time.
Keep everything cold. This is the number one rule for flaky scones. Cold butter creates steam as it melts in the oven, which lifts the dough and creates those tender layers. I like to cube my butter and pop it in the freezer for 10 minutes before I start. I also chill my mixing bowl if the kitchen is warm. And if the dough starts to feel soft or sticky at any point, I pop the whole baking sheet in the fridge for 15 minutes before baking.
Handle the dough gently. I know it’s tempting to keep kneading until the dough looks smooth, but that’s exactly what makes scones tough. The dough should be shaggy and a little rough-looking. When you pat it into a circle, use a light touch. Think of it like you’re handling a baby bird — gentle and quick.
Don’t twist the cutter. When you cut the scones, press straight down and lift straight up. Twisting the knife or scraper seals the edges, which prevents the scones from rising evenly. I learned this one the hard way after a batch of oddly shaped, lopsided scones.
Watch the baking time. Ovens vary, so start checking at the 12-minute mark. The scones are done when they’re golden on the bottom and the tops spring back when lightly touched. If you’re not sure, you can gently lift one with a spatula and check the bottom. Overbaked scones are dry, so it’s better to pull them a minute early than a minute late.
Make the glaze while the scones cool. This saves time and ensures the glaze is ready to go when the scones are completely cool. I’ve tried rushing this step and ended up with melted glaze running off the scones. Patience pays off here.
Variations & Adaptations
One of the best things about this recipe is how easy it is to customize. Here are some of my favorite variations, all of which I’ve tested and loved.
Gluten-Free Version: Substitute the all-purpose flour with a 1:1 gluten-free baking flour blend that contains xanthan gum. I’ve had great results with Bob’s Red Mill 1:1 Baking Flour. The texture will be slightly more delicate, but the flavor is just as good. Add an extra tablespoon of cream if the dough seems too dry.
Vegan Version: Use cold vegan butter (I like Miyoko’s) and substitute the heavy cream with full-fat coconut cream or a plant-based heavy cream alternative. For the glaze, use maple syrup and a vegan powdered sugar, and replace the cream with a non-dairy milk. The scones won’t be quite as flaky, but they’ll still be tender and delicious.
Chocolate Chip Pumpkin Scones: Add 1/2 cup of mini chocolate chips to the dry ingredients before adding the wet ingredients. The chocolate pairs beautifully with the pumpkin and spices. I like dark chocolate chips for a less sweet option.
Cranberry Orange Pumpkin Scones: Add 1/2 cup of dried cranberries and 1 tablespoon of orange zest to the dry ingredients. For the glaze, replace the maple syrup with fresh orange juice and a little orange zest. The bright citrus flavor is a perfect contrast to the warm spices.
Savory Pumpkin Scones: Skip the sugar and pumpkin pie spice, and add 1/2 cup of shredded cheddar cheese, 1/4 cup of chopped fresh sage, and 1/4 teaspoon of black pepper. Reduce the pumpkin puree to 1/3 cup. These are amazing with soup or chili.
Serving & Storage Suggestions
These scones are best served warm, fresh from the oven, with the maple glaze still slightly soft. But they’re also wonderful at room temperature, making them perfect for make-ahead breakfasts or brunch spreads.
Serving Suggestions: Serve the scones with a hot cup of coffee or tea for a cozy fall breakfast. They’re also fantastic alongside a bowl of butternut squash soup or a hearty salad for lunch. For a special brunch, arrange them on a platter with fresh apple slices, a bowl of whipped butter, and a little extra maple syrup for drizzling.
Storage: Store leftover scones in an airtight container at room temperature for up to 3 days. If you’ve already glazed them, place a sheet of parchment paper between layers to prevent sticking. The glaze will soften slightly over time, but the scones will still be delicious.
Freezing: You can freeze the unbaked scones for up to 3 months. Cut the dough into wedges, place them on a parchment-lined baking sheet, and freeze until solid. Then transfer the frozen scones to a zip-top bag. When you’re ready to bake, place the frozen scones on a baking sheet, brush with cream, and bake at 400°F for 18 to 20 minutes. No need to thaw. You can also freeze baked, unglazed scones for up to 3 months. Thaw at room temperature, then warm in a 300°F oven for 5 minutes before glazing.
Reheating: To reheat a single scone, pop it in a toaster oven or microwave for about 15 seconds. For a larger batch, warm them in a 300°F oven for 5 to 7 minutes. The glaze will get a little melty, but that’s part of the charm.
One thing I love about these scones is that the flavors actually develop over time. Day-old scones taste even more pumpkin-y and spiced, so don’t be afraid to make them a day ahead.
Nutritional Information & Benefits
These pumpkin scones are a treat, but they also offer some nutritional benefits thanks to the star ingredient. Here’s a rough estimate of the nutritional values per scone (with glaze):
| Nutrient | Amount per Scone |
|---|---|
| Calories | 280 |
| Total Fat | 12g |
| Saturated Fat | 7g |
| Cholesterol | 35mg |
| Sodium | 280mg |
| Total Carbohydrates | 40g |
| Dietary Fiber | 2g |
| Sugars | 20g |
| Protein | 4g |
Pumpkin is packed with vitamin A, which is great for eye health and immune function. It’s also a good source of fiber and antioxidants. The maple syrup in the glaze provides a more natural sweetness than refined sugar, though it’s still sugar, so enjoy these scones in moderation. If you’re looking to cut back on sugar, you can reduce the glaze or skip it altogether — the scones are still delicious on their own.
For those with dietary restrictions, these scones can be made gluten-free or vegan with the substitutions mentioned above. They are not dairy-free in their original form, but the vegan version works well for those avoiding dairy. As always, check your ingredient labels if you have specific allergies.
Conclusion
These light and fluffy pumpkin scones with maple glaze have become a staple in my kitchen, and I honestly think they’ll become one in yours too. They’re the kind of recipe that feels special enough for a holiday brunch but simple enough for a random Tuesday morning when you just want something cozy. The texture is spot-on — tender, flaky, and light — and the maple glaze is the perfect finishing touch.
I love how forgiving this recipe is. You don’t need to be a pastry chef or have a bunch of fancy tools. You just need a little patience, a light touch, and a willingness to enjoy the process. And honestly, the smell alone is worth it. Your whole kitchen will smell like autumn, and that’s a pretty good return on investment for 30 minutes of work.
I’d love to hear how these turn out for you. Did you try any variations? Did you double the glaze like I always do? Drop a comment below and let me know — I read every single one, and I love seeing what you come up with. And if you’re looking for another cozy fall treat, you might enjoy my cinnamon apple baked oatmeal or these maple pecan energy bites. Happy baking, friends!
Frequently Asked Questions
Can I use fresh pumpkin instead of canned?
Yes, you can use fresh pumpkin puree, but you’ll need to make sure it’s well-drained. Fresh pumpkin tends to have more water than canned, which can make the scones gummy. After pureeing the cooked pumpkin, let it sit in a fine-mesh strainer lined with cheesecloth for about 30 minutes to remove excess moisture.
Why are my scones dry?
Dry scones are usually the result of overmixing the dough or overbaking. Mix the dough just until it comes together — it should look shaggy, not smooth. And check the scones a few minutes before the suggested baking time. Every oven is different, and even one extra minute can make a difference.
Can I make the dough ahead of time?
Absolutely. You can prepare the dough, cut it into wedges, and refrigerate them on the baking sheet for up to 24 hours before baking. You can also freeze the unbaked wedges for up to 3 months. Just bake from frozen, adding a few extra minutes to the baking time.
Can I skip the glaze?
Yes! The scones are delicious on their own, especially if you want a less sweet option. You can also sprinkle the tops with coarse sugar before baking for a little sparkle and crunch without the glaze. Or try a simple dusting of powdered sugar instead.
How do I get a taller scone?
For taller scones, make sure your baking powder is fresh and your butter is very cold. You can also pat the dough a little thicker — up to 1 inch — before cutting. Just keep in mind that thicker scones may need an extra minute or two of baking time.
Pin This Recipe!

Light & Fluffy Pumpkin Scones with Easy Maple Glaze
These light and fluffy pumpkin scones are tender, flaky, and perfectly spiced, topped with a simple maple glaze. They come together in about 30 minutes with no chilling required, making them the perfect fall treat for cozy mornings or holiday brunches.
- Prep Time: 15 minutes
- Cook Time: 16 minutes
- Total Time: 31 minutes
- Yield: 8 servings 1x
- Category: Breakfast
- Cuisine: American
Ingredients
- 2 cups (250g) all-purpose flour
- 1/3 cup (65g) granulated sugar
- 1 tablespoon baking powder
- 1 teaspoon pumpkin pie spice
- 1/2 teaspoon ground cinnamon
- 1/2 teaspoon salt
- 6 tablespoons (85g) unsalted butter, cold and cubed
- 1/2 cup (120g) pumpkin puree
- 1/4 cup (60ml) heavy cream, plus more for brushing
- 1 teaspoon vanilla extract
- 1 cup (120g) powdered sugar
- 2 tablespoons pure maple syrup
- 1–2 tablespoons heavy cream or milk
- 1/2 teaspoon vanilla extract (optional)
Instructions
- Preheat your oven to 400°F (200°C) and line a baking sheet with parchment paper.
- In a large mixing bowl, whisk together the all-purpose flour, granulated sugar, baking powder, pumpkin pie spice, ground cinnamon, and salt.
- Add the cold, cubed butter to the flour mixture. Using a pastry cutter or two forks, cut the butter into the flour until the mixture resembles coarse meal with pea-sized butter pieces.
- In a separate small bowl, whisk together the pumpkin puree, 1/4 cup heavy cream, and 1 teaspoon vanilla extract until smooth.
- Pour the wet ingredients into the dry ingredients and stir with a fork or spatula just until the dough comes together. It will look shaggy.
- Turn the dough out onto a lightly floured surface and gently bring it together with your hands. Pat it into a circle about 3/4-inch thick (about 7 to 8 inches in diameter).
- Using a bench scraper or sharp knife, cut the circle into 8 wedges. Transfer the wedges to the prepared baking sheet, spacing them about 2 inches apart.
- Brush the tops of the scones with a little extra heavy cream.
- Bake for 14 to 16 minutes, or until the scones are golden brown on the bottom and the tops are firm to the touch. Let cool on the baking sheet for 5 minutes, then transfer to a wire rack to cool completely.
- While the scones cool, make the maple glaze: In a small bowl, whisk together the powdered sugar, maple syrup, 1/2 teaspoon vanilla extract (if using), and 1 tablespoon heavy cream. Whisk until smooth. Add more cream if needed to reach a pourable consistency.
- Drizzle the glaze over the cooled scones. Let the glaze set for about 10 minutes before serving.
Notes
Keep all ingredients cold for flaky scones. Handle the dough gently and do not overmix. For best results, let scones cool completely before glazing. The dough can be refrigerated for up to 24 hours or frozen unbaked for up to 3 months.
Nutrition
- Serving Size: 1 scone
- Calories: 280
- Sugar: 20
- Sodium: 280
- Fat: 12
- Saturated Fat: 7
- Carbohydrates: 40
- Fiber: 2
- Protein: 4
Keywords: pumpkin scones, maple glaze, fall breakfast, easy scone recipe, pumpkin spice


