My kid claimed to hate oatmeal for three solid years. Every morning was the same little negotiation—a bowl of something warm, and she’d push it away like I’d offered her a plate of gravel. Then, last October, I made a batch of these pumpkin baked oatmeal cups “just for myself” on a Sunday afternoon. I was tired, the kitchen was a mess, and honestly, I wasn’t thinking about converting anyone. I just wanted something easy for the week ahead.
An hour later, I found her standing on a stool at the counter, quietly eating one straight from the muffin tin. No announcement. No fanfare. Just the quiet, satisfying crunch of a kid proving herself wrong. She didn’t even look at me—just asked if we could make more for her lunchbox. That was the moment I knew these little cups were something special.
Maybe you’ve been there too—trying to get a picky eater to warm up to breakfast, or just needing a grab-and-go option that doesn’t cost a fortune. These pumpkin baked oatmeal cups are soft, naturally sweet, and packed with enough cozy fall flavor that even the most stubborn oatmeal-hater might just get caught with their hand in the tin. I’ve been making them every week since, and they’ve officially become our go-to budget-friendly meal prep staple.
Why You’ll Love This Recipe
I’ve tested this recipe more times than I can count—through soggy batches, undercooked centers, and one memorable attempt where I forgot the pumpkin entirely. These are the things I learned so you don’t have to. Here’s why these oatmeal cups earn a permanent spot in your weekly rotation:
- Budget-Friendly: A whole batch costs about the same as one fancy coffee shop muffin. Canned pumpkin is cheap, oats are a pantry staple, and you likely have most of the other ingredients on hand already.
- Quick & Easy: From bowl to oven in about 10 minutes. No fancy techniques, no complicated steps—just mix, scoop, and bake.
- Perfect for Meal Prep: They keep beautifully in the fridge for up to a week and freeze like a dream. Grab one on your way out the door and breakfast is solved.
- Crowd-Pleaser: I’ve served these at playdates, school events, and even a Thanksgiving brunch. Kids and adults alike reach for seconds without hesitation.
- Naturally Sweetened: Just a little maple syrup or honey does the trick—no refined sugar needed. The pumpkin and warm spices do the heavy lifting for flavor.
What makes these different from every other baked oatmeal recipe out there? It’s the texture. They’re not dense or dry like some oatmeal cups can be. The pumpkin keeps them incredibly moist, while the oats give just enough chew. They hit that perfect spot between a muffin and a bowl of oatmeal—portable, satisfying, and impossible to resist.
What Ingredients You Will Need
This recipe uses simple, wholesome ingredients that won’t break the bank. Most of these are pantry staples, especially if you keep a can of pumpkin around during fall. Here’s what you’ll need:
- Rolled oats, 2 cups (use old-fashioned rolled oats for the best texture—quick oats can make them mushy)
- Canned pumpkin puree, 1 cup (not pumpkin pie filling—just plain pumpkin; I prefer Libby’s for consistent results)
- Milk, 1 cup (any milk works—dairy, almond, oat, or even leftover buttermilk)
- Eggs, 2 large, lightly beaten
- Maple syrup or honey, 1/3 cup (adjust to your sweetness preference; I use slightly less for younger kids)
- Melted coconut oil or unsalted butter, 3 tablespoons (cooled slightly)
- Pumpkin pie spice, 2 teaspoons (or make your own with cinnamon, nutmeg, ginger, and cloves)
- Cinnamon, 1 teaspoon (adds extra warmth)
- Baking powder, 1 teaspoon (helps them rise just a little)
- Salt, 1/4 teaspoon (balances the sweetness)
- Vanilla extract, 1 teaspoon
- Optional mix-ins: 1/2 cup chocolate chips, dried cranberries, or chopped nuts (I usually add mini chocolate chips—kids go wild for them)
Ingredient Tips: For the best texture, use rolled oats rather than instant. If you’re dairy-free, any plant-based milk works perfectly—I’ve used oat milk and unsweetened almond milk with great results. The pumpkin puree can be swapped for butternut squash puree if you happen to have that on hand. Just make sure it’s not seasoned.
I always buy canned pumpkin in bulk when it goes on sale during the fall. A single 15-ounce can is exactly what you need for this recipe, and the leftover few tablespoons can be stirred into yogurt or spread on toast. No waste, no fuss.
Equipment Needed
Nothing fancy here—just the basics you probably already own:
- Muffin tin (standard 12-cup; I use a nonstick one, but any will work with liners)
- Muffin liners (paper or silicone—paper is easier for grab-and-go, silicone is reusable and budget-friendly)
- Large mixing bowl
- Medium bowl or liquid measuring cup (for whisking wet ingredients)
- Whisk (or a fork in a pinch)
- Measuring cups and spoons
- Spatula (for scraping every last bit of batter)
- Cooling rack (optional but helps them cool evenly)
If you don’t have a muffin tin, you can bake this as a single 8×8 dish and scoop portions—just add about 10-15 minutes to the baking time. I’ve done it that way when my muffin tin was buried in the back of a cabinet, and it worked just fine. Budget-friendly tip: silicone muffin liners are about five dollars and save you from buying paper ones again and again.
Preparation Method
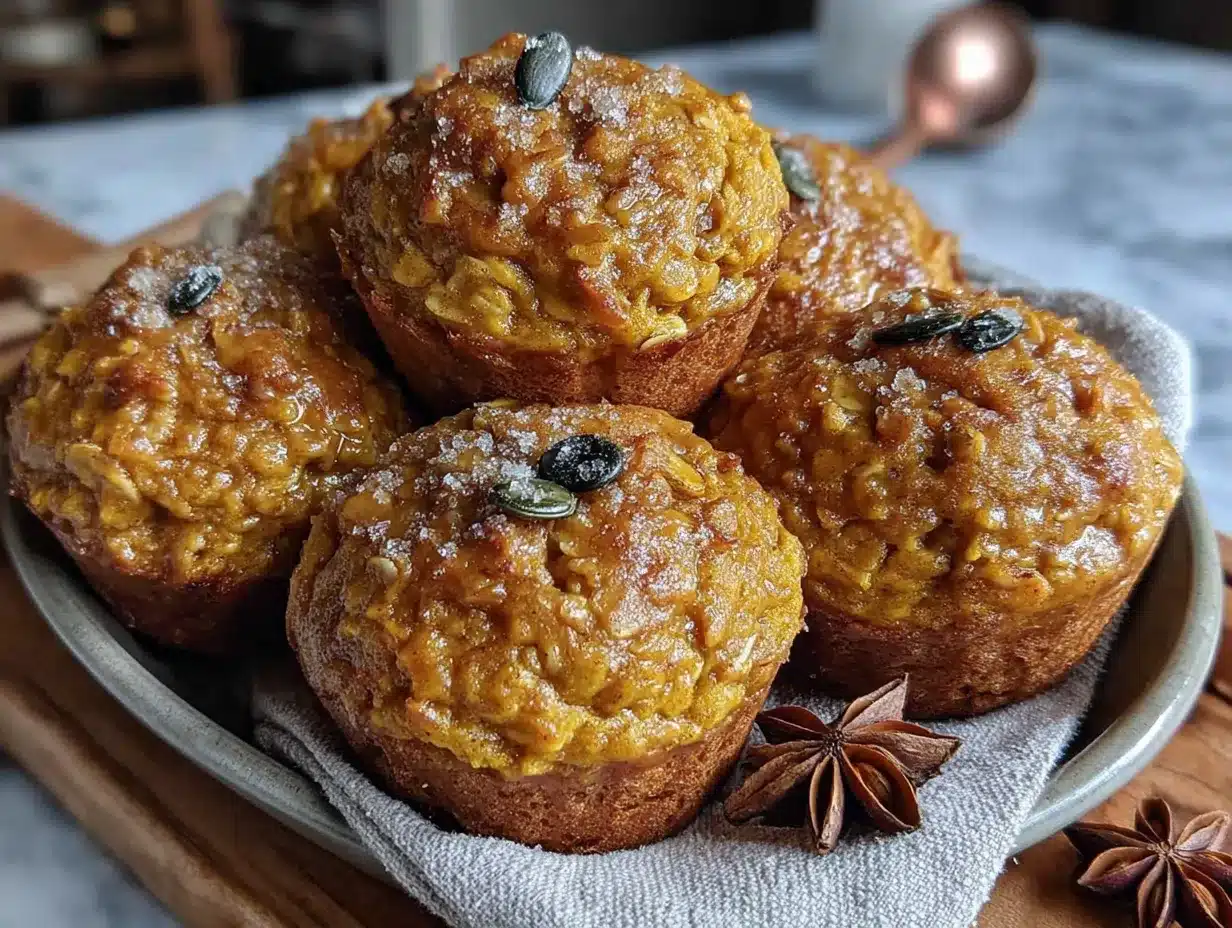
This comes together fast—about 10 minutes of active time, then the oven does the rest. Let’s walk through it step by step.
- Preheat your oven to 375°F (190°C). Line a 12-cup muffin tin with paper or silicone liners. If you’re using silicone, give them a quick spray of nonstick spray for extra insurance—I learned this after one stubborn batch refused to let go.
- In a large bowl, whisk together the dry ingredients. Add the rolled oats, pumpkin pie spice, cinnamon, baking powder, and salt. Stir them together so the spices are evenly distributed. This takes about 30 seconds but makes a real difference—nobody wants a bite that’s all clove and nothing else.
- In a separate bowl, combine the wet ingredients. Whisk the pumpkin puree, milk, beaten eggs, maple syrup (or honey), melted coconut oil or butter, and vanilla extract until smooth. The mixture should look like a thick, creamy orange shake. If your coconut oil solidifies on contact with cold ingredients, don’t panic—just whisk a little more and it’ll come together.
- Pour the wet ingredients into the dry ingredients. Fold gently with a spatula until just combined. A few small streaks of flour are okay—overmixing can make the oatmeal cups dense. This is where I usually add my chocolate chips or other mix-ins, folding them in at the very end.
- Divide the batter evenly among the 12 muffin cups. I use a 1/4-cup scoop for this—it’s the perfect amount and keeps things neat. The cups will be quite full, almost to the top. That’s fine; they don’t rise dramatically like muffins, so filling them generously gives you a nice, hearty cup.
- Bake for 20-25 minutes. Start checking at 20 minutes—the tops should be set and lightly golden, and a toothpick inserted in the center should come out clean or with just a few moist crumbs. If the toothpick is wet with batter, give them another 3-5 minutes. My oven runs hot, so I usually check at 18 minutes just to be safe.
- Cool in the pan for 5 minutes. This step is important—it lets them set so they don’t fall apart when you take them out. After 5 minutes, transfer them to a wire rack to cool completely. If you skip this, they might stick to the liners or crumble when you try to lift them out.
- Once cool, enjoy immediately or store for later. They’re delicious warm, at room temperature, or even cold straight from the fridge. I won’t judge.
Sensory Cues: When they’re done, your kitchen will smell like a cozy autumn afternoon—warm pumpkin, cinnamon, and a hint of maple. The tops should feel firm but spring back when you press them gently. The edges will be just slightly darker than the center. Trust your nose and your eyes; they rarely lie.
Cooking Tips & Techniques
After making these weekly for two months straight, I’ve gathered a few hard-won tips that make a real difference:
- Don’t overmix the batter. I know I said it already, but it bears repeating. Stir until the dry ingredients are just moistened. Overmixing activates the gluten in the oats and makes the cups tough instead of tender.
- Let the batter rest for 5 minutes before baking. This gives the oats time to absorb some of the liquid, which results in a softer, more cohesive cup. I stumbled onto this by accident when I got distracted by a phone call, and it was a game-changer.
- Use room temperature eggs. Cold eggs can make the coconut oil or butter seize up. If you forgot to take them out ahead of time, place them in a bowl of warm water for 5 minutes—works every time.
- Line your muffin tin properly. Paper liners are easiest for grab-and-go, but if you’re using silicone, give them a light spray. I learned this the hard way when my first batch of silicone liners held onto the oatmeal cups like they were best friends.
- Make a double batch and freeze half. These freeze beautifully for up to three months. I always double the recipe on Sunday, bake one batch for the week, and freeze the other for busy mornings when I know I’ll need something quick.
Common Mistake to Avoid: Don’t be tempted to swap in quick oats for rolled oats. I tried it once when I was out of rolled oats, and the texture was mushy and sad—like baby food in a cup. Rolled oats give you that satisfying chew that makes these feel like a real breakfast.
Variations & Adaptations
One of the best things about this recipe is how flexible it is. Here are some variations I’ve tried and loved:
- Chocolate Chip Pumpkin Cups: Add 1/2 cup mini chocolate chips to the batter. This is the version that finally won over my oatmeal-hater. The chocolate melts into little pockets of sweetness that make breakfast feel like a treat.
- Vegan Version: Replace the eggs with 2 flax eggs (2 tablespoons ground flaxseed mixed with 6 tablespoons water, let sit for 5 minutes) and use plant-based milk and maple syrup. They come out slightly denser but still delicious. My vegan friend couldn’t tell the difference.
- Gluten-Free Option: Use certified gluten-free rolled oats. That’s it—no other changes needed. Oats are naturally gluten-free, but some brands are processed in facilities that handle wheat, so check the label if you’re sensitive.
- Apple Pumpkin Twist: Fold in 1/2 cup finely diced apple (peeled) along with the mix-ins. It adds a little tartness and extra moisture. I do this in early fall when apples are cheap and plentiful.
- Protein-Packed Version: Add 2 tablespoons of your favorite protein powder (vanilla works best) and reduce the oats by 2 tablespoons to keep the texture balanced. Great for post-workout breakfasts or growing teenagers.
Seasonal Swap: In spring, I sometimes swap the pumpkin for mashed banana and use a little less sweetener. It changes the flavor completely but keeps the same easy method. The kids call them “banana oatmeal cupcakes” and they disappear just as fast.
Serving & Storage Suggestions
These oatmeal cups are incredibly versatile when it comes to serving. Here’s how I handle them:
Serving Temperature: They’re delicious at any temperature. Warm from the oven with a pat of butter melting on top is my personal favorite. Room temperature is perfect for lunchboxes—they won’t get soggy or fall apart. Cold from the fridge, they have a denser, almost cheesecake-like texture that my oldest actually prefers.
What to Serve With: A dollop of Greek yogurt or a drizzle of extra maple syrup turns these into a more substantial breakfast. For a quick snack, they’re perfect on their own with a glass of milk. I’ve even crumbled one over a bowl of vanilla ice cream for a quick dessert—don’t tell the kids.
Storage: Keep them in an airtight container in the refrigerator for up to 5 days. I layer them with parchment paper between stacks so they don’t stick together. For longer storage, freeze them in a single layer on a baking sheet, then transfer to a freezer bag. They’ll keep for up to 3 months.
Reheating: Pop one in the microwave for 20-30 seconds for that fresh-from-the-oven warmth. If you’re reheating from frozen, give it 45-60 seconds. You can also reheat them in a toaster oven at 350°F for about 5 minutes if you want the edges to crisp up slightly.
Flavor Development: Honestly, these taste even better on day two. The flavors meld together overnight, and the texture becomes more uniform. I often make them a day ahead on purpose just for that reason. They’re one of those rare recipes that actually improves with a little patience.
Nutritional Information & Benefits
Here’s a rough estimate per oatmeal cup (based on 12 servings, without optional mix-ins):
| Nutrient | Amount Per Cup |
|---|---|
| Calories | 145 |
| Total Fat | 5g |
| Saturated Fat | 3g |
| Carbohydrates | 22g |
| Fiber | 3g |
| Sugar | 8g |
| Protein | 4g |
| Vitamin A | 80% DV |
Health Benefits: Pumpkin is packed with vitamin A, which supports eye health and immune function—especially handy during cold and flu season. Oats provide soluble fiber that helps keep little (and big) tummies full and satisfied until lunchtime. The eggs add a nice protein boost, and the spices like cinnamon have anti-inflammatory properties. These are a far cry from the sugary, processed breakfast bars you’d grab at the store.
Dietary Considerations: This recipe is naturally nut-free (if you skip the nuts as a mix-in) and can easily be made gluten-free and vegan. It’s also free of refined sugar if you use maple syrup or honey. Always check your labels if cooking for someone with allergies—especially with oats and their potential cross-contamination.
Conclusion
These pumpkin baked oatmeal cups have become more than just a recipe in our house—they’re a little solution to a big problem. They solve the “what’s for breakfast” scramble, they keep my grocery budget happy, and they’ve turned a former oatmeal-hater into someone who actually asks for them. That’s a win I didn’t see coming, and I’m still quietly smug about it.
I hope you give them a try, whether you’re feeding a picky eater, meal-prepping for a busy week, or just looking for something cozy to bake on a Sunday afternoon. Customize them however you like—throw in some chocolate chips, swap the pumpkin for banana, make them your own. That’s the beauty of a simple, forgiving recipe like this one.
If you make these, I’d love to hear how they turned out. Drop a comment below or tag me in your photos—I’m genuinely excited to see your version. And if you have a picky eater at home, let me know if they got caught with their hand in the muffin tin too. Happy baking, friends!
Frequently Asked Questions
Can I use quick oats instead of rolled oats?
I wouldn’t recommend it. Quick oats absorb liquid differently and will give you a mushy, dense texture that’s more like baby food than a baked oatmeal cup. Rolled oats are worth the extra chewiness they provide.
How do I make these nut-free for school lunches?
Simply skip any nut-based mix-ins and use a nut-free milk like oat milk or dairy milk. The recipe itself doesn’t contain nuts, so it’s naturally nut-free as long as you’re careful with add-ins. Always check your oat label if cross-contamination is a concern.
Can I use fresh pumpkin instead of canned?
Yes, but you’ll need to cook and puree it first. Fresh pumpkin has more water content than canned, so you may need to drain it slightly or bake the cups a few minutes longer. Canned pumpkin is more consistent and convenient, honestly—I stick with it for meal prep.
How do I keep these from sticking to the liners?
Use good-quality paper liners or lightly spray silicone liners with nonstick spray. Letting them cool in the pan for a full 5 minutes before transferring also helps. If you’re still having trouble, try baking them directly in a greased muffin tin without liners—they’ll pop right out.
Can I double this recipe for a crowd?
Absolutely. The recipe doubles beautifully. Just make sure you have two muffin tins or bake in batches. The baking time stays the same, but you may want to rotate the pans halfway through if your oven has hot spots. I regularly make a double batch for school events and potlucks.
Pin This Recipe!
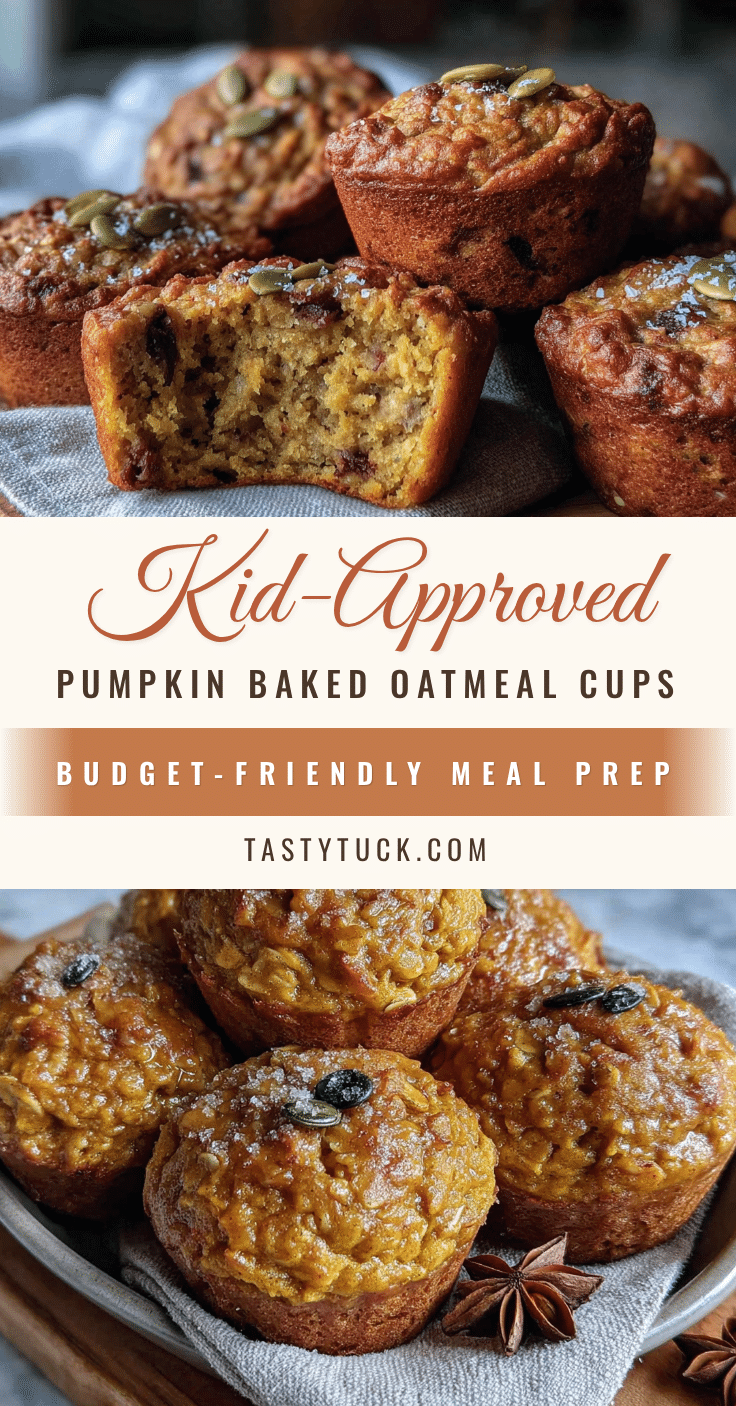
Kid-Approved Pumpkin Baked Oatmeal Cups: Easy Meal Prep

Soft, naturally sweet pumpkin baked oatmeal cups that are perfect for meal prep and picky eaters. Made with simple ingredients, they’re budget-friendly, quick to prepare, and perfect for grab-and-go breakfasts or snacks.
- Prep Time: 10 minutes
- Cook Time: 25 minutes
- Total Time: 35 minutes
- Yield: 12 servings 1x
- Category: Breakfast
- Cuisine: American
Ingredients
- 2 cups rolled oats (old-fashioned)
- 1 cup canned pumpkin puree (not pumpkin pie filling)
- 1 cup milk (dairy, almond, oat, or buttermilk)
- 2 large eggs, lightly beaten
- 1/3 cup maple syrup or honey
- 3 tablespoons melted coconut oil or unsalted butter, cooled slightly
- 2 teaspoons pumpkin pie spice
- 1 teaspoon cinnamon
- 1 teaspoon baking powder
- 1/4 teaspoon salt
- 1 teaspoon vanilla extract
- Optional mix-ins: 1/2 cup chocolate chips, dried cranberries, or chopped nuts
Instructions
- Preheat your oven to 375°F (190°C). Line a 12-cup muffin tin with paper or silicone liners. If using silicone, spray lightly with nonstick spray.
- In a large bowl, whisk together the rolled oats, pumpkin pie spice, cinnamon, baking powder, and salt until evenly distributed.
- In a separate bowl, whisk together the pumpkin puree, milk, beaten eggs, maple syrup (or honey), melted coconut oil or butter, and vanilla extract until smooth.
- Pour the wet ingredients into the dry ingredients. Fold gently with a spatula until just combined. A few small streaks are okay. Fold in any optional mix-ins at this point.
- Divide the batter evenly among the 12 muffin cups, filling them almost to the top. A 1/4-cup scoop works well.
- Bake for 20-25 minutes, until the tops are set and lightly golden, and a toothpick inserted in the center comes out clean or with a few moist crumbs.
- Cool in the pan for 5 minutes, then transfer to a wire rack to cool completely.
- Enjoy warm, at room temperature, or cold. Store leftovers in an airtight container in the refrigerator for up to 5 days, or freeze for up to 3 months.
Notes
For best texture, use rolled oats, not quick oats. Let batter rest 5 minutes before baking for softer cups. Use room temperature eggs to prevent coconut oil from seizing. These taste even better on day two as flavors meld. To freeze, place in a single layer on a baking sheet, then transfer to a freezer bag for up to 3 months. Reheat in microwave for 20-30 seconds or in toaster oven at 350°F for 5 minutes.
Nutrition
- Serving Size: 1 oatmeal cup
- Calories: 145
- Sugar: 8
- Sodium: 95
- Fat: 5
- Saturated Fat: 3
- Carbohydrates: 22
- Fiber: 3
- Protein: 4
Keywords: pumpkin baked oatmeal cups, easy meal prep, kid-friendly breakfast, healthy oatmeal cups, fall breakfast recipe, budget-friendly breakfast, grab-and-go breakfast


