I was sorting through a box of old cookbooks at a library book sale last fall—you know the kind, where the pages smell like dust and someone’s grandmother’s handwriting is tucked in the margins—when the retired librarian behind the counter said, “You look like someone who’d appreciate a good cookie trick.” I honestly wasn’t sure if that was a compliment or a warning, but she reached under the counter and pulled out a stained index card. “Pumpkin snickerdoodles,” she said. “But only make half. The full batch is too much for two people.” And that, my friends, is how this recipe found me. I’ve made a lot of cookies in my time, but something about that card—the way it was worn soft at the edges, the tiny coffee ring in the corner—made me want to try it the second I got home.
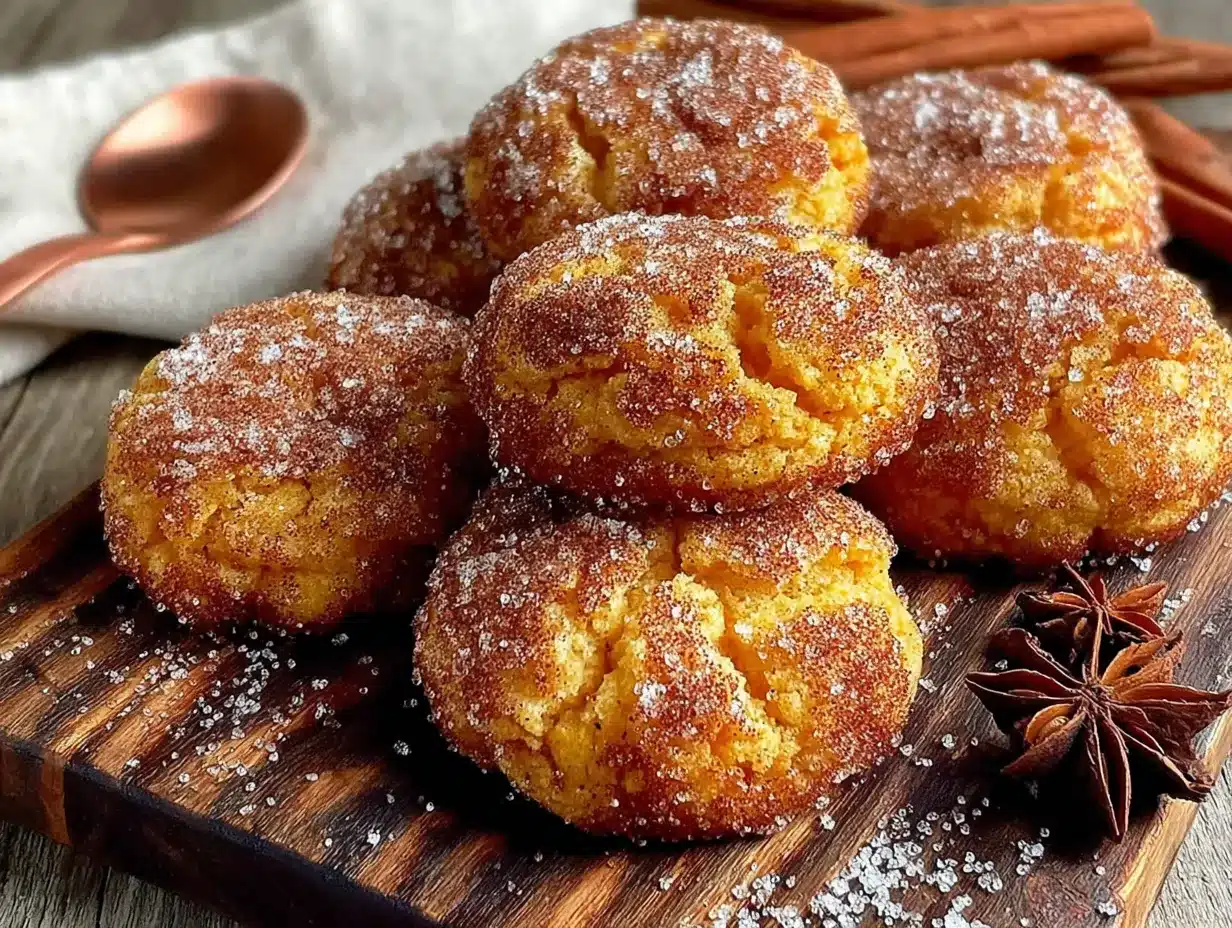
The thing about pumpkin cookies is they often turn out cakey and sad, more muffin-top than cookie. But these? These are chewy at the edges, soft in the middle, and rolled in that unmistakable cinnamon-sugar cloak that makes snickerdoodles the unsung heroes of the cookie world. The pumpkin adds a tenderness you don’t get from a standard recipe, plus it keeps them moist for days—if they last that long. Maybe you’ve been there, staring at half a can of pumpkin puree in your fridge after making a pie, wondering what to do with the leftovers. This is the answer, and it takes about 20 minutes from start to finish.
I’ll be honest: the first batch I made, I forgot the cream of tartar. I mean, who keeps cream of tartar in their pantry these days? I ended up using a splash of lemon juice as a substitute, and honestly, it worked fine. That little imperfection taught me something important about this recipe—it’s forgiving. It doesn’t demand perfection, which is exactly what I need on a Tuesday night when I’m tired and just want something warm and sweet without a production. This recipe stayed with me because it’s the kind of thing you can make without thinking too hard, and the results feel like a hug.
Why You’ll Love This Recipe
Let me tell you why these pumpkin snickerdoodles have earned a permanent spot in my weeknight rotation. I’ve tested this recipe at least a dozen times, tweaking the spice ratio and the bake time until everything clicked. It’s been approved by my picky neighbor, my coworker who “doesn’t like pumpkin desserts,” and my own late-night cookie cravings. Here’s what makes it special:
- Quick & Easy: From start to finish, you’re looking at about 20 minutes. No chilling, no complicated steps, no mixer required. Just a bowl, a spoon, and your oven.
- Simple Ingredients: You probably already have everything except maybe the pumpkin puree. No weird specialty flours or obscure spices—just pantry basics that come together beautifully.
- Perfect for Small Households: This makes exactly 8 cookies. No more staring at a plate of 24 cookies wondering what to do with the extras. It’s portion-controlled without being sad about it.
- Crowd-Pleaser: I’ve served these to kids, adults, and even a gluten-free friend (just swap the flour), and they disappear every single time.
- Unbelievably Delicious: The texture is the real star here—crispy cinnamon-sugar edges with a soft, almost creamy center. The pumpkin doesn’t scream at you; it just makes everything more tender and flavorful.
What makes this recipe different from every other pumpkin cookie out there is the cream of tartar. It gives snickerdoodles that signature tangy-sweet flavor and that slightly chewy texture that cakey pumpkin cookies just can’t match. Plus, the small batch size means you’re not committing to a week’s worth of cookies—you get just enough to satisfy that craving without the guilt or the waste. Honestly, it’s the kind of recipe that makes you feel like you’ve discovered a secret. Close your eyes after that first bite—you’ll see what I mean.
What Ingredients You Will Need
This recipe uses simple, wholesome ingredients to deliver that perfect snickerdoodle texture with a cozy pumpkin twist. Most of these are pantry staples, which makes this an easy last-minute treat when the craving hits. Here’s what you’ll need:
For the Cookie Dough
- 1/4 cup unsalted butter, softened (I use Kerrygold for the rich flavor, but any good-quality butter works—just make sure it’s truly softened, not melted)
- 1/4 cup granulated sugar (adds sweetness and helps create that crackly top)
- 2 tablespoons packed light brown sugar (adds moisture and a hint of molasses depth)
- 1 large egg yolk (room temperature—this gives richness without making the dough too wet)
- 1/4 cup pumpkin puree (not pumpkin pie filling! I recommend Libby’s for consistent texture and flavor)
- 1/2 teaspoon vanilla extract (pure, not imitation, for the best flavor)
- 3/4 cup all-purpose flour (spoon and level for accuracy—don’t scoop directly from the bag)
- 1/4 teaspoon cream of tartar (this is non-negotiable for that classic snickerdoodle tang)
- 1/4 teaspoon baking soda (helps the cookies spread just right)
- 1/4 teaspoon salt (balances the sweetness and enhances the pumpkin flavor)
- 1/2 teaspoon ground cinnamon (the backbone of the flavor profile)
- 1/4 teaspoon ground nutmeg (freshly grated if you have it—it makes a difference)
- 1/8 teaspoon ground ginger (adds warmth without being spicy)
- Pinch of ground cloves (optional, but it rounds out the pumpkin spice beautifully)
For the Cinnamon-Sugar Coating
- 2 tablespoons granulated sugar
- 1 teaspoon ground cinnamon
A quick note on ingredient selection: when it comes to pumpkin puree, I’ve tried both canned and fresh, and honestly, canned is more consistent for baking. Fresh pumpkin can be watery and lead to flat cookies. If you’re using fresh, make sure to drain it well in a cheesecloth or paper towels. For the butter, let it sit out for about 30 minutes before you start—it should be soft enough to leave a dent when you press it, but not melted. And if you don’t have cream of tartar, you can substitute 1/2 teaspoon of lemon juice or white vinegar, but the tang won’t be quite as pronounced. It’ll still be delicious, just different.
Equipment Needed
You don’t need a fancy kitchen to make these cookies, which is part of the beauty. Here’s what you’ll actually use:
- Medium mixing bowl (any bowl works, but I prefer a ceramic one because it doesn’t slide around)
- Small bowl (for the cinnamon-sugar coating)
- Whisk or fork (for mixing the dry ingredients)
- Rubber spatula or wooden spoon (for combining the dough—I’ve used both and prefer the spatula for scraping the sides)
- Baking sheet (a standard half-sheet pan works perfectly)
- Parchment paper or silicone baking mat (parchment is easier for cleanup, but silicone mats give slightly more even browning)
- Cookie scoop or tablespoon (a 1.5-tablespoon scoop makes perfectly uniform cookies, but a regular spoon works too)
- Cooling rack (optional but recommended—it keeps the bottoms from getting soggy)
If you don’t have a cookie scoop, just use two spoons to portion the dough—it’s not rocket science. And if you’re using a dark-colored baking sheet, reduce the oven temperature by 25°F to prevent over-browning. I learned that one the hard way after a batch of charcoal-colored cookies. Budget tip: dollar store baking sheets work fine, just keep an eye on the bake time since they tend to heat unevenly.
Preparation Method
Let’s get to the fun part. Here’s how to make these pumpkin snickerdoodles step by step. I’ve included time estimates and sensory cues so you know exactly what to look for.
- Preheat your oven to 350°F (175°C). Line a baking sheet with parchment paper or a silicone mat. Do this first so the oven is ready when you are—it takes about 10 minutes to preheat, which is exactly how long it takes to make the dough.
- Cream the butter and sugars together. In your medium bowl, beat the softened butter, granulated sugar, and brown sugar together with a spatula or wooden spoon until light and fluffy. This should take about 2 minutes. You’re looking for a pale, creamy texture—it should look like soft frosting. Don’t rush this step; proper creaming creates air pockets that make the cookies tender.
- Add the wet ingredients. Mix in the egg yolk, pumpkin puree, and vanilla extract until fully combined. The mixture will look slightly curdled at first—that’s normal, don’t panic. Keep stirring until it comes together into a smooth, glossy batter. It should smell like pumpkin pie at this point, which is dangerously good.
- Whisk the dry ingredients. In a separate small bowl, whisk together the flour, cream of tartar, baking soda, salt, cinnamon, nutmeg, ginger, and cloves. Whisking ensures everything is evenly distributed—nobody wants a pocket of baking soda in their cookie.
- Combine wet and dry. Gradually add the dry ingredients to the wet mixture, stirring gently until just combined. Stop as soon as you don’t see any more streaks of flour. Overmixing will make the cookies tough, and we want them soft and tender. The dough will be soft and slightly sticky, but not wet. If it feels too sticky to handle, refrigerate it for 10 minutes.
- Make the coating. In your small bowl, stir together the 2 tablespoons of sugar and 1 teaspoon of cinnamon. Set it aside near your baking sheet.
- Shape the cookies. Using a cookie scoop or tablespoon, portion out 8 equal balls of dough, each about 1.5 tablespoons in size. Roll each ball between your palms until smooth—this helps the coating stick evenly. If the dough is too sticky to roll, lightly wet your hands.
- Coat the cookies. Roll each dough ball in the cinnamon-sugar mixture, pressing gently so it adheres. Place them on the prepared baking sheet, spacing them about 2 inches apart. They will spread, so don’t crowd them.
- Bake. Place the baking sheet in the preheated oven and bake for 10-12 minutes. At 10 minutes, the edges should be set and lightly golden, but the centers will still look slightly puffy and underdone. That’s exactly what you want—they’ll continue to set as they cool. If you prefer crisper cookies, go to 12 minutes, but watch closely so the bottoms don’t burn.
- Cool. Let the cookies rest on the baking sheet for 3 minutes. This allows them to firm up enough to transfer without breaking. Then move them to a cooling rack to cool completely. The tops will develop those beautiful crackles as they cool—that’s the cream of tartar at work.
A quick warning: don’t skip the cooling step on the baking sheet. I learned this the hard way when I tried to move a cookie too early and ended up with a cinnamon-sugar blob on my counter. Patience, my friend, pays off in cookies.
Cooking Tips & Techniques
After making these cookies more times than I care to count, I’ve picked up a few tricks that make the process smoother and the results more consistent. Here’s what I wish someone had told me:
Don’t overmix the dough. This is the number one mistake I see with pumpkin cookies. Pumpkin adds extra moisture, which makes the gluten develop faster. Mix until the flour just disappears, then stop. Overmixed dough leads to dense, tough cookies, and nobody wants that.
Use room temperature ingredients. Cold butter won’t cream properly, and cold egg yolk can make the dough lumpy. Set everything out 30 minutes before you start. If you forgot, you can soften butter in the microwave in 5-second bursts—just don’t melt it. For the egg yolk, place it in a bowl of warm water for 5 minutes.
Chill if needed. If your dough feels too sticky to roll, pop it in the fridge for 10-15 minutes. This is especially helpful on humid days or if your pumpkin puree was particularly watery. Chilled dough is easier to handle and produces thicker cookies.
Watch the bake time. Ovens vary wildly. My friend’s oven runs hot, and her cookies are done at 9 minutes. Mine takes the full 12. Start checking at 9 minutes and look for the visual cues—set edges, puffy centers, light golden color. The cookies will look underdone when you pull them out, and that’s perfect.
Use a cookie scoop for uniformity. Evenly sized cookies bake evenly. If you’re using spoons, try to make each portion the same size. I’ve had batches where one cookie was twice the size of another, and the small ones burned while the big ones were raw in the middle. Not a good look.
Double the coating. This is my personal secret. After rolling the dough balls in the cinnamon-sugar, I give them a second light roll in any leftover mixture. It creates a thicker, crunchier crust that’s absolutely divine. Just don’t overdo it—you don’t want a mouthful of straight sugar.
Variations & Adaptations
One of the best things about this recipe is how adaptable it is. I’ve tried several variations, and they’ve all been winners. Here are some ideas to make it your own:
Gluten-Free Version: Substitute the all-purpose flour with a 1:1 gluten-free baking flour blend. I’ve used Bob’s Red Mill and King Arthur, and both worked perfectly. No other adjustments needed—just make sure your blend contains xanthan gum for structure.
Vegan Adaptation: Use vegan butter (I like Miyoko’s) and replace the egg yolk with 1 tablespoon of aquafaba (the liquid from a can of chickpeas) or a flax egg (1 tablespoon ground flaxseed mixed with 2.5 tablespoons water, let sit for 5 minutes). The texture will be slightly less tender, but still delicious.
Extra Spicy: If you love pumpkin spice, double the cinnamon and add a pinch of cardamom. I made a batch with cardamom last Thanksgiving, and they disappeared before the turkey was carved. The cardamom adds an unexpected floral note that’s absolutely addictive.
Chocolate-Dipped: After the cookies cool, dip half of each cookie in melted dark chocolate and let it set on parchment paper. The bitterness of the chocolate contrasts beautifully with the sweet, spiced cookie. This turns them from a simple snack into a dessert that looks fancy with zero extra effort.
Pumpkin-Free Version: This works surprisingly well. Replace the pumpkin puree with 1/4 cup of unsweetened applesauce and add an extra tablespoon of butter. You’ll lose the pumpkin flavor, but the cookies will still be soft and snickerdoodle-y. My friend makes this version for her kids who “don’t like pumpkin,” and they never know the difference.
Make It a Bar Cookie: Press the dough into a greased 8×4-inch loaf pan, sprinkle the cinnamon-sugar on top, and bake for 18-20 minutes. Cut into squares once cooled. This is my go-to when I’m feeling lazy and don’t want to roll individual cookies.
Serving & Storage Suggestions
These cookies are best served warm, when the centers are still soft and the cinnamon-sugar coating is slightly melty. But honestly, they’re pretty amazing at room temperature too. Here’s how to make the most of them:
Serving Temperature: Warm them in the microwave for 10 seconds if they’ve been sitting out for a while. It brings back that fresh-from-the-oven texture. Pair them with a cold glass of milk, a hot cup of coffee, or even a scoop of vanilla ice cream for an indulgent dessert.
Presentation: Arrange them on a simple white plate or a wooden board for that cozy, rustic look. A light dusting of extra cinnamon on the plate adds a nice touch. If you’re serving them at a gathering, stack them in a pyramid—it looks impressive and makes it easy for people to grab one.
Complementary Dishes: These cookies pair beautifully with chai tea, apple cider, or a pumpkin spice latte. For a dessert spread, serve them alongside chocolate chip cookies, brownies, or a simple vanilla panna cotta. They also make a great addition to a brunch table—trust me, they’re amazing with morning coffee.
Storage Instructions: Store the cookies in an airtight container at room temperature for up to 3 days. Layer them with parchment paper between each layer to prevent sticking. The cookies will soften slightly over time as the pumpkin moisture distributes, but they’ll still be delicious.
Freezing Instructions: You can freeze the baked cookies for up to 2 months. Place them in a single layer on a baking sheet and freeze until solid, then transfer to a freezer-safe bag. To thaw, leave them at room temperature for about 30 minutes. For longer storage, freeze the unbaked dough balls (without the coating) for up to 3 months. When ready to bake, roll them in the cinnamon-sugar while still frozen and add 2 minutes to the bake time.
Reheating: The microwave is your friend here. 10-15 seconds on high will make them taste freshly baked. If you’re reheating a batch, pop them in a 300°F oven for 5 minutes. The flavors actually deepen after a day or two, so don’t be afraid to make them ahead.
Nutritional Information & Benefits
Let’s be real: these are cookies, not health food. But they do have some redeeming qualities, and knowing what’s in them helps you enjoy them mindfully. Here’s the breakdown per cookie (based on 8 cookies):
| Nutrient | Amount per Cookie |
|---|---|
| Calories | 145 |
| Total Fat | 7g |
| Saturated Fat | 4g |
| Carbohydrates | 20g |
| Sugar | 12g |
| Fiber | 1g |
| Protein | 2g |
| Vitamin A | 15% DV |
| Iron | 4% DV |
The pumpkin puree is the star here nutritionally—it’s packed with vitamin A for eye health and immune support, plus fiber that helps with digestion. The cinnamon has anti-inflammatory properties and can help regulate blood sugar levels. And the cream of tartar? It’s actually a source of potassium, which supports heart health. Not bad for a cookie, right?
Dietary considerations: These cookies contain gluten, dairy, and eggs. For gluten-free and vegan options, see the variations section above. The recipe is nut-free as written, which makes it great for school lunches or parties where allergies are a concern. If you’re watching your sugar intake, you can reduce the sugar in the dough to 3 tablespoons total, but the coating needs the full amount for that signature crunch.
From my perspective, these cookies are about balance. They’re a treat, not a daily staple, but they’re made with real ingredients and no weird additives. That matters to me. When I eat one, I feel good about what’s in it, and I enjoy every single bite without guilt.
Conclusion
These quick small batch pumpkin snickerdoodles have become my go-to for those moments when I need something sweet, fast, and satisfying. They’re proof that you don’t need a complicated recipe or a full pantry to create something genuinely delicious. The pumpkin keeps them soft, the cinnamon-sugar coating gives them that irresistible crunch, and the small batch size means you get just enough to enjoy without feeling like you need to share (though you probably will, because they’re that good).
I love this recipe because it’s forgiving, flexible, and ridiculously easy to make. Whether you’re using up leftover pumpkin puree, craving a cozy fall treat in the middle of summer, or just want a quick baking project that won’t take over your evening, these cookies deliver. They’ve saved me from more than a few late-night cravings, and they’ve impressed people who swore they didn’t like pumpkin desserts. That’s the kind of recipe worth keeping close.
So go ahead—give them a try. Customize them with your favorite spices, dip them in chocolate, or keep them classic. However you make them, I’d love to hear how they turn out. Drop a comment below and let me know what you think. Did you add cardamom? Double the coating? Bake them into bars? Share your version—I’m always looking for new ideas. And if you loved these, you might also enjoy my easy pumpkin bread for another quick treat. Happy baking, friends!
Frequently Asked Questions
Can I use pumpkin pie filling instead of pumpkin puree?
No, please don’t. Pumpkin pie filling is pre-sweetened and spiced, which will throw off the sugar and spice balance in the recipe. Your cookies will come out overly sweet and potentially mushy. Stick with 100% pure pumpkin puree for the best results.
Why did my cookies turn out flat?
Flat cookies usually mean the butter was too soft or melted, or the dough was overmixed. Make sure your butter is softened but not melted, and mix the dough just until the flour disappears. If your kitchen is warm, chilling the dough for 10 minutes before baking can help prevent spreading.
Can I double this recipe?
Absolutely! Just double all the ingredients and bake in batches. The bake time stays the same, but make sure your oven racks are positioned in the center. If you’re baking two sheets at once, rotate them halfway through for even baking.
How do I know when the cookies are done?
Look for set edges that are lightly golden, with centers that still look slightly puffy and underdone. The cookies will continue to bake on the hot sheet after you pull them out. If the centers look fully set in the oven, they’ll be overbaked once cooled.
Can I make these cookies without cream of tartar?
Yes, but the texture and flavor will be different. Cream of tartar gives snickerdoodles their signature tang and chewy texture. If you don’t have it, substitute with 1/2 teaspoon of lemon juice or white vinegar mixed into the wet ingredients. The cookies will still be good, just not quite the same.
Pin This Recipe!
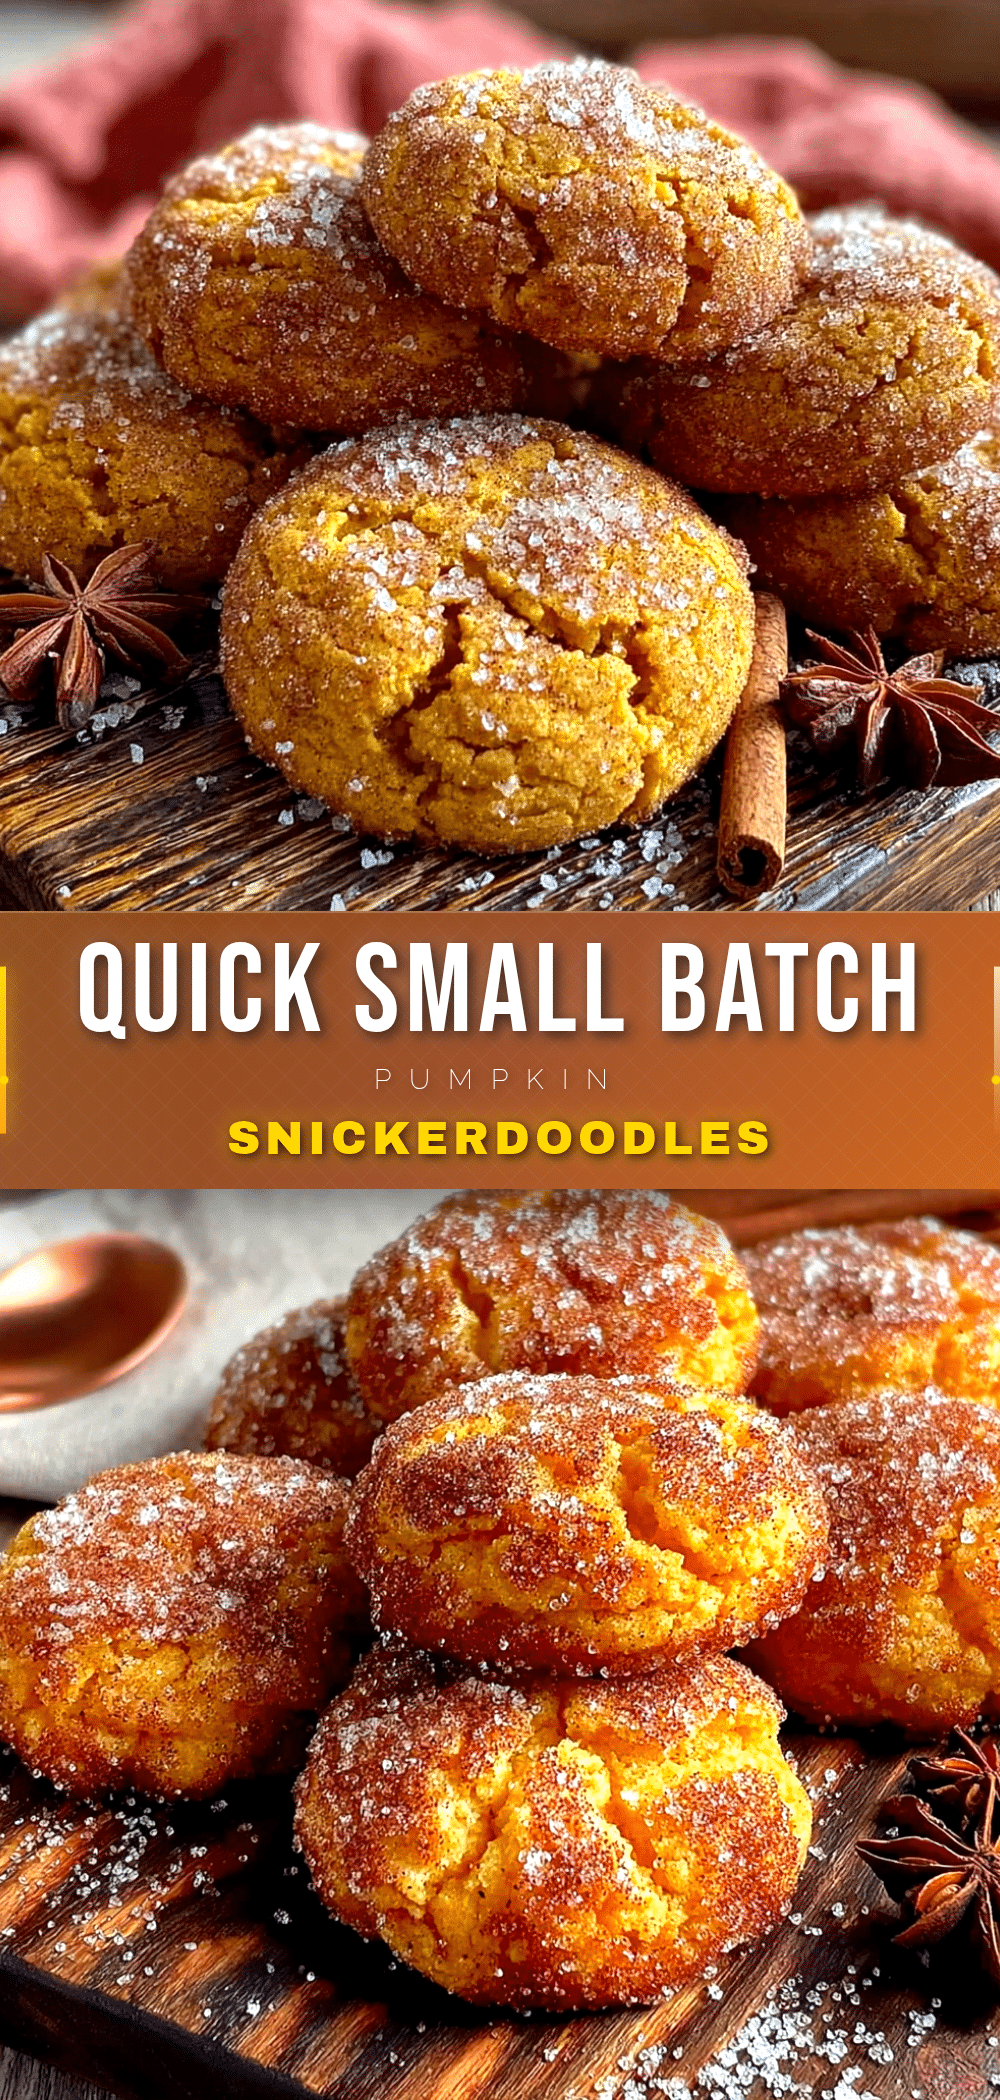
Easy Small Batch Pumpkin Snickerdoodles Recipe
These quick and easy pumpkin snickerdoodles are chewy at the edges, soft in the middle, and rolled in a cinnamon-sugar coating. Perfect for using up leftover pumpkin puree, this small batch recipe makes exactly 8 cookies in about 20 minutes.
- Prep Time: 10 minutes
- Cook Time: 10-12 minutes
- Total Time: 20-22 minutes
- Yield: 8 cookies 1x
- Category: Dessert
- Cuisine: American
Ingredients
- 1/4 cup unsalted butter, softened
- 1/4 cup granulated sugar
- 2 tablespoons packed light brown sugar
- 1 large egg yolk, room temperature
- 1/4 cup pumpkin puree (not pumpkin pie filling)
- 1/2 teaspoon vanilla extract
- 3/4 cup all-purpose flour
- 1/4 teaspoon cream of tartar
- 1/4 teaspoon baking soda
- 1/4 teaspoon salt
- 1/2 teaspoon ground cinnamon
- 1/4 teaspoon ground nutmeg
- 1/8 teaspoon ground ginger
- Pinch of ground cloves (optional)
- 2 tablespoons granulated sugar (for coating)
- 1 teaspoon ground cinnamon (for coating)
Instructions
- Preheat your oven to 350°F (175°C). Line a baking sheet with parchment paper or a silicone mat.
- In a medium bowl, beat the softened butter, granulated sugar, and brown sugar together with a spatula or wooden spoon until light and fluffy, about 2 minutes.
- Mix in the egg yolk, pumpkin puree, and vanilla extract until fully combined and smooth.
- In a separate small bowl, whisk together the flour, cream of tartar, baking soda, salt, cinnamon, nutmeg, ginger, and cloves.
- Gradually add the dry ingredients to the wet mixture, stirring gently until just combined. The dough will be soft and slightly sticky.
- In a small bowl, stir together the 2 tablespoons of sugar and 1 teaspoon of cinnamon for the coating.
- Using a cookie scoop or tablespoon, portion out 8 equal balls of dough, each about 1.5 tablespoons. Roll each ball between your palms until smooth.
- Roll each dough ball in the cinnamon-sugar mixture, pressing gently so it adheres. Place them on the prepared baking sheet, spacing them about 2 inches apart.
- Bake for 10-12 minutes. The edges should be set and lightly golden, but the centers will still look slightly puffy and underdone.
- Let the cookies rest on the baking sheet for 3 minutes, then transfer to a cooling rack to cool completely.
Notes
Don’t overmix the dough. Use room temperature ingredients. If dough is too sticky, chill for 10-15 minutes. Start checking cookies at 9 minutes. For a thicker crust, give the dough balls a second light roll in the cinnamon-sugar coating. Store in an airtight container at room temperature for up to 3 days. Freeze baked cookies for up to 2 months or unbaked dough balls (without coating) for up to 3 months.
Nutrition
- Serving Size: 1 cookie
- Calories: 145
- Sugar: 12
- Sodium: 95
- Fat: 7
- Saturated Fat: 4
- Carbohydrates: 20
- Fiber: 1
- Protein: 2
Keywords: pumpkin snickerdoodles, small batch cookies, pumpkin cookies, easy pumpkin recipe, fall cookies, snickerdoodle recipe


