There used to be a tiny bakery tucked behind a vintage bookstore in Portland—the kind of place with mismatched chairs and a chalkboard menu that changed daily. They made these apple cider cookies that were absolutely unforgettable. Soft in the center, chewy at the edges, with this cinnamon glaze that pooled into every little crevice. When they closed last fall—just a handwritten sign on the door one morning, “Thanks for the memories”—I honestly felt a little lost. I mean, I’d drive twenty minutes out of my way just to grab a bag of those cookies on a rainy afternoon.
After eleven tries—and some truly questionable batches that turned out more like hockey pucks than cookies—I finally got it. The secret? A few smart swaps that make these lighter without sacrificing that signature chewiness. Let me tell you, my kitchen looked like a flour bomb went off for a solid month, but it was worth every single mess.
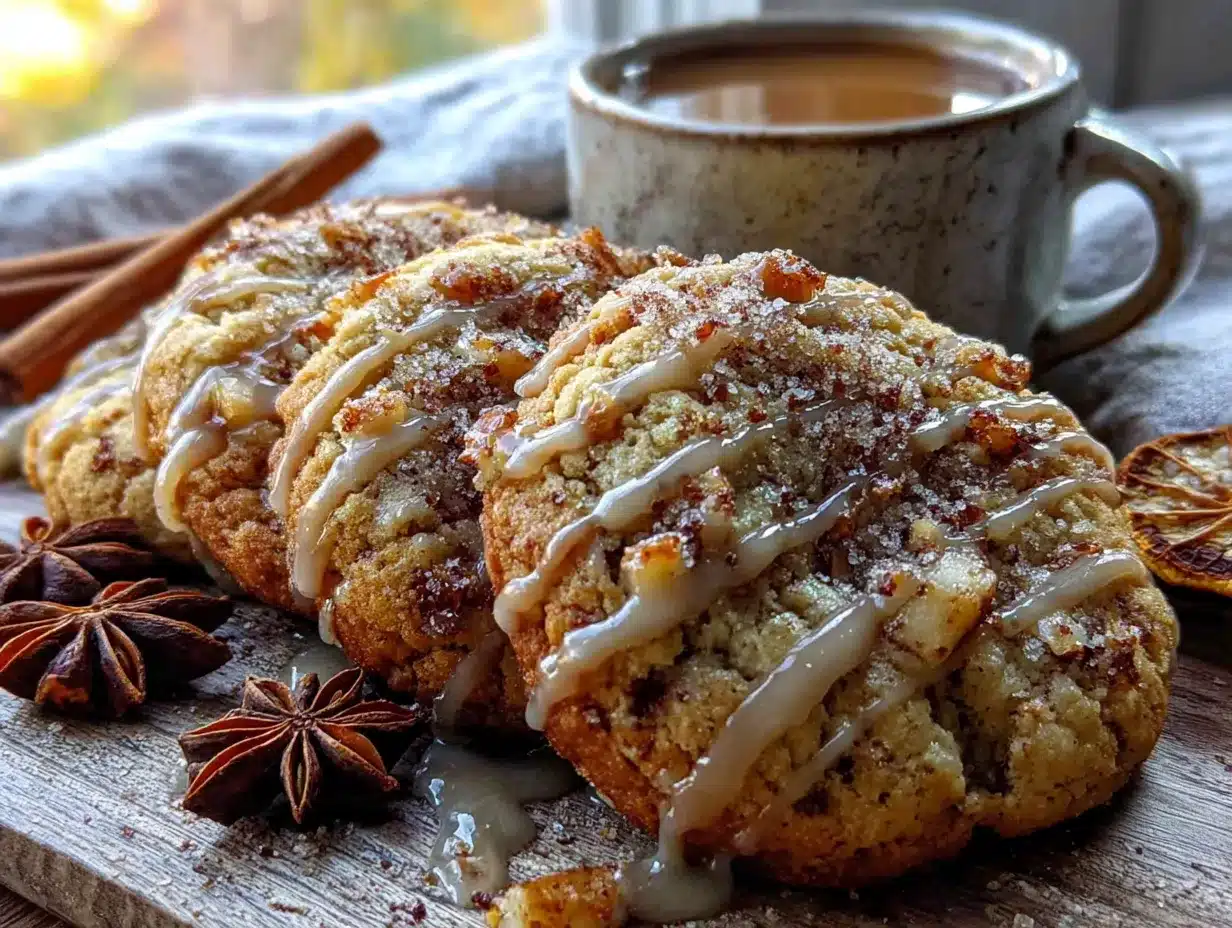
These lighter chewy apple cider cookies with cinnamon glaze are my tribute to that little bakery. They’ve got that same cozy, spiced flavor that makes you close your eyes after the first bite. Maybe you’ve been there—chasing a recipe from a place that just doesn’t exist anymore. I get it. And honestly, I think these might be even better than the original. The texture is spot-on, the glaze is dreamy, and they make your whole house smell like autumn. That’s the kind of magic worth recreating.
Why You’ll Love This Recipe
These aren’t your average cookies. I’ve tested this recipe more times than I care to admit, tweaking and tasting until every detail was just right. Here’s what makes them stand out:
- Quick & Easy : Comes together in about 30 minutes, perfect for those sudden cookie cravings or last-minute bake sales. No complicated techniques here.
- Simple Ingredients : You probably have most of these in your pantry right now. No hunting down obscure baking supplies at specialty stores.
- Perfect for Fall Gatherings : Great for Thanksgiving dessert tables, Halloween parties, or just a cozy weekend treat with a hot mug of tea.
- Crowd-Pleaser : Kids love the glaze, adults love the apple cider flavor, and everyone goes back for seconds. I’ve never brought these anywhere without someone asking for the recipe.
- Unbelievably Delicious : The combination of chewy texture, concentrated apple flavor, and that cinnamon glaze is pure comfort food magic.
What makes this recipe different from all the other apple cider cookies out there? It’s the technique. I reduce the apple cider on the stovetop until it’s thick and syrupy, concentrating all that fruity goodness into a powerful flavor punch. Then I use a blend of whole wheat pastry flour and all-purpose flour for a lighter texture that still feels satisfying. And here’s the kicker—I swap out some of the butter for Greek yogurt, cutting calories without cutting richness. You honestly can’t taste the difference, I promise.
This recipe isn’t just good—it’s the kind that makes you close your eyes after the first bite. It’s comfort food reimagined: healthier, faster, but with the same soul-soothing satisfaction. Perfect for impressing guests without stress, or turning a simple Tuesday into something a little more memorable.
What Ingredients You Will Need
This recipe uses simple, wholesome ingredients to deliver bold apple cider flavor and satisfying texture without the fuss. Most of these are pantry staples, which makes these cookies perfect for spontaneous baking sessions.
- Apple cider (1 cup / 240 ml) — Look for fresh, unfiltered cider for the best flavor. You’ll reduce this on the stove to concentrate the taste. I recommend a local orchard’s cider if you can find it—the flavor is noticeably brighter.
- Unsalted butter (4 tablespoons / 56 grams, softened) — This adds richness without going overboard. Make sure it’s at room temperature so it creams properly with the sugar.
- Greek yogurt (¼ cup / 60 grams, plain) — The secret ingredient for lighter cookies. It replaces some of the butter and adds moisture without extra fat. Use full-fat or 2% for best texture.
- Granulated sugar (½ cup / 100 grams) — Just enough sweetness to balance the apple cider’s natural tartness. You could use coconut sugar here for a more complex flavor.
- Light brown sugar (¼ cup / 50 grams, packed) — Adds moisture and that subtle molasses note that pairs so well with cinnamon. Don’t skip this one.
- Large egg (1, at room temperature) — Helps bind everything together. Let it sit out for about 20 minutes before you start baking.
- Vanilla extract (1 teaspoon / 5 ml) — Pure vanilla makes a difference here. Imitation will work, but the flavor won’t be as warm and rounded.
- Whole wheat pastry flour (1 cup / 120 grams) — This gives the cookies a lighter, tender crumb while adding a bit of fiber. Regular whole wheat flour is too dense—stick with pastry flour if you can.
- All-purpose flour (¾ cup / 90 grams) — Balances the whole wheat flour for the perfect chewiness. Spoon and level your measuring cups for accuracy.
- Baking soda (½ teaspoon) — Helps the cookies spread just the right amount.
- Baking powder (½ teaspoon) — Adds a little lift for that soft center.
- Salt (¼ teaspoon) — Don’t skip this—it enhances all the other flavors.
- Ground cinnamon (1 teaspoon) — The star spice here. I prefer Saigon cinnamon for its bold, warm flavor.
- Ground nutmeg (¼ teaspoon) — Adds that subtle warmth that makes these taste like autumn in cookie form.
- Ground ginger (¼ teaspoon) — A tiny bit of heat that complements the apple cider beautifully.
For the Cinnamon Glaze:
- Powdered sugar (1 cup / 120 grams) — Sift it first to avoid lumps in your glaze.
- Ground cinnamon (½ teaspoon) — Adjust to taste—I like mine with a noticeable cinnamon kick.
- Milk (2-3 tablespoons / 30-45 ml) — Use whole milk for a creamier glaze, or almond milk if you’re dairy-free. Add it slowly until you reach the right consistency.
- Vanilla extract (½ teaspoon) — Optional but recommended for extra depth.
Equipment Needed
You don’t need a fancy bakery setup for these cookies. Here’s what you’ll actually use:
- Small saucepan — For reducing the apple cider. A 1-quart size works perfectly.
- Large mixing bowl — I use a glass bowl because it doesn’t retain odors, but any large bowl will do.
- Electric hand mixer or stand mixer — You can cream the butter and sugar by hand if you’re feeling strong, but a mixer makes it much easier. I’ve done both—hand mixing works, but your arm will definitely feel it.
- Whisk — For combining the dry ingredients evenly.
- Rubber spatula — For scraping down the bowl and folding in the dry ingredients. I’ve broken a few cheap ones—invest in a sturdy silicone spatula.
- Baking sheets (2) — Light-colored metal sheets work best for even browning. Dark sheets can cause the bottoms to burn.
- Parchment paper or silicone baking mats — Essential for preventing sticking and ensuring easy cleanup. I prefer parchment because it’s easier to slide cookies off.
- Cookie scoop (about 1.5 tablespoons) — For uniform cookies that bake evenly. A #40 scoop is perfect. If you don’t have one, use two spoons.
- Cooling rack — Wire racks let air circulate so your cookies cool properly without getting soggy bottoms.
- Small bowl or liquid measuring cup — For whisking together the glaze.
Budget-friendly tip: If you don’t have a cookie scoop, just use a tablespoon measure and shape the dough balls with your hands. They won’t be perfectly round, but honestly, homemade-looking cookies have more charm anyway.
Preparation Method
- Reduce the apple cider. Pour 1 cup of apple cider into a small saucepan. Bring it to a boil over medium-high heat, then reduce the heat to medium-low and let it simmer. Stir occasionally. You’re looking for it to reduce down to about ¼ cup—this takes roughly 15-20 minutes. It should look thick and syrupy, almost like maple syrup. Watch it carefully toward the end because it can burn quickly. Set it aside to cool completely. I learned this the hard way—hot cider syrup will melt your butter and ruin the dough texture.
- Preheat your oven. Set it to 350°F (175°C). Line two baking sheets with parchment paper or silicone mats. This is non-negotiable—trust me, you don’t want to scrape these off a bare pan.
- Cream the butter and sugars. In a large mixing bowl, beat together 4 tablespoons softened butter, ½ cup granulated sugar, and ¼ cup packed brown sugar. Beat for about 2-3 minutes until the mixture looks light and fluffy. Scrape down the sides of the bowl with your spatula. This step matters—proper creaming adds air that helps with texture.
- Add the wet ingredients. Beat in the egg, ¼ cup Greek yogurt, 1 teaspoon vanilla extract, and the cooled reduced apple cider. Mix until just combined—don’t overmix here. The batter might look a little separated at this point, and that’s totally normal. It will come together once you add the flour.
- Whisk the dry ingredients. In a separate bowl, whisk together 1 cup whole wheat pastry flour, ¾ cup all-purpose flour, ½ teaspoon baking soda, ½ teaspoon baking powder, ¼ teaspoon salt, 1 teaspoon cinnamon, ¼ teaspoon nutmeg, and ¼ teaspoon ginger. Whisking ensures everything is evenly distributed—no one wants a pocket of baking soda in their cookie.
- Combine wet and dry. Gradually add the dry ingredients to the wet mixture, stirring with a rubber spatula or mixing on low speed. Mix just until no streaks of flour remain. Overmixing will make the cookies tough, so stop as soon as it comes together. The dough will be soft and slightly sticky—that’s what you want.
- Chill the dough. Cover the bowl with plastic wrap and refrigerate for at least 30 minutes. This step is crucial. Chilling firms up the butter and allows the flour to hydrate, which prevents the cookies from spreading too thin in the oven. I’ve skipped this step when I was impatient, and the cookies turned into flat, crispy discs. Not cute.
- Scoop and shape. Use your cookie scoop or a tablespoon to portion out dough balls about 1.5 tablespoons each. Roll them gently between your palms to form smooth balls. Place them on the prepared baking sheets, spacing them about 2 inches apart. They will spread a bit, so give them room to breathe.
- Bake. Bake one sheet at a time for 10-12 minutes. The edges should look set and lightly golden, but the centers will still look soft and slightly underdone. That’s exactly what you want for chewy cookies. If you wait until the centers look fully baked, they’ll be overdone and dry. Remove from the oven and let the cookies rest on the baking sheet for 5 minutes. This allows them to finish setting up without overbaking.
- Cool completely. Transfer the cookies to a wire cooling rack and let them cool completely before glazing. If you glaze them while they’re still warm, the glaze will melt and slide right off. Patience, my friend.
- Make the glaze. In a small bowl, whisk together 1 cup sifted powdered sugar, ½ teaspoon cinnamon, ½ teaspoon vanilla extract, and 2 tablespoons milk. Whisk until smooth. If it’s too thick, add another tablespoon of milk. If it’s too thin, add a little more powdered sugar. You want it thick enough to drizzle but thin enough to spread slightly.
- Glaze the cookies. Drizzle the glaze over the cooled cookies using a spoon or a small piping bag. I like to zigzag it back and forth for that bakery-style look. Let the glaze set for about 15-20 minutes before serving. The glaze will harden slightly but stay soft enough to be pleasant.
Cooking Tips & Techniques
After all those test batches, I’ve picked up a few tricks that make these cookies turn out perfectly every time. Let me save you some trouble.
Don’t rush the cider reduction. This is the most important step. If you don’t reduce the cider enough, your cookies will be flat and lack flavor. If you reduce it too much, it can turn into hard candy. Watch for that syrupy consistency—it should coat the back of a spoon. I once got distracted by a phone call and ended up with what looked like apple cider caramel. It smelled amazing but was completely unusable.
Room temperature ingredients matter. Cold butter doesn’t cream properly, and cold egg can make the dough seize up. I know it’s tempting to just use ingredients straight from the fridge, but taking 20 minutes to let everything come to room temperature makes a noticeable difference in texture. Set your butter, egg, and yogurt out on the counter before you start reducing the cider, and they’ll be ready by the time you need them.
Chill the dough—no shortcuts. I cannot stress this enough. The 30-minute chill time is not optional. Without it, the cookies spread into thin, crispy wafers instead of staying thick and chewy. If you’re in a hurry, you can pop the scooped dough balls in the freezer for 15 minutes instead. That works in a pinch.
Use a light hand with the flour. Spoon the flour into your measuring cup and level it off with a knife. Scooping directly from the bag packs the flour down and gives you too much, resulting in dry, cakey cookies. I’ve made that mistake more times than I’d like to admit.
Bake one sheet at a time. If you try to bake both sheets at once, the heat distribution gets uneven and your cookies will bake inconsistently. It takes a little longer, but the results are worth it. While one sheet bakes, keep the other one in the fridge so the dough stays chilled.
Check for doneness by touch. The edges should be set and lightly golden, but the center should still look soft and slightly puffy. If you press gently, it should spring back just a little. This visual cue is more reliable than any timer, since ovens vary so much.
Variations & Adaptations
One of the best things about this recipe is how adaptable it is. Here are some variations I’ve tried and loved:
Gluten-Free Version : Swap both flours for a good gluten-free all-purpose blend that contains xanthan gum. I’ve had great results with Bob’s Red Mill 1-to-1 Baking Flour. The texture will be slightly more tender, but the flavor stays amazing. Just make sure to chill the dough for a full hour—gluten-free dough tends to be stickier.
Dairy-Free Adaptation : Use vegan butter sticks (not tub margarine) and replace the Greek yogurt with dairy-free yogurt or applesauce. For the glaze, use almond milk or oat milk. I tested this with Miyoko’s vegan butter and it worked beautifully—the cookies were slightly less chewy but still delicious.
Apple Cider Caramel Swirl : For an extra indulgent twist, swirl in some store-bought or homemade caramel sauce before baking. Drop small spoonfuls of caramel onto the dough balls and gently fold them in—don’t overmix. The caramel creates little pockets of gooey goodness throughout the cookie.
Spiced Maple Variation : Replace the granulated sugar with maple sugar and add an extra ¼ teaspoon of cinnamon. Drizzle with a maple glaze instead (use maple extract instead of vanilla in the glaze). This version tastes like a maple apple cider donut in cookie form—absolutely dangerous.
Add-In Options : Fold in ½ cup of chopped walnuts, pecans, or dried cranberries after combining the wet and dry ingredients. White chocolate chips also work surprisingly well here—they add a creamy sweetness that balances the tart apple flavor. I once added toasted pecans and a handful of butterscotch chips, and my family devoured them in one afternoon.
Lower Sugar Option : Reduce the granulated sugar to ⅓ cup and the brown sugar to 2 tablespoons. The cookies will be less sweet but the apple cider flavor will shine through more. The texture will be slightly less tender, so add an extra tablespoon of Greek yogurt to compensate.
Serving & Storage Suggestions
These cookies are best served at room temperature, straight from the cooling rack. The glaze should be fully set but still soft enough to be pleasant. I love them with a hot cup of chai tea or a tall glass of cold milk. They’re also fantastic crumbled over vanilla ice cream for a quick dessert—just break them up and sprinkle on top.
For a beautiful presentation, arrange the cookies on a wooden board or a white platter. Dust them with a tiny pinch of extra cinnamon right before serving. If you’re bringing them to a gathering, stack them in a pretty mason jar or a tin lined with parchment paper. They make excellent hostess gifts during the fall season.
Storage Instructions: Store the cookies in an airtight container at room temperature for up to 5 days. Place a piece of bread in the container to help maintain moisture—the bread will absorb excess air and keep the cookies soft. I’ve been doing this for years and it works like magic. Just replace the bread slice every couple of days.
Freezer Instructions: You can freeze the baked cookies (unglazed) for up to 3 months. Place them in a single layer on a baking sheet and freeze until solid, then transfer to a freezer-safe bag. When you’re ready to enjoy them, thaw at room temperature and glaze fresh. The glaze doesn’t freeze well, so always add it after thawing.
You can also freeze the raw dough balls. Scoop them onto a baking sheet, freeze until solid, then transfer to a freezer bag. Bake directly from frozen, adding 2-3 minutes to the baking time. This is my favorite trick for having fresh cookies on demand without the mess.
Flavor Development: These cookies actually taste better the next day. The apple cider flavor deepens and the spices meld together beautifully. If you can resist eating them all on day one, you’ll be rewarded on day two. I mean, I can’t always resist either, but when I do, it’s worth it.
Nutritional Information & Benefits
Here’s the nutritional breakdown per cookie (based on 24 cookies):
| Nutrient | Amount |
|---|---|
| Calories | 98 |
| Total Fat | 3g |
| Saturated Fat | 1.5g |
| Cholesterol | 15mg |
| Sodium | 65mg |
| Total Carbohydrates | 17g |
| Dietary Fiber | 1g |
| Sugars | 10g |
| Protein | 2g |
These cookies are lighter than traditional versions thanks to the Greek yogurt swap, which reduces the fat content by about 30% without sacrificing texture. The whole wheat pastry flour adds a bit of fiber and complex carbohydrates, making them more satisfying than cookies made with all-purpose flour alone.
Apple cider contains antioxidants called polyphenols, which may help reduce inflammation and support heart health. Cinnamon has been shown to help regulate blood sugar levels, which is a nice bonus when you’re eating something sweet. Of course, these are still cookies—they’re a treat, not a health food. But it’s nice to know there’s a little something extra in every bite.
Dietary Considerations: These cookies are vegetarian and can be made dairy-free with the substitutions mentioned above. They are not vegan (due to the egg) and are not suitable for a keto diet. The gluten-free version works well for those with gluten sensitivities.
Potential Allergens: Wheat (gluten), dairy, eggs. If you’re baking for someone with allergies, always check your ingredient labels carefully.
Conclusion
These lighter chewy apple cider cookies with cinnamon glaze are everything I hoped they would be—and maybe even a little more. They’ve got that nostalgic bakery flavor without the heavy feeling afterward, and they come together with ingredients you probably already have in your pantry. Honestly, I think that little Portland bakery would approve.
What I love most about this recipe is how flexible it is. Make them gluten-free, add in some nuts, or double the cinnamon if that’s your thing. The basic formula is forgiving enough to handle your creativity. That’s the mark of a good recipe, if you ask me—one that you can make your own without worrying it will fall apart.
So go ahead, preheat that oven and give these a try. I’d love to hear how they turn out for you. Did you add something unexpected? Did they remind you of a bakery from your own past? Drop a comment below and share your cookie story. And if you snap a photo, tag me—I always love seeing your baking adventures. Happy baking, friend!
Frequently Asked Questions
Can I use apple juice instead of apple cider?
You can, but the flavor won’t be as rich. Apple juice is thinner and less concentrated, so the cookies will have a milder apple taste. If you use apple juice, reduce it to ¼ cup just like you would with cider, but know that the final flavor will be noticeably different. Stick with real apple cider for the best results.
Why did my cookies turn out flat?
Flat cookies usually mean one of three things: the dough wasn’t chilled long enough, the butter was too soft or melted, or you didn’t reduce the apple cider enough. Make sure you chill the dough for at least 30 minutes, use butter that’s softened but not melted, and reduce the cider until it’s thick and syrupy. If you’re still having trouble, try adding an extra 2 tablespoons of flour to the dough.
Can I make these cookies ahead of time?
Absolutely. You can make the dough up to 3 days in advance and keep it refrigerated. Just wrap it tightly in plastic wrap so it doesn’t dry out. You can also freeze the baked cookies (unglazed) for up to 3 months. I actually prefer making the dough a day ahead—the flavors develop more and the cookies turn out even better.
How do I get the glaze to look bakery-perfect?
The key is getting the right consistency. Your glaze should be thick enough to hold its shape when drizzled but thin enough to flow smoothly. Start with 2 tablespoons of milk and add more a teaspoon at a time until it looks right. For that professional zigzag pattern, use a small piping bag with the tip snipped off, or just drizzle with a spoon. Let the cookies cool completely before glazing, or it will melt right off.
Can I double this recipe?
Yes, this recipe doubles beautifully. Just make sure you reduce the apple cider in batches rather than trying to double it in one pot—it takes too long and can burn more easily. Also, don’t crowd your oven. Bake one sheet at a time even if you double the recipe. The extra time is worth it for evenly baked cookies.
Pin This Recipe!

Lighter Chewy Apple Cider Cookies with Easy Cinnamon Glaze

These lighter chewy apple cider cookies with cinnamon glaze are a tribute to a beloved Portland bakery. Soft in the center, chewy at the edges, with a dreamy cinnamon glaze, they’re made with smart swaps like Greek yogurt for a lighter texture without sacrificing flavor.
- Prep Time: 15 minutes
- Cook Time: 12 minutes
- Total Time: 1 hour 2 minutes (includes chilling and cooling)
- Yield: 24 cookies 1x
- Category: Dessert
- Cuisine: American
Ingredients
- 1 cup (240 ml) apple cider
- 4 tablespoons (56 g) unsalted butter, softened
- 1/4 cup (60 g) plain Greek yogurt
- 1/2 cup (100 g) granulated sugar
- 1/4 cup (50 g) light brown sugar, packed
- 1 large egg, at room temperature
- 1 teaspoon (5 ml) vanilla extract
- 1 cup (120 g) whole wheat pastry flour
- 3/4 cup (90 g) all-purpose flour
- 1/2 teaspoon baking soda
- 1/2 teaspoon baking powder
- 1/4 teaspoon salt
- 1 teaspoon ground cinnamon
- 1/4 teaspoon ground nutmeg
- 1/4 teaspoon ground ginger
- For the Cinnamon Glaze:
- 1 cup (120 g) powdered sugar, sifted
- 1/2 teaspoon ground cinnamon
- 2–3 tablespoons (30–45 ml) milk
- 1/2 teaspoon vanilla extract
Instructions
- Reduce the apple cider: Pour 1 cup of apple cider into a small saucepan. Bring to a boil over medium-high heat, then reduce heat to medium-low and simmer, stirring occasionally, until reduced to about 1/4 cup (roughly 15-20 minutes). It should look thick and syrupy. Set aside to cool completely.
- Preheat your oven to 350°F (175°C). Line two baking sheets with parchment paper or silicone mats.
- Cream the butter and sugars: In a large mixing bowl, beat together 4 tablespoons softened butter, 1/2 cup granulated sugar, and 1/4 cup packed brown sugar for 2-3 minutes until light and fluffy. Scrape down the sides of the bowl.
- Add the wet ingredients: Beat in the egg, 1/4 cup Greek yogurt, 1 teaspoon vanilla extract, and the cooled reduced apple cider. Mix until just combined.
- Whisk the dry ingredients: In a separate bowl, whisk together 1 cup whole wheat pastry flour, 3/4 cup all-purpose flour, 1/2 teaspoon baking soda, 1/2 teaspoon baking powder, 1/4 teaspoon salt, 1 teaspoon cinnamon, 1/4 teaspoon nutmeg, and 1/4 teaspoon ginger.
- Combine wet and dry: Gradually add the dry ingredients to the wet mixture, stirring with a rubber spatula or mixing on low speed until just combined. Do not overmix. The dough will be soft and slightly sticky.
- Chill the dough: Cover the bowl with plastic wrap and refrigerate for at least 30 minutes.
- Scoop and shape: Use a cookie scoop or tablespoon to portion out dough balls about 1.5 tablespoons each. Roll gently between your palms to form smooth balls. Place on prepared baking sheets, spacing them about 2 inches apart.
- Bake: Bake one sheet at a time for 10-12 minutes. The edges should be set and lightly golden, but the centers will still look soft. Remove from oven and let cookies rest on the baking sheet for 5 minutes.
- Cool completely: Transfer cookies to a wire cooling rack and let cool completely before glazing.
- Make the glaze: In a small bowl, whisk together 1 cup sifted powdered sugar, 1/2 teaspoon cinnamon, 1/2 teaspoon vanilla extract, and 2 tablespoons milk. Whisk until smooth. Add more milk if too thick, or more powdered sugar if too thin.
- Glaze the cookies: Drizzle the glaze over the cooled cookies using a spoon or small piping bag. Let the glaze set for 15-20 minutes before serving.
Notes
Don’t rush the cider reduction; it should be thick and syrupy. Room temperature ingredients matter for proper creaming. Chilling the dough is crucial to prevent spreading. Use a light hand when measuring flour. Bake one sheet at a time for even results. Check doneness by touch—edges set, center soft. Cookies taste even better the next day.
Nutrition
- Serving Size: 1 cookie
- Calories: 98
- Sugar: 10
- Sodium: 65
- Fat: 3
- Saturated Fat: 1.5
- Carbohydrates: 17
- Fiber: 1
- Protein: 2
Keywords: apple cider cookies, chewy cookies, cinnamon glaze, fall cookies, lighter cookies, Greek yogurt cookies, whole wheat pastry flour


