I was supposed to be making a proper baked cheesecake. I had the springform pan out, the cream cheese softening on the counter, and a whole plan mapped out in my head. Then my toddler decided that was the perfect moment to dump an entire box of cereal across the kitchen floor. By the time I cleaned up, found the missing measuring cups, and calmed down, it was already 8 PM. The oven was still cold, and honestly, so was my motivation. I looked at the block of cream cheese and the package of Biscoff cookies sitting on the counter and thought, “Well, this isn’t going to work.” I grabbed the wrong thing—I reached for the cookie butter instead of the melted butter for the crust. I was already annoyed and tired. What came out of the fridge a few hours later was nothing like the plan. It was better. These quick no-bake Biscoff cheesecake bars were a happy accident born from a chaotic Tuesday night. The first bite made me stop. That smooth, spiced filling against the crunchy cookie crust was something I had to make again on purpose. I mean, who knew a kitchen fail could turn into a recipe you actually want to share? Maybe you’ve been there, staring at a half-baked plan and wondering if you should just order takeout. Stick with me on this one.
Why You’ll Love This Recipe
Let me tell you why these quick no-bake Biscoff cheesecake bars have become my most-requested dessert. I’ve tested this recipe about seven times now, tweaking the ratios and the chilling time, and this version is the one that finally stuck. It is the kind of dessert that makes you look like you spent hours in the kitchen when you really didn’t.
- Quick & Easy: This comes together in about 15 minutes of active work. No oven, no water bath, no fuss. Perfect for those evenings when you need dessert but your energy is already gone.
- Simple Ingredients: You only need five main ingredients. No fancy grocery trips. I bet you have most of these in your pantry right now.
- Perfect for Weeknights: When you want something sweet after dinner but don’t want to turn on the oven or dirty a dozen dishes, these are your answer.
- Crowd-Pleaser: I brought these to a neighborhood potluck last month, and three people asked for the recipe before the night was over. Kids and adults both go for seconds.
- Unbelievably Delicious: The texture is what gets me every time. That creamy, almost mousse-like filling against the crunchy, spiced crust is pure comfort.
What makes this different from other cheesecake bar recipes is the technique. Instead of just mixing everything together, we let the cream cheese come to room temperature and whip it until it’s truly light and fluffy. It makes a huge difference. This isn’t just another no-bake dessert—it is the one you’ll keep coming back to. It is the kind of dessert that makes you close your eyes after the first bite, even if you’re just eating it standing in front of the fridge at 10 PM. Not that I’ve done that.
What Ingredients You Will Need
This recipe uses simple, pantry-friendly ingredients to deliver that signature Biscoff flavor and creamy texture without any complicated steps. Most of these are things you might already have on hand.
- For the crust:
- 200g (about 2 cups) Biscoff cookies, crushed into fine crumbs
- 60g (¼ cup) unsalted butter, melted (use salted butter and skip the added salt if that’s all you have)
- A pinch of salt (optional, but I like it to balance the sweetness)
- For the filling:
- 450g (2 blocks) full-fat cream cheese, softened to room temperature (I really recommend Philadelphia for the creamiest texture)
- 100g (½ cup) granulated sugar
- 1 teaspoon vanilla extract
- 240ml (1 cup) heavy cream, cold (this is what gives the bars that light, mousse-like texture)
- 120g (½ cup) Biscoff cookie butter (also called Lotus Biscoff spread), plus more for drizzling on top
A few notes on ingredients. The full-fat cream cheese is non-negotiable here if you want that rich, creamy texture. Low-fat versions have too much water and can make the filling runny. Trust me, I learned that the hard way. For the Biscoff cookies, I use the original ones, but the caramelized flavor works beautifully. If you can’t find cookie butter, you can actually make your own by blending more Biscoff cookies with a little oil until smooth, but honestly, the jarred stuff is so convenient. For a dairy-free version, you can use a plant-based cream cheese block and coconut cream instead of heavy cream, but the texture will be slightly different. Look for firm, block-style vegan cream cheese, not the spreadable kind in a tub.
Equipment Needed
You don’t need a lot of fancy tools for these quick no-bake Biscoff cheesecake bars. That is part of the beauty of this recipe.
- An 8×8 inch square baking pan (a 9×9 works too, but the bars will be slightly thinner)
- Parchment paper for lining the pan (this makes lifting the bars out so much easier)
- A food processor or a zip-top bag and a rolling pin for crushing the cookies
- A medium microwave-safe bowl for melting the butter
- A large mixing bowl for the cream cheese filling
- An electric hand mixer or a stand mixer with the paddle attachment
- A separate bowl for whipping the heavy cream (or whip it right in the stand mixer bowl)
- A rubber spatula for folding
- Measuring cups and spoons
If you don’t have a food processor, don’t worry. Put the cookies in a sturdy zip-top bag, squeeze out the air, and go to town with a rolling pin or even the bottom of a heavy pan. It is a little more work, but it gets the job done. I actually prefer this method sometimes because it feels more satisfying. Just make sure the crumbs are fairly fine for the best crust. For the mixer, a hand mixer works perfectly fine. I used one for years before I got my stand mixer. The key is just making sure your bowls are clean and dry.
Preparation Method
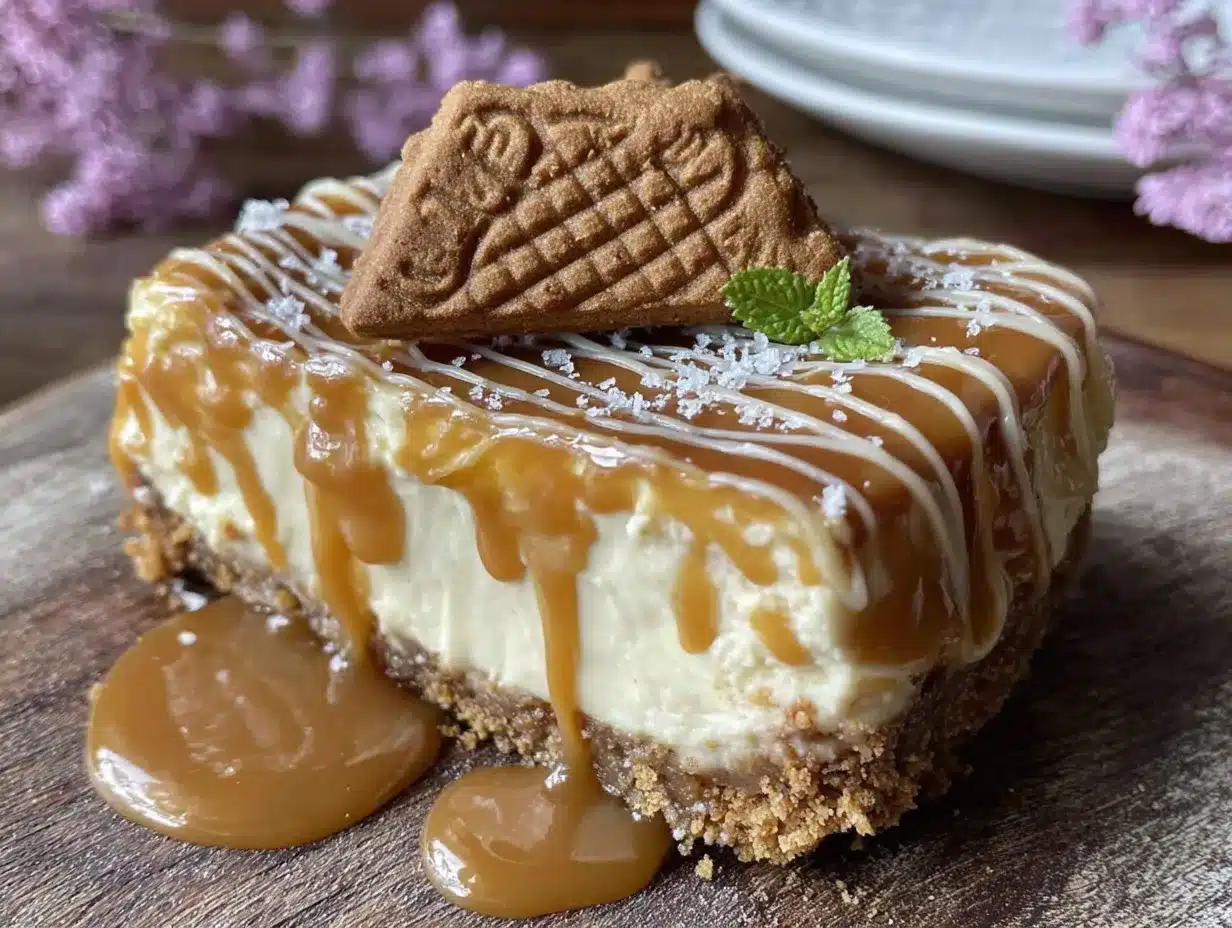
Let me walk you through how to make these quick no-bake Biscoff cheesecake bars. The whole active process takes about 15 to 20 minutes, but you do need to plan for a few hours of chill time. Make these in the morning or even the night before you plan to serve them.
- Prepare the pan. Line your 8×8 inch baking pan with two long strips of parchment paper, crisscrossing them so they hang over the edges on all four sides. This creates little handles that let you lift the finished bars out cleanly. Set the pan aside.
- Make the crust. Put the Biscoff cookies in your food processor and pulse until they become fine crumbs. You should have about 1 ½ cups of crumbs. If you’re using the bag method, crush them until no large pieces remain. Pour the crumbs into a medium bowl. Add the melted butter and the pinch of salt if using. Stir with a fork until all the crumbs are moistened and the mixture looks like wet sand. Press this mixture firmly and evenly into the bottom of your prepared pan. I use the bottom of a flat measuring cup to really pack it down. A tight crust is a non-crumbling crust. Pop this in the fridge while you make the filling.
- Whip the cream cheese base. In your large mixing bowl, beat the softened cream cheese with an electric mixer on medium speed until it is completely smooth and fluffy. This takes about 2 minutes. Scrape down the sides and the bottom of the bowl with your spatula. Add the granulated sugar and vanilla extract, and beat for another minute until the sugar is dissolved and the mixture is light and airy. Don’t rush this step. If the cream cheese is lumpy, your filling will be lumpy.
- Add the cookie butter. Spoon the Biscoff cookie butter into the cream cheese mixture. Beat on low speed until it is fully incorporated and the filling is a uniform tan color. Scrape the bowl again. Set this mixture aside for a moment.
- Whip the heavy cream. In a separate clean bowl (or if you have a second set of beaters, you can use the same mixer), whip the cold heavy cream on medium-high speed until stiff peaks form. This means when you lift the beaters, the cream stands up in peaks that don’t flop over. Be careful not to over-whip, or you’ll end up with butter. It takes about 3 to 4 minutes with a hand mixer.
- Fold it all together. Take about a third of the whipped cream and stir it into the cream cheese mixture. This lightens the batter and makes it easier to fold in the rest. Then, gently fold in the remaining whipped cream using your rubber spatula. Use a cut-and-fold motion, scraping from the bottom of the bowl up and over. Stop as soon as you don’t see any white streaks. Over-mixing can deflate the air and make the bars dense.
- Assemble and chill. Spoon the filling over the chilled crust. Spread it evenly with your spatula. Give the pan a few gentle taps on the counter to release any air bubbles. Drizzle a little extra melted cookie butter over the top and swirl it with a toothpick for a pretty finish. Cover the pan with plastic wrap and refrigerate for at least 6 hours, but overnight is best. The bars need that time to set up properly. I know it is hard to wait, but it is worth it.
- Slice and serve. Once fully chilled and firm, lift the bars out of the pan using the parchment paper handles. Place them on a cutting board. Use a sharp, clean knife to slice them into 9 or 16 squares, depending on how big you want them. Wipe the knife clean between cuts for the neatest slices.
Cooking Tips & Techniques
After making these quick no-bake Biscoff cheesecake bars more times than I can count, I have a few tricks to share. The biggest mistake people make is not letting the cream cheese soften enough. Cold cream cheese creates lumps that no amount of mixing can fix. Leave it on the counter for at least an hour before you start. I set a timer so I don’t forget.
Another thing I learned the hard way is to not skip the step of whipping the cream separately. I tried being lazy once and just folding in the cold cream directly. The filling was much denser and not nearly as light and airy. Taking those extra few minutes to whip the cream makes the bars feel like a fancy mousse. It is a small step with a big payoff.
For the crust, press it down firmly. I use the bottom of a glass to really compact it. A loose crust will fall apart when you try to cut the bars. Also, make sure your pan is lined well with parchment paper. The first time I made these, I forgot the parchment and spent ten minutes trying to dig the bars out of the pan. It was not a pretty sight.
Timing wise, I always make these the night before I need them. The extra chill time makes them slice so much cleaner. If you are in a rush, 4 hours is the absolute minimum, but the texture won’t be as firm. Patience is the secret ingredient here.
Variations & Adaptations
One of the best things about these quick no-bake Biscoff cheesecake bars is how easy they are to change up. Here are a few ways I’ve played with the recipe.
- Chocolate Biscoff Bars: Add 60g (¼ cup) of melted dark chocolate to the cream cheese mixture along with the cookie butter. It adds a rich, deep flavor that pairs beautifully with the spice of the Biscoff cookies. I did this for a friend’s birthday, and it was a hit.
- Vegan Version: Use vegan block cream cheese and full-fat coconut cream (the solid part from a chilled can of coconut milk) instead of heavy cream. The coconut cream whips up surprisingly well. The flavor is a little different, but still delicious.
- Lemon Biscoff Bars: Add the zest of one lemon and a tablespoon of lemon juice to the cream cheese mixture. The bright citrus cuts through the richness and makes the bars feel a little lighter. This is my go-to for spring gatherings.
- Gluten-Free Option: Biscoff cookies are actually made with wheat flour, so they are not gluten-free. For a gluten-free version, use gluten-free speculoos cookies if you can find them, or use a gluten-free graham cracker crust instead.
- Extra Crunch: Sprinkle some crushed Biscoff cookies on top of the filling before it sets, right after you drizzle the cookie butter. It adds a lovely texture contrast to the creamy filling.
Serving & Storage Suggestions
These quick no-bake Biscoff cheesecake bars are best served cold, straight from the fridge. The texture is perfect at that temperature—firm but creamy. I like to let them sit at room temperature for about 5 minutes before serving, just to take the chill off. It makes the flavor a little more pronounced.
For presentation, I arrange the bars on a simple white platter. A light dusting of crushed Biscoff cookies on top looks beautiful and adds a little extra crunch. You can also serve them with a dollop of freshly whipped cream or a scoop of vanilla ice cream if you want to go all out. They pair wonderfully with a strong cup of coffee or a glass of cold milk.
To store leftovers, place them in an airtight container in the refrigerator. They will stay fresh for up to 5 days. Honestly, they are even better on day two after the flavors have had more time to meld together. I have also frozen these bars successfully. Wrap individual slices tightly in plastic wrap and then in foil, and freeze for up to 3 months. To thaw, just transfer a slice to the fridge overnight. The texture remains remarkably good.
Nutritional Information & Benefits
Let me be real with you—these are a treat. They are not health food, and they are not pretending to be. But knowing what is in them can help you enjoy them mindfully. Here is an approximate breakdown for one bar, based on cutting the pan into 9 servings.
- Calories: 420
- Fat: 28g
- Saturated Fat: 16g
- Carbohydrates: 38g
- Sugar: 26g
- Protein: 6g
The cream cheese does provide some calcium and protein, and the heavy cream adds a little vitamin A. The Biscoff cookies, well, they are for the soul. If you are watching your sugar intake, you can reduce the sugar in the filling to 75g (about ⅓ cup) without affecting the texture too much. The cookie butter and cookies are already quite sweet. For a lower-carb version, you could use a sugar substitute like monk fruit sweetener in the filling, but I haven’t tested that myself. This recipe contains dairy and gluten, so it is not suitable for those with allergies to those ingredients.
Conclusion
If you take one thing from this story, let it be this: sometimes the best recipes come from the most chaotic moments. These quick no-bake Biscoff cheesecake bars are proof that you don’t need a perfect plan or a spotless kitchen to make something incredible. They are simple, they are fast, and they are absolutely delicious. I hope you give them a try, and I hope they become a happy accident in your kitchen too. Play around with the variations, make them your own, and don’t stress if the drizzle isn’t perfect. It still tastes amazing. If you make these, I would love to hear about it. Drop a comment below and tell me how they turned out, or share a photo on Pinterest and tag me. Happy no-baking!
Frequently Asked Questions
Can I use a different cookie for the crust?
Absolutely. Graham crackers, digestive biscuits, or even vanilla wafers would work. The flavor will change, but the texture will be similar. If you use a less sweet cookie, you might want to add a tablespoon of sugar to the crust mixture.
Do I have to use heavy cream?
For the best texture, yes. Heavy cream whips up stiff and stable, which gives the bars their light, mousse-like feel. You can try using a can of full-fat coconut cream for a dairy-free option, but the texture will be a little different.
My cream cheese is lumpy. What did I do wrong?
It likely wasn’t soft enough. Cream cheese needs to be at room temperature to blend smoothly. If you are in a hurry, you can cut the cold cream cheese into small cubes and microwave it in 10-second bursts until it is soft but not melted. Let it sit for a minute after microwaving before you beat it.
Can I make these in a different sized pan?
Yes. A 9×9 inch pan will give you thinner bars. A 9×13 inch pan will make the bars quite thin, so you might want to double the crust recipe for that size. The chilling time will be shorter for thinner bars.
How do I get clean slices?
Use a sharp knife and wipe it clean with a damp paper towel between each cut. For the neatest slices, you can even dip the knife in hot water, dry it off, and then cut. Let the bars chill for the full recommended time—rushing this step leads to messy cuts.
Pin This Recipe!
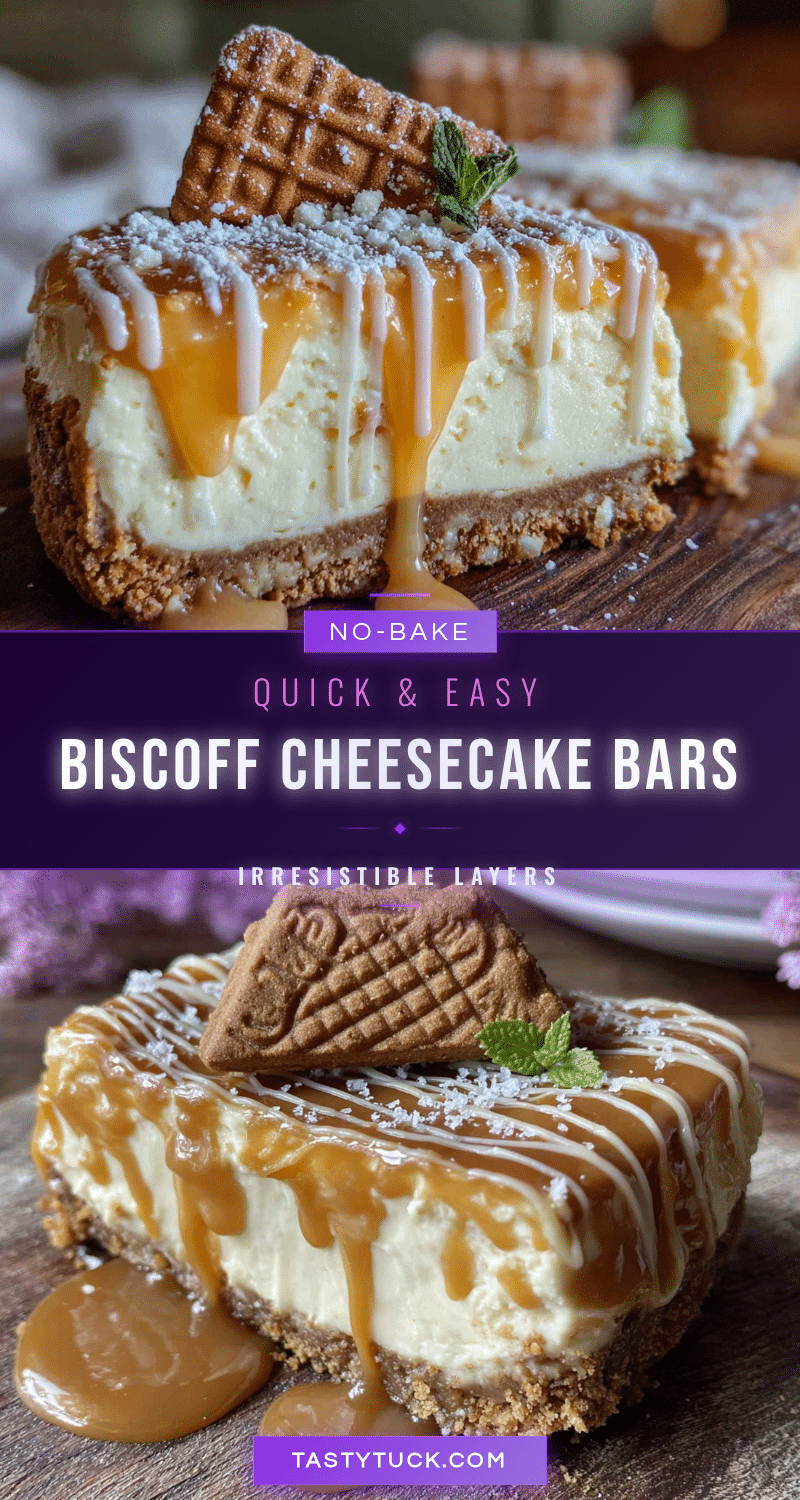
Quick No-Bake Biscoff Cheesecake Bars: Easy 5-Ingredient Dessert
These quick no-bake Biscoff cheesecake bars are a happy accident born from a chaotic Tuesday night. With just 5 main ingredients and 15 minutes of active work, you get a creamy, spiced filling on a crunchy cookie crust that is perfect for weeknights and crowd-pleasing.
- Prep Time: 15 minutes
- Cook Time: 0 minutes
- Total Time: 6 hours 15 minutes (includes chilling)
- Yield: 9 servings 1x
- Category: Dessert
- Cuisine: American
Ingredients
- 200g (about 2 cups) Biscoff cookies, crushed into fine crumbs
- 60g (¼ cup) unsalted butter, melted
- A pinch of salt (optional)
- 450g (2 blocks) full-fat cream cheese, softened to room temperature
- 100g (½ cup) granulated sugar
- 1 teaspoon vanilla extract
- 240ml (1 cup) heavy cream, cold
- 120g (½ cup) Biscoff cookie butter, plus more for drizzling
Instructions
- Line an 8×8 inch baking pan with two long strips of parchment paper, crisscrossing them so they hang over the edges on all four sides. Set aside.
- Make the crust: Pulse Biscoff cookies in a food processor until fine crumbs. Pour into a medium bowl, add melted butter and salt, and stir until mixture looks like wet sand. Press firmly and evenly into the bottom of the prepared pan. Refrigerate while making the filling.
- In a large mixing bowl, beat softened cream cheese with an electric mixer on medium speed until smooth and fluffy, about 2 minutes. Scrape down sides and bottom.
- Add sugar and vanilla extract, beat for another minute until sugar is dissolved and mixture is light and airy.
- Add Biscoff cookie butter and beat on low speed until fully incorporated and uniform in color. Scrape bowl and set aside.
- In a separate clean bowl, whip cold heavy cream on medium-high speed until stiff peaks form, about 3-4 minutes. Do not over-whip.
- Fold about one-third of the whipped cream into the cream cheese mixture to lighten it. Then gently fold in the remaining whipped cream until no white streaks remain.
- Spoon filling over chilled crust and spread evenly. Tap pan gently on counter to release air bubbles. Drizzle extra melted cookie butter on top and swirl with a toothpick.
- Cover with plastic wrap and refrigerate for at least 6 hours, preferably overnight.
- Once fully set, lift bars out using parchment handles. Place on cutting board and slice into 9 or 16 squares with a sharp knife, wiping clean between cuts.
Notes
Let cream cheese soften at room temperature for at least 1 hour to avoid lumps. Whip cream separately for a light, mousse-like texture. Press crust firmly to prevent crumbling. Chill overnight for best results. For clean slices, use a sharp knife and wipe it clean between cuts.
Nutrition
- Serving Size: 1 bar (based on 9 se
- Calories: 420
- Sugar: 26
- Fat: 28
- Saturated Fat: 16
- Carbohydrates: 38
- Protein: 6
Keywords: no-bake cheesecake, Biscoff cheesecake bars, easy dessert, 5-ingredient dessert, quick dessert, no-bake dessert


