My neighbor, a retired kindergarten teacher named Carol, watched me wrestling a bag of Oreos open with my teeth one Tuesday afternoon. I was trying to make a fancy layered cheesecake for a book club meeting, and honestly, it was going terribly. The crust was too buttery, the filling was lumpy, and I had chocolate smeared from my wrist to my elbow. Carol didn’t say a word at first. She just walked over to her garden fence, picked a few sprigs of mint, and handed them over with a wink. “You’re overthinking it,” she said. “Forget the cheesecake. Make dirt cups instead. Kids love them, and they take ten minutes.”
I laughed, thinking she was joking. But later that night, staring at a half-crushed bag of Oreos and some leftover pudding, I remembered her advice. I threw it together in a few minutes, and honestly? It was the hit of the book club. The other ladies couldn’t stop talking about how fun and delicious it was. That was the moment I stopped trying to impress everyone with complicated techniques and started focusing on what actually works—simple, fast, and genuinely joyful food. Maybe you’ve been there too, standing in your kitchen after a long day, wondering why you’re making things so hard on yourself. This recipe is for those nights.
Why You’ll Love This Recipe
Let’s be real—sometimes you just need a dessert that’s ready before your kids finish their homework. This Easy Oreo Dirt Cups recipe is exactly that. It’s the kind of dessert that makes you look like a hero without actually doing much work. I mean, who doesn’t love a treat that comes together in under 15 minutes?
- Quick & Easy: You’re looking at about 15 minutes from start to finish. No baking, no complicated steps, and definitely no stress.
- Simple Ingredients: You probably already have most of these in your pantry. Oreos, instant pudding, milk, and some gummy worms. That’s it.
- Perfect for Weeknights: Whether it’s a Tuesday night or a Friday celebration, these dirt cups fit right in. They’re fun enough for a party but simple enough for a regular evening.
- Crowd-Pleaser: Kids go absolutely crazy for them, and adults secretly love them too. I’ve seen grown-ups sneak seconds at parties—no judgment here.
- Unbelievably Delicious: The combination of creamy chocolate pudding, crunchy Oreo crumbs, and chewy gummy worms is pure comfort food magic. It’s nostalgic, satisfying, and just plain good.
What makes this version different from the hundred other dirt cup recipes out there? It’s the texture. I’ve tested this dozens of times to get the perfect balance—creamy pudding that’s not too thick, Oreo crumbs that stay crunchy, and gummy worms that don’t get soggy. Plus, I’ll share my trick for making the pudding extra smooth. Trust me, this is the best version you’ll find.
What Ingredients You Will Need
This recipe uses simple, everyday ingredients to create something that feels special. No fancy grocery trips required—just your standard pantry staples and a bag of gummy worms. Here’s what you’ll need:
- 1 package (14.3 ounces) Oreo cookies (regular or double stuf both work great)
- 1 package (3.9 ounces) instant chocolate pudding mix (I prefer Jell-O brand for consistent results)
- 2 cups cold milk (whole milk gives the creamiest texture, but 2% works fine too)
- 1 container (8 ounces) whipped topping (like Cool Whip, thawed)
- 1 package (4.5 ounces) gummy worms (any brand works—I like the sour ones for extra fun)
- Optional: 2 tablespoons cream cheese (softened, for a richer pudding layer)
- Optional: 1 teaspoon vanilla extract (adds depth to the chocolate flavor)
A few notes on ingredients. For the Oreos, I’ve tried both regular and double stuf, and honestly, either works. The double stuf has more cream filling, which makes the crumbs a bit richer, but regular Oreos are perfectly fine. If you’re using a dairy-free milk alternative, go with unsweetened almond or oat milk—just know the pudding might be slightly less thick. I’ve tested it with oat milk, and it still works great. For the gummy worms, look for the softer, fresher ones at the store. Stale gummy worms can be hard and chewy, which isn’t as fun to bite into.
Equipment Needed
You don’t need any fancy gadgets for this one. Here’s what you’ll need:
- Mixing bowls: One medium bowl for the pudding, one small bowl for crushing Oreos
- Whisk or electric mixer: A whisk works fine, but an electric mixer makes the pudding smoother
- Measuring cups and spoons: For the milk and any optional ingredients
- Plastic bag and rolling pin: For crushing the Oreos into fine crumbs (or use a food processor)
- 6-8 small cups or glasses: Clear plastic cups are fun so you can see the layers, but any small glass or jar works
- Spatula: For scraping every last bit of pudding
If you don’t have a food processor, no worries. Just put the Oreos in a zip-top bag and crush them with a rolling pin. It’s actually kind of therapeutic—I sometimes do it to blow off steam after a long day. For the cups, I like using 6-ounce clear plastic cups because they show off the layers, but mason jars or even small bowls work too. If you’re making these for a party, look for disposable cups at the dollar store—they’re cheap and make cleanup a breeze.
Preparation Method
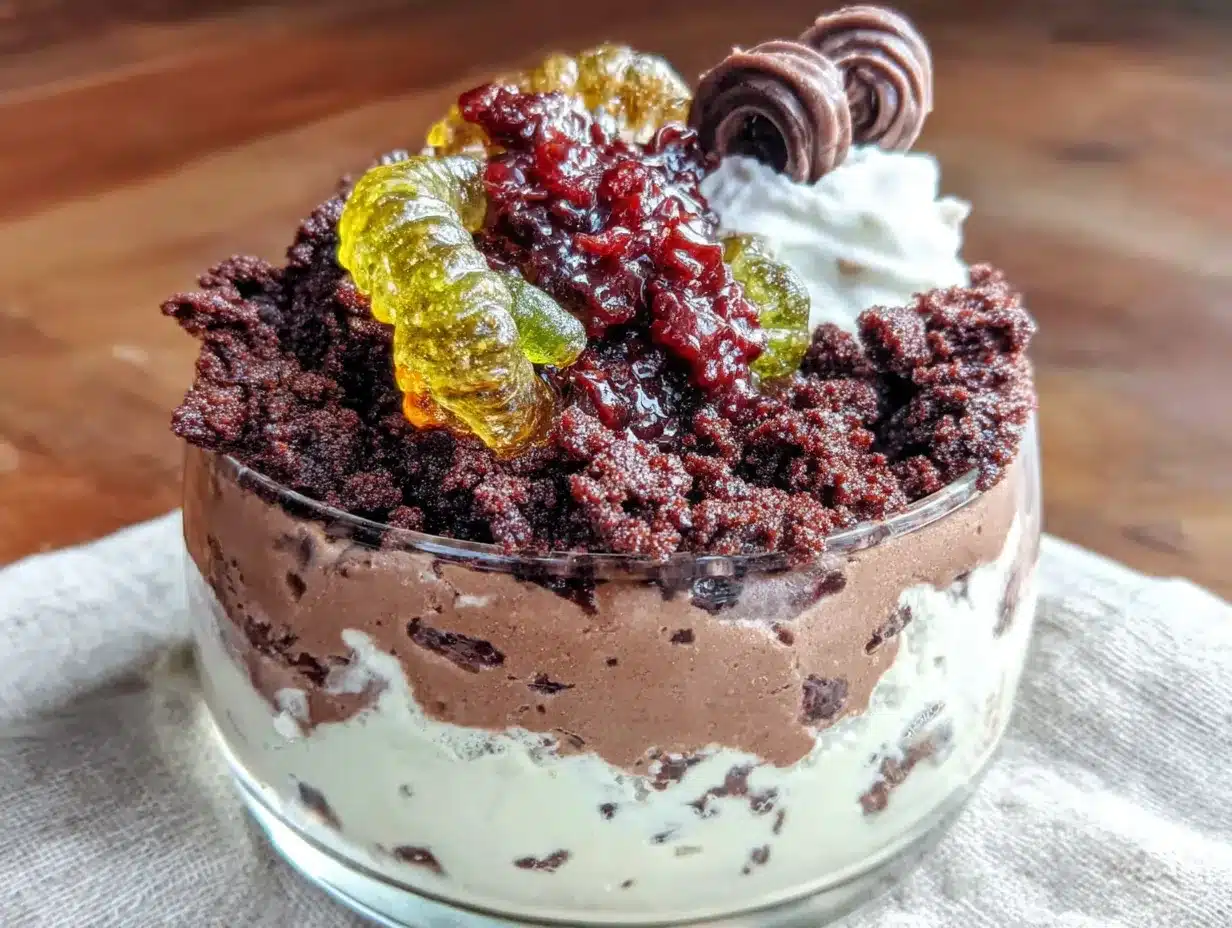
Alright, let’s get to the fun part. This recipe comes together in about 15 minutes, and the hardest part is waiting for the pudding to set. Here’s how to do it:
- Crush the Oreos: Place the entire package of Oreos (cream filling included) into a zip-top bag. Seal it tight, then use a rolling pin to crush them into fine crumbs. You want a mix of fine dust and small chunks—not completely powdered, but close. Set aside about 2 tablespoons of crumbs for garnish later. If you’re using a food processor, pulse until you get the same texture. Don’t overdo it, or you’ll end up with Oreo butter.
- Make the pudding: In a medium bowl, whisk together the instant chocolate pudding mix and 2 cups of cold milk. Whisk for about 2 minutes until it starts to thicken. If you’re using the optional cream cheese, beat it with an electric mixer first until smooth, then add the pudding mix and milk. This gives the pudding a richer, cheesecake-like texture. Let the pudding sit for 5 minutes to set up completely.
- Fold in the whipped topping: Gently fold the thawed whipped topping into the pudding using a spatula. Be gentle—you want to keep the mixture light and airy. If you’re adding vanilla extract, stir it in now. The mixture should be smooth and creamy, with no streaks of white.
- Layer the cups: Start with a layer of Oreo crumbs at the bottom of each cup—about 1-2 tablespoons. Then add a layer of the pudding mixture, filling the cup about halfway. Add another layer of Oreo crumbs, then more pudding, leaving about half an inch at the top. Finish with a final layer of Oreo crumbs. The goal is to have three layers of crumbs and two layers of pudding.
- Add the gummy worms: Press a few gummy worms into the top layer of crumbs so they look like they’re crawling out of the “dirt.” You can also tuck some into the middle layers for a fun surprise. I like to use 2-3 worms per cup, depending on their size.
- Chill (optional but recommended): Refrigerate the cups for at least 30 minutes before serving. This helps the flavors meld together and makes the pudding even creamier. If you’re in a rush, you can serve them immediately—they’re still delicious.
A few things to watch for. The pudding should be thick but still pourable when you layer it. If it’s too runny, let it sit for another minute or two. Also, don’t skip the step of setting aside some Oreo crumbs for garnish—it makes the cups look more polished. And here’s a tip I learned the hard way: don’t add the gummy worms too early, or they’ll get soft and lose their chewiness. Add them right before serving for the best texture.
Cooking Tips & Techniques
After making these dirt cups more times than I can count, I’ve picked up a few tricks that make a real difference. First, the texture of your Oreo crumbs matters more than you think. If you crush them too fine, they turn into a paste. If they’re too chunky, they don’t stick together properly. Aim for a consistency like coarse sand—some fine powder, some tiny chunks. This gives you that perfect “dirt” texture that looks realistic and feels great in your mouth.
Another tip: let the pudding set fully before layering. I know it’s tempting to rush, but if the pudding is too runny, it will soak into the Oreo crumbs and make everything mushy. Give it the full 5 minutes, and you’ll get clean, distinct layers. If you’re using an electric mixer, don’t overbeat the pudding—it can get grainy. Just mix until it’s smooth and starting to thicken.
One mistake I made early on was using low-fat milk. The pudding never set properly, and the whole thing turned into a soupy mess. Stick with whole milk or at least 2% for the best results. And if you’re making these ahead of time, wait to add the gummy worms until just before serving. They’ll stay chewy and fun instead of turning into sad, soggy noodles.
For the whipped topping, make sure it’s fully thawed but still cold. If it’s too warm, it won’t fold in evenly, and you’ll end up with white streaks. I usually take it out of the freezer and let it sit in the fridge overnight, then give it a quick stir before using.
Variations & Adaptations
One of the best things about this recipe is how easy it is to customize. Here are some of my favorite variations:
- Peanut Butter Dirt Cups: Add 2 tablespoons of creamy peanut butter to the pudding mixture before folding in the whipped topping. It adds a rich, nutty flavor that pairs perfectly with chocolate. Just make sure the peanut butter is room temperature so it blends in smoothly.
- Mint Chocolate Dirt Cups: Use mint-flavored Oreos instead of regular, and add 1/4 teaspoon of peppermint extract to the pudding. Top with a few chocolate shavings for an extra-special touch. These are great for St. Patrick’s Day or Christmas.
- Vegan Dirt Cups: Use dairy-free Oreos (they’re accidentally vegan!), plant-based milk, and a vegan instant pudding mix. For the whipped topping, look for a coconut-based version. The texture is slightly different, but it’s still delicious.
- Gluten-Free Dirt Cups: Swap the regular Oreos for gluten-free chocolate sandwich cookies. Most gluten-free versions work well, just make sure to check the package. Everything else in the recipe is naturally gluten-free.
- Berry Dirt Cups: Add a layer of fresh raspberries or sliced strawberries between the pudding and Oreo crumbs. The tartness of the berries cuts through the sweetness and adds a pop of color.
I’ve tried the peanut butter version myself, and it was a huge hit with my family. The key is to use a natural peanut butter that’s not too oily—otherwise, the pudding can get a bit greasy. For the mint version, go easy on the peppermint extract. A little goes a long way, and you don’t want it to taste like toothpaste.
Serving & Storage Suggestions
These dirt cups are best served cold, straight from the fridge. The contrast between the cool, creamy pudding and the crunchy Oreo crumbs is what makes them so satisfying. I like to serve them in clear cups so everyone can see the layers—it adds to the fun. If you’re making them for a party, you can even set up a “dirt cup bar” with different toppings like extra gummy worms, chocolate shavings, or crushed cookies.
For storage, cover each cup with plastic wrap or a lid and refrigerate for up to 3 days. The texture will change slightly over time—the Oreo crumbs will soften, and the pudding will firm up—but they’ll still taste great. I actually think they’re even better the next day, once the flavors have had time to meld together. Just don’t add the gummy worms until you’re ready to serve, or they’ll lose their chewiness.
If you’re taking these to a potluck or picnic, assemble them in disposable cups with lids. They travel well, and you won’t have to worry about washing dishes afterward. For reheating (though I can’t imagine why you’d want to), these are meant to be served cold. Don’t microwave them—it’ll turn the whole thing into a warm, goopy mess.
Nutritional Information & Benefits
Let’s be honest—these dirt cups are a treat, not a health food. But here’s the approximate nutritional breakdown for one serving (based on 8 servings):
- Calories: 320
- Fat: 14g
- Carbohydrates: 48g
- Protein: 4g
- Sugar: 34g
That said, there are a few bright spots. The milk provides calcium and vitamin D, and the Oreos (believe it or not) contain a small amount of iron. If you use the cream cheese variation, you’ll also get a bit of protein and probiotics. For a lighter version, you can use sugar-free pudding mix and low-fat milk—just know the texture won’t be quite as creamy.
These are not suitable for anyone with a dairy allergy unless you use the vegan substitutions. They also contain gluten from the Oreos, so if you’re celiac, make sure to use gluten-free cookies. And of course, they’re not low-carb or keto-friendly—but that’s okay. Sometimes you just need a little sweetness in your life.
Conclusion
So there you have it—the easiest, most fun dessert you’ll make all week. These Easy Oreo Dirt Cups with Gummy Worms are proof that you don’t need fancy techniques or expensive ingredients to create something truly memorable. They’re quick, they’re delicious, and they’ll put a smile on everyone’s face—including yours.
I love this recipe because it reminds me to keep things simple. Carol was right: we overthink things too much. Sometimes the best recipes are the ones that come together in 15 minutes and don’t require a single trip to the grocery store. So go ahead, give these a try. Customize them however you like—add peanut butter, swap in mint Oreos, or throw in some fresh berries. Make them your own.
And when you do, I’d love to hear about it. Leave a comment below and tell me how your dirt cups turned out. Did your kids love them? Did you sneak one for yourself after everyone went to bed? Share your photos, your variations, and your stories. Let’s keep this conversation going—because honestly, the best recipes are the ones we share.
Frequently Asked Questions
Can I make these dirt cups ahead of time?
Yes, you can assemble them up to 24 hours in advance. Just wait to add the gummy worms until right before serving so they stay chewy. Cover the cups with plastic wrap and refrigerate.
Can I use homemade pudding instead of instant?
You can, but it will change the texture. Homemade pudding is thinner and won’t set as firmly, so your layers might blend together. If you want to try it, cook the pudding until it’s very thick, then let it cool completely before layering.
How do I keep the Oreo crumbs from getting soggy?
The key is to let the pudding set fully before layering and to use a thick, creamy pudding consistency. Also, don’t overmix the crumbs into the pudding—keep them separate in distinct layers. Serving the cups within 24 hours also helps maintain crunchiness.
Can I freeze these dirt cups?
Freezing is not recommended. The pudding will become watery and grainy when thawed, and the Oreo crumbs will turn mushy. These are best enjoyed fresh from the refrigerator.
What other candies can I use instead of gummy worms?
Get creative! Gummy bugs, chocolate rocks, or even crushed candy bars work great. For a Halloween version, try candy eyeballs or mini pumpkins. Just make sure to add them right before serving for the best texture.
Pin This Recipe!

Easy Oreo Dirt Cups: Best 15-Minute Dessert Recipe

These Easy Oreo Dirt Cups are a quick, no-bake dessert that comes together in just 15 minutes. Layers of creamy chocolate pudding, crunchy Oreo crumbs, and chewy gummy worms make this a fun and delicious treat that kids and adults love.
- Prep Time: 15 minutes
- Cook Time: 0 minutes
- Total Time: 15 minutes
- Yield: 8 servings 1x
- Category: Dessert
- Cuisine: American
Ingredients
- 1 package (14.3 ounces) Oreo cookies (regular or double stuf)
- 1 package (3.9 ounces) instant chocolate pudding mix
- 2 cups cold milk (whole milk preferred, 2% works)
- 1 container (8 ounces) whipped topping (like Cool Whip, thawed)
- 1 package (4.5 ounces) gummy worms
- Optional: 2 tablespoons cream cheese (softened)
- Optional: 1 teaspoon vanilla extract
Instructions
- Crush the entire package of Oreos (cream filling included) into fine crumbs using a zip-top bag and rolling pin or a food processor. Set aside about 2 tablespoons for garnish.
- In a medium bowl, whisk together the instant chocolate pudding mix and 2 cups cold milk for about 2 minutes until it starts to thicken. If using cream cheese, beat it first until smooth, then add pudding mix and milk. Let sit for 5 minutes to set.
- Gently fold the thawed whipped topping into the pudding using a spatula until smooth and no streaks remain. If using vanilla extract, stir it in now.
- Layer the cups: Start with 1-2 tablespoons of Oreo crumbs at the bottom of each cup. Add a layer of pudding mixture to fill halfway. Add another layer of crumbs, then more pudding, leaving about 1/2 inch at the top. Finish with a final layer of Oreo crumbs.
- Press a few gummy worms into the top layer of crumbs so they look like they’re crawling out. Optionally, tuck some into the middle layers.
- Refrigerate for at least 30 minutes before serving for best texture. Serve cold.
Notes
For best texture, let pudding set fully before layering. Add gummy worms just before serving to keep them chewy. Use whole milk for creamiest pudding. Crush Oreos to a coarse sand consistency for realistic ‘dirt’ texture. Can be assembled up to 24 hours in advance (without gummy worms).
Nutrition
- Serving Size: 1 cup
- Calories: 320
- Sugar: 34
- Fat: 14
- Carbohydrates: 48
- Protein: 4
Keywords: Oreo dirt cups, no-bake dessert, chocolate pudding, gummy worms, easy dessert, kid-friendly, 15-minute dessert


