I figured a gummy made from berries and gelatin would taste like a sad, medicinal compromise. It took about one batch of these Homemade Elderberry Immune-Boost Gummies for that assumption to fall apart completely. The first one I popped out of the silicone mold was a deep, jewel-toned purple, and I honestly expected that familiar syrupy-sweet cough-drop flavor. Instead, I got a bright, tart-sweet burst of berry that made me immediately reach for another. They weren’t just tolerable—they were genuinely good. And somewhere between the second and third gummy, I realized I hadn’t thought about the jar of store-bought supplements sitting in the back of my pantry once.
This recipe started because my kids came home from school with the sniffles again, and I was tired of wrestling them for a spoonful of dark syrup. I needed something that felt more like a treat and less like a chore. These gummies have that perfect bouncy texture, not too firm and not too soft, with a flavor that actually tastes like real elderberries. They’ve become my secret weapon for cold season, and I’m pretty sure my kids think they’re getting away with something.
Why You’ll Love This Recipe
Let’s be real—getting your family to take supplements can feel like a negotiation you never win. These Homemade Elderberry Immune-Boost Gummies change the game completely.
- Quick & Easy: You only need about 15 minutes of active prep time. The hardest part is waiting for them to set in the fridge.
- Simple Ingredients: No obscure powders or hard-to-find extracts. You can find everything at a regular grocery store or online.
- Perfect for Picky Eaters: Kids (and honestly, adults) love the gummy texture and fruity flavor. It feels like eating candy, not taking medicine.
- Crowd-Pleaser: I brought a batch to a playdate and the other moms asked for the recipe before the kids finished the first handful.
- Unbelievably Delicious: The combination of tart elderberry with a touch of honey and lemon creates a balanced flavor that’s refreshing, not cloying.
What makes this version different from the rest? It’s the ratio. I tested this about four times to get the perfect balance between immune-boosting benefits and a taste that actually makes you want to eat them. Plus, using real elderberry syrup instead of powder gives them that authentic, deep berry flavor you just can’t fake.
This isn’t just another gummy recipe. It’s the kind that makes you feel good about giving your kids something that’s actually working for their bodies. It’s comfort food for your immune system—faster, tastier, and way more fun than a pill.
What Ingredients You Will Need
This recipe uses simple, wholesome ingredients to deliver a powerful immune boost without any of the artificial stuff. Most of these are pantry staples in my house during the winter months.
- 1 cup (240 ml) prepared elderberry syrup – This is the star of the show. I prefer a high-quality syrup with no added sugar, but any brand works. Look for one with real elderberry extract and no artificial flavors. (Adds the immune-boosting power)
- 3 tablespoons (45 ml) fresh lemon juice – Fresh is important here. Bottled juice just doesn’t give the same bright, zesty kick. It also helps preserve the gummies naturally. (Balances the sweetness and adds vitamin C)
- 2-3 tablespoons (30-45 ml) honey or maple syrup – Adjust this to your taste. I use local honey for its own immune benefits, but maple syrup works great for a vegan option. Start with 2 tablespoons and taste the mixture before adding more. (Adds natural sweetness and soothing properties)
- 1/4 cup (60 ml) cold water – This is for blooming the gelatin. It’s important to use cold water so the gelatin dissolves evenly without clumping.
- 4 tablespoons (about 28 grams) unflavored gelatin powder – This is what gives the gummies their signature bouncy texture. I recommend Knox brand for consistent results. For a vegetarian version, you can use agar agar, but the texture will be different. (Creates the gummy texture)
- Optional: 1/2 teaspoon vitamin C powder (ascorbic acid) – This adds an extra immune boost and a slightly tarter flavor. You can find it in the supplement section or online. (Boosts the immune benefits)
- Optional: 1 tablespoon (15 ml) elderberry concentrate – If you want an even deeper berry flavor and color, add this. It’s not necessary, but it takes the flavor to the next level. (Intensifies the elderberry taste)
For ingredient sourcing, I personally stick with a brand of elderberry syrup that lists organic elderberries as the first ingredient. It makes a difference in both flavor and potency. If you’re making your own syrup from scratch, just reduce it down a bit more than usual so the gummies aren’t too watery.
Equipment Needed
You don’t need a fancy kitchen setup for this recipe. Here’s what I use every time I make a batch of these Homemade Elderberry Immune-Boost Gummies.
- Silicone gummy molds – These are worth the investment. I have a set of bear-shaped molds that my kids love. You can find them on Amazon or at craft stores. They make popping out the gummies so easy.
- Small saucepan – A 1-quart saucepan works perfectly. You just need enough room to heat the liquid without it splashing everywhere.
- Whisk – A small whisk helps incorporate the gelatin without lumps. A fork works in a pinch, but a whisk is better.
- Fine-mesh strainer – This is optional but helpful if your elderberry syrup has any pulp or sediment. It gives you perfectly smooth gummies.
- Liquid measuring cup with spout – Something with a pour spout makes filling the molds way less messy. I use a 2-cup Pyrex measuring cup.
- Dropper or small squeeze bottle – For precision filling. A dropper works great for tiny molds, but a squeeze bottle is faster for larger batches.
- Refrigerator space – You need a flat spot in your fridge where the molds can sit undisturbed for at least 2-3 hours.
If you don’t have silicone molds, you can pour the mixture into a small glass dish and cut it into squares once it sets. It won’t be as cute, but it works. I’ve done this in a pinch and it’s totally fine.
Preparation Method
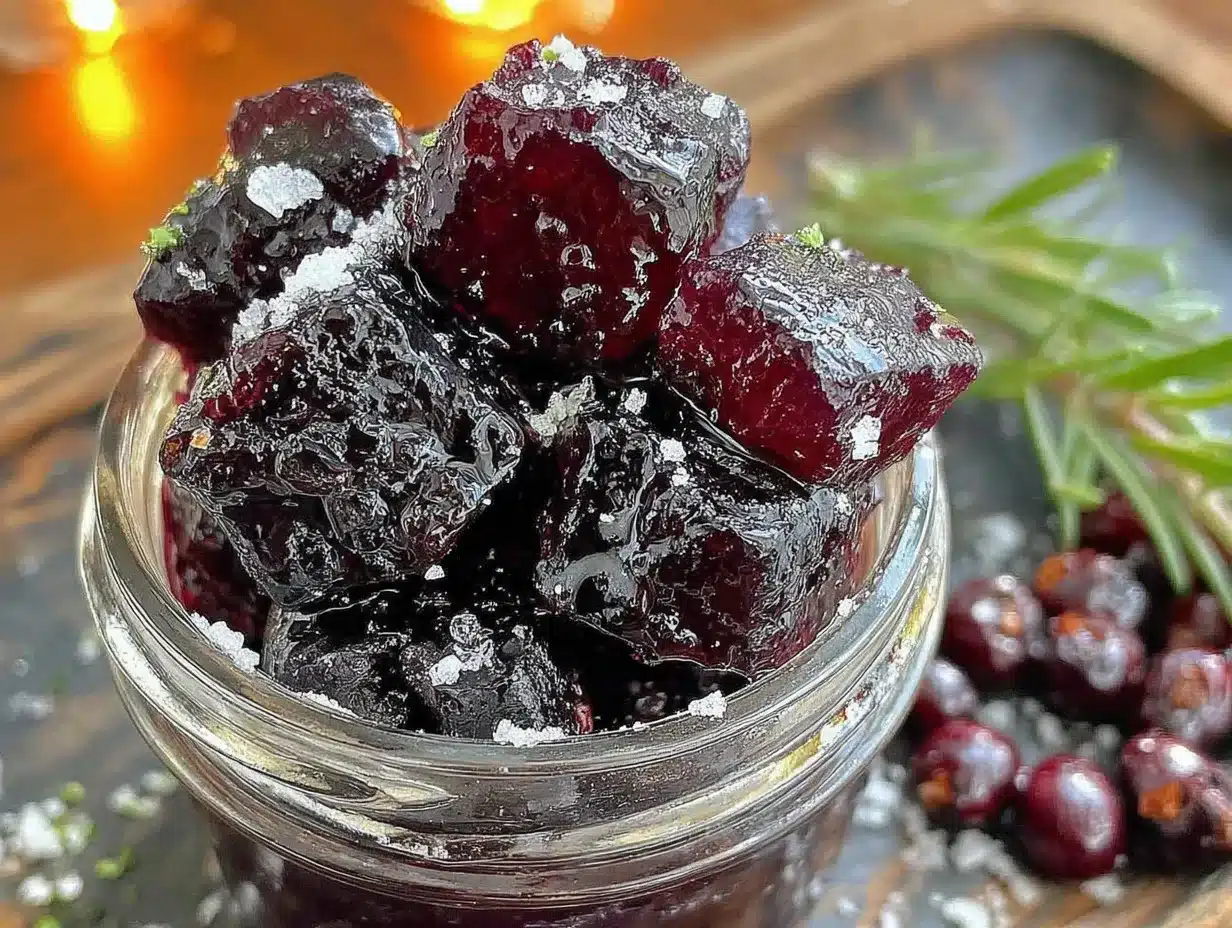
Making these Homemade Elderberry Immune-Boost Gummies is surprisingly straightforward. Just follow these steps and you’ll have a batch ready in no time.
- Bloom the gelatin. Pour the 1/4 cup of cold water into a small bowl. Sprinkle the gelatin powder evenly over the surface. Don’t stir it yet—just let it sit for about 5 minutes. It will look like a thick, spongy mass. This is called blooming, and it’s essential for smooth, lump-free gummies. If you skip this step, you’ll end up with grainy texture.
- Heat the base liquid. In a small saucepan, combine the elderberry syrup, lemon juice, and honey (or maple syrup). Warm it over low heat, stirring gently. You don’t want it to boil—just get it warm enough to dissolve the honey. Around 100-110°F is perfect. If it gets too hot, it can damage the immune-boosting properties of the elderberry.
- Combine the gelatin and liquid. Once the liquid is warm, remove it from the heat. Add the bloomed gelatin to the saucepan. Whisk continuously until the gelatin is completely dissolved. This usually takes about 1-2 minutes. The mixture should look smooth and glossy with no streaks. If you’re using vitamin C powder or elderberry concentrate, add it now and whisk again.
- Strain the mixture (optional but recommended). Pour the mixture through a fine-mesh strainer into your liquid measuring cup. This catches any undissolved gelatin bits or pulp from the syrup. You’ll get a perfectly smooth liquid that will set into clear, beautiful gummies.
- Fill the molds. Place your silicone molds on a small baking sheet or tray (this makes them easier to move). Use your dropper or squeeze bottle to fill each cavity almost to the top. Don’t overfill—the gummies will expand slightly as they set. If you get bubbles on the surface, pop them with a toothpick or give the tray a gentle tap on the counter.
- Let them set. Carefully transfer the tray to the refrigerator. Let the gummies set for at least 2-3 hours, but overnight is even better. They should be firm to the touch and pop out of the molds easily. Don’t rush this step—if you try to remove them too early, they’ll be sticky and misshapen.
- Pop them out. Gently flex the silicone mold to release each gummy. They should come out cleanly with a satisfying little pop. If any stick, try placing the mold in the freezer for 5 minutes—that usually does the trick.
A quick note: The mixture will start to thicken as it cools, so work reasonably quickly when filling the molds. If it gets too thick, just reheat it gently on the stove for a few seconds. I’ve had to do this more times than I’d like to admit.
Cooking Tips & Techniques
I’ve made enough batches of these gummies to learn a few things the hard way. Here’s what I wish someone had told me from the start.
Don’t boil the mixture. This is probably the most important tip. High heat can break down the gelatin and destroy some of the beneficial compounds in the elderberries. Keep it at a gentle simmer at most. I ruined my first batch by getting impatient and cranking up the heat—the gummies never set properly and were a sticky mess.
Use a squeeze bottle for filling. I tried using a spoon for my first batch and ended up with elderberry syrup everywhere. A squeeze bottle gives you so much more control. You can find them at any kitchen supply store or just use a clean condiment bottle.
Let them dry slightly after unmolding. Once you pop the gummies out, let them sit on a piece of parchment paper for about 30 minutes. This allows any excess moisture to evaporate, which helps prevent them from sticking together in the storage container. I learned this after my first batch turned into one giant gummy blob in the jar.
Taste test the liquid before pouring. Before you fill the molds, dip a spoon in and taste the mixture. This is your last chance to adjust the sweetness or tartness. I always add a little extra lemon juice at this stage because I like the tang.
Work in batches if you have multiple molds. If you’re making a double batch, don’t try to fill all the molds at once. The mixture will thicken as it sits. Fill one set of molds, then reheat the mixture briefly before filling the next set.
Variations & Adaptations
One of the best things about this recipe is how easy it is to customize. Here are a few variations I’ve tried and loved.
- Vegan Version: Substitute the gelatin with agar agar powder. Use 2 tablespoons of agar agar instead of the 4 tablespoons of gelatin. The texture will be a bit firmer and less bouncy, but still delicious. Use maple syrup instead of honey to keep it fully plant-based.
- Extra Immune Boost: Add 1/2 teaspoon of turmeric powder and a pinch of black pepper to the mixture. The pepper helps your body absorb the turmeric. It gives the gummies a slightly earthy flavor and a beautiful golden undertone. I make this version when cold season is really bad.
- Tropical Twist: Replace half of the elderberry syrup with pineapple or mango juice. The tropical fruit flavor pairs surprisingly well with the tart elderberries. Plus, pineapple contains bromelain, which is great for reducing inflammation.
- Low-Sugar Option: Use a sugar-free elderberry syrup and omit the honey or maple syrup entirely. You can add a few drops of stevia or monk fruit sweetener if you need extra sweetness. The gummies will be a bit tarter but still totally enjoyable.
- Herbal Infusion: Steep a bag of echinacea or ginger tea in the warm liquid for 5 minutes before adding the gelatin. Strain out the tea bag and proceed with the recipe. This adds another layer of immune support and a subtle herbal flavor.
My personal favorite variation is the one with extra ginger. I grate a 1-inch piece of fresh ginger into the warm liquid and let it steep for 10 minutes before straining. The warmth of the ginger combined with the tart elderberry is just perfect for a sore throat.
Serving & Storage Suggestions
These gummies are best enjoyed straight from the fridge—the cold, bouncy texture is part of the appeal. I like to serve them in a small bowl as a mid-morning snack or an after-school treat. They’re also great for packing in lunchboxes, especially during cold season.
For storage, place the gummies in an airtight container and keep them in the refrigerator. They’ll stay fresh for up to 2-3 weeks, though mine never last that long. I use a glass jar with a tight-fitting lid. If you layer them, separate each layer with a piece of parchment paper to prevent sticking.
You can also freeze these gummies for longer storage. Spread them in a single layer on a baking sheet and freeze for about an hour, then transfer them to a freezer-safe bag. They’ll keep for up to 3 months. To thaw, just move them to the refrigerator overnight. The texture might be slightly softer after freezing, but they’re still delicious.
One thing I’ve noticed—the flavors actually deepen and meld together after a day or two in the fridge. So if you can resist eating them all immediately, they’ll taste even better on day two. The tartness of the lemon and the sweetness of the honey become more balanced.
Nutritional Information & Benefits
Here’s the approximate nutritional breakdown for a serving of 4-5 gummies (based on a batch of 50 gummies):
- Calories: 35-45
- Carbohydrates: 8-10g
- Sugars: 6-8g (from honey and elderberry syrup)
- Protein: 2-3g (from gelatin)
- Vitamin C: 15-25% of daily value (from elderberry and lemon juice)
These gummies are a fantastic source of immune-supporting nutrients. Elderberries are packed with antioxidants called anthocyanins, which help your body fight off oxidative stress. The vitamin C from the lemon juice supports white blood cell function, and the gelatin provides collagen-boosting protein that’s great for your skin and joints.
This recipe is naturally gluten-free and dairy-free. If you use maple syrup instead of honey, it’s also vegan-friendly. The only potential allergen to note is gelatin, which is derived from animal collagen. For a completely plant-based option, use the agar agar variation mentioned above.
I personally love that these gummies give me a way to support my family’s health without relying on sugary commercial gummies or hard-to-swallow pills. It’s a small, delicious step toward feeling better during cold season.
Conclusion
These Homemade Elderberry Immune-Boost Gummies have honestly become a staple in my kitchen. They’re quick to make, packed with real immune-supporting ingredients, and they actually taste good enough that my kids ask for them by name. That’s a win I’ll take any day.
Don’t be afraid to tweak the recipe to fit your family’s taste. Add more honey if you like them sweeter, or throw in some extra lemon for a tarter kick. The beauty of making them yourself is that you have total control over what goes in. You know exactly what you’re eating—no mystery ingredients or artificial junk.
I’d love to hear how your batch turns out. Did you try a variation? Did your kids love them as much as mine do? Drop a comment below and let me know. And if you’re looking for another easy, comforting treat to make this season, you might enjoy this cozy peach cobbler for a completely different kind of indulgence. Or if you’re sticking with the immune-boosting theme, this hearty pasta e fagioli soup is perfect for warming up on a cold day. Happy gummy-making!
Frequently Asked Questions
Can I use powdered elderberry instead of syrup?
Yes, you can. Use about 2 tablespoons of elderberry powder mixed into warm water or juice. You’ll need to adjust the sweetness since powder isn’t sweetened. I recommend adding an extra tablespoon of honey to balance the tartness.
How many gummies should I eat per day?
For adults, 4-5 gummies per day is a good maintenance dose. For children aged 4 and up, 2-3 gummies is plenty. Always check with your pediatrician before giving any supplement to young children. And remember, these are a supplement, not a replacement for a healthy diet.
Why didn’t my gummies set properly?
This usually happens for one of three reasons: the mixture got too hot and broke down the gelatin, you didn’t add enough gelatin, or you didn’t let them set long enough. Make sure you bloom the gelatin properly and don’t boil the mixture. If they’re still runny after 4 hours in the fridge, you can try reheating the mixture with an extra tablespoon of gelatin.
Can I make these without a mold?
Absolutely. Pour the mixture into a small glass dish or silicone ice cube tray. Once set, cut them into small squares with a sharp knife. They won’t be as cute as bear-shaped gummies, but they work just as well. I’ve done this when I couldn’t find my molds.
How long do these gummies last at room temperature?
I don’t recommend leaving them out for more than a few hours. Because they contain fruit juice and honey, they can spoil if left at room temperature for too long. Always store them in the refrigerator for maximum freshness and food safety.
Pin This Recipe!
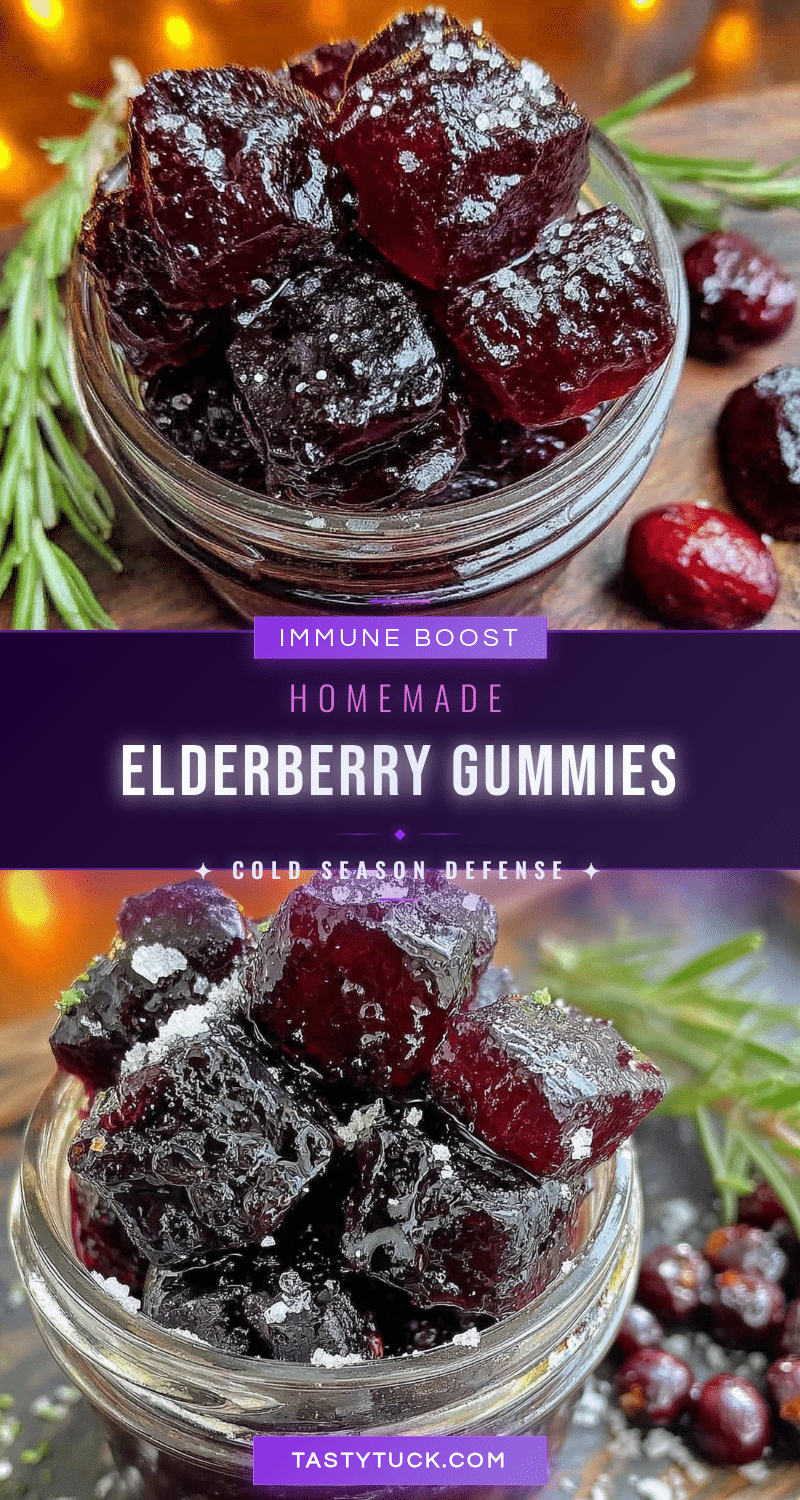
Homemade Elderberry Gummies: Easy Immune-Boost Recipe
These Homemade Elderberry Immune-Boost Gummies are a delicious and fun way to support your immune system. Made with real elderberry syrup, lemon juice, and honey, they have a perfect bouncy texture and a bright, tart-sweet flavor that kids and adults love.
- Prep Time: 15 minutes
- Cook Time: 5 minutes
- Total Time: 2 hours 20 minutes (including setting time)
- Yield: 50 gummies 1x
- Category: Snack
- Cuisine: American
Ingredients
- 1 cup (240 ml) prepared elderberry syrup
- 3 tablespoons (45 ml) fresh lemon juice
- 2–3 tablespoons (30–45 ml) honey or maple syrup
- 1/4 cup (60 ml) cold water
- 4 tablespoons (about 28 grams) unflavored gelatin powder
- Optional: 1/2 teaspoon vitamin C powder (ascorbic acid)
- Optional: 1 tablespoon (15 ml) elderberry concentrate
Instructions
- Bloom the gelatin: Pour the 1/4 cup of cold water into a small bowl. Sprinkle the gelatin powder evenly over the surface. Let it sit for about 5 minutes until it becomes a thick, spongy mass.
- Heat the base liquid: In a small saucepan, combine the elderberry syrup, lemon juice, and honey (or maple syrup). Warm over low heat, stirring gently, until the honey dissolves. Do not boil; keep around 100-110°F.
- Combine the gelatin and liquid: Remove the saucepan from heat. Add the bloomed gelatin and whisk continuously until completely dissolved (about 1-2 minutes). If using vitamin C powder or elderberry concentrate, add and whisk again.
- Strain the mixture (optional): Pour through a fine-mesh strainer into a liquid measuring cup to remove any undissolved bits or pulp.
- Fill the molds: Place silicone molds on a baking sheet. Use a dropper or squeeze bottle to fill each cavity almost to the top. Pop any bubbles with a toothpick or tap the tray gently.
- Let them set: Refrigerate for at least 2-3 hours, or overnight, until firm to the touch.
- Pop them out: Gently flex the silicone mold to release the gummies. If they stick, place the mold in the freezer for 5 minutes.
Notes
Do not boil the mixture as high heat can break down gelatin and destroy beneficial compounds. Work quickly when filling molds as the mixture thickens as it cools. Let gummies dry on parchment paper for 30 minutes after unmolding to prevent sticking. Flavors deepen after a day in the fridge.
Nutrition
- Serving Size: 4-5 gummies
- Calories: 3545
- Sugar: 68
- Sodium: 5
- Carbohydrates: 810
- Protein: 23
Keywords: elderberry gummies, immune boost, homemade gummies, elderberry recipe, healthy snacks, gelatin gummies, immune support


