My daughter turned seven, and somehow, I forgot to order her cake. Two weeks of planning, a Pinterest board with thirty-seven pins, and a calendar reminder that I definitely snoozed instead of acted on. The morning of her party, I stood in my kitchen staring at a box of cake mix, a bag of Halloween sprinkles from last year, and a jar of chocolate frosting that was definitely not enough to cover a whole cake.
Panic set in — the kind where you start opening every cabinet hoping a fully decorated cake magically appears. But then I remembered a trick I’d seen years ago: a spiderweb drip. It doesn’t require a ton of frosting to cover the whole cake because the web itself does the heavy lifting visually. And honestly? It looked cooler than anything I could have planned.
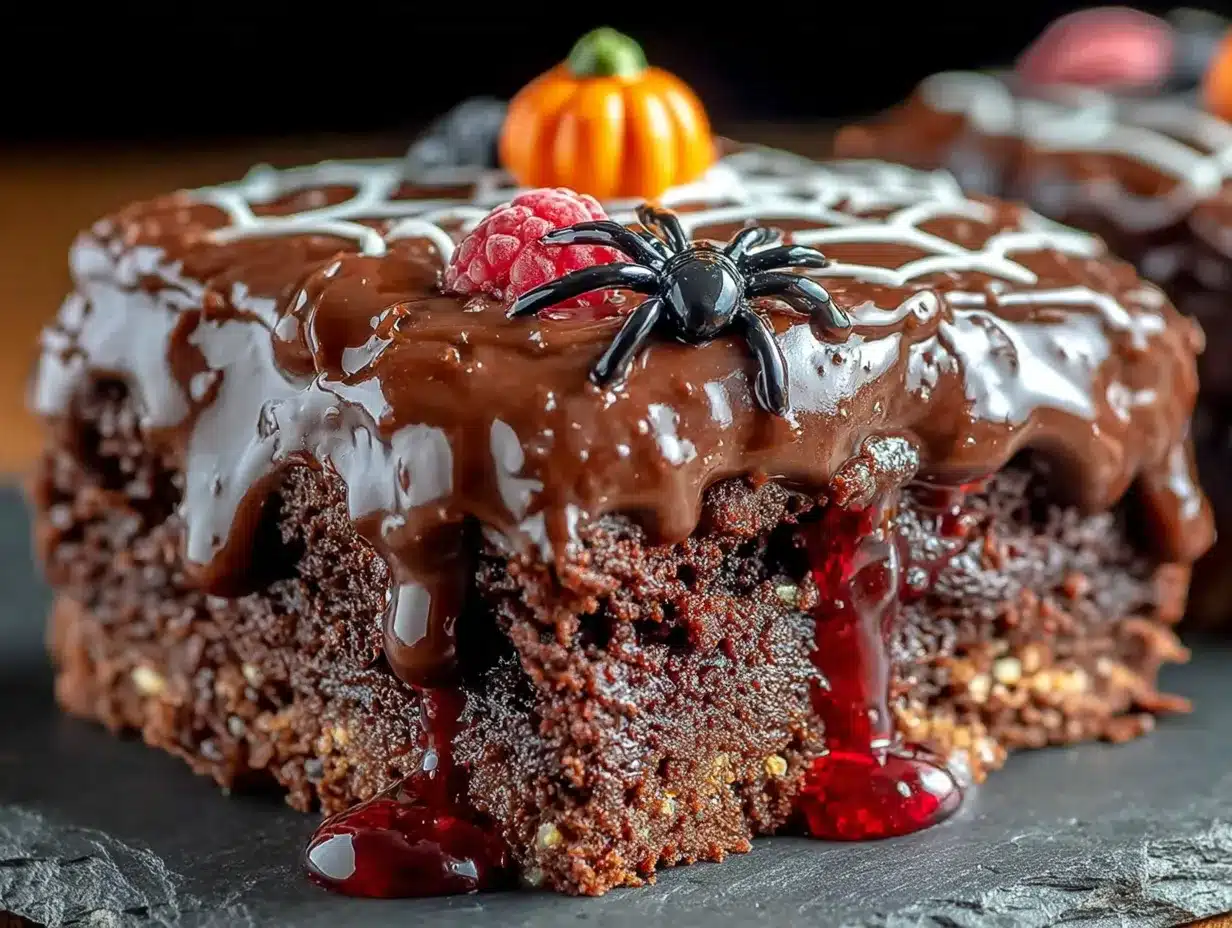
So I threw together this Best Halloween Birthday Sheet Cake with Spiderweb Drip in about an hour flat. The kids went absolutely bonkers when they saw it. My daughter said it was the “spookiest, prettiest cake ever” — and she’s a tough critic. That’s the thing about this cake. It looks like you fussed for hours, but really, it’s just a clever little trick with melted chocolate and a piping bag.
This is the kind of recipe that saves the day when life gets chaotic. Or when you just want to make something impressive without the stress. Either way, it works.
Why You’ll Love This Recipe
Let me tell you why this sheet cake has become my go-to for every Halloween birthday in our house. I’ve tested it three times now — once in panic mode, once for a friend’s party, and once just because I wanted the leftovers.
- Quick & Easy: From start to finish, this comes together in under 90 minutes. That includes cooling time. For a decorated cake, that’s practically magic.
- Simple Ingredients: You probably have everything already. Cake mix, eggs, oil, butter, powdered sugar, chocolate chips. No weird specialty items you’ll never use again.
- Perfect for Dual Occasions: Halloween birthday? Fall party? Spooky movie night? This cake works for all of them. It’s festive without being too childish for adults to enjoy.
- Crowd-Pleaser: I’ve served this to kids, grandparents, and picky teenagers. Every single person went back for seconds. The chocolate buttercream is dangerously good.
- Unbelievably Impressive: The spiderweb drip looks like something from a bakery. People will ask where you ordered it. That’s your moment to smile mysteriously.
What makes this different from every other sheet cake out there is the technique. Instead of covering the entire cake in frosting (which always ends up uneven for me), you create a thin crumb coat and let the spiderweb do all the decorating work. It’s genius, honestly. Less frosting, more visual impact, and way less stress.
This cake is the kind that makes you close your eyes after the first bite. The cake is moist and tender, the frosting is rich and creamy, and that chocolate drip adds just the right amount of drama. It’s comfort food with a spooky twist — perfect for making a Halloween birthday feel special without spending all day in the kitchen.
What Ingredients You Will Need
This recipe uses simple, mostly pantry-staple ingredients to deliver that bakery-quality look without the fuss. Here’s everything you’ll need, broken down by component.
For the Cake
- 1 box (15.25 oz) yellow or vanilla cake mix — I prefer Betty Crocker or Duncan Hines for consistent results. The texture is always reliable.
- 3 large eggs, room temperature — Cold eggs can make the batter seize up. Set them out 30 minutes before baking.
- 1/2 cup vegetable oil — Canola or avocado oil works too. Avoid olive oil; the flavor is too strong.
- 1 cup water — Or substitute milk for a richer, denser crumb. Buttermilk also works beautifully here.
- 1 teaspoon vanilla extract — Pure vanilla is best, but imitation works in a pinch.
For the Chocolate Buttercream
- 1 cup (2 sticks) unsalted butter, softened — Let it sit out for at least an hour. Cold butter makes lumpy frosting.
- 3 1/2 cups powdered sugar, sifted — Sifting prevents those annoying little clumps that ruin smooth frosting.
- 1/2 cup unsweetened cocoa powder — I use Hershey’s Special Dark for a richer color and flavor. Regular cocoa works too.
- 1/4 cup heavy cream — Whole milk works as a substitute, but cream makes it extra luxurious.
- 1 teaspoon vanilla extract
- 1/4 teaspoon salt — Balances the sweetness and enhances the chocolate.
For the Spiderweb Drip
- 1/2 cup dark chocolate chips — Ghirardelli 60% cacao is my go-to. The darker color shows up better against the frosting.
- 2 tablespoons coconut oil — This is the secret to a smooth, drippy consistency. Vegetable shortening works too.
- White icing pen or melted white chocolate — For the web lines. Wilton’s white icing pen is easiest, but you can melt 1/4 cup white chips with 1 teaspoon coconut oil.
For Decoration (Optional but Fun)
- Halloween sprinkles — Ghosts, bats, pumpkins. Whatever makes you happy.
- Candy eyeballs — These really sell the spooky vibe.
- Orange food coloring — Just a drop for the frosting if you want a more Halloween-y color.
One quick note about the cake mix: I know some people prefer from-scratch cakes, and I respect that. But for this recipe, the box mix actually works better. It’s more forgiving, stays moist longer, and honestly? Nobody can tell the difference once that buttercream hits it. If you want to go homemade, use your favorite vanilla cake recipe — just make sure it’s sturdy enough to hold up to frosting.
For the chocolate chips, don’t use milk chocolate for the drip. It’s too light and won’t show up well against the dark frosting. Dark chocolate or semi-sweet is the way to go.
Equipment Needed
You don’t need a fully stocked bakery to pull this off. Here’s what you’ll actually use:
- 13×9-inch sheet pan — Standard size. Glass, metal, or ceramic all work. Just make sure it’s at least 2 inches deep.
- Hand mixer or stand mixer — For the frosting. You can whisk by hand, but your arm will hate you.
- Piping bags — Disposable ones are easiest. You’ll need two: one for the chocolate drip and one for the web lines.
- Small round piping tip (Wilton #2 or #3) — For drawing the spiderweb. A ziplock bag with a tiny corner snipped off works too.
- Offset spatula — For smoothing the frosting. A butter knife works in a pinch.
- Microwave-safe bowl — For melting the chocolate drip.
- Cooling rack — Helps the cake cool evenly and prevents a soggy bottom.
If you don’t have piping bags, don’t stress. I’ve used ziplock bags plenty of times. Just fill them, snip a tiny corner, and go. The key is keeping that hole small — you can always make it bigger, but you can’t undo a giant cut.
One tip: invest in a good offset spatula if you bake often. The $5 one from the grocery store works fine, but a nicer one with a comfortable handle makes frosting so much easier. I learned that the hard way after fighting with a flimsy spatula for years.
Preparation Method
Alright, let’s get baking. This looks complicated, but I promise it’s just a series of simple steps. Take it one at a time.
Step 1: Bake the Cake
Preheat your oven to 350°F (175°C). Grease your 13×9 pan thoroughly — I use butter and a dusting of flour, but cooking spray works too. In a large bowl, combine the cake mix, eggs, oil, water, and vanilla extract. Beat on medium speed for 2 minutes until smooth and well combined. Pour the batter into the prepared pan and spread it evenly. Bake for 28-32 minutes, or until a toothpick inserted in the center comes out clean with just a few moist crumbs. Let the cake cool in the pan for 10 minutes, then transfer to a cooling rack. Here’s the hard part: let it cool completely. At least one hour. If you frost a warm cake, you’ll get a melty mess. Trust me, I’ve done it.
Step 2: Make the Chocolate Buttercream
While the cake cools, make your frosting. In a large bowl, beat the softened butter on medium speed until creamy and light, about 2 minutes. Add the sifted powdered sugar and cocoa powder alternately with the heavy cream, starting and ending with the sugar. Beat on low speed until combined, then increase to medium-high and beat for 3 minutes until light and fluffy. Add the vanilla and salt, then beat one more minute. Taste it. Add more salt if you want that salted caramel vibe, or more sugar if you like it sweeter. Cover and set aside at room temperature.
Step 3: Crumb Coat the Cake
Once the cake is completely cool, place it on your serving platter or cutting board. Using your offset spatula, spread a thin, even layer of buttercream over the entire top and sides of the cake. This is the crumb coat — it traps all those loose crumbs so your final layer looks clean. Don’t worry about perfection here. Just get it covered. Pop the cake in the refrigerator for 15-20 minutes to let that crumb coat set.
Step 4: Apply the Final Frosting Layer
Take the cake out of the fridge. Apply the remaining buttercream in a thicker, even layer over the top and sides. Use your spatula to smooth it out as best you can. For a rustic look, leave some swirls and texture. For a cleaner look, run the spatula under hot water, dry it, and use it to smooth the frosting. The heat helps melt the buttercream just enough for a glass-smooth finish. Chill the cake again for 20 minutes.
Step 5: Make the Spiderweb Drip
In a microwave-safe bowl, combine the dark chocolate chips and coconut oil. Microwave in 30-second intervals, stirring between each, until completely smooth and glossy. Let it cool for 2-3 minutes — it should be warm but not hot. Transfer to a piping bag fitted with a small round tip or just snip the corner. Drizzle the chocolate in a zigzag pattern across the top of the cake, letting some drip down the sides. You control the drips by how much pressure you apply. Go slow. You can always add more.
Step 6: Draw the Spiderweb
While the chocolate drip is still wet (this is important), use your white icing pen or melted white chocolate to draw concentric circles starting from the center of the cake outward. Space them about an inch apart. Then, using a toothpick or the tip of a knife, drag from the center outward through all the circles, creating the web effect. Wipe the toothpick clean between each drag for sharp lines. Work quickly before the chocolate sets. If it starts to firm up, pop the cake in the fridge for 5 minutes to set the drip, then draw the web on top of the set chocolate.
Step 7: Decorate and Serve
Add your Halloween sprinkles, candy eyeballs, or any other spooky decorations. Let the cake sit at room temperature for about 30 minutes before serving so the frosting softens slightly. Slice and serve. Watch everyone’s faces light up.
Cooking Tips & Techniques
I’ve made this cake enough times to know exactly where things can go wrong. Here’s what I’ve learned the hard way.
Don’t rush the cooling process. I know it’s tempting to speed things up, but a warm cake will turn your buttercream into a greasy mess. If you’re short on time, you can cool the cake in the fridge for 30 minutes after it’s come to room temperature. Just wrap it loosely in plastic wrap first so it doesn’t absorb fridge smells.
The coconut oil is non-negotiable. Without it, the chocolate drip will be too thick and won’t flow properly. It also helps the chocolate set with that nice, shiny finish. If you don’t have coconut oil, vegetable shortening works as a substitute — use the same amount.
Test your drip consistency first. Before you go anywhere near the cake, squeeze a little melted chocolate onto a plate. It should flow slowly and smoothly. If it’s too thick, add another teaspoon of coconut oil. Too thin? Let it cool for another minute. Getting this right makes the difference between a beautiful web and a puddle.
Work in a cool room. If your kitchen is hot, the chocolate will keep running down the sides instead of stopping in those perfect drips. If it’s a warm day, chill the frosted cake for 30 minutes before adding the drip. The cold frosting helps the chocolate set faster.
One mistake I made: The first time I tried this, I drew the web lines too thick. They bled together and looked like a Jackson Pollock painting. Keep those lines thin and delicate. Less is more.
Multitasking tip: While the cake is cooling, make your frosting and get your decorations ready. That way, when the cake is cool, you can go straight into decorating without stopping.
Variations & Adaptations
This recipe is super flexible. Here are some ways to make it your own.
Gluten-Free Version
Use a gluten-free yellow cake mix — King Arthur Flour makes an excellent one. Everything else in the recipe is naturally gluten-free, including the buttercream and chocolate drip. Just double-check your sprinkles and candy decorations for gluten if that’s a concern.
Dairy-Free Version
Swap the butter in the frosting for a high-quality vegan butter stick (not the spreadable kind in a tub). Use canned coconut cream instead of heavy cream. The chocolate drip uses coconut oil, so that’s already dairy-free. Make sure your chocolate chips are dairy-free — many dark chocolate brands are, but check the label.
Flavor Twists
Add 1 teaspoon of peppermint extract to the buttercream for a mint chocolate version — it’s amazing for Christmas or winter birthdays. Or add 1/2 teaspoon of almond extract to the cake batter for a subtle nutty flavor that pairs beautifully with the chocolate. For a more intense chocolate experience, use a chocolate cake mix instead of yellow and add 1/2 cup of mini chocolate chips to the batter.
Different Web Colors
Instead of a white web, use orange candy melts for a pumpkin vibe, or green for a Frankenstein look. You can also tint the white icing with gel food coloring for custom colors. Purple and green together look incredible for a witchy theme.
Other Occasions
This spiderweb technique isn’t just for Halloween. Skip the spooky sprinkles and use the web for a “spider” birthday party, a bug-themed event, or even a science-themed party. Or just make it for fun — no occasion needed. I’ve done that more than once.
Serving & Storage Suggestions
This cake is best served at room temperature. The buttercream softens to that perfect creamy texture, and the chocolate drip stays glossy but firm enough to hold its shape. If you’ve refrigerated the cake, let it sit out for at least 30 minutes before serving.
For presentation, I like to place the cake on a black or orange platter to really make the colors pop. Add a few fake spiders or plastic skeletons around the base for extra Halloween drama. Kids love it, and adults get a kick out of it too.
Storage: Cover the cake loosely with plastic wrap or aluminum foil and store at room temperature for up to 3 days. If your house is warm, store it in the refrigerator — just let it come to room temperature before serving. The cake actually tastes better on day two, once the flavors have had time to meld.
Freezing: You can freeze the unfrosted cake for up to 3 months. Wrap it tightly in plastic wrap, then foil. When you’re ready to use it, thaw overnight in the refrigerator, then bring to room temperature before frosting. I don’t recommend freezing the frosted cake — the texture of the buttercream changes, and the chocolate drip can get weird.
Reheating: If you want that just-baked warmth, microwave individual slices for 10-15 seconds. It’s dangerous how good warm chocolate buttercream is.
Nutritional Information & Benefits
Let’s be real — this is a celebration cake, not a health food. But here’s the breakdown if you’re curious.
Per serving (based on 12 servings):
- Calories: 480
- Fat: 26g
- Carbohydrates: 62g
- Protein: 5g
- Sugar: 44g
- Fiber: 2g
That said, there are a few bright spots. Dark chocolate contains antioxidants and can help lower blood pressure in small amounts. The eggs provide protein and healthy fats. And honestly? Sometimes you need a treat that’s just for fun. Life is short. Eat the cake.
If you’re looking for a lighter option, you can reduce the sugar in the buttercream by using a sugar-free powdered sweetener, or cut the portion size in half. But for a birthday cake? I say go all out.
Allergen note: This recipe contains dairy, eggs, and gluten. See the variations section for dairy-free and gluten-free options.
Conclusion
This Best Halloween Birthday Sheet Cake with Spiderweb Drip has saved me more times than I can count. It’s the recipe I turn to when I need something impressive without the stress. The cake is moist, the frosting is rich, and that spiderweb decoration? It never fails to get oohs and ahhs.
I love that this recipe lets you be creative. You can make it as spooky or as cute as you want. Add more spiders, fewer spiders, different colors — it’s your canvas. And honestly? Even if the web comes out a little crooked, it still looks intentional. That’s the beauty of a handmade cake.
If you make this, I’d love to hear about it. Drop a comment below and tell me how your spiderweb turned out. Did you add any fun decorations? Did the kids freak out (in a good way)? Share your photos and tag me — I love seeing your creations.
Now go make some magic. You’ve got this.
Frequently Asked Questions
Can I make this cake ahead of time?
Absolutely. Bake the cake up to two days in advance and store it wrapped tightly at room temperature. Make the frosting a day ahead and keep it covered in the fridge — just let it come to room temperature and re-whip it before using. For best results, add the spiderweb drip the day you’re serving it.
My chocolate drip is too thick. What do I do?
Add another teaspoon of coconut oil and microwave for 10 seconds. Stir well. The consistency should be like warm honey — it should flow slowly off a spoon. If it’s still too thick, add a little more oil until it’s right.
Can I use a different size pan?
You can use a 9×9 square pan, but the cake will be thicker and need a few extra minutes of baking time. A 9×13 is ideal because it gives you enough surface area for the web to really show off. If you use a round pan, you’ll need to adjust the baking time and the web design.
How do I get clean spiderweb lines?
Use a toothpick or the tip of a sharp knife, and wipe it clean between each drag from center to edge. Work quickly while the white icing is still wet. If the white icing starts to set before you finish, pop the cake in the fridge for 5 minutes to firm up the chocolate, then continue.
Can I use store-bought frosting instead of homemade?
You can, but I really recommend making the buttercream from scratch. It takes 10 minutes and tastes so much better. If you’re in a pinch, use two cans of store-bought chocolate frosting and whip them with a hand mixer for a minute to make them fluffier. Add a pinch of salt to cut the sweetness.
Pin This Recipe!
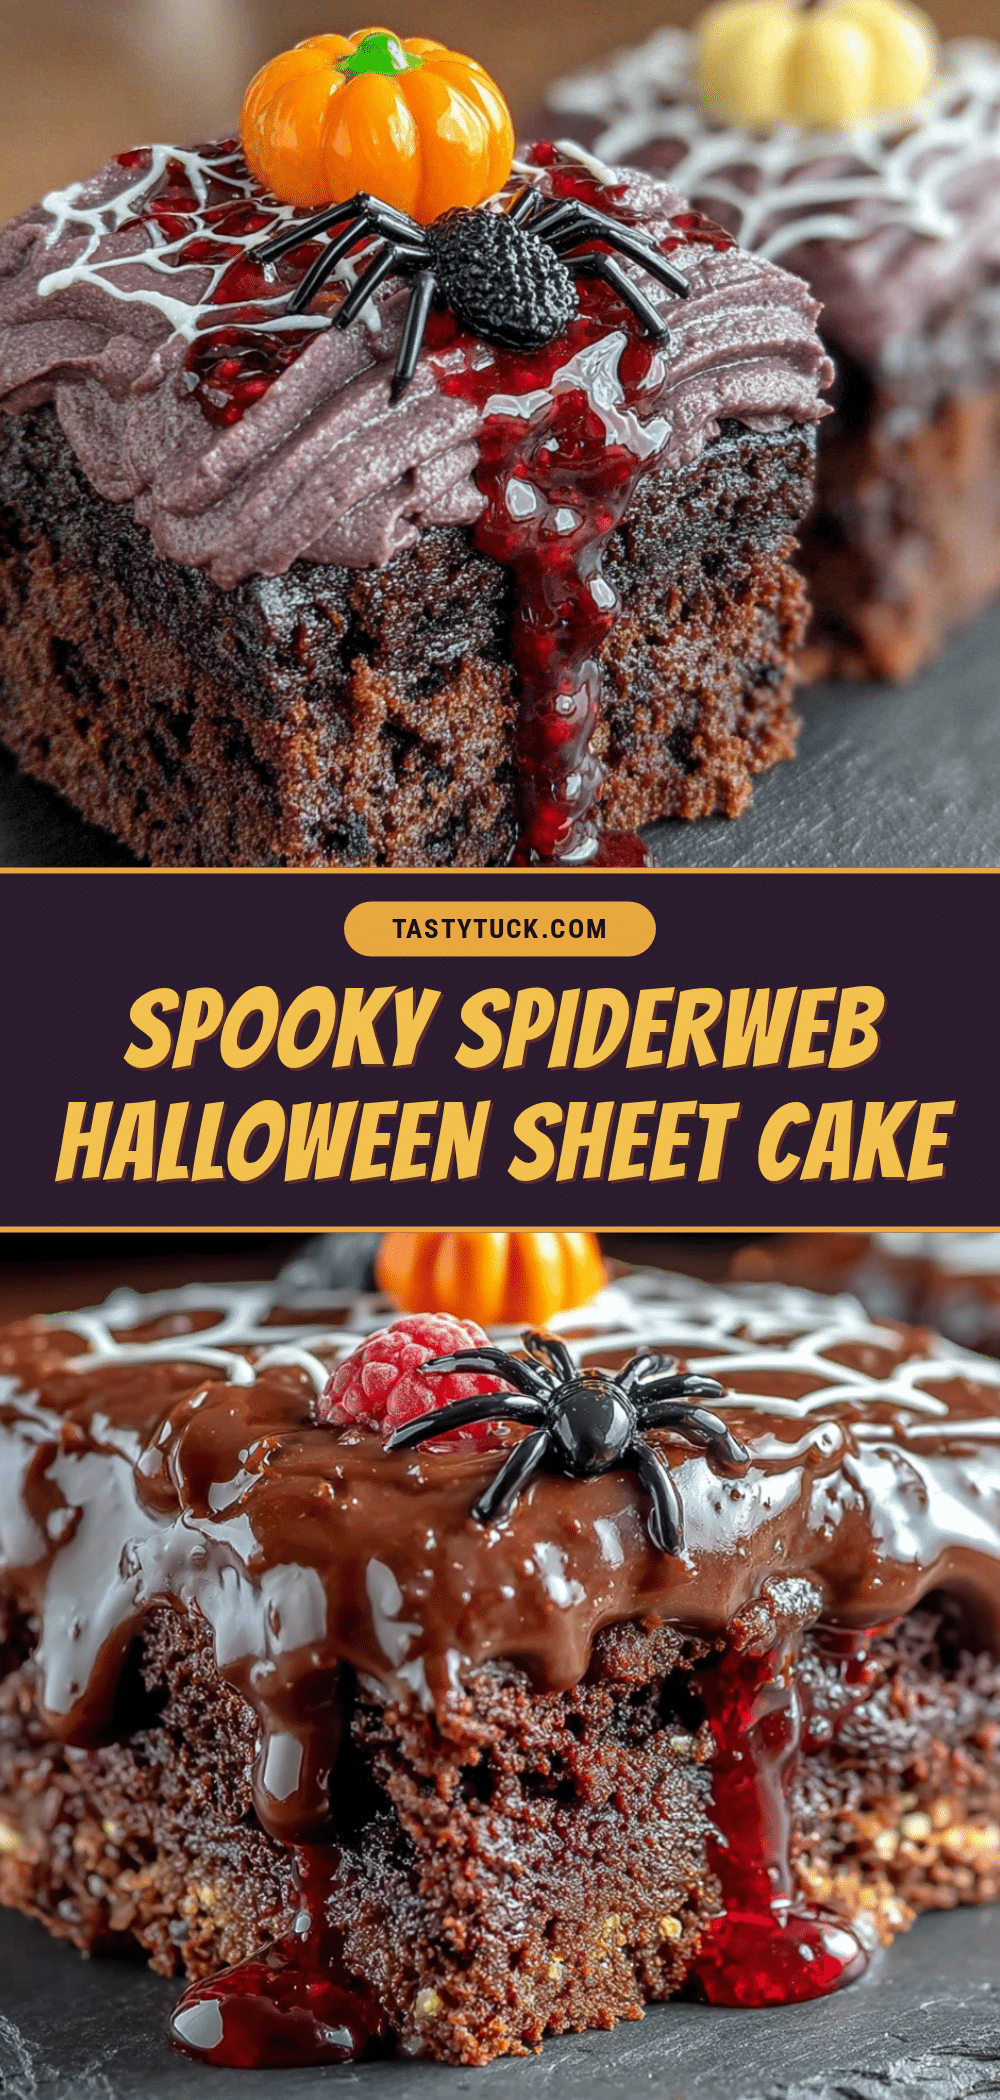
Best Halloween Birthday Sheet Cake with Easy Spiderweb Drip
A quick and easy Halloween birthday sheet cake with a moist crumb, rich chocolate buttercream, and a stunning spiderweb drip decoration that looks bakery-made but comes together in under 90 minutes.
- Prep Time: 20 minutes
- Cook Time: 30 minutes
- Total Time: 90 minutes (including cooling)
- Yield: 12 servings 1x
- Category: Dessert
- Cuisine: American
Ingredients
- 1 box (15.25 oz) yellow or vanilla cake mix
- 3 large eggs, room temperature
- 1/2 cup vegetable oil
- 1 cup water
- 1 teaspoon vanilla extract
- 1 cup (2 sticks) unsalted butter, softened
- 3 1/2 cups powdered sugar, sifted
- 1/2 cup unsweetened cocoa powder
- 1/4 cup heavy cream
- 1 teaspoon vanilla extract
- 1/4 teaspoon salt
- 1/2 cup dark chocolate chips
- 2 tablespoons coconut oil
- White icing pen or melted white chocolate (for web lines)
- Halloween sprinkles (optional)
- Candy eyeballs (optional)
- Orange food coloring (optional)
Instructions
- Preheat oven to 350°F (175°C). Grease a 13×9-inch sheet pan thoroughly.
- In a large bowl, combine cake mix, eggs, oil, water, and vanilla extract. Beat on medium speed for 2 minutes until smooth.
- Pour batter into prepared pan and spread evenly. Bake for 28-32 minutes, until a toothpick inserted in center comes out clean with a few moist crumbs.
- Cool cake in pan for 10 minutes, then transfer to a cooling rack. Cool completely (at least 1 hour).
- For buttercream: Beat softened butter on medium speed until creamy (2 minutes). Alternately add sifted powdered sugar and cocoa powder with heavy cream, starting and ending with sugar. Beat on low until combined, then medium-high for 3 minutes until fluffy. Add vanilla and salt, beat 1 more minute.
- Once cake is cool, spread a thin crumb coat of buttercream over top and sides. Refrigerate 15-20 minutes.
- Apply remaining buttercream in a thicker, even layer. Smooth with an offset spatula. Chill 20 minutes.
- For drip: Microwave dark chocolate chips and coconut oil in 30-second intervals, stirring until smooth. Cool 2-3 minutes. Transfer to a piping bag with small round tip.
- Drizzle chocolate in a zigzag pattern across cake top, letting some drip down sides.
- While chocolate is still wet, use white icing pen to draw concentric circles from center outward, spaced about 1 inch apart.
- Using a toothpick, drag from center outward through all circles to create web effect. Wipe toothpick clean between each drag.
- Add Halloween sprinkles, candy eyeballs, or other decorations. Let sit at room temperature 30 minutes before serving.
Notes
Don’t rush cooling; warm cake will melt buttercream. Coconut oil is essential for proper drip consistency. Test drip on a plate first. Work in a cool room for best results. Keep web lines thin and delicate. Cake tastes even better on day two.
Nutrition
- Serving Size: 1 slice (1/12 of cak
- Calories: 480
- Sugar: 44
- Sodium: 320
- Fat: 26
- Saturated Fat: 12
- Carbohydrates: 62
- Fiber: 2
- Protein: 5
Keywords: Halloween cake, birthday cake, sheet cake, spiderweb cake, chocolate buttercream, easy cake, spooky cake, fall dessert


