Let’s be honest—getting dinner on the table that everyone actually eats can feel like a small miracle. These crispy parmesan baked chicken tenders solve that problem without a lot of fuss. They’re crunchy on the outside, juicy on the inside, and made with ingredients you probably already have in your pantry.
- Kid-Approved Crunch: The panko and parmesan combo creates that golden, shatteringly crisp coating kids go crazy for. No one will miss the deep fryer.
- 20-Minute Prep: From start to oven in about 20 minutes. Perfect for those afternoons when soccer practice runs late and everyone’s hangry.
- Simple Ingredients: Chicken breast, breadcrumbs, cheese, eggs, and a few spices. No weird preservatives or mystery ingredients.
- Baked, Not Fried: All the crunch without the grease. Your kitchen stays clean, and you feel good about what you’re serving.
- Totally Customizable: Swap the parmesan for cheddar, add a pinch of cayenne for heat, or go gluten-free with almond flour. This recipe bends to whatever you need.
I’ve tested this recipe about a dozen times to get that perfect balance of crispy coating and tender meat. The secret? A quick buttermilk soak and baking them on a wire rack so the heat circulates all around. It makes a real difference.
These tenders are the kind of meal that makes you feel like a hero at the dinner table. Kids ask for seconds, adults sneak them straight from the baking sheet, and you get to enjoy a quiet moment knowing dinner was a win. If you’re looking for more easy weeknight winners, you might also enjoy this BBQ mini meatloaf muffins recipe for another kid-friendly option.
What Ingredients You Will Need
This recipe keeps things simple. Most of these ingredients are pantry staples, and the ones that aren’t are easy to find at any grocery store. Here’s what you’ll need and why each one matters.
- Chicken breast tenders (1.5 lbs / 680g) – Look for pre-trimmed tenderloins or cut your own from boneless skinless chicken breasts. I prefer buying whole breasts and cutting them myself—you get more uniform pieces that cook evenly.
- Buttermilk (1 cup / 240ml) – This is the secret to tender chicken. The acid in buttermilk breaks down the proteins just enough to keep the meat juicy. No buttermilk? Add a tablespoon of lemon juice or vinegar to regular milk and let it sit for 5 minutes.
- Panko breadcrumbs (1.5 cups / 150g) – These are flakier and lighter than regular breadcrumbs. They create that ultra-crispy texture without needing to fry. I use the plain variety and season them myself.
- Grated Parmesan cheese (1 cup / 100g) – Use the real stuff from a wedge or a good-quality pre-grated brand. The powdery canned stuff won’t give you the same flavor or crunch. I recommend BelGioioso or Parmesan Reggiano if you want to splurge.
- Garlic powder (1 tsp) – Adds savory depth without burning or turning bitter in the oven.
- Paprika (1 tsp) – For color and a subtle smoky sweetness. Smoked paprika works great here too.
- Salt (1 tsp) and black pepper (½ tsp) – Essential for seasoning the coating and the chicken itself.
- Eggs (2 large) – Helps the breadcrumb mixture stick to the chicken. Whisk them well so the coating adheres evenly.
- Olive oil spray or melted butter (2 tbsp) – A light spritz or brush of fat on top of the tenders helps them brown and get crispy in the oven. Don’t skip this step.
Ingredient Tips: If you can’t find buttermilk, plain Greek yogurt thinned with a little milk works as a substitute. For a dairy-free version, use almond milk with a splash of lemon juice and skip the parmesan—try nutritional yeast instead for that cheesy flavor. And if you’re feeding a crowd, this recipe doubles easily. Just use two baking sheets and rotate them halfway through.
Equipment Needed
You don’t need a lot of fancy gear for this recipe. Here’s what I use every time.
- Baking sheet (half-sheet pan, 18×13 inches) – A rimmed baking sheet catches any drips and gives you enough space to spread the tenders out. If they’re crowded, they’ll steam instead of crisp.
- Wire rack – This is the game-changer. Placing a wire rack on your baking sheet lifts the chicken off the surface so air circulates underneath. The bottoms get just as crispy as the tops. I use a basic cooling rack that fits inside my baking sheet.
- Three shallow bowls – For the buttermilk, the egg wash, and the breadcrumb mixture. I use pie plates or wide soup bowls—something with a flat bottom makes dipping easier.
- Meat thermometer – Not strictly necessary, but it takes the guesswork out. Chicken is done at 165°F (74°C) in the thickest part. I’ve overcooked plenty of tenders before I started using one.
- Tongs – For moving the chicken from bowl to bowl and onto the baking sheet. Keeps your hands clean and the coating intact.
Budget-Friendly Alternatives: No wire rack? You can flip the tenders halfway through baking to crisp both sides. Or use a lightly greased baking sheet and expect the bottoms to be a little softer—still delicious, just not as crunchy. I’ve done it both ways, and honestly, my kids didn’t notice the difference.
Preparation Method
Here’s the step-by-step process for making these crispy parmesan baked chicken tenders. I’ve included all the little details that make a difference.
- Preheat your oven to 400°F (200°C). Place a wire rack inside a rimmed baking sheet and spray it lightly with olive oil. This prevents sticking and helps with browning.
- Prepare the chicken. If using whole chicken breasts, slice them into even strips about 1 inch thick. Pat them dry with paper towels—this helps the buttermilk soak in better. Season lightly with salt and pepper.
- Soak in buttermilk. Place the chicken strips in a bowl and pour the buttermilk over them. Let them sit for at least 15 minutes while you prepare the coating. If you have more time, 30 minutes to an hour is even better. The buttermilk tenderizes the meat and keeps it from drying out in the oven.
- Set up your breading station. In the first shallow bowl, add the remaining buttermilk (or fresh buttermilk if you drained the first batch). In the second bowl, whisk the eggs until frothy. In the third bowl, combine the panko breadcrumbs, grated parmesan, garlic powder, paprika, salt, and pepper. Mix well with a fork.
- Bread the chicken. Working one piece at a time, dip a tender into the buttermilk, let the excess drip off, then dip into the egg wash. Finally, press it into the breadcrumb mixture, turning to coat all sides. Shake off any loose crumbs and place it on the wire rack. Repeat with all the tenders.
- Spray with oil. Lightly spray the tops of the breaded tenders with olive oil spray. This is crucial for that golden brown color. If you don’t have spray, brush each tender with melted butter instead.
- Bake for 15-18 minutes. Place the baking sheet in the preheated oven. Bake for 15 minutes, then check for doneness. The tenders should be golden brown and crispy. If you’re unsure, use a meat thermometer—165°F (74°C) is the magic number.
- Optional broil for extra crunch. If you want them even crispier, switch the oven to broil for the last 1-2 minutes. Watch them closely—they can burn fast under the broiler.
- Rest for 2-3 minutes. Let the tenders rest on the wire rack before serving. This helps the coating set and keeps them from getting soggy on the plate.
Troubleshooting Tips: If your coating is falling off, you probably skipped the buttermilk soak or didn’t press the breadcrumbs firmly enough. Make sure each piece is fully coated and the crumbs are pressed into the egg wash. If the tenders are browning too quickly, your oven might run hot—check them at the 12-minute mark and rotate the pan if needed.
Cooking Tips & Techniques
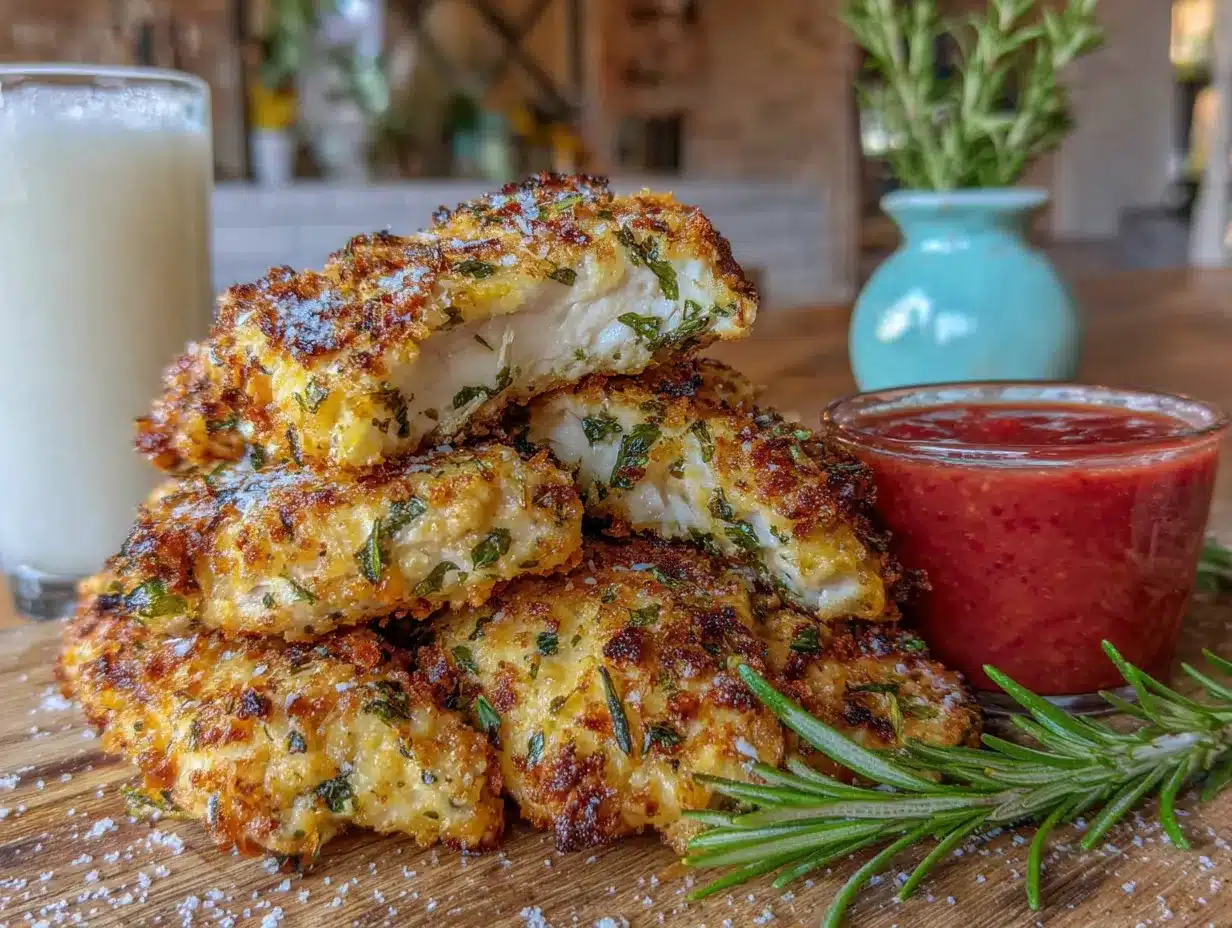
After making these tenders more times than I can count, here are the things I wish someone had told me.
Don’t skip the buttermilk soak. I know it’s tempting to rush, but that 15-minute soak is what keeps the chicken from turning into dry, sad strips. The acid in buttermilk breaks down the muscle fibers just enough to lock in moisture. I once skipped it because I was in a hurry, and the result was noticeably drier. Never again.
Use a wire rack. This is the single biggest tip for crispy baked chicken. When the chicken sits directly on the baking sheet, the bottom steams and gets soggy. The wire rack lets hot air circulate underneath, so every side gets crispy. I bought a cheap cooling rack at the dollar store, and it changed everything.
Don’t overcrowd the pan. Leave at least an inch of space between each tender. If they’re touching, they’ll steam each other and you’ll lose that crunch. Use two baking sheets if you need to—just rotate them halfway through baking.
Season each layer. Don’t rely only on the breadcrumb mixture for flavor. Season the chicken lightly before the buttermilk soak, and add a pinch of salt to the egg wash too. Layers of seasoning make a difference.
Watch the broiler. I’ve burned more tenders than I want to admit by walking away during the broil step. Stay right there and keep an eye on them. Thirty seconds can be the difference between perfectly golden and charcoal.
Multitasking tip: While the chicken is soaking in buttermilk, set up your breading station and preheat the oven. By the time the soak is done, everything is ready to go. This cuts your total active time down to about 15 minutes.
Variations & Adaptations
This recipe is endlessly adaptable. Here are some of my favorite twists.
- Gluten-Free Version: Swap the panko for gluten-free breadcrumbs or crushed pork rinds for a low-carb option. I’ve used almond flour mixed with parmesan too—it works but gives a denser coating. For a Whole30-friendly option, try this crispy paleo cole slaw on the side for a complete meal.
- Spicy Kick: Add ½ teaspoon of cayenne pepper or red pepper flakes to the breadcrumb mixture. My husband loves this version—he says it makes the tenders taste like a restaurant appetizer.
- Cheese Swap: Use finely grated cheddar, asiago, or pecorino instead of parmesan. Each cheese brings a different flavor. Cheddar makes them taste like cheesy chicken fingers, while pecorino adds a sharper, saltier bite.
- Herb-Crusted: Mix in 1 tablespoon of dried Italian seasoning or fresh chopped parsley into the breadcrumbs. This gives the tenders a garden-fresh flavor that pairs beautifully with marinara sauce.
- Air Fryer Method: Cook at 375°F (190°C) for 10-12 minutes, flipping halfway through. The air fryer makes them extra crispy with even less oil. I’ve tested this multiple times, and the texture is almost identical to deep-fried.
- Dip Variations: Serve with honey mustard, ranch, barbecue sauce, or a simple lemon-herb aioli. My kids love ketchup (of course), but I prefer a tangy yogurt-dill dip.
Serving & Storage Suggestions
These tenders are best served fresh out of the oven while they’re still crispy. But they also reheat surprisingly well if you know the right tricks.
Serving Suggestions: Serve the tenders hot with your favorite dipping sauces on the side. They’re great with a simple green salad, roasted vegetables, or a pile of crispy french fries. For a fun twist, slice them up and serve over a bed of greens for a chicken tender salad—my kids actually eat this without complaint. I also love pairing them with loaded potato salad for a hearty, crowd-pleasing dinner.
Storage: Store leftover tenders in an airtight container in the refrigerator for up to 4 days. Place a paper towel in the container to absorb excess moisture—this helps keep the coating from getting too soft.
Reheating: The oven or air fryer is your best bet for restoring crispiness. Reheat in a 375°F (190°C) oven for 5-7 minutes, or in the air fryer at 350°F (175°C) for 3-4 minutes. The microwave works in a pinch but will make the coating soft. If you’re in a hurry, I’ve microwaved them and then finished them under the broiler for 30 seconds—it’s a decent compromise.
Freezing: These tenders freeze beautifully. Place them on a baking sheet in a single layer and freeze until solid (about 2 hours). Transfer to a freezer-safe bag or container. To reheat, bake from frozen at 400°F (200°C) for 18-22 minutes, flipping halfway through. No need to thaw first.
Flavor Development: The tenders are best the day they’re made, but the flavors actually meld a bit after a day in the fridge. The parmesan flavor becomes more pronounced, and the spices settle into the coating. My kids even like them cold straight from the fridge for lunch the next day.
Nutritional Information & Benefits
These crispy parmesan baked chicken tenders are a healthier alternative to fried versions without sacrificing flavor or texture. Here’s the estimated nutritional breakdown per serving (about 4-5 tenders):
| Nutrient | Amount Per Serving |
|---|---|
| Calories | 380 |
| Protein | 42g |
| Carbohydrates | 18g |
| Fat | 15g |
| Saturated Fat | 5g |
| Cholesterol | 145mg |
| Sodium | 680mg |
| Fiber | 1g |
| Sugar | 3g |
Health Benefits: Chicken breast is a lean source of high-quality protein, which supports muscle growth and keeps you feeling full. Parmesan cheese adds calcium and a small amount of protein. Baking instead of frying significantly reduces the fat and calorie content. This recipe is also lower in carbs than traditional breaded and fried tenders, making it a good option for those watching their carbohydrate intake.
Dietary Considerations: This recipe contains dairy (buttermilk, parmesan) and gluten (panko breadcrumbs). For a dairy-free version, use almond milk with lemon juice and nutritional yeast. For gluten-free, use certified gluten-free breadcrumbs. Always check your ingredient labels if you’re cooking for someone with allergies.
Conclusion
These crispy parmesan baked chicken tenders have become a staple in my kitchen for good reason. They’re quick enough for a busy weeknight, fancy enough for company, and kid-friendly enough that I never hear complaints. The combination of crunchy panko, salty parmesan, and juicy chicken is hard to beat—especially when it comes out of the oven instead of a deep fryer.
I love that this recipe feels forgiving. You can swap cheeses, adjust the spices, or change the cooking method, and it still turns out great. That’s the kind of recipe I keep coming back to. It’s not fussy or demanding—it just works.
Try them this week and see what your family thinks. I’d love to hear how they turn out! Drop a comment below with your favorite dipping sauce or any variations you tried. And if you make them for a party or potluck, let me know—they disappear fast every time I bring them. Happy cooking!
Frequently Asked Questions
Can I use chicken thighs instead of breasts?
Absolutely. Chicken thighs will be even juicier and more flavorful. Just adjust the cooking time slightly—thighs may need 2-3 extra minutes in the oven. Make sure they reach 165°F (74°C) internally.
How do I keep the coating from falling off?
Make sure you pat the chicken dry before the buttermilk soak, and press the breadcrumbs firmly into the egg wash. The wire rack also helps because the coating doesn’t stick to the pan. If you’re still having trouble, try letting the breaded tenders rest for 5 minutes before baking—this helps the coating set.
Can I make these ahead of time?
Yes! You can bread the tenders up to a day in advance and keep them covered in the refrigerator. Bake them just before serving. Or bake them fully, then reheat in the oven or air fryer. They’re also great for meal prep—just portion them out with veggies and a dip for easy lunches.
What’s the best way to reheat leftovers?
The oven or air fryer works best. Reheat at 375°F (190°C) for 5-7 minutes in the oven, or 3-4 minutes in the air fryer at 350°F (175°C). Avoid the microwave if you want to keep the coating crispy. If you’re in a rush, microwave for 30 seconds then finish under the broiler.
Can I freeze the breaded but unbaked tenders?
Yes! Place the breaded tenders on a baking sheet in a single layer and freeze until solid (about 2 hours). Transfer to a freezer bag. Bake from frozen at 400°F (200°C) for 18-22 minutes, adding a few extra minutes if needed. No need to thaw first—this makes them perfect for busy nights.
Pin This Recipe!

Crispy Parmesan Baked Chicken Tenders – Easy Kid-Friendly Dinner

These crispy parmesan baked chicken tenders are crunchy on the outside, juicy on the inside, and made with simple ingredients. They’re baked, not fried, and ready in about 20 minutes of prep time.
- Prep Time: 20 minutes
- Cook Time: 18 minutes
- Total Time: 38 minutes
- Yield: 4 servings 1x
- Category: Main Course
- Cuisine: American
Ingredients
- 1.5 lbs (680g) chicken breast tenders
- 1 cup (240ml) buttermilk
- 1.5 cups (150g) panko breadcrumbs
- 1 cup (100g) grated Parmesan cheese
- 1 tsp garlic powder
- 1 tsp paprika
- 1 tsp salt
- ½ tsp black pepper
- 2 large eggs
- 2 tbsp olive oil spray or melted butter
Instructions
- Preheat your oven to 400°F (200°C). Place a wire rack inside a rimmed baking sheet and spray it lightly with olive oil.
- If using whole chicken breasts, slice them into even strips about 1 inch thick. Pat them dry with paper towels and season lightly with salt and pepper.
- Place the chicken strips in a bowl and pour the buttermilk over them. Let them soak for at least 15 minutes (up to 1 hour if time allows).
- Set up your breading station: In the first shallow bowl, add remaining buttermilk. In the second bowl, whisk the eggs until frothy. In the third bowl, combine panko breadcrumbs, grated Parmesan, garlic powder, paprika, salt, and pepper. Mix well.
- Working one piece at a time, dip a tender into the buttermilk, let excess drip off, then dip into the egg wash. Finally, press it into the breadcrumb mixture, turning to coat all sides. Shake off loose crumbs and place on the wire rack. Repeat with all tenders.
- Lightly spray the tops of the breaded tenders with olive oil spray or brush with melted butter.
- Bake for 15-18 minutes, until golden brown and crispy. Chicken should reach an internal temperature of 165°F (74°C).
- Optional: For extra crunch, switch the oven to broil for the last 1-2 minutes, watching closely to prevent burning.
- Let the tenders rest on the wire rack for 2-3 minutes before serving.
Notes
Don’t skip the buttermilk soak—it keeps the chicken juicy. Use a wire rack for maximum crispiness. Don’t overcrowd the pan; leave at least an inch between tenders. For gluten-free, use gluten-free breadcrumbs. For dairy-free, use almond milk with lemon juice and nutritional yeast instead of Parmesan.
Nutrition
- Serving Size: 4-5 tenders
- Calories: 380
- Sugar: 3
- Sodium: 680
- Fat: 15
- Saturated Fat: 5
- Carbohydrates: 18
- Fiber: 1
- Protein: 42
Keywords: crispy chicken tenders, baked chicken tenders, parmesan chicken, kid-friendly dinner, easy chicken recipe


