The sheet pan came out of the oven, and my husband actually stopped mid-sentence. He just stared at it for a second—crispy golden fries buried under a mountain of savory chili, melted cheddar, and all the toppings you could want. Then he grabbed a fork and started eating straight from the pan. No plate. No shame. That’s when I knew this one was a keeper.
Honestly, I wasn’t trying to invent anything fancy that night. I had a pound of ground beef thawing on the counter, a bag of frozen fries in the freezer, and absolutely zero energy for a complicated dinner. You know those nights where you just want something that feels like comfort food but doesn’t require scrubbing a dozen pots? That was me. I threw everything on a single sheet pan, crossed my fingers, and hoped for the best.
What came out of the oven was better than I expected. The fries stayed crispy on the edges, the chili got all bubbly and thick, and the cheese melted into every little nook and cranny. It tasted like something you’d order at a diner, but I made it in my pajamas. That’s the kind of magic I can get behind.
These easy loaded chili cheese fries have become our go-to for busy weeknights, game days, and those times when you just need a meal that feels like a hug. No complicated techniques, no weird ingredients—just good, honest food that makes everyone happy. Let me show you how to make them.
Why You’ll Love This Recipe
I’ve tested this recipe more times than I care to admit, and here’s the honest truth: it works every single time. Not because I’m some kind of culinary genius, but because the method is solid. The fries get crispy, the chili stays saucy, and the whole thing comes together on one pan. Less cleanup, more eating—that’s my kind of math.
- Quick & Easy: From fridge to table in about 45 minutes, with only 10 minutes of active prep. Perfect for those nights when hangry sets in.
- Simple Ingredients: Ground beef, canned tomatoes, beans, frozen fries, cheese—stuff you probably already have or can grab without a second thought.
- Perfect for Game Day or Dinner: This works as a hearty main dish or a shareable appetizer. It’s equally at home on your coffee table during the big game or at your kitchen table on a Tuesday.
- Crowd-Pleaser: I’ve served this to picky kids, hungry teenagers, and grown adults who claim they’re “not really into chili.” The pan comes back empty every time.
- Unbelievably Delicious: The combination of crispy fries, rich chili, melted cheese, and fresh toppings is pure comfort food perfection. It’s the kind of meal that makes you close your eyes after the first bite.
What sets this recipe apart is the layering technique. Instead of dumping everything on top of raw fries and hoping for the best, we par-bake the fries first so they get that golden crunch. Then we add the chili and cheese and let the oven do the rest. No soggy fries here—just crispy, cheesy, loaded perfection.
This isn’t just another loaded fries recipe. It’s the one you’ll come back to again and again because it’s reliable, delicious, and so easy you’ll memorize it after one try. Plus, it’s a great way to use up leftover chili if you happen to have some in the freezer. If you love one-pan meals as much as I do, you should also check out my easy loaded BBQ chicken crockpot recipe for another set-it-and-forget-it dinner idea.
What Ingredients You Will Need
This recipe uses simple, everyday ingredients to build big flavor without any fuss. Most of these are pantry staples, and the ones that aren’t are easy to find at any grocery store. Here’s what you’ll need:
For the Chili
- 1 pound ground beef (80/20 works best for flavor, but lean is fine too)
- 1 medium yellow onion, diced (about 1 cup)
- 3 cloves garlic, minced (or 1 teaspoon garlic powder in a pinch)
- 1 can (15 ounces) diced tomatoes (fire-roasted adds nice depth)
- 1 can (15 ounces) kidney beans, drained and rinsed (or black beans if that’s what you have)
- 2 tablespoons tomato paste (adds richness and thickness)
- 1 tablespoon chili powder (I like McCormick for consistent heat)
- 1 teaspoon ground cumin
- 1/2 teaspoon smoked paprika (regular works too, but smoked is better)
- 1/2 teaspoon salt (plus more to taste)
- 1/4 teaspoon black pepper
- 1/2 cup beef broth or water (to adjust consistency)
For the Fries Base
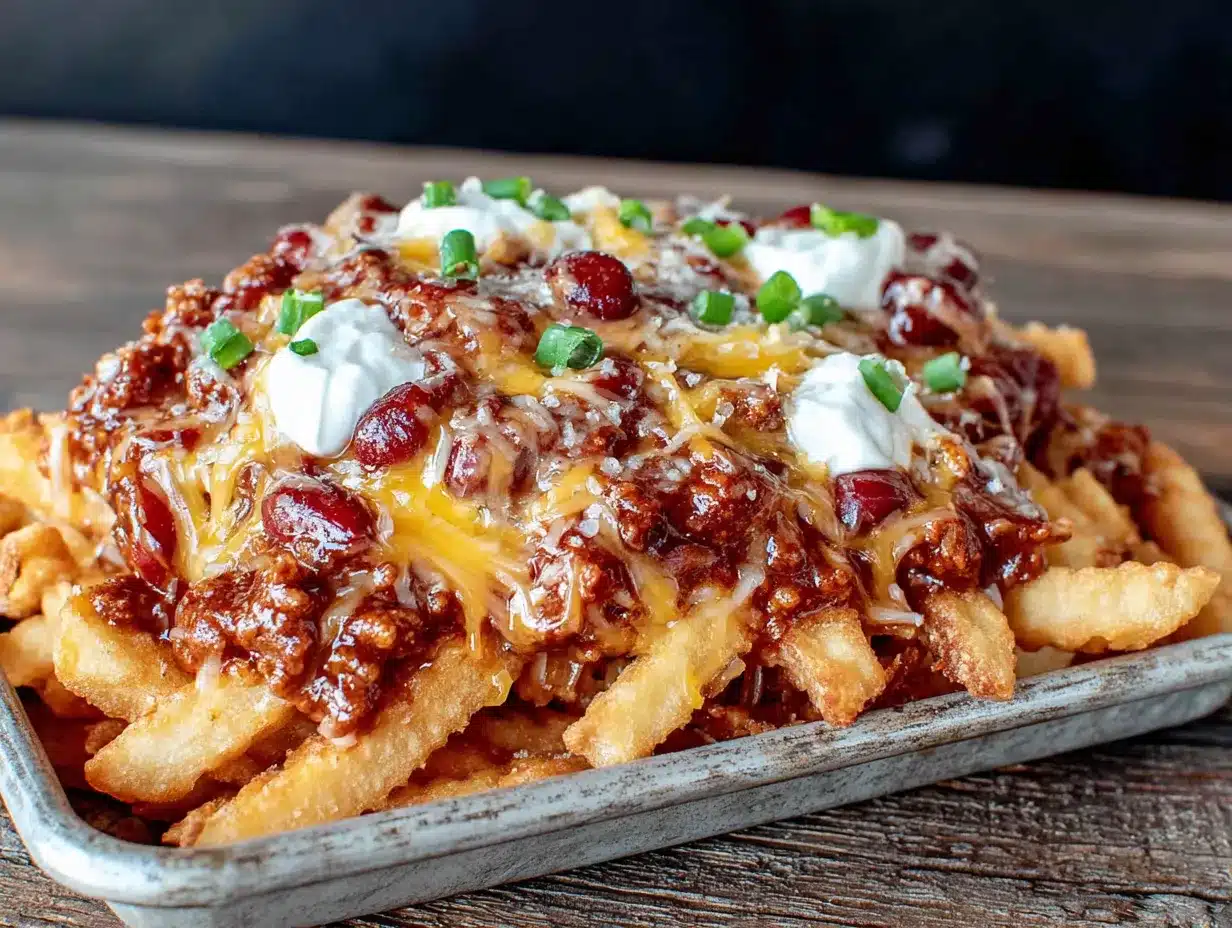
- 1 bag (28 ounces) frozen french fries (crinkle cut, steak fries, or shoestring—your choice)
- 2 tablespoons olive oil (for extra crispiness)
- 1/2 teaspoon garlic powder
- 1/2 teaspoon salt
For the Toppings
- 2 cups shredded cheddar cheese (sharp or mild, both work great)
- 1/2 cup sour cream
- 1/4 cup sliced green onions (both white and green parts)
- 1/4 cup pickled jalapeños (optional, but highly recommended)
- 1 medium tomato, diced (for freshness)
- Fresh cilantro, chopped (if you’re into that sort of thing)
A few notes on ingredients: I prefer using frozen fries over homemade here because they’re consistent and save time. If you want to use fresh potatoes, go for it—just cut them into even strips and soak them in cold water for 30 minutes to remove excess starch before baking. For the ground beef, don’t go leaner than 90/10 or the chili can turn out dry. A little fat equals a lot of flavor.
If you’re looking for a vegetarian version, swap the ground beef for a plant-based crumble or an extra can of beans. The rest of the recipe stays the same. And if you’re feeling adventurous, try adding a tablespoon of cocoa powder to the chili—it’s a trick I picked up from a friend in Texas, and it adds this incredible depth without making it taste like chocolate.
Equipment Needed
One of the best things about this recipe is how little equipment it requires. Here’s what you’ll need:
- Large sheet pan (18×13 inches is ideal; a half-sheet pan works perfectly)
- Large skillet or Dutch oven (for cooking the chili)
- Wooden spoon or spatula (for breaking up the ground beef)
- Chef’s knife (a sharp one makes dicing the onion so much easier)
- Cutting board
- Measuring spoons
- Can opener
- Colander (for rinsing the beans)
- Box grater (if you’re shredding your own cheese—which I highly recommend)
If you don’t have a sheet pan this size, you can use a 9×13 baking dish instead. The fries won’t get quite as crispy since they’ll be more crowded, but it’ll still taste great. I’ve also made this on a pizza pan in a pinch, and it worked fine—just watch the cooking time since it’s thinner.
One tip: line your sheet pan with parchment paper or aluminum foil for the easiest cleanup ever. Seriously, it makes a world of difference when that cheese gets all bubbly and stuck on. I learned that lesson the hard way after spending 20 minutes scrubbing a pan.
Preparation Method
Let’s get cooking. This comes together in a few simple steps, and I’ll walk you through each one so you don’t miss a thing.
Step 1: Preheat and Prep
Preheat your oven to 425°F (220°C). While it’s heating up, dice your onion, mince the garlic, and drain and rinse the kidney beans. Having everything ready before you start cooking makes the whole process smoother—trust me on this one.
Step 2: Par-Bake the Fries
Spread the frozen fries in a single layer on your sheet pan. Drizzle with olive oil and sprinkle with garlic powder and salt. Toss everything together with your hands (yes, get in there) until the fries are evenly coated. Bake for 15 minutes. They should be starting to crisp up on the edges but not fully done yet—we’re going to finish them with the chili and cheese.
Step 3: Make the Chili
While the fries are baking, heat a large skillet over medium-high heat. Add the ground beef and cook, breaking it up with your spoon, until it’s browned and no longer pink—about 6 to 8 minutes. If there’s a lot of excess fat, spoon most of it out, leaving about a tablespoon for flavor.
Add the diced onion and cook for 3 to 4 minutes until it starts to soften. Stir in the minced garlic and cook for another 30 seconds until it smells amazing. Add the tomato paste, chili powder, cumin, smoked paprika, salt, and pepper. Stir everything together and let it cook for a minute to toast the spices—this step makes a big difference in flavor.
Pour in the diced tomatoes (with their juices) and the beef broth. Bring it to a simmer, then reduce the heat to medium-low and let it bubble away for 10 minutes. Stir occasionally. The chili should thicken up nicely. Stir in the kidney beans and cook for another 2 minutes just to warm them through. Taste it and adjust the seasoning if needed—maybe a pinch more salt or another dash of chili powder.
Step 4: Assemble and Bake
Pull the sheet pan with the par-baked fries out of the oven. Spoon the chili evenly over the top of the fries. Don’t stress about covering every single fry—some bare fries are fine and actually add nice texture. Sprinkle the shredded cheddar cheese all over the chili and fries. Pop the whole thing back in the oven for 10 to 12 minutes, until the cheese is melted and bubbly and the edges of the fries are deep golden brown.
Step 5: Add Fresh Toppings
Take the sheet pan out of the oven and let it sit for about 2 minutes. This lets the cheese set just a little so it doesn’t slide off when you serve it. Dollop spoonfuls of sour cream over the top, then sprinkle on the green onions, diced tomato, pickled jalapeños, and fresh cilantro. The fresh toppings balance out all that rich, cheesy goodness and add brightness to every bite.
Step 6: Serve Immediately
These loaded chili cheese fries are best served hot, straight from the oven. Use a spatula to scoop portions onto plates or just set the sheet pan in the middle of the table and let everyone dig in. No judgment here—I’ve definitely eaten mine straight from the pan more times than I’d like to admit.
Cooking Tips & Techniques
After making this recipe more times than I can count, I’ve picked up a few tricks that make a real difference. Here are the ones worth knowing:
Don’t skip the par-bake. I know it’s tempting to just pile everything on raw fries and call it a day, but that’s how you end up with sad, soggy fries. Giving them a head start in the oven ensures they stay crispy even under all that chili and cheese. Trust the process on this one.
Use freshly shredded cheese. Pre-shredded cheese has anti-caking agents that prevent it from melting as smoothly. I know it’s convenient, but taking two minutes to shred a block of cheddar makes a noticeable difference in how gooey and delicious the final dish is. Your future self will thank you.
Toast your spices. That minute you spend cooking the chili powder and cumin with the tomato paste isn’t just for show—it wakes up the oils in the spices and makes the whole dish taste deeper and more complex. It’s one of those small steps that elevates a good recipe into a great one.
Watch your oven time. All ovens run a little differently, so keep an eye on things during the final bake. You want the cheese melted and bubbly, not burnt and sad. If your oven runs hot, start checking at the 8-minute mark.
Let it rest briefly. I know you’re hungry, but giving the finished dish a couple of minutes to rest before adding the cold toppings helps everything settle. The cheese firms up just enough that it doesn’t slide off when you scoop it, and the sour cream stays nice and cool against the hot fries.
One mistake I made early on was using too much chili. I thought more is better, but it actually weighed down the fries and made them soggy. You want enough chili to coat everything generously, but not so much that the fries are swimming in it. A thin, even layer is the sweet spot.
If you’re making this for a crowd and need to scale up, use two sheet pans instead of one crowded one. Overcrowding leads to steaming instead of crisping, and nobody wants steamed fries. If you love sheet pan dinners as much as I do, my easy BBQ loaded mini meatloaf muffins are another great option for busy nights.
Variations & Adaptations
One of the best things about this recipe is how easy it is to switch things up. Here are some of my favorite variations:
Loaded Chili Cheese Sweet Potato Fries
Swap the regular frozen fries for sweet potato fries. The sweetness pairs beautifully with the savory chili and smoky spices. Bake them a few minutes longer since sweet potato fries tend to be thicker and need more time to crisp up.
Tex-Mex Style
Add a can of drained corn and some diced green chiles to the chili. Top with pepper jack cheese instead of cheddar, and finish with a squeeze of fresh lime juice and a drizzle of crema. It’s like a fiesta on a sheet pan.
Vegetarian Version
Skip the ground beef and use two cans of beans instead—try a mix of kidney beans and black beans. Add a diced bell pepper and some mushrooms for extra texture and umami. The rest of the recipe stays exactly the same, and honestly, you won’t miss the meat.
Loaded Chili Cheese Waffle Fries
Use frozen waffle fries instead of regular fries. The ridges catch all the chili and cheese, making every bite perfect. Plus, waffle fries just feel more fun, you know?
Spicy Kick Version
Add a diced jalapeño (seeds and all) to the chili while it cooks, use pepper jack cheese, and top with extra pickled jalapeños and a drizzle of hot sauce. This one’s for the heat seekers out there.
I’ve also made this with leftover comforting Olive Garden loaded pasta e fagioli soup as the chili base—just thicken it up a bit on the stove first, and you’ve got an entirely different but equally delicious meal.
Serving & Storage Suggestions
These loaded chili cheese fries are best served immediately, straight from the oven while the cheese is still stretchy and the fries are at their crispiest. I like to set the sheet pan right on the table with a stack of plates and forks and let everyone serve themselves. It feels casual and fun, which is exactly the vibe this dish deserves.
For a full meal, I’ll sometimes serve this with a simple side salad dressed with lime and cilantro. The freshness cuts through all that richness and makes the whole thing feel a little more balanced. A cold beer or a tall glass of iced tea is the perfect drink pairing.
Storage: If you have leftovers (unlikely, but possible), let them cool completely, then transfer to an airtight container. Store in the refrigerator for up to 3 days. The fries will lose their crispiness, but the flavor will still be there.
Reheating: The best way to reheat leftovers is in the oven or air fryer. Spread them on a sheet pan and bake at 375°F for about 10 minutes, until heated through. The microwave works in a pinch, but the fries will be soft. Add fresh toppings after reheating for the best results.
Freezing: I don’t recommend freezing the fully assembled dish since the fries get weird when thawed. But you can freeze the chili on its own for up to 3 months, then make fresh fries when you’re ready to eat. That’s actually a great meal prep strategy.
Nutritional Information & Benefits
Let’s be real—this isn’t health food, and it’s not pretending to be. But that doesn’t mean it can’t be part of a balanced diet. Here’s the estimated nutritional breakdown for one serving (about 1/6 of the sheet pan):
- Calories: 520
- Protein: 28g
- Carbohydrates: 38g
- Fat: 28g
- Fiber: 8g
- Sugar: 6g
- Sodium: 890mg
The good news is that this dish does have some redeeming qualities. The kidney beans are packed with fiber and plant-based protein, which helps keep you full and supports digestion. The tomatoes provide lycopene, a powerful antioxidant. And the onions and garlic offer anti-inflammatory benefits. Plus, if you use sweet potato fries, you’ll get a healthy dose of vitamin A.
For those watching their intake, you can lighten things up by using lean ground beef, reduced-fat cheese, and Greek yogurt instead of sour cream. It won’t be exactly the same, but it’ll still hit the spot. This recipe is naturally gluten-free as written, just double-check your chili powder and beef broth labels if that’s a concern.
Conclusion
These easy loaded chili cheese fries are the kind of recipe that feels like a secret weapon. They’re simple enough for a random Tuesday night but impressive enough to serve at a party. The combination of crispy fries, hearty chili, melted cheese, and fresh toppings is basically irresistible—I’ve yet to meet someone who didn’t go back for seconds.
What I love most about this recipe is how forgiving it is. You can swap ingredients, adjust the spice level, use whatever cheese you have on hand, and it still turns out delicious. It’s comfort food without the stress, and honestly, that’s exactly what we all need more of.
I’d love to hear how yours turn out. Did you add any fun toppings? Switch up the protein? Make it extra spicy? Drop a comment below and let me know—I read every single one, and your ideas might just inspire my next batch. And if you’re looking for another comforting, crowd-pleasing meal, try my loaded lasagna recipe for a hearty dinner that feeds a crowd.
Now go make some loaded fries. You deserve them.
Frequently Asked Questions
Can I use homemade fries instead of frozen?
Absolutely. Just cut your potatoes into even strips, soak them in cold water for 30 minutes to remove starch, pat them dry, toss with oil and seasonings, and bake at 425°F for about 20 minutes before adding the chili. The prep takes a bit longer, but the result is just as good.
How do I keep the fries from getting soggy?
The key is par-baking the fries before adding the chili, and not using too much chili. You want a generous but thin layer—think coating, not swimming. Also, make sure your chili isn’t too watery. Let it simmer until it thickens up before spooning it over the fries.
Can I make this ahead of time?
You can make the chili up to 3 days ahead and store it in the fridge. When you’re ready to eat, just bake the fries, reheat the chili on the stove, and assemble. The final dish is best eaten fresh, but the components can be prepped in advance.
What’s the best cheese for loaded chili cheese fries?
Cheddar is the classic choice—sharp or mild both work great. Pepper jack adds a nice kick, and Monterey Jack melts beautifully. A blend of cheddar and Monterey Jack is my personal favorite. Whatever you use, shred it yourself for the best melt.
Can I make this in a slow cooker or Instant Pot?
You can make the chili in either appliance, but the fries need to be baked in the oven to get crispy. For the slow cooker, brown the beef first, then add everything else and cook on low for 4 to 6 hours. For the Instant Pot, use the sauté function to brown the beef, then pressure cook on high for 10 minutes. Either way, bake the fries separately and assemble at the end.
Pin This Recipe!
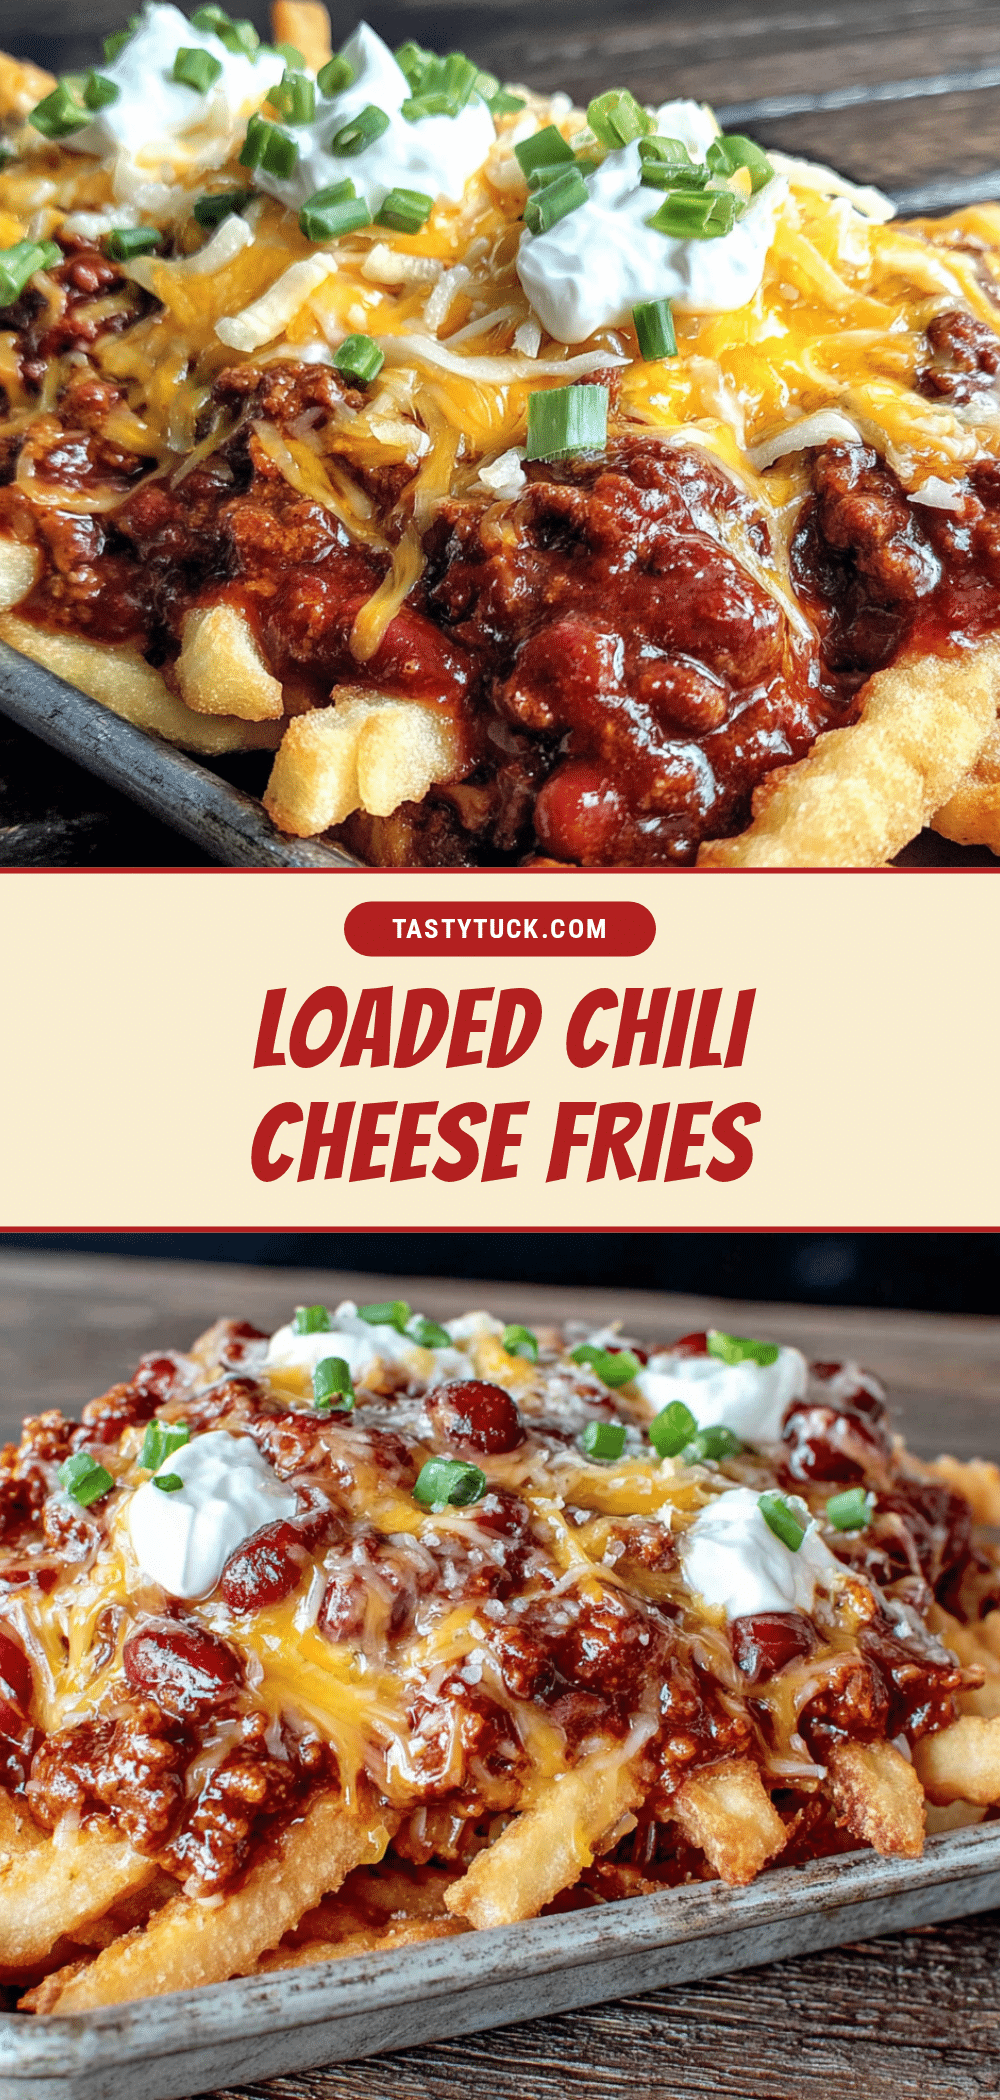
Easy Loaded Chili Cheese Fries: Best Sheet Pan Dinner

Crispy golden fries topped with savory chili, melted cheddar, and fresh toppings, all baked on a single sheet pan for an easy, crowd-pleasing dinner or game day snack.
- Prep Time: 10 minutes
- Cook Time: 35 minutes
- Total Time: 45 minutes
- Yield: 6 servings 1x
- Category: Main Course
- Cuisine: American
Ingredients
- 1 pound ground beef (80/20 works best)
- 1 medium yellow onion, diced (about 1 cup)
- 3 cloves garlic, minced (or 1 teaspoon garlic powder)
- 1 can (15 ounces) diced tomatoes (fire-roasted preferred)
- 1 can (15 ounces) kidney beans, drained and rinsed
- 2 tablespoons tomato paste
- 1 tablespoon chili powder
- 1 teaspoon ground cumin
- 1/2 teaspoon smoked paprika
- 1/2 teaspoon salt
- 1/4 teaspoon black pepper
- 1/2 cup beef broth or water
- 1 bag (28 ounces) frozen french fries (crinkle cut, steak fries, or shoestring)
- 2 tablespoons olive oil
- 1/2 teaspoon garlic powder
- 1/2 teaspoon salt
- 2 cups shredded cheddar cheese (sharp or mild)
- 1/2 cup sour cream
- 1/4 cup sliced green onions (both white and green parts)
- 1/4 cup pickled jalapeños (optional)
- 1 medium tomato, diced
- Fresh cilantro, chopped (optional)
Instructions
- Preheat oven to 425°F (220°C). Dice onion, mince garlic, drain and rinse kidney beans.
- Spread frozen fries in a single layer on a sheet pan. Drizzle with olive oil, sprinkle with garlic powder and salt, and toss to coat. Bake for 15 minutes until starting to crisp.
- While fries bake, heat a large skillet over medium-high heat. Add ground beef and cook, breaking it up, until browned (6-8 minutes). Drain excess fat, leaving about 1 tablespoon.
- Add diced onion and cook 3-4 minutes until softened. Stir in garlic and cook 30 seconds. Add tomato paste, chili powder, cumin, smoked paprika, salt, and pepper; cook 1 minute to toast spices.
- Pour in diced tomatoes (with juices) and beef broth. Bring to a simmer, reduce heat to medium-low, and cook 10 minutes, stirring occasionally, until thickened. Stir in kidney beans and cook 2 more minutes. Adjust seasoning to taste.
- Remove par-baked fries from oven. Spoon chili evenly over fries. Sprinkle shredded cheddar cheese over the top.
- Return to oven and bake 10-12 minutes until cheese is melted and bubbly and fries are deep golden brown.
- Let rest 2 minutes. Dollop sour cream over the top, then sprinkle with green onions, diced tomato, pickled jalapeños, and cilantro.
- Serve immediately, straight from the sheet pan.
Notes
Par-bake the fries first to keep them crispy. Use freshly shredded cheese for best melt. Toast spices for deeper flavor. Let rest briefly before adding cold toppings. For vegetarian version, swap ground beef for plant-based crumble or extra beans. For sweet potato fries, bake a few minutes longer.
Nutrition
- Serving Size: 1/6 of sheet pan
- Calories: 520
- Sugar: 6
- Sodium: 890
- Fat: 28
- Saturated Fat: 12
- Carbohydrates: 38
- Fiber: 8
- Protein: 28
Keywords: loaded chili cheese fries, sheet pan dinner, easy dinner, game day food, comfort food, one pan meal


