“Hey, did you bring the graduation treats?” That text popped up on my phone just as I was juggling a million things on the last day of school. Honestly, I hadn’t planned for anything fancy—just something quick, tasty, and a bit festive. So, I rummaged through the pantry and spotted a bag of peanut butter cups. Suddenly, the idea clicked: why not turn those into decadent graduation cap brownies? It sounded almost too simple, but hey, sometimes the best recipes come from last-minute inspiration and a little bit of chaos.
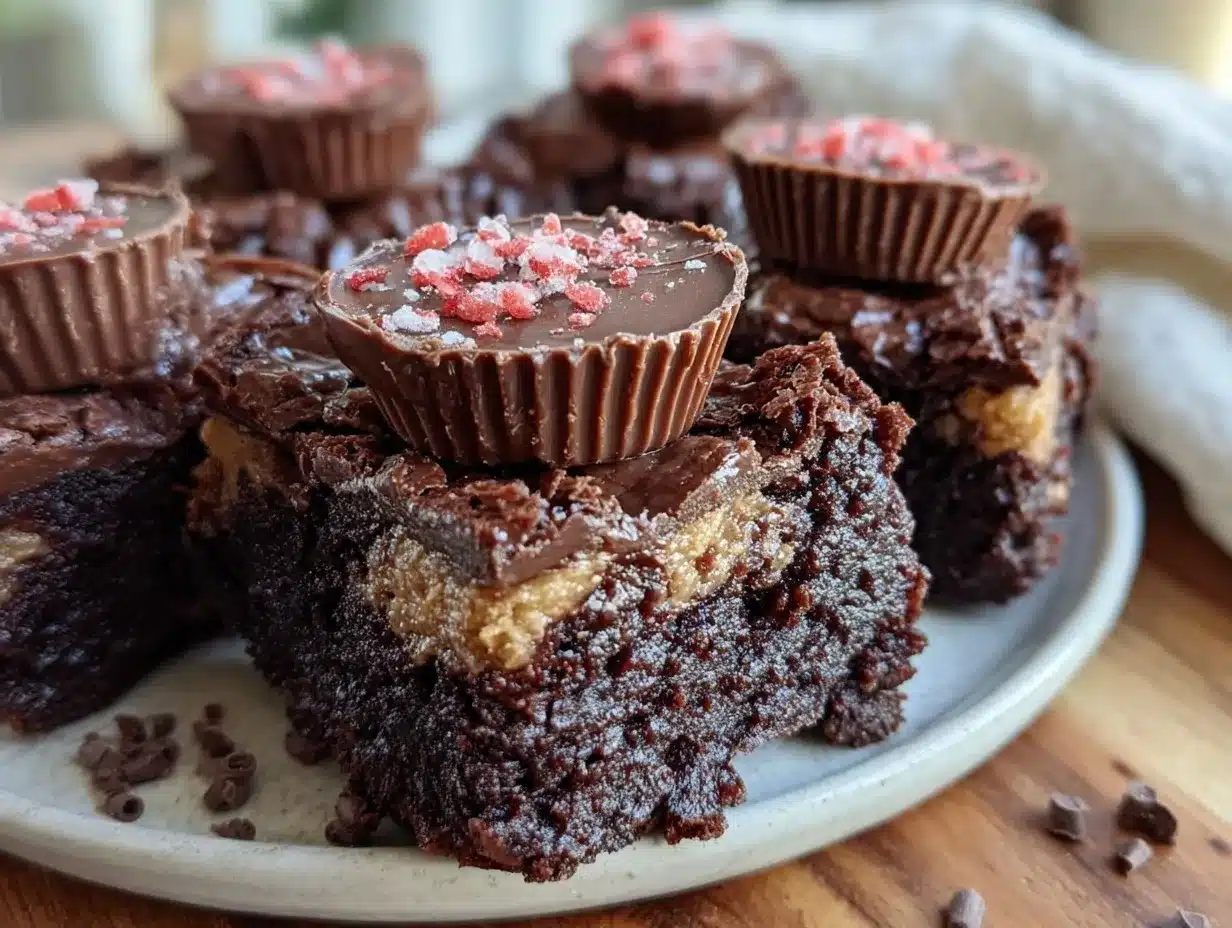
The magic happened when I baked a batch of fudgy brownies, stuffed with those peanut butter cups, then topped them with a perfect little square of chocolate to mimic a graduation cap. The effect was cute, unexpected, and more importantly, delicious. What started as a rushed plan turned into a party hit—kids and adults kept coming back for more, and I realized this recipe wasn’t just a quick fix; it felt like a sweet little celebration on a plate.
I’ve since made these Decadent Graduation Cap Brownies with Peanut Butter Cups multiple times. Each batch reminds me of that frantic, joyful afternoon that ended with smiles and full bellies. It’s a recipe I trust for both last-minute parties and planned celebrations because it’s indulgent but easy, and honestly, who can resist peanut butter and chocolate teaming up in brownie form? There’s a quiet satisfaction in knowing this treat brings a little bit of fun and a whole lot of flavor to graduation day.
Why You’ll Love This Recipe
After making these brownies several times, I’ve come to appreciate what makes them stand out from your typical brownie recipe. Here’s why this recipe is a keeper:
- Quick & Easy: Ready in under an hour, including prep and baking—perfect for busy parents or spontaneous party hosts.
- Simple Ingredients: No need for specialty stores; most ingredients are pantry staples, and peanut butter cups add that extra wow factor.
- Perfect for Graduation Parties: The cap design adds a festive touch that’s both charming and thematic without extra fuss.
- Crowd-Pleaser: Kids love the gooey peanut butter surprise, and adults appreciate the rich chocolate flavor.
- Unbelievably Delicious: The fudgy texture combined with peanut butter cups inside creates an irresistible dessert experience.
What really sets these apart is the balance between indulgence and ease. Instead of complicated decorations or fancy piping, the simple chocolate square “caps” and a little frosting “tassel” make these brownies festive and fun. Plus, swapping in peanut butter cups instead of just mixing in peanut butter gives a melty, gooey center that’s just right—not too dry or overwhelming.
Honestly, this recipe has become my go-to graduation dessert because it feels special without the stress. It’s that kind of treat that makes people pause, smile, and maybe even savor the moment a little longer—just what every celebration deserves.
What Ingredients You Will Need
This recipe uses straightforward, tasty ingredients that come together to create that perfect rich, peanut buttery, chocolatey brownie texture. Most are everyday pantry staples, and the peanut butter cups add a fun twist you won’t find in your average brownie.
- For the Brownie Batter:
- Unsalted butter, 1 cup (227 g), melted and slightly cooled (adds richness and moisture)
- Granulated sugar, 2 cups (400 g)
- Large eggs, 3, room temperature (helps with structure)
- Vanilla extract, 2 teaspoons (for depth of flavor)
- All-purpose flour, 1 cup (120 g), sifted (for a tender crumb)
- Cocoa powder, ¾ cup (75 g), unsweetened (I like Hershey’s for consistent flavor)
- Salt, ½ teaspoon (balances sweetness)
- Baking powder, ¼ teaspoon (just enough for slight lift without cakiness)
- For the Filling:
- Peanut butter cups, about 15–20 mini-sized (nestlé or Reese’s work great; use mini for even distribution)
- For the Graduation Cap Decoration:
- Chocolate squares, about 1-inch pieces (dark or semi-sweet, for the cap tops)
- Black or dark brown frosting, about ½ cup (homemade or store-bought, for the tassels)
Feel free to swap out all-purpose flour for almond flour to make these gluten-free, but note the texture will be a bit different. Also, if you want a dairy-free version, use coconut oil instead of butter and dairy-free peanut butter cups. The ingredients are flexible, but the peanut butter cups are key for that decadent surprise inside.
Equipment Needed
To whip up these decadent graduation cap brownies, you’ll need a handful of basic kitchen tools—nothing too fancy:
- 9×13-inch baking pan (metal or glass works fine; I prefer glass because it heats evenly)
- Mixing bowls (one large, one medium for sifting dry ingredients)
- Whisk or electric mixer (a handheld mixer saves effort, but whisking by hand is doable)
- Spatula for folding batter and spreading evenly
- Measuring cups and spoons for accuracy
- Wire rack for cooling
- Small piping bag or zip-top bag (for frosting tassels; a toothpick can also work for finer details)
If you don’t have a 9×13 pan, an 8×8 will work; just expect thicker brownies and adjust baking time slightly (add 5-10 minutes). For frosting, I’ve used simple plastic sandwich bags with a tiny corner snipped off—budget-friendly and easy cleanup. Keeping your butter melted but not hot is essential for smooth batter, so a microwave-safe bowl or small saucepan helps.
Preparation Method
- Preheat the Oven: Set your oven to 350°F (175°C). Grease your 9×13-inch pan lightly or line it with parchment paper for easy removal. This prep step saves time later.
- Mix Wet Ingredients: In a large bowl, whisk together 1 cup (227 g) melted butter and 2 cups (400 g) granulated sugar until combined. Add 3 room-temperature eggs one at a time, beating well after each. Stir in 2 teaspoons vanilla extract.
- Combine Dry Ingredients: In a separate bowl, sift together 1 cup (120 g) all-purpose flour, ¾ cup (75 g) cocoa powder, ½ teaspoon salt, and ¼ teaspoon baking powder. Sifting prevents clumps and helps with a smooth batter.
- Mix Dry into Wet: Gradually fold the dry ingredients into the wet mixture using a spatula. Don’t overmix—just until combined. The batter should be thick and shiny.
- Pour Half the Batter into Pan: Spread evenly with your spatula or the back of a spoon. This layer will hold the peanut butter cups in place.
- Add Peanut Butter Cups: Arrange 15–20 mini peanut butter cups evenly over the batter, slightly pressing them down so they nestle in but don’t sink entirely.
- Top with Remaining Batter: Spoon the rest of the brownie batter over the peanut butter cups and spread gently to cover them.
- Bake: Place in the oven for 30–35 minutes. Start checking around 28 minutes—insert a toothpick near the edge (not in peanut butter cups) to test doneness. It should come out with a few moist crumbs but not wet batter.
- Cool Completely: Let brownies cool in the pan on a wire rack for at least 1 hour. This step is crucial for clean slicing and for the peanut butter cups to firm up inside.
- Decorate the Graduation Caps: Cut brownies into squares. Place a chocolate square on top of each brownie to serve as the cap’s flat top. Using black or dark brown frosting, pipe a small tassel starting from one corner of the chocolate square extending slightly onto the brownie.
- Serve and Enjoy: These brownies look festive and taste even better when shared. Store leftovers in an airtight container at room temperature for up to 3 days or refrigerate for up to a week.
Tip: If your frosting is too thick to pipe, warm it slightly in the microwave for 5-10 seconds. Also, slicing brownies with a sharp knife dipped in hot water yields cleaner cuts.
Cooking Tips & Techniques
Handling brownies and peanut butter cups together can be a bit tricky, so here’s what I’ve learned:
- Don’t Overbake: Brownies should be fudgy, not dry. Check early and often once you hit 25 minutes. The gooey peanut butter cups inside can make the center seem undercooked, so test edges for doneness.
- Room Temperature Eggs: This helps the batter come together smoothly and traps air for a better crumb. I usually take eggs out 30 minutes before starting.
- Frosting Tassels: Use a small piping tip or a zip-top bag with a tiny snip. If you’re not confident piping, a toothpick dipped in frosting can do little dots or lines.
- Peanut Butter Cups Placement: Space them evenly so every brownie gets a good amount of peanut butter goo. If you crowd them, they’ll melt into one another, and if too sparse, some brownies will be peanut-butter-free.
- Cooling Time: Waiting for the brownies to cool completely is key. Hot brownies will crumble and the peanut butter cups may be too melty to hold shape.
Once I made the mistake of cutting right out of the oven and ended up with a gooey mess. Trust me, patience here pays off. Also, stirring the dry ingredients gently into the wet helps keep the texture tender—not cakey.
Variations & Adaptations
Feel free to put your own spin on these brownies to fit different tastes or dietary needs:
- Nut-Free Version: Replace peanut butter cups with caramel-filled chocolates or mini chocolate chips for a safe alternative.
- Seasonal Twist: Swap the peanut butter cups with peppermint patties for a winter graduation or use white chocolate chips for a lighter flavor.
- Gluten-Free: Use almond flour or a gluten-free flour blend instead of all-purpose flour. The texture will be slightly different but still delicious.
- Vegan Adaptation: Use flax eggs (1 tablespoon flaxseed meal + 3 tablespoons water per egg), dairy-free butter, and vegan peanut butter cups like those from Enjoy Life.
- Extra Crunch: Add chopped toasted pecans or walnuts into the batter for a nutty crunch that complements the gooey centers.
Personally, I once tried adding a swirl of salted caramel sauce just before baking. It was indulgent but added a nice surprise when bites hit a salty-sweet spot. This recipe is forgiving, so feel free to experiment.
Serving & Storage Suggestions
Serve these brownies slightly warm or at room temperature for the best texture. The peanut butter cups are nice and melty when warm, but the brownies hold together best once cooled.
Pair them with a cold glass of milk, a scoop of vanilla ice cream, or even a cup of fresh coffee for a comforting dessert experience. For a full graduation party spread, these brownies complement savory finger foods perfectly—like walking taco casserole or loaded hot dogs.
For storage, keep brownies in an airtight container at room temperature for up to 3 days. They also freeze well—wrap pieces individually in plastic wrap, then place in a freezer bag for up to 2 months. Thaw overnight in the fridge and warm briefly before serving to bring back that melty peanut butter cup goodness.
Flavors actually deepen a bit after a day, so making these a day ahead is a stress-free option that tastes just as incredible.
Nutritional Information & Benefits
These brownies are definitely a treat with a rich, satisfying flavor. Here’s an approximate breakdown per brownie (based on 24 servings):
| Calories | 220 |
|---|---|
| Fat | 12g |
| Carbohydrates | 26g |
| Protein | 3g |
Key ingredients like cocoa powder provide antioxidants, and peanut butter adds a bit of protein and healthy fats. Of course, these brownies are best enjoyed as an occasional indulgence rather than a daily snack.
They’re gluten-friendly if you swap to almond flour and can be dairy-free with ingredient substitutions, making them accessible for many dietary needs.
Conclusion
These Decadent Graduation Cap Brownies with Peanut Butter Cups are more than just a dessert—they’re a fun way to celebrate big moments with something homemade, easy, and truly memorable. Whether you’re scrambling to put together last-minute party treats or planning ahead for a graduation bash, this recipe delivers that perfect mix of chocolate, peanut butter, and festive charm.
I love how simple tweaks—like adding peanut butter cups and the graduation cap detail—turn a classic brownie into a standout centerpiece. Plus, it’s an approachable recipe for any home baker, whether you’re making dessert for a crowd or just treating yourself.
Give it a try and make it your own. And hey, if you end up tweaking the recipe or adding your own spin, drop a comment—I’d love to hear how your graduation celebration goes!
FAQs
Can I use regular-sized peanut butter cups instead of mini ones?
You can, but mini peanut butter cups distribute more evenly throughout the brownies. If using regular-sized, cut them into smaller pieces to avoid overly large pockets of peanut butter.
How do I make sure the brownies don’t stick to the pan?
Grease the pan well or line it with parchment paper with some overhang for easy lifting. This helps get clean squares and less mess.
Can I prepare these brownies a day ahead?
Absolutely! They taste even better after resting overnight. Just store in an airtight container at room temperature or in the fridge.
Is it possible to make these brownies gluten-free?
Yes, swap the all-purpose flour for almond flour or your favorite gluten-free blend. The texture will be slightly different but still delicious.
What’s the best way to pipe the tassels on the graduation caps?
Use a small piping tip or a zip-top bag with a tiny snip. If you don’t have piping tools, a toothpick dipped in frosting can create simple tassel lines.
Pin This Recipe!
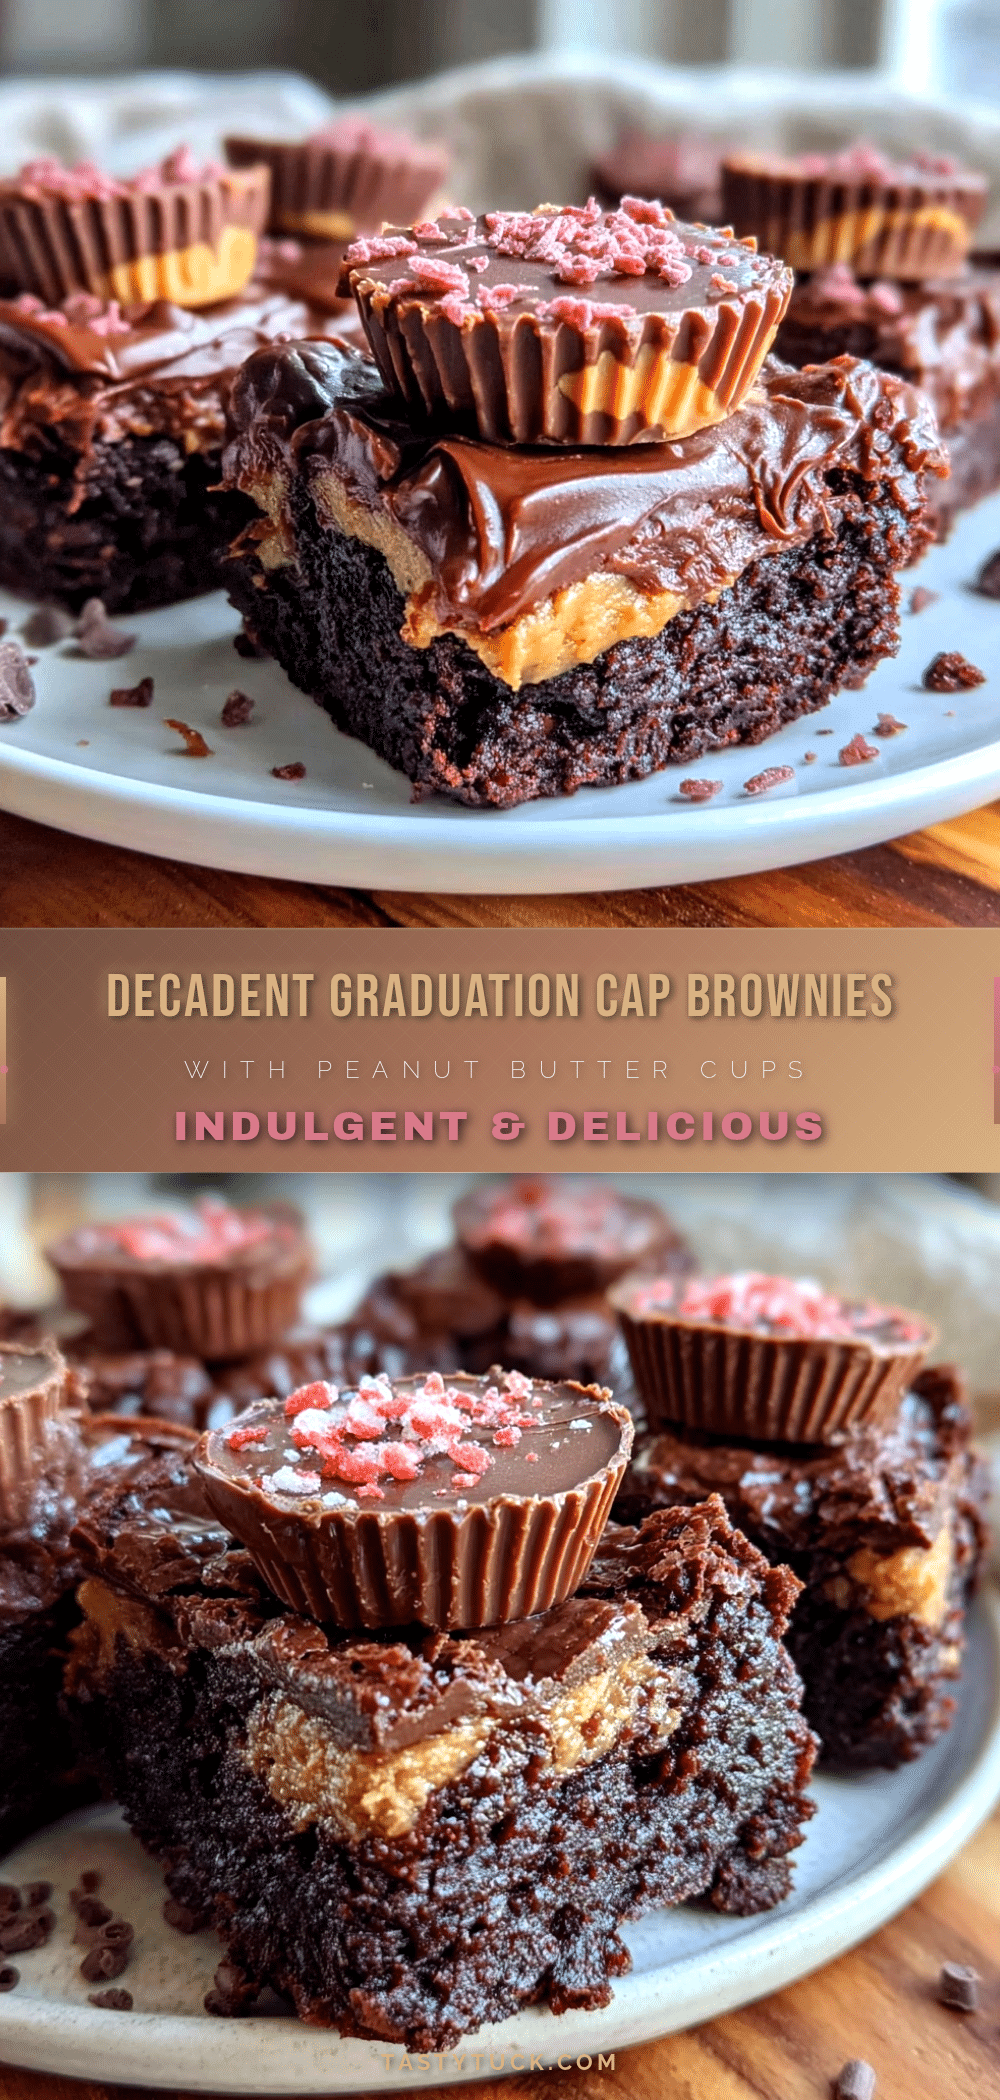
Decadent Graduation Cap Brownies with Peanut Butter Cups
Fudgy brownies stuffed with mini peanut butter cups and topped with chocolate squares and frosting tassels, perfect for graduation parties and easy to make.
- Prep Time: 15 minutes
- Cook Time: 30-35 minutes
- Total Time: 1 hour 15 minutes
- Yield: 24 servings 1x
- Category: Dessert
- Cuisine: American
Ingredients
- 1 cup (227 g) unsalted butter, melted and slightly cooled
- 2 cups (400 g) granulated sugar
- 3 large eggs, room temperature
- 2 teaspoons vanilla extract
- 1 cup (120 g) all-purpose flour, sifted
- 3/4 cup (75 g) unsweetened cocoa powder
- 1/2 teaspoon salt
- 1/4 teaspoon baking powder
- 15–20 mini peanut butter cups
- Chocolate squares, about 1-inch pieces (dark or semi-sweet)
- 1/2 cup black or dark brown frosting (homemade or store-bought)
Instructions
- Preheat the oven to 350°F (175°C). Grease a 9×13-inch pan lightly or line it with parchment paper.
- In a large bowl, whisk together melted butter and granulated sugar until combined. Add eggs one at a time, beating well after each. Stir in vanilla extract.
- In a separate bowl, sift together flour, cocoa powder, salt, and baking powder.
- Gradually fold the dry ingredients into the wet mixture using a spatula until just combined. The batter should be thick and shiny.
- Pour half the batter into the prepared pan and spread evenly.
- Arrange mini peanut butter cups evenly over the batter, pressing down slightly.
- Spoon the remaining batter over the peanut butter cups and spread gently to cover.
- Bake for 30–35 minutes, checking around 28 minutes by inserting a toothpick near the edge; it should come out with a few moist crumbs but not wet batter.
- Cool brownies completely in the pan on a wire rack for at least 1 hour.
- Cut brownies into squares. Place a chocolate square on top of each brownie to serve as the graduation cap top.
- Pipe a small tassel with black or dark brown frosting starting from one corner of the chocolate square extending slightly onto the brownie.
- Serve and enjoy. Store leftovers in an airtight container at room temperature for up to 3 days or refrigerate for up to a week.
Notes
Do not overbake to keep brownies fudgy. Use room temperature eggs for better batter texture. Cool brownies completely before cutting for clean slices. Warm frosting slightly if too thick to pipe. Use mini peanut butter cups for even distribution. Grease pan well or line with parchment paper to prevent sticking.
Nutrition
- Serving Size: 1 brownie (1/24th of
- Calories: 220
- Fat: 12
- Carbohydrates: 26
- Protein: 3
Keywords: brownies, graduation treats, peanut butter cups, chocolate, party dessert, easy brownies, fudgy brownies, festive dessert


