That faint, tangy aroma — the kind that curls up your nose before you even open the jar — still takes me straight to my tiny kitchen windowsill on an early spring morning. It was there, with an old glass jar and just two simple ingredients, that I first coaxed life from flour and water. The slow rhythm of stirring, the gentle bubbles forming overnight, and that unmistakable sour scent became a quiet ritual. It was never about rushing, but about patience and trust in the invisible world of wild yeast and bacteria, something you can’t really see but absolutely feel in the crumb of fresh bread.
I remember watching that sourdough starter bubble and grow, day by day, as if it had its own heartbeat. It was oddly calming — a reminder that some things, like good things in bread and life, need time. This Easy 7-Day Sourdough Starter from Scratch Guide is more than just a recipe; it’s an invitation to slow down and connect with a timeless tradition. Honestly, it stuck with me because it’s the kind of recipe that doesn’t just fill your belly but also fills a corner of your kitchen with a little magic and a lot of promise.
Starting your own sourdough starter can feel like stepping into a secret club of bakers who understand that flour and water can be so much more than just ingredients. It’s a little science, a little art, and a whole lot of patience. And if you give it a week, you’ll have your very own bubbling, singing starter ready for perfect homemade bread. There’s something quietly satisfying in knowing you made it from scratch, and that feeling is what makes this starter worth every minute.
Why You’ll Love This Recipe
This Easy 7-Day Sourdough Starter from Scratch Guide is designed to make the mysterious process of starting your own starter approachable and enjoyable, even if you’ve never baked bread before. From personal kitchen experiments to countless loaves, here’s why this guide stands out:
- Quick & Easy: Although sourdough itself takes time, this starter comes together with minimal effort — just simple daily feedings over 7 days, perfect for fitting into a busy schedule.
- Simple Ingredients: You only need flour and water — no special equipment or additives required. Plus, you probably already have everything in your pantry.
- Perfect for Beginners: The step-by-step process breaks down the science without overwhelming, making it ideal for anyone curious about baking real homemade bread with that authentic tang.
- Reliable Results: Tested and tweaked from my own kitchen trials, this guide helps you avoid common pitfalls so your starter is bubbly, active, and strong.
- Full of Flavor: This starter produces bread with a rich, complex taste and satisfying chewy crumb — nothing like store-bought yeast breads.
- Emotionally Rewarding: There’s something special about nurturing a living culture. It’s a little project that connects you to a tradition thousands of years old.
Unlike other starters that may require unusual flours or fancy tools, this recipe uses everyday all-purpose flour and regular filtered water. The key is the feeding schedule and a few simple observations — like watching for bubbles or smelling that signature tang. I’ve shared tips to make sure even if your kitchen is chilly or your schedule unpredictable, you can still coax your starter to life.
Honestly, this isn’t just a recipe; it’s the start of a beautiful baking adventure. If you’ve tried other starters and given up, this method’s consistency and simplicity might just be the reason you finally succeed.
What Ingredients You Will Need
This recipe uses simple, wholesome ingredients to deliver a lively sourdough starter without fuss. The beauty is in the basics, which are pantry staples for most home bakers.
- Unbleached all-purpose flour (about 120 grams or 1 cup per feeding) — I recommend King Arthur Flour for consistent results, but any unbleached brand works well.
- Filtered or bottled water (120 ml or about ½ cup per feeding), room temperature — Chlorine in tap water can slow fermentation, so filtered water helps keep your starter happy.
- A clean glass jar (at least 1-quart size) — Wide mouth is best for easy stirring and feeding.
- Kitchen scale (optional but highly recommended) — Accurate measurements help your starter stay balanced.
Optional but helpful:
- Whole wheat or rye flour (for occasional feedings) — Adding a little rye can jumpstart fermentation, especially if your kitchen is cold.
- Rubber band or piece of tape — To mark the starter’s rise each day.
Substitution tips:
- Use bread flour for a stronger gluten structure if you want a more vigorous starter.
- For gluten-free options, sprouted gluten-free flours like buckwheat or sorghum can be used, but the fermentation timeline may vary.
Keep it simple, and don’t overthink the ingredients. The real magic is in the natural wild yeasts and bacteria present in your flour and environment.
Equipment Needed
- Glass jar (at least 1 quart) — I prefer clear glass so you can watch the bubbles forming. Mason jars work great, but any clean jar with a wide mouth will do.
- Kitchen scale — Not mandatory, but it makes measuring flour and water more precise, which helps your starter stay balanced.
- Wooden spoon or spatula — For stirring. Avoid metal as it can react with the starter.
- Rubber band or masking tape — To mark the starter’s level and track growth.
- Clean cloth or loose lid — For covering the jar to allow airflow but keep out dust and insects.
If you don’t have a scale, use standard measuring cups, but remember that flour can settle differently, so try to scoop lightly and level with a knife. A wide mouth jar is my personal favorite because it’s easier to stir and feed without making a mess.
Keeping your tools clean but not sterilized is key — you want the good microbes to thrive, not be wiped out.
Preparation Method
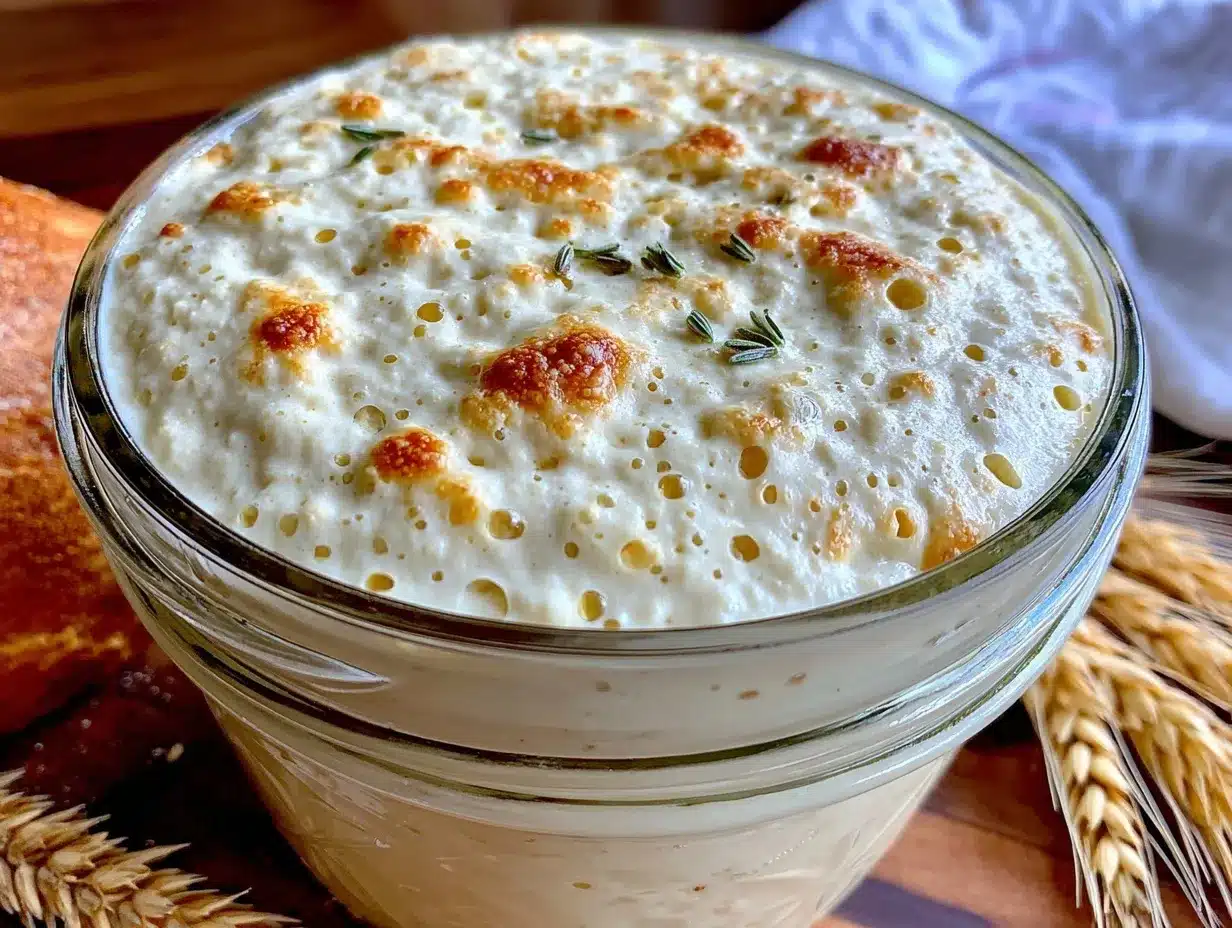
- Day 1: Mix the starter (5 minutes) — Combine ½ cup (60 g) unbleached all-purpose flour with ½ cup (120 ml) filtered room-temperature water in your jar. Stir well until no dry flour remains. The mixture should have a thick batter-like consistency. Cover loosely with a cloth or lid and leave at room temperature (around 70°F/21°C) for 24 hours.
- Day 2: Check for bubbles (2 minutes) — By now, you might see a few bubbles, but it’s okay if you don’t. Stir the starter once to incorporate air. Discard half the starter (about ½ cup), then feed with ½ cup (60 g) flour and ½ cup (120 ml) water. Stir, cover, and rest for another 24 hours.
- Day 3: Look for activity (2 minutes) — You should start seeing bubbles and notice a tangy smell. Repeat the discard and feeding process from Day 2. If your kitchen is cool, give it a bit more time but keep feeding daily.
- Day 4: Increase feeding frequency if bubbly (5 minutes) — If the starter is very bubbly and doubling in size within 6-8 hours, switch to feeding twice daily (morning and night) to build strength. Each feeding involves discarding half and adding equal parts flour and water by weight or volume.
- Day 5: Consistency check (5 minutes) — Your starter should be rising and falling predictably. It should smell pleasantly sour but not off. Adjust feeding amounts if it’s very liquid or very stiff; consistency should be like thick pancake batter.
- Day 6: Float test (5 minutes) — To test readiness, drop a spoonful of starter in water; if it floats, it’s ready to bake with. If not, keep feeding and wait another day or two.
- Day 7: Starter is ready — When your starter consistently doubles in size within 4-6 hours and passes the float test, it’s time to bake! You can now use it for your favorite bread recipes.
Tips:
- Keep your starter at room temperature, ideally between 70-75°F (21-24°C). Cooler temps slow fermentation; warmer temps speed it up.
- Don’t stress about exact measurements — consistency and routine are more important.
- Use a rubber band to mark the starter’s height after feeding to track rise and fall.
Patience pays off — I’ve had starters that took a bit longer but ended up with amazing flavor. This method works well even if you’re new to sourdough.
Cooking Tips & Techniques
Starting a sourdough starter is a bit like caring for a pet — it needs regular attention but not too much fuss. Here are some tips I’ve learned that’ll help your starter thrive:
- Consistent feeding schedule: Try to feed your starter at roughly the same times each day. This builds a predictable rhythm for the wild yeast.
- Discarding starter: It might feel wasteful, but discarding half before feeding keeps the acidity balanced and prevents your jar from overflowing.
- Use the right water: Chlorine kills yeast. If your tap water is heavily chlorinated, using filtered or bottled water makes a huge difference.
- Temperature control: If your kitchen is cold, place your jar in a warm spot — near a radiator or on top of the fridge.
- Don’t seal the jar tightly: Your starter needs to breathe. A loose lid or cloth cover works best.
- Be patient with bubbles: Some starters take a bit longer to bubble up. Resist the urge to add extras or rush the process.
One time, I left my starter in a chilly kitchen and it barely bubbled by Day 4. I started feeding twice daily and moved it to a sunnier spot — by Day 7 it was lively and ready. These little tweaks can save you from frustration.
Variations & Adaptations
Feel free to personalize your starter to suit your taste or dietary needs. Here are some ideas:
- Whole Wheat or Rye Boost: Substitute 25-50% of the all-purpose flour with whole wheat or rye flour during feedings. These flours contain more nutrients and wild yeast, speeding up fermentation and adding a deeper flavor.
- Gluten-Free Starter: Use gluten-free flours like buckwheat, brown rice, or sorghum. Note that gluten-free starters behave differently and might take longer to develop.
- Fed with Fruit Juice: Instead of water, try feeding your starter with unsweetened apple juice to introduce natural sugars and wild yeasts, for a subtle fruity tang.
- Cold Fermentation: Once established, keep your starter in the fridge and feed weekly. Feed it 1-2 days before baking to reactivate.
I once tried a rye-heavy starter for a denser, earthier loaf, and it was fantastic for rustic breads. Also, if you want to speed things up, incorporating a small amount of commercial yeast on Day 1 can jumpstart the process, but this recipe thrives naturally without it.
Serving & Storage Suggestions
Once your starter is active and bubbly, it’s ready to be transformed into delicious homemade bread. Here’s how to keep it happy and make the most of it:
- Serving temperature: Always feed your starter at room temperature to keep the yeast active.
- Storage: Store your starter at room temperature if you bake frequently (daily or every other day). For less frequent baking, refrigerate and feed once a week.
- Refrigerated starter: Bring to room temperature and feed 1-2 times before baking to reactivate.
- Freezing: You can freeze starter for long-term storage, but it will require a few feedings to revive.
- Using discard: Don’t throw away the discard! Use it in pancakes, crackers, or quick breads for a hint of sourdough flavor without waiting.
Flavors develop and mature over time, so starters that have been maintained for months often produce the best bread. If you’re interested in pairing your homemade sourdough with a sweet treat, you might enjoy the Cozy Cracker Barrel Loaded Peach Cobbler for a delightful finish to your baking day.
Nutritional Information & Benefits
Sourdough bread made from your own starter has several benefits over commercial breads. While the starter itself is just flour and water, it sparks fermentation, which enhances nutrition:
- Improved digestibility: The natural fermentation breaks down gluten and phytic acid, making sourdough easier on your stomach.
- Lower glycemic index: Sourdough breads cause a gentler rise in blood sugar compared to most yeast breads.
- Rich in beneficial bacteria: While baking kills active bacteria, the fermentation process supports gut health indirectly.
- Minimal ingredients: You control what goes into your bread, avoiding preservatives and additives found in store-bought versions.
For those watching gluten, sourdough fermentation reduces gluten content but is not gluten-free. If you want to explore lighter bread options, you might like the Flavorful Loaded Vegetarian Black Bean Burgers as a wholesome alternative meal.
Conclusion
This Easy 7-Day Sourdough Starter from Scratch Guide is more than just a how-to; it’s an invitation to slow down, nurture, and enjoy the quiet joy of baking from scratch. You don’t need fancy ingredients or equipment — just patience, a little daily care, and a willingness to watch something small grow into something delicious.
Whether you’re a novice baker or someone looking to reclaim the art of homemade bread, this starter is your trusty companion. I love this recipe because it feels like a gentle project that rewards you with the best homemade loaves — crusty on the outside and tender on the inside.
Give it a try, tweak it to your kitchen’s rhythm, and soon you’ll have a bubbling jar of starter that’s ready to bring that unmistakable sourdough magic to your table. And if you feel inspired to celebrate your baking success, pairing your bread with a sweet treat like the Easy One-Bowl Loaded Strawberry Cake Mix might just be the perfect ending.
FAQs
How do I know if my sourdough starter is ready to use?
When your starter consistently doubles in size within 4 to 6 hours after feeding and passes the float test (a spoonful floats in water), it’s ready for baking.
Can I use tap water to feed my starter?
Tap water often contains chlorine, which can inhibit fermentation. It’s best to use filtered, bottled, or boiled and cooled water for best results.
What if my starter smells bad or moldy?
A healthy starter should smell tangy or slightly yeasty. If you notice pink, orange, or fuzzy mold, discard the starter and begin again. A strong, unpleasant smell usually means it needs more frequent feedings.
How often should I feed my sourdough starter?
At room temperature, feed your starter once or twice daily. If refrigerated, feed it about once a week and bring it back to room temperature before baking.
Can I use whole wheat or rye flour to start my sourdough?
Yes! Incorporating whole wheat or rye flour can boost the fermentation process and add deeper flavor. You can substitute 25-50% of the flour with these varieties during feedings.
Pin This Recipe!
Easy 7-Day Sourdough Starter from Scratch Guide for Perfect Homemade Bread
This guide provides a simple, step-by-step method to create a lively sourdough starter using just flour and water over 7 days, perfect for beginners and seasoned bakers alike.
- Prep Time: 5 minutes (initial mixing on Day 1)
- Cook Time: 0 minutes (starter development time is 7 days)
- Total Time: 7 days
- Yield: 1 active sourdough starter jar (about 1 quart)
- Category: Bread Starter
- Cuisine: Universal
Ingredients
- Unbleached all-purpose flour (about 120 grams or 1 cup per feeding)
- Filtered or bottled water (120 ml or about ½ cup per feeding), room temperature
- Optional: Whole wheat or rye flour for occasional feedings
- Optional: Rubber band or piece of tape to mark starter rise
Instructions
- Day 1: Mix ½ cup (60 g) unbleached all-purpose flour with ½ cup (120 ml) filtered room-temperature water in a clean glass jar. Stir until no dry flour remains. Cover loosely and leave at room temperature for 24 hours.
- Day 2: Check for bubbles. Stir once to incorporate air. Discard half the starter (about ½ cup), then feed with ½ cup (60 g) flour and ½ cup (120 ml) water. Stir, cover, and rest for 24 hours.
- Day 3: Look for activity such as bubbles and tangy smell. Repeat discard and feeding process from Day 2. If kitchen is cool, allow more time but feed daily.
- Day 4: If starter is very bubbly and doubling in size within 6-8 hours, feed twice daily (morning and night) by discarding half and adding equal parts flour and water.
- Day 5: Check consistency; starter should rise and fall predictably and smell pleasantly sour. Adjust feeding amounts if too liquid or stiff.
- Day 6: Perform float test by dropping a spoonful of starter in water; if it floats, it is ready to bake with. If not, continue feeding.
- Day 7: Starter is ready when it consistently doubles in size within 4-6 hours and passes the float test. Use for baking your favorite bread recipes.
Notes
Keep starter at room temperature (70-75°F). Use filtered or bottled water to avoid chlorine. Feed starter consistently at same times daily. Discard half before feeding to maintain acidity balance. Avoid metal utensils. If kitchen is cold, place jar in a warm spot. Do not seal jar tightly; allow airflow.
Nutrition
- Serving Size: Starter amount used
- Calories: 100
- Carbohydrates: 22
- Fiber: 1
- Protein: 3
Keywords: sourdough starter, homemade bread, bread starter, sourdough, baking, fermentation, wild yeast, beginner bread recipe


