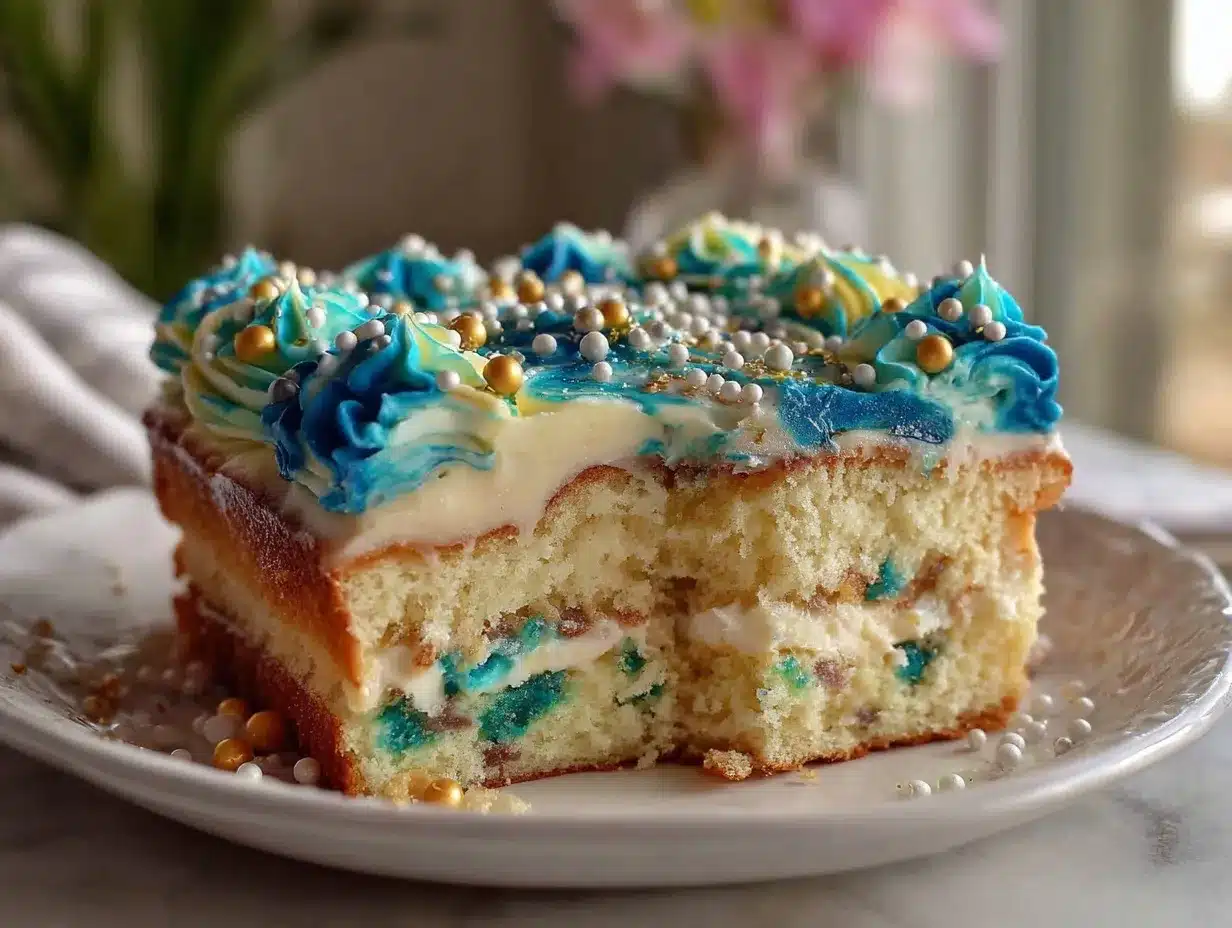
“Hey, do you think we can make the cake in school colors this year?” That text popped up from my niece just a few days before her graduation party. Honestly, I was already juggling a million things, so I wasn’t sure how to pull off a cake that looked both festive and delicious without turning it into a full baking marathon. But then I remembered this “perfect graduation sheet cake with vibrant school colors frosting” I’d fussed over last year for a similar celebration. It wasn’t fancy or over-the-top, just a moist, tender sheet cake with frosting that truly popped—like the kind that makes you stop mid-conversation and say, “Wow, you made this?”
That moment of surprise and delight is why this cake stuck with me. It’s not just about the flavors but the colors that bring a burst of joy to the party table and the ease that lets you focus on celebrating rather than stressing. The frosting’s vibrant hues are playful but never messy, and the cake base is forgiving enough for even a late-night solo baker to nail it. I’m telling you, this recipe became my go-to when I needed a quick, crowd-pleasing dessert that felt personalized and special.
What’s funny is how the frosting colors remind me of the cheerful chaos of graduation day—the caps flying, the cheers, the proud smiles. And every time I make this cake, I get a little nostalgic, thinking about all those moments of accomplishment wrapped up in a sweet bite. It’s become more than just a dessert; it’s a small celebration in itself.
Why You’ll Love This Recipe
This perfect graduation sheet cake with vibrant school colors frosting isn’t just another dessert; it’s a recipe born from real moments and tested by many celebrations. Having made it several times over, I can say it reliably delivers on taste, looks, and ease. Here’s why it’s worth your time:
- Quick & Easy: Ready in under 1 hour, including frosting, which is a lifesaver on busy graduation days or last-minute parties.
- Simple Ingredients: No need for specialty stores—pantry staples like all-purpose flour, sugar, and butter create a classic but moist cake base.
- Perfect for Celebrations: Whether it’s a graduation, a school event, or a themed party, the customizable school colors frosting makes it stand out.
- Crowd-Pleaser: Kids and adults alike keep coming back for seconds—there’s something about the fluffy frosting and tender crumb combo that hits the spot.
- Unbelievably Delicious: The frosting isn’t just colorful; it’s creamy, with a balanced sweetness that complements the cake’s subtle vanilla notes.
This isn’t your run-of-the-mill sheet cake. The frosting technique uses a simple approach to achieve those bright, clean color swirls without bleeding—something I learned after a few trial runs (and frosting mishaps!). The cake itself stays moist for days, so you can prep ahead and focus on the party prep instead. Honestly, it’s the kind of recipe that made me rethink how I approach celebratory desserts—fun, fast, and festive all at once.
What Ingredients You Will Need
This recipe uses simple, wholesome ingredients to deliver bold flavor and a satisfying texture without fuss. Most of these are staples you probably have on hand, with a few additions for the frosting’s vibrant hues.
- For the Cake:
- 2 ½ cups (315 g) all-purpose flour
- 2 ½ tsp baking powder
- ½ tsp baking soda
- ½ tsp salt
- 1 cup (227 g) unsalted butter, softened (I prefer Land O’Lakes for a creamy texture)
- 1 ¾ cups (350 g) granulated sugar
- 4 large eggs, room temperature
- 1 tbsp vanilla extract (pure is best for flavor depth)
- 1 cup (240 ml) buttermilk, room temperature (adds tenderness and moisture)
- For the Vibrant School Colors Frosting:
- 1 cup (227 g) unsalted butter, softened
- 4 cups (480 g) powdered sugar, sifted
- 4 tbsp (60 ml) whole milk or heavy cream (adjust for consistency)
- 1 tsp vanilla extract
- Gel food coloring in your school’s colors (I recommend AmeriColor gels for bright, true hues)
Some tips on ingredients: For a dairy-free option, swap buttermilk for almond milk mixed with 1 tbsp lemon juice, and use dairy-free margarine for the butter. If you’re aiming for gluten-free, almond or oat flour can work, but the texture will shift a bit—still tasty, just different. The gel food coloring is key here because liquid colors can make the frosting runny and dull the vibrancy.
Equipment Needed
- 9×13-inch (23×33 cm) baking sheet or pan – a standard size that fits most ovens and makes serving easy
- Electric mixer or stand mixer – for smooth, creamy frosting and well-mixed batter
- Mixing bowls – ideally one large for batter and one for frosting
- Rubber spatula – great for folding ingredients and scraping bowls
- Offset spatula or butter knife – for spreading frosting evenly
- Measuring cups and spoons – accuracy here matters for texture
- Cooling rack – helps the cake cool evenly and prevents sogginess
If you don’t have a stand mixer, a handheld mixer works just fine—I’ve used both. For frosting, a bench scraper can help smooth the surface perfectly, but an offset spatula does the trick for most home bakers. Don’t skip the cooling rack; letting the cake cool fully before frosting prevents melting and sliding.
Preparation Method
- Preheat and Prep: Set your oven to 350°F (175°C). Grease the 9×13-inch pan with butter or non-stick spray, then lightly dust with flour or line with parchment paper for easier cleanup. This takes about 10 minutes.
- Mix Dry Ingredients: In a medium bowl, whisk together the flour, baking powder, baking soda, and salt. This ensures even distribution and helps the cake rise evenly. Set aside.
- Cream Butter and Sugar: Using your electric mixer, beat the softened butter and granulated sugar on medium speed until light and fluffy—about 3 to 5 minutes. This step is crucial for a tender crumb. The mixture should look pale and slightly fluffy.
- Add Eggs and Vanilla: Beat in the eggs one at a time, mixing well after each addition. Then stir in the vanilla extract. The batter might look slightly curdled, but that’s normal.
- Alternate Adding Dry Ingredients and Buttermilk: Reduce mixer speed to low. Add one-third of the dry ingredients, then half the buttermilk. Repeat, ending with the dry ingredients. Mix just until combined—overmixing can make the cake tough. This step takes about 5 minutes.
- Pour and Smooth: Transfer the batter to the prepared pan. Use a spatula to spread it evenly, smoothing the top. Tap the pan gently on the counter to remove air bubbles.
- Bake: Place the pan in the oven and bake for 35-40 minutes. Start checking around 32 minutes by inserting a toothpick into the center. It should come out clean or with a few moist crumbs.
- Cool Completely: Let the cake cool in the pan for 15 minutes, then transfer to a cooling rack to cool fully before frosting. This step is key to prevent frosting meltdown, so patience here really pays off.
- Prepare Frosting: Beat the softened butter until creamy, about 2 minutes. Gradually add powdered sugar, one cup at a time, mixing on low speed. Add milk and vanilla, then increase speed to medium-high and beat until fluffy, about 3-4 minutes.
- Color the Frosting: Divide the frosting into separate bowls depending on how many school colors you want to use. Add gel food coloring a little at a time until you achieve vibrant shades. Remember, gel colors are super concentrated, so a little goes a long way!
- Apply Frosting: Start with a thin crumb coat layer of white or neutral frosting and chill for 15 minutes. Then use an offset spatula or piping bags to spread or pipe the colorful frosting in stripes, swirls, or blocks—whatever style fits your vibe. This part is fun and personal!
- Final Chill: Refrigerate the cake for at least 30 minutes to set the frosting before serving. This helps keep the colors crisp and the frosting firm.
A quick note: If your frosting feels too stiff, add a splash more milk. If too soft, add powdered sugar gradually. Also, be careful not to overbake the cake—dry sheet cakes are a bummer (I’ve learned that the hard way!).
Cooking Tips & Techniques
Here’s what I’ve picked up after a few rounds with this recipe that might save you from kitchen headaches:
- Room Temperature Ingredients: Butter, eggs, and buttermilk at room temp mix more smoothly, giving you that tender texture. Cold ingredients cause lumps or uneven baking.
- Don’t Overmix: Once you add flour, mix just until combined. Overmixing activates gluten, making the cake dense instead of light and fluffy.
- Gel vs. Liquid Color: Gel food coloring is a game changer here. Liquid dye can thin out the frosting, dulling the colors and texture.
- Frosting Consistency: If your frosting is too soft to hold shape, chill it for 10 minutes and then try again. Alternatively, add a bit more powdered sugar to stiffen it up.
- Chilling Between Layers: A quick chill after the crumb coat makes the final frosting layer neater and prevents crumbs from mixing in.
- Multitasking Tip: While the cake bakes, start preparing your frosting colors. This cuts down total prep time and keeps things moving smoothly.
- Personal Fail: I once skipped the crumb coat and ended up with crumb specks in my frosting—lesson learned the sticky way!
Variations & Adaptations
This cake is a great canvas for different tweaks depending on your needs or flavor cravings.
- Flavor Twists: Add a teaspoon of almond or coconut extract to the batter for a subtle change. For a chocolate version, swap out ½ cup flour for cocoa powder and add mini chocolate chips.
- Frosting Alternatives: Try cream cheese frosting for a tangy contrast to the sweet cake. You can still tint it with gel colors for that vibrant look.
- Dietary Adjustments: Gluten-free bakers can use a 1-to-1 gluten-free flour blend. For dairy-free, almond or oat milk and vegan butter work well, though the texture shifts slightly.
- Decorating Styles: Instead of stripes, pipe polka dots or ombré fades in your school colors. You can even add edible glitter or sprinkles for extra festivity.
- Personal Variation: One year, I swapped half the sugar for brown sugar, giving the cake a deeper caramel note that paired beautifully with the bright frosting.
Serving & Storage Suggestions
This sheet cake is best served at room temperature so the frosting is soft and creamy, and the cake is tender. It pairs wonderfully with a fresh fruit salad or a cold glass of milk for a classic combo.
For storage, cover the cake loosely with plastic wrap or store it in an airtight container. It keeps well in the refrigerator for up to 4 days. If you want to keep it longer, wrap tightly and freeze for up to 2 months. When ready to serve, thaw in the fridge overnight and bring to room temperature before slicing.
Reheating isn’t usually necessary, but if you want to warm a slice, microwave it for 10-15 seconds to soften the cake and frosting slightly—just don’t overdo it or the frosting will melt.
Flavors tend to deepen after a day, so sometimes I make this cake a day ahead to let the vanilla and buttery notes settle beautifully.
Nutritional Information & Benefits
Estimated per serving (based on 12 servings):
| Calories | 340 |
|---|---|
| Fat | 18g |
| Carbohydrates | 44g |
| Protein | 4g |
This recipe offers a classic sweet treat, with butter and buttermilk providing richness and tenderness. Using real butter adds vitamin A and healthy fats, while the buttermilk contributes calcium and protein. For those mindful of dietary restrictions, the recipe can be adapted gluten-free or dairy-free as mentioned.
It’s definitely an indulgence, but one that brings joy and comfort, which is part of the whole celebration experience. Moderation and sharing make it a sweet memory without guilt.
Conclusion
This perfect graduation sheet cake with vibrant school colors frosting has become a staple for marking special moments with a touch of sweetness and color. It’s approachable for any home baker and customizable enough to fit your style, whether you’re sticking to classic vanilla or mixing in your own twists. I love how it brings people together around the table, sparking smiles as much as compliments.
Feel free to tweak the frosting shades or try different flavors to make it your own—it’s meant to celebrate your graduate and your kitchen creativity. I’d love to hear how yours turns out or any fun variations you try!
So go ahead—grab your mixing bowl, pick those school colors, and make a cake that’s as memorable as the day itself. Don’t forget to share your experience or photos; I’m always excited to see your baking stories.
Frequently Asked Questions
Can I make this cake a day ahead?
Absolutely! Bake and frost the cake the day before. Store it covered at room temperature or in the fridge to keep it fresh.
What’s the best way to get vibrant frosting colors?
Use gel food coloring rather than liquid. Gel colors are more concentrated and won’t thin your frosting or dull the brightness.
Can I freeze this sheet cake?
Yes, wrap the frosted cake tightly in plastic wrap and foil, then freeze up to 2 months. Thaw overnight in the fridge before serving.
How do I avoid crumbs in my frosting?
Apply a thin crumb coat layer of frosting first and chill the cake for 15 minutes before adding the final frosting layer. This traps crumbs and keeps the surface smooth.
Can I substitute buttermilk?
Yes, mix 1 cup of milk with 1 tablespoon of lemon juice or white vinegar and let it sit 5-10 minutes to mimic buttermilk’s acidity and moisture.
For a festive twist, you might enjoy pairing this cake with a fruity dessert like the easy one bowl loaded strawberry cake, which also brings bright flavors and simple prep to the table. Or, if you’re planning a full celebration spread, the comforting Midwest loaded walking taco casserole is a crowd-pleasing savory option that pairs nicely with sweet treats like this sheet cake.
Pin This Recipe!
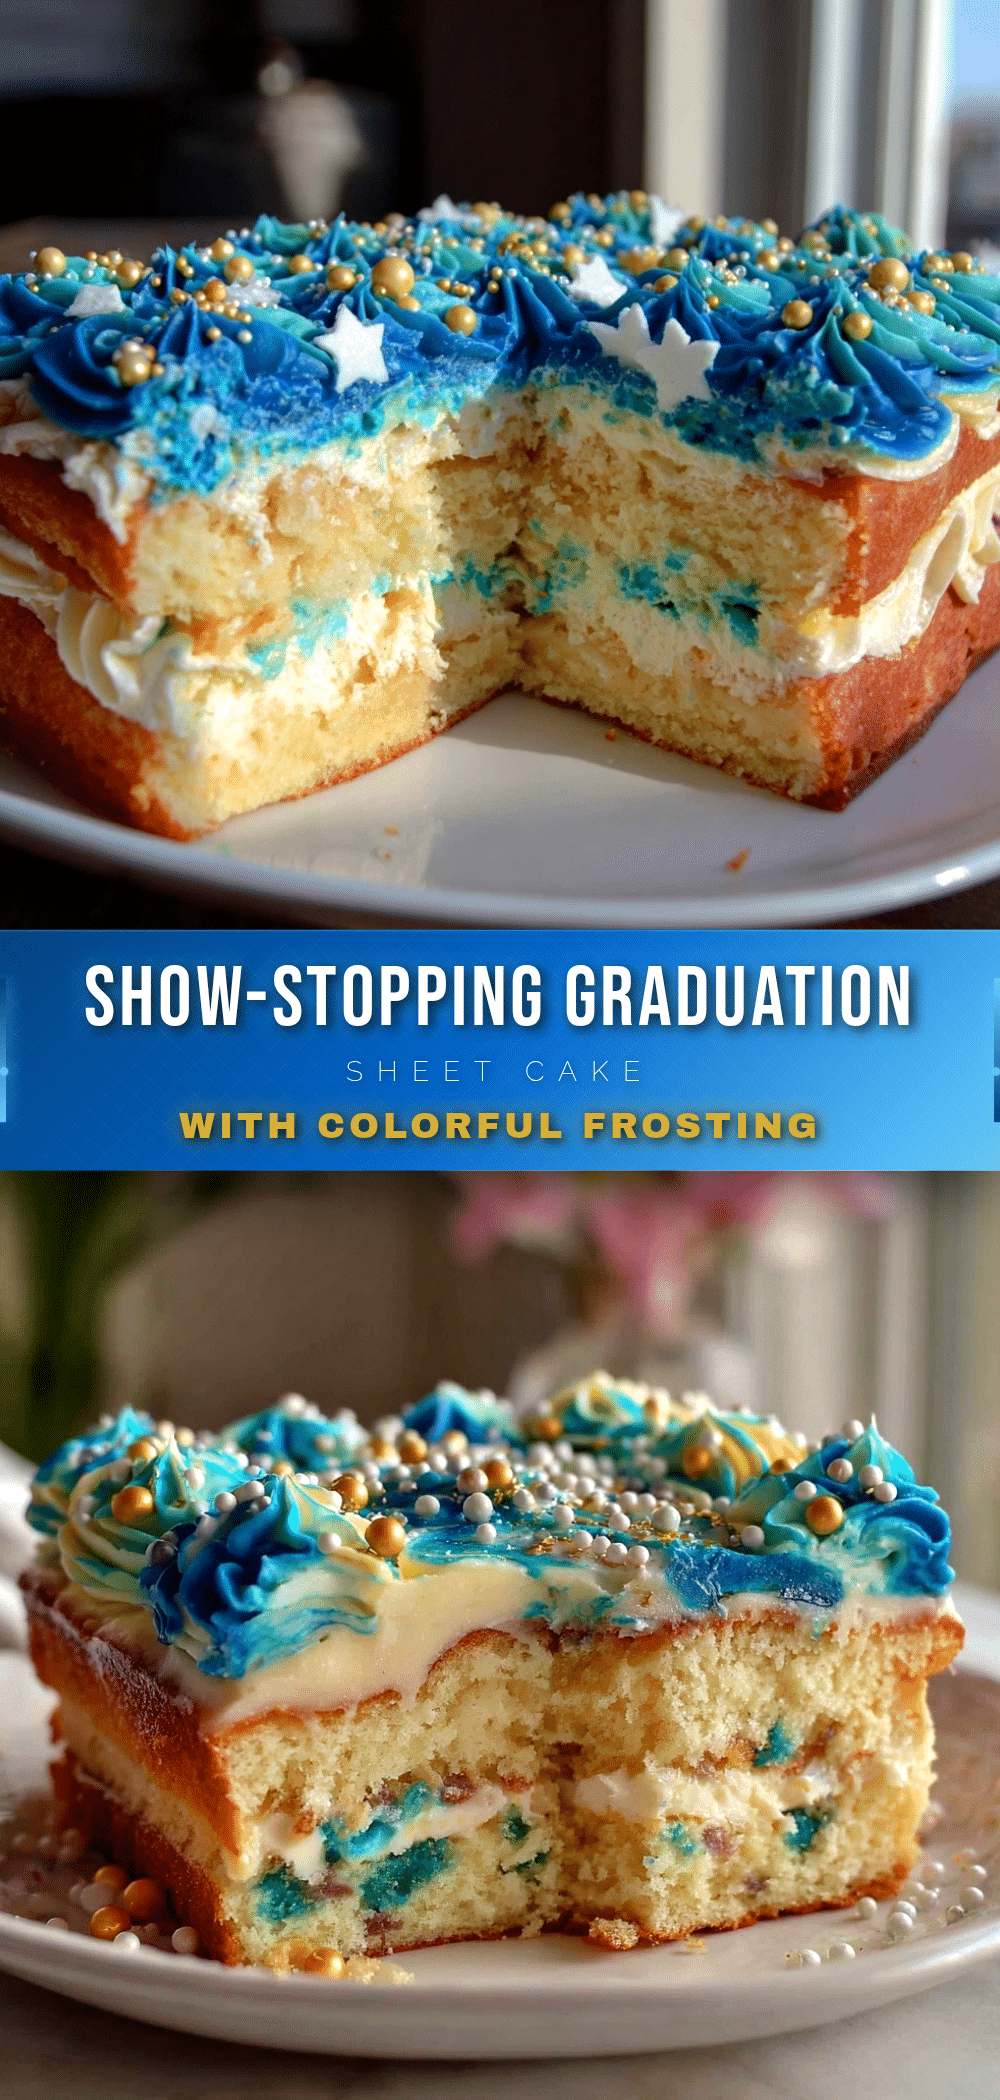
Perfect Graduation Sheet Cake with Vibrant School Colors Frosting
A moist, tender sheet cake topped with creamy, colorful frosting in vibrant school colors, perfect for graduation celebrations and easy to make under an hour.
- Prep Time: 20 minutes
- Cook Time: 40 minutes
- Total Time: 1 hour
- Yield: 12 servings 1x
- Category: Dessert
- Cuisine: American
Ingredients
- 2 1/2 cups (315 g) all-purpose flour
- 2 1/2 tsp baking powder
- 1/2 tsp baking soda
- 1/2 tsp salt
- 1 cup (227 g) unsalted butter, softened
- 1 3/4 cups (350 g) granulated sugar
- 4 large eggs, room temperature
- 1 tbsp vanilla extract
- 1 cup (240 ml) buttermilk, room temperature
- 1 cup (227 g) unsalted butter, softened (for frosting)
- 4 cups (480 g) powdered sugar, sifted
- 4 tbsp (60 ml) whole milk or heavy cream
- 1 tsp vanilla extract (for frosting)
- Gel food coloring in your school’s colors
Instructions
- Preheat oven to 350°F (175°C). Grease a 9×13-inch pan with butter or non-stick spray and lightly dust with flour or line with parchment paper.
- In a medium bowl, whisk together flour, baking powder, baking soda, and salt. Set aside.
- Using an electric mixer, beat softened butter and granulated sugar on medium speed until light and fluffy, about 3 to 5 minutes.
- Beat in eggs one at a time, mixing well after each addition. Stir in vanilla extract.
- Reduce mixer speed to low. Add one-third of dry ingredients, then half the buttermilk. Repeat, ending with dry ingredients. Mix just until combined.
- Pour batter into prepared pan and smooth the top. Tap pan gently to remove air bubbles.
- Bake for 35-40 minutes, checking at 32 minutes with a toothpick; it should come out clean or with a few moist crumbs.
- Cool cake in pan for 15 minutes, then transfer to a cooling rack to cool completely before frosting.
- For frosting, beat softened butter until creamy, about 2 minutes. Gradually add powdered sugar, one cup at a time, mixing on low speed.
- Add milk and vanilla extract, then beat on medium-high speed until fluffy, about 3-4 minutes.
- Divide frosting into separate bowls and add gel food coloring to achieve vibrant shades.
- Apply a thin crumb coat layer of white or neutral frosting and chill for 15 minutes.
- Use an offset spatula or piping bags to spread or pipe colorful frosting in desired patterns.
- Refrigerate cake for at least 30 minutes to set frosting before serving.
Notes
Use gel food coloring for vibrant frosting colors to avoid runny or dull frosting. Chill the crumb coat before applying final frosting to prevent crumbs. Room temperature ingredients ensure smooth mixing and tender texture. Avoid overmixing after adding flour to keep cake light and fluffy. The cake keeps well refrigerated for up to 4 days and can be frozen for up to 2 months.
Nutrition
- Serving Size: 1 slice (1/12 of cak
- Calories: 340
- Fat: 18
- Carbohydrates: 44
- Protein: 4
Keywords: graduation cake, sheet cake, school colors frosting, easy cake recipe, colorful frosting, celebration cake, vanilla sheet cake