Scrambling through the kitchen with three different things burning, a toddler tugging at my pants, and a phone ringing off the hook when I realized the dessert I planned for the big family BBQ was nowhere to be found. Half the ingredients were missing, and the clock was mercilessly ticking down to guests arriving. Somehow, in that mess, this show-stopping red velvet flag cake with cream cheese frosting was born — not from perfection, but from sheer necessity and a stubborn refusal to serve anything less than memorable. The rich red velvet layers, the tangy cream cheese frosting, and that striking flag design that somehow came together despite the chaos? Yeah, it’s become my go-to crowd-pleaser for when I want to impress but can’t be bothered with anything complicated.
Honestly, this recipe stuck with me because it’s the kind of cake that looks like you spent hours perfecting it, but it’s actually straightforward enough for a frazzled cook like me to pull off on a whim. The cream cheese frosting isn’t just a topping here — it’s the soul of the cake, balancing the sweet with that subtle tang, smoothing out every bite. I remember the first time I made this, I was skeptical, thinking, “flags and cakes? Really?” But it turns out, the visual wow factor pairs perfectly with the classic flavors we all love.
So, if you want a dessert that brings a little bit of celebration, a little bit of nostalgia, and a whole lot of deliciousness, this red velvet flag cake with cream cheese frosting might just be the recipe you didn’t know you needed — especially when time’s tight and you want to truly impress without the stress.
Why You’ll Love This Show-Stopping Red Velvet Flag Cake Recipe
After testing this cake recipe through several family gatherings and even a few potluck disasters, I can say with confidence this flag cake is a keeper. Here’s why:
- Quick & Easy: This cake comes together in under 90 minutes from start to finish, making it perfect for last-minute celebrations or when you’re juggling a million things.
- Simple Ingredients: You likely have everything you need already — basic pantry staples plus cream cheese and buttermilk for that classic red velvet tang.
- Perfect for Patriotic Occasions: Whether it’s July 4th, Memorial Day, or a family reunion, this cake’s flag design brings the festive spirit right to your table.
- Crowd-Pleaser: Kids and adults alike rave about the moist cake and creamy frosting combo — it’s a real mood lifter on any dessert table.
- Unbelievably Delicious: The red velvet’s subtle cocoa flavor combined with the smooth, tangy cream cheese frosting delivers that perfect balance of sweet and rich.
What makes this red velvet flag cake stand out? It’s all about the layering and the frosting technique — I blend the cream cheese frosting until ultra-smooth, ensuring it spreads like a dream, which is key for making that flag pattern crisp and vibrant. Plus, the cake layers stay moist but firm enough to hold their shape, which means no messy sagging or crumbling when you slice it up. This isn’t just a red velvet cake; it’s a statement piece that tastes as fantastic as it looks.
There’s something special about serving a dessert that makes people pause, snap photos, and then dig in with genuine smiles. That’s the kind of moment this cake delivers, every single time.
What Ingredients You Will Need
This recipe uses simple, wholesome ingredients that come together to deliver bold flavor and a satisfying texture without the fuss. Most are pantry staples, with a couple of fresh or dairy items that give this cake its classic charm.
- For the Red Velvet Cake Layers:
- 2 ½ cups (320g) all-purpose flour (for the perfect structure)
- 1 ½ cups (300g) granulated sugar
- 1 teaspoon baking soda
- 1 teaspoon fine salt
- 1 teaspoon unsweetened cocoa powder (don’t skip this — it adds that subtle chocolate hint)
- 1 ½ cups (360ml) buttermilk, room temperature (for moist, tender crumb)
- 1 ½ cups (360ml) vegetable oil or canola oil
- 2 large eggs, room temperature
- 2 tablespoons (30ml) red food coloring (gel works best for vibrant color without extra liquid)
- 1 teaspoon pure vanilla extract
- 1 teaspoon distilled white vinegar (helps react with baking soda for lift)
- For the Cream Cheese Frosting:
- 16 ounces (450g) cream cheese, softened (I prefer Philadelphia for consistent texture)
- ½ cup (115g) unsalted butter, softened
- 4 cups (500g) powdered sugar, sifted (adjust for sweetness and consistency)
- 1 teaspoon pure vanilla extract
- Pinch of salt (balances sweetness)
- For the Flag Decoration:
- Fresh blueberries (for the blue field)
- Additional cream cheese frosting for piping the white stripes
If you want to swap buttermilk for a dairy-free option, mix 1 ½ cups milk with 1 ½ tablespoons lemon juice and let it sit for 5 minutes — works like a charm. For gluten-free, almond flour could be experimented with, but keep in mind the texture will differ. The red gel food coloring is key here; liquid dyes can make the batter runny and impact how the layers bake.
Equipment Needed
- Two 9-inch (23cm) round cake pans — I like using non-stick or well-greased metal pans for even baking.
- Mixing bowls (one large for the batter, one for the frosting)
- Electric mixer or stand mixer — cream cheese frosting blends best with a paddle attachment.
- Rubber spatula for folding and scraping bowls clean.
- Cooling racks to let your cake layers cool completely before frosting.
- Offset spatula or butter knife for spreading frosting evenly — an offset spatula makes the flag stripes easier.
- Piping bag with a small round tip (optional) for neat white stripes.
- Measuring cups and spoons for precise ingredient amounts.
If you don’t have a stand mixer, a sturdy hand mixer works fine — just be sure the cream cheese and butter are properly softened to avoid lumps. For piping the stripes, you can also use a simple zip-top bag with the corner snipped off. I’ve found that a good cooling rack is a small but mighty investment; it helps keep the cake from getting soggy on the bottom.
Preparation Method
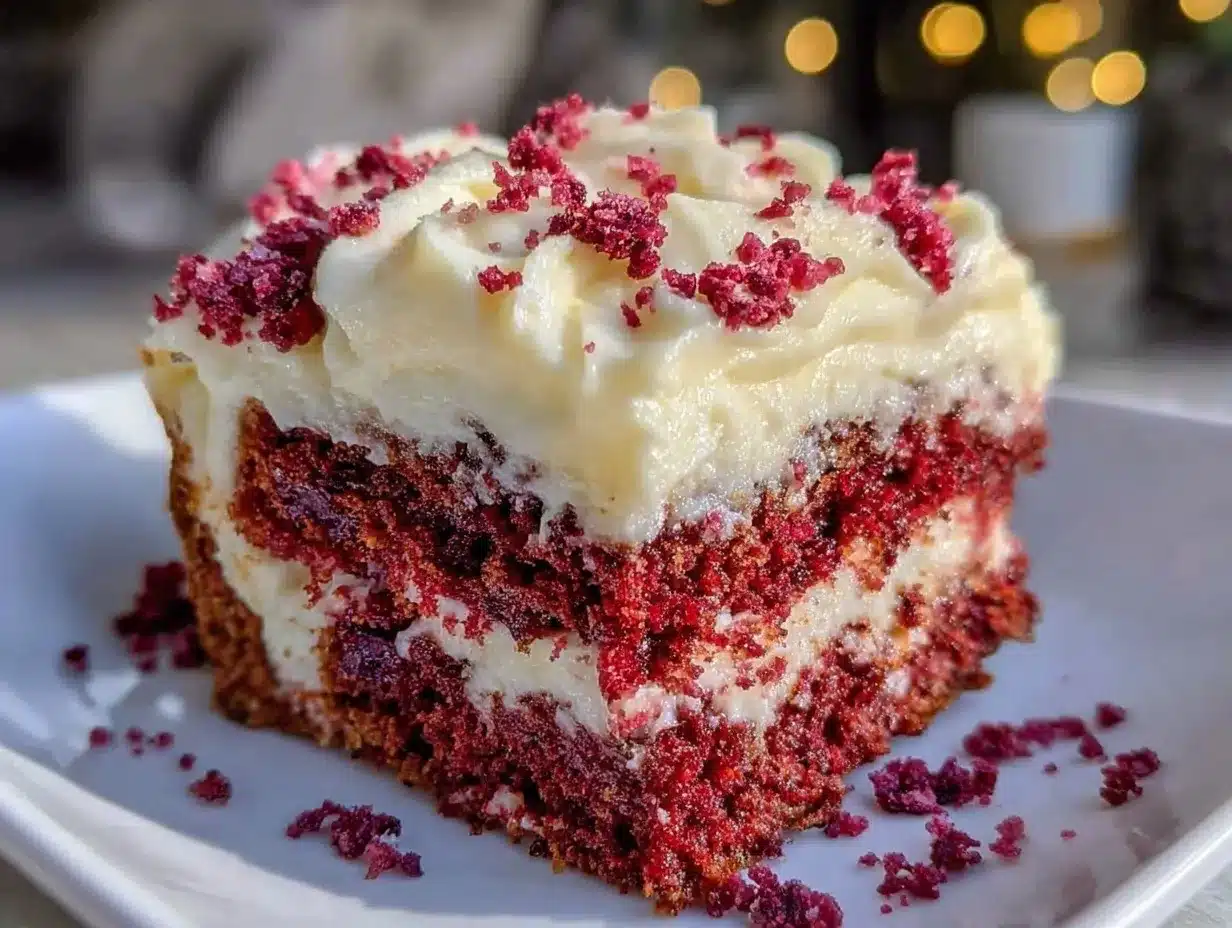
- Preheat your oven to 350°F (175°C). Grease and flour two 9-inch round cake pans or line them with parchment paper for easy removal. This step’s important to prevent sticking, especially with the rich red batter.
- Mix dry ingredients: In a large bowl, sift together the flour, sugar, baking soda, salt, and cocoa powder. Whisk to combine evenly — this ensures your cake layers bake uniformly without clumps.
- Combine wet ingredients: In a separate bowl, whisk the buttermilk, vegetable oil, eggs, red food coloring, vanilla extract, and vinegar until fully blended. The vinegar and buttermilk work their magic here to give the cake its signature tender crumb and slight tang.
- Incorporate wet and dry: Slowly pour the wet mixture into the dry ingredients while mixing on low speed with your electric mixer. Beat just until smooth and combined — overmixing can make the cake tough, so stop as soon as the batter is uniform and velvety.
- Divide batter evenly: Pour half the batter into each prepared pan. Tap the pans gently on the counter to release any air bubbles. This helps the cake bake evenly and prevents weird holes.
- Bake: Place pans in the oven and bake for 25 to 30 minutes, or until a toothpick inserted in the center comes out clean. Baking times vary, so start checking at 25 minutes to avoid overbaking, which dries the cake out.
- Cool: Let the cakes cool in the pans for 10 minutes, then turn out onto wire racks to cool completely before frosting. This is crucial — frosting warm cakes melts the cream cheese frosting and makes a mess.
- Prepare the frosting: Beat the softened cream cheese and butter together until smooth and creamy, about 2-3 minutes. Gradually add the sifted powdered sugar, mixing on low speed until combined, then increase speed to medium and beat for another 2-3 minutes. Add vanilla and salt, and taste-test for balance — add more powdered sugar if you want it sweeter or thicker.
- Assemble the cake: Place one cake layer on your serving plate. Spread a generous layer of cream cheese frosting on top. Carefully place the second cake layer on top.
- Create the flag design: Spread a smooth layer of frosting over the entire cake. Use an offset spatula to smooth the top and sides. To make the blue field, frost a square area on the top-left corner and press fresh blueberries into the frosting in neat rows. Then, pipe or spread white frosting stripes across the rest of the cake horizontally. Alternating red velvet cake shows through where you leave stripes thin or space them carefully.
- Chill: Refrigerate the cake for at least 30 minutes before serving so the frosting sets up nicely and the flavors meld.
Pro tip: If you want your frosting extra smooth for piping, beat it a little longer and keep a spatula handy to scrape down the bowl often. Also, if your cream cheese isn’t softened enough, you’ll end up with lumps, so plan ahead. The flag design takes a bit of patience, but it’s worth it for the “wow” moment.
Cooking Tips & Techniques
From my experience, the key to a killer red velvet flag cake is in the details. Here are some lessons I learned the hard way:
- Don’t skip sifting dry ingredients: It helps keep the batter light and avoids clumps of cocoa or baking soda that can ruin the crumb.
- Use gel food coloring: It’s concentrated and doesn’t affect batter consistency like liquid dyes do. That brighter red really makes the flag pop.
- Softened cream cheese and butter are non-negotiable for smooth frosting: I’ve ruined batches just because the cream cheese was too cold. Leave it out for at least an hour before mixing.
- For even layers, weigh your batter: If you want to get fancy, use a kitchen scale for equal amounts in each pan. It’s a small step that pays off in presentation.
- Don’t overbake: Check your cakes early and often. Nothing sadder than a dry red velvet cake.
- Keep your frosting cold while decorating: If your kitchen is warm, the frosting can get too soft to pipe clean stripes. Pop it into the fridge for 10 minutes if it gets too runny.
- Multitasking tip: While the cake bakes, whip up the frosting and prep your blueberries so you can assemble the moment the cakes are cool.
Also, I once tried making this cake without vinegar and buttermilk — the texture was off and the color dull. Those two ingredients are the unsung heroes of authentic red velvet. Trust me, they’re worth the extra step.
Variations & Adaptations
Want to customize your red velvet flag cake? Here are a few ideas I’ve played with that worked beautifully:
- Gluten-Free Version: Swap the all-purpose flour for a 1:1 gluten-free baking mix. The texture changes a bit but still delivers on flavor.
- Dairy-Free Adaptation: Use dairy-free cream cheese and coconut milk-based buttermilk substitute. The frosting might be slightly thinner but still tasty.
- Mini Flag Cupcakes: Make this recipe into individual cupcakes, decorating each with a small flag pattern. This is a fun twist for parties — I’ve shared a perfect individual flag cupcakes recipe that’s a breeze.
- Berry Variations: In place of blueberries, try fresh blackberries or raspberries for the blue field. Or swap the cream cheese frosting for a whipped mascarpone topping for a lighter finish.
- Chocolate Red Velvet: Add an extra tablespoon of cocoa powder for a deeper chocolate punch. Just be sure to balance with a little more sugar.
Last summer, I even tried layering this cake with a homemade strawberry jam swirl between the layers, inspired by the easy one bowl strawberry cake I love. It brought a subtle fruity surprise that everyone adored.
Serving & Storage Suggestions
This red velvet flag cake is best served chilled or at room temperature to let the flavors shine. I like to slice it into generous wedges and serve alongside a cup of strong coffee or a glass of cold milk — honestly, it’s a match made in dessert heaven.
For storage, keep the cake in an airtight container in the refrigerator. It stays fresh for up to 4 days, though I doubt it lasts that long in my house! You can freeze it for up to 2 months by wrapping it tightly in plastic wrap and foil — thaw overnight in the fridge before serving.
Reheating is not really necessary, but if you prefer softer frosting, leave slices at room temperature for 30 minutes before serving. The flavors of the cream cheese frosting mellow and meld beautifully after a day or two, so if you can wait, it’s actually better the next day.
For an impressive dessert spread, pair this cake with other classics like a warm skillet pie — the perfect cast iron loaded apple pie skillet complements the red velvet beautifully for a truly festive table.
Nutritional Information & Benefits
Estimated per serving (1 slice, based on 12 servings):
| Calories | 350-400 kcal |
|---|---|
| Fat | 18g |
| Carbohydrates | 48g |
| Protein | 4g |
| Sugar | 32g |
This cake isn’t a health food, but it includes some beneficial ingredients. The buttermilk provides calcium and protein, while cream cheese adds richness along with vitamin A. The cocoa powder offers antioxidants in small amounts. For those mindful of allergens, this recipe contains dairy, eggs, and gluten — but can be adapted for gluten-free or dairy-free diets with substitutions mentioned earlier.
From a wellness perspective, sometimes comfort food like this is exactly what you need to bring people together and make memories — and that’s priceless.
Conclusion
This show-stopping red velvet flag cake with cream cheese frosting is one of those rare recipes that combines visual wow-factor with classic, comforting flavor. It’s approachable enough for a busy parent or a distracted cook but special enough to become the centerpiece of any celebration. I love how it balances simplicity with style and how it always brings smiles around the table.
Feel free to make it your own — add your favorite berries, swap out the frosting, or try mini cupcakes for a fun twist. It’s your celebration, your cake. I can’t wait to hear how you put your spin on it!
If you’ve enjoyed this recipe, you might appreciate the easy charm of a one-bowl loaded strawberry cake mix recipe or the cozy vibe of a cracker barrel loaded peach cobbler to round out your dessert repertoire. Drop a comment below with your tweaks or questions — I love hearing from fellow dessert lovers!
Frequently Asked Questions
Can I make this red velvet flag cake ahead of time?
Absolutely! You can bake the cake layers a day in advance and store them wrapped tightly. Frost and decorate the day you plan to serve for the freshest look.
What if I don’t have buttermilk?
No worries — mix 1 ½ cups milk with 1 ½ tablespoons lemon juice or white vinegar and let it sit for 5 minutes. This homemade buttermilk substitute works perfectly.
How do I prevent cream cheese frosting from being too runny?
Make sure your cream cheese and butter are softened but not melted. Beat well and chill the frosting if your kitchen is warm before decorating.
Can I use this recipe to make cupcakes instead of a cake?
Yes! Bake the batter in cupcake liners for about 18-20 minutes. Decorate with small flag designs or simple frosting swirls.
Is there a way to make this cake less sweet?
You can reduce powdered sugar in the frosting slightly and balance with a pinch of salt. Just taste as you go to keep the frosting creamy and flavorful.
Pin This Recipe!
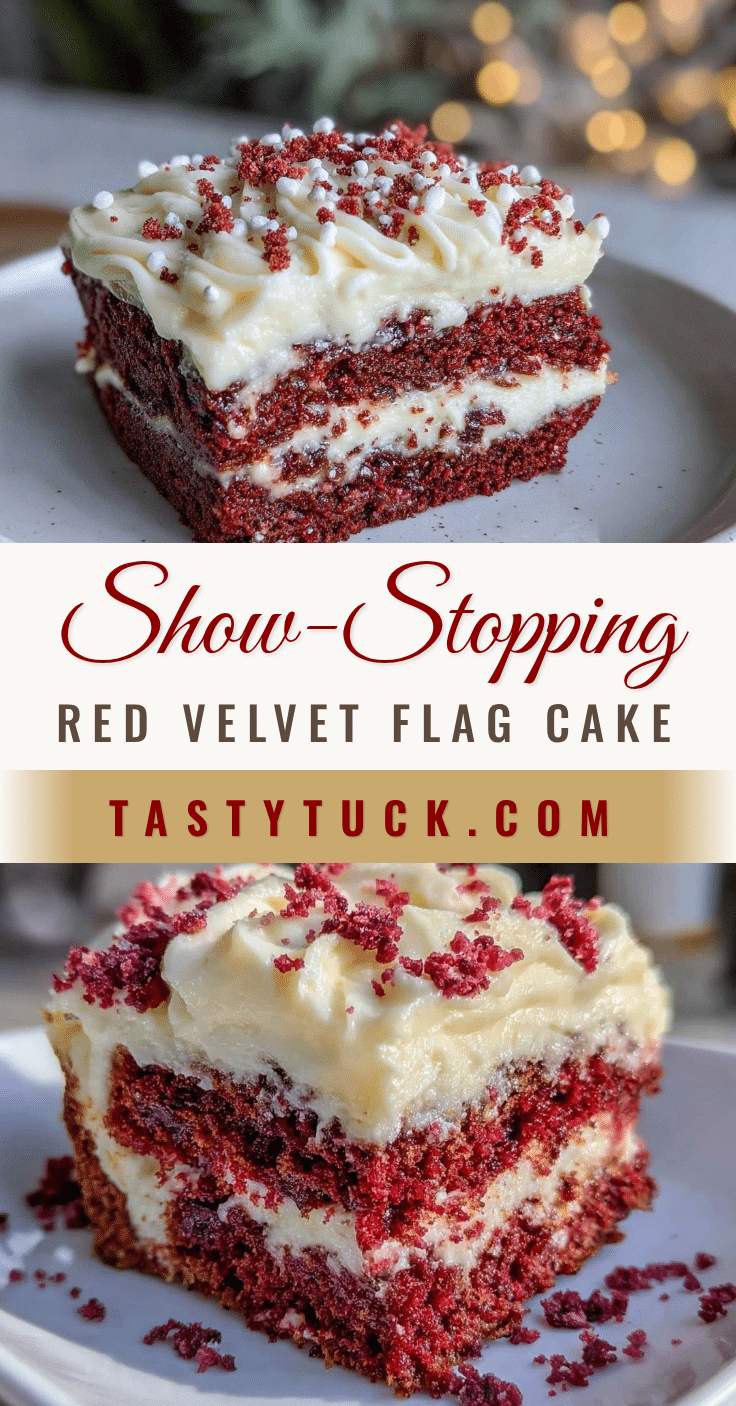
Show-Stopping Red Velvet Flag Cake Recipe Easy Homemade Cream Cheese Frosting
A quick and easy red velvet flag cake with tangy cream cheese frosting, perfect for patriotic occasions and last-minute celebrations. This cake combines moist red velvet layers with a smooth, tangy frosting and a striking flag design.
- Prep Time: 20 minutes
- Cook Time: 30 minutes
- Total Time: 50 minutes
- Yield: 12 servings 1x
- Category: Dessert
- Cuisine: American
Ingredients
- 2 ½ cups (320g) all-purpose flour
- 1 ½ cups (300g) granulated sugar
- 1 teaspoon baking soda
- 1 teaspoon fine salt
- 1 teaspoon unsweetened cocoa powder
- 1 ½ cups (360ml) buttermilk, room temperature
- 1 ½ cups (360ml) vegetable oil or canola oil
- 2 large eggs, room temperature
- 2 tablespoons (30ml) red food coloring (gel)
- 1 teaspoon pure vanilla extract
- 1 teaspoon distilled white vinegar
- 16 ounces (450g) cream cheese, softened
- ½ cup (115g) unsalted butter, softened
- 4 cups (500g) powdered sugar, sifted
- 1 teaspoon pure vanilla extract (for frosting)
- Pinch of salt (for frosting)
- Fresh blueberries (for the blue field)
- Additional cream cheese frosting for piping the white stripes
Instructions
- Preheat your oven to 350°F (175°C). Grease and flour two 9-inch round cake pans or line them with parchment paper.
- In a large bowl, sift together the flour, sugar, baking soda, salt, and cocoa powder. Whisk to combine evenly.
- In a separate bowl, whisk the buttermilk, vegetable oil, eggs, red food coloring, vanilla extract, and vinegar until fully blended.
- Slowly pour the wet mixture into the dry ingredients while mixing on low speed with your electric mixer. Beat just until smooth and combined.
- Pour half the batter into each prepared pan. Tap the pans gently on the counter to release any air bubbles.
- Bake for 25 to 30 minutes, or until a toothpick inserted in the center comes out clean.
- Let the cakes cool in the pans for 10 minutes, then turn out onto wire racks to cool completely before frosting.
- Beat the softened cream cheese and butter together until smooth and creamy, about 2-3 minutes. Gradually add the sifted powdered sugar, mixing on low speed until combined, then increase speed to medium and beat for another 2-3 minutes. Add vanilla and salt, and adjust sweetness if desired.
- Place one cake layer on your serving plate. Spread a generous layer of cream cheese frosting on top. Carefully place the second cake layer on top.
- Spread a smooth layer of frosting over the entire cake. Use an offset spatula to smooth the top and sides.
- Frost a square area on the top-left corner and press fresh blueberries into the frosting in neat rows to create the blue field.
- Pipe or spread white frosting stripes across the rest of the cake horizontally, leaving thin or spaced stripes so the red velvet cake shows through.
- Refrigerate the cake for at least 30 minutes before serving to set the frosting and meld flavors.
Notes
Use gel food coloring for vibrant red without affecting batter consistency. Soften cream cheese and butter well before making frosting to avoid lumps. Chill frosting if too soft while decorating. Weigh batter for even layers if possible. Do not overbake to keep cake moist. Homemade buttermilk substitute: mix 1 ½ cups milk with 1 ½ tablespoons lemon juice or vinegar and let sit 5 minutes.
Nutrition
- Serving Size: 1 slice (1/12 of cak
- Calories: 375
- Sugar: 32
- Sodium: 350
- Fat: 18
- Saturated Fat: 7
- Carbohydrates: 48
- Fiber: 1
- Protein: 4
Keywords: red velvet cake, flag cake, cream cheese frosting, patriotic dessert, easy cake recipe, 4th of July dessert, quick red velvet, homemade frosting


