“Are you sure this will work?” I asked, eyeing the layers of bright red cake batter carefully spooned into the rectangular pans. The Fourth of July was just hours away, and I had promised my neighbors a dessert that would really stand out at the block party. Honestly, I wasn’t even sure if my idea to turn a classic red velvet cake into a flag design would come together without turning into a crumbly mess. But there was something about that deep, almost velvet-smooth red color paired with tangy cream cheese frosting that kept calling me back to the kitchen week after week.
The idea struck me late one quiet evening, while I was experimenting with a few recipes after baking several batches of the loaded chocolate delight that my family raved about. The contrast of red velvet’s iconic hue with creamy white frosting seemed perfect for a summer gathering, and I wanted to create something that was both visually dramatic and downright delicious.
After a few trial runs—some layers too thick, others crumbling too much—I finally nailed the perfect balance. The cake is moist but sturdy enough to hold the flag pattern, and the frosting is silky without being too sweet. When I brought it to the party, neighbors kept coming back for seconds, and a few asked for the recipe right on the spot. That shy skepticism I started with melted away as the flavors and colors came together. Now, this Show-Stopping Red Velvet Flag Cake with Cream Cheese Frosting has become my go-to dessert when I want to impress without stress, and I think you’ll find it just as rewarding.
Why You’ll Love This Recipe
Making this Show-Stopping Red Velvet Flag Cake with Cream Cheese Frosting isn’t just about baking a pretty dessert—it’s about creating a centerpiece that brings smiles and sweet memories. After countless tests and tweaks, I can say this cake really hits the mark.
- Quick & Easy: Despite its impressive look, the whole cake comes together in about 1 hour 30 minutes, including baking and decorating. Great for busy cooks!
- Simple Ingredients: You probably have everything in your pantry and fridge already—no need for specialty trips. I lean on trusted brands like King Arthur flour and Philadelphia cream cheese for consistent results.
- Perfect for Patriotic Occasions: Whether it’s Independence Day, Memorial Day, or a summer BBQ, this cake fits right in with the festive vibe.
- Crowd-Pleaser: Kids and adults alike love the moist texture and the tangy-sweet balance of the cream cheese frosting.
- Unbelievably Delicious: The red velvet flavor here isn’t just about color—it’s that subtle cocoa undertone paired with smooth frosting that makes each bite unforgettable.
What sets this cake apart is the technique I use to layer and cut the cake to reveal the flag pattern inside. It’s not just slapping on red and white layers; it’s a little artful assembly that anyone can master with patience. Plus, the cream cheese frosting is whipped just right—light and fluffy but firm enough to hold those crisp edges. It’s the kind of dessert that makes you pause and savor, the kind that makes guests ask, “How did you do that?” without needing a complicated answer.
Honestly, I love how this recipe blends festive visuals with familiar flavors, turning a classic red velvet into an unforgettable statement piece. Plus, if you’re a fan of other celebration-ready treats, you might appreciate the loaded apple pie skillet or the individual flag cupcakes I’ve developed for easy, crowd-friendly options.
What Ingredients You Will Need
This recipe uses simple, wholesome ingredients to deliver bold flavor and satisfying texture without the fuss. Most are pantry staples, and substitutions are straightforward for any dietary tweaks.
- For the Red Velvet Cake Layers:
- All-purpose flour – 2 ½ cups (312.5 g), sifted
- Granulated sugar – 2 cups (400 g)
- Unsweetened cocoa powder – 1 tablespoon (7.5 g) (adds subtle chocolate flavor)
- Baking soda – 1 teaspoon (5 g)
- Salt – ½ teaspoon (3 g)
- Buttermilk – 1 cup (240 ml), room temperature (use dairy-free milk + 1 tbsp vinegar for substitution)
- Vegetable oil – 1 cup (240 ml)
- Large eggs – 2, room temperature
- Red food coloring – 2 tablespoons (liquid or gel works fine)
- Vanilla extract – 1 teaspoon (5 ml)
- White vinegar – 1 teaspoon (5 ml) (reacts with baking soda for lift)
- For the Cream Cheese Frosting:
- Cream cheese – 16 oz (450 g), softened (I prefer Philadelphia brand for smoothness)
- Unsalted butter – ½ cup (115 g), softened
- Powdered sugar – 4 cups (480 g), sifted to avoid lumps
- Vanilla extract – 1 teaspoon (5 ml)
- Pinch of salt – to balance sweetness
Feel free to swap out the all-purpose flour for a gluten-free blend if needed, just ensure it has xanthan gum or similar binder. For the cream cheese, dairy-free alternatives work but may change frosting texture slightly. When picking your red food coloring, gel tends to give a richer color without adding extra liquid, which helps keep the batter just right.
Equipment Needed
- Two 9×13-inch (23×33 cm) rectangular cake pans – essential for the flag design layers
- Mixing bowls – medium and large
- Electric mixer or stand mixer – for smooth batter and frosting
- Measuring cups and spoons – for accurate ingredient amounts
- Rubber spatula – great for folding and scraping bowls clean
- Cooling racks – to cool cakes evenly and prevent sogginess
- Sharp serrated knife – for trimming and shaping cake layers precisely
- Offset spatula – helps spread frosting evenly and cleanly
- Plastic wrap or parchment paper – for layering and assembling
If you don’t have two pans, you can bake in batches and reuse the same pan, just let it cool fully before the next batch. I’ve also used a hand mixer when a stand mixer wasn’t available, and it works fine with a bit of elbow grease. For frosting, an offset spatula really makes a difference in getting those clean edges that make the flag stand out. Budget-friendly pans from trusted brands like Wilton or Nordic Ware have lasted me years and clean up easily.
Preparation Method
- Prep and Preheat (10 minutes): Preheat your oven to 350°F (175°C). Grease the two 9×13 pans with butter or non-stick spray, then line them with parchment paper for easy release.
- Mix Dry Ingredients (5 minutes): In a large bowl, sift together the all-purpose flour, sugar, cocoa powder, baking soda, and salt. Sifting ensures no lumps and a lighter texture.
- Combine Wet Ingredients (5 minutes): In another bowl, whisk together the buttermilk, vegetable oil, eggs, red food coloring, vanilla extract, and white vinegar until smooth and consistent.
- Make the Batter (5 minutes): Slowly pour the wet mixture into the dry ingredients while mixing on low speed with your electric mixer. Mix until just combined—overmixing can make the cake dense. The batter should be smooth and bright red.
- Bake the Cakes (30-35 minutes): Divide the batter evenly between the two pans. Bake in the center rack for 30-35 minutes or until a toothpick inserted comes out mostly clean (a few moist crumbs are okay). Avoid opening the oven door too often to prevent sinking.
- Cool Completely (45 minutes): Let the cakes cool in the pans for 15 minutes, then transfer to cooling racks. It’s important the cakes are fully cool before frosting to avoid melting the cream cheese.
- Prepare the Frosting (10 minutes): Beat softened cream cheese and butter together until smooth and fluffy. Gradually add powdered sugar, beating on low speed first, then high until creamy. Add vanilla extract and salt, mixing just to combine.
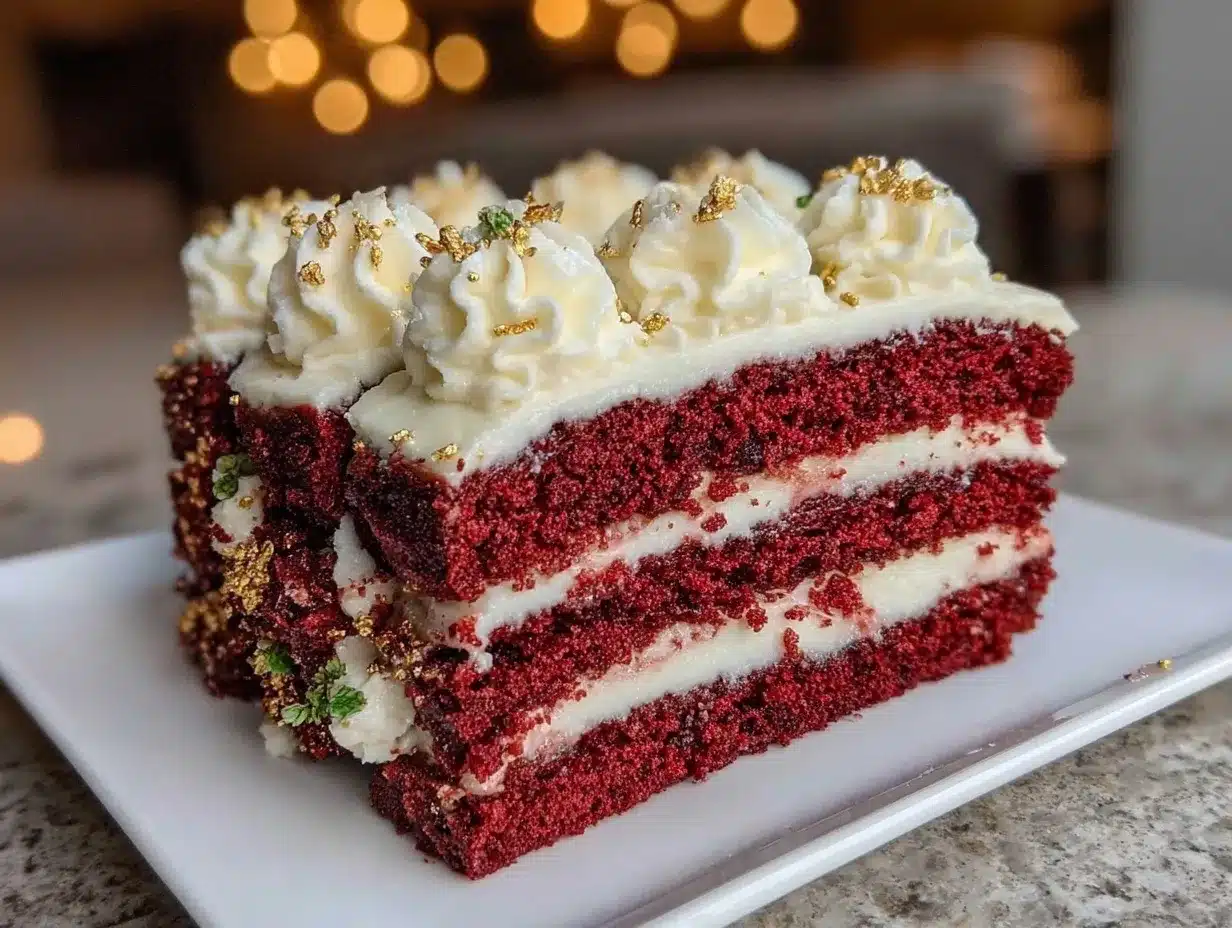
- Assemble the Flag Cake (20 minutes): Once cooled, slice each cake into three equal strips horizontally. Arrange strips in a flag pattern on your serving platter: alternate red velvet strips and frosting-covered strips to mimic the stripes. Use a piping bag or spoon to add frosting dots or stars in the top-left corner.
- Final Touches: Chill the cake for 30 minutes to firm up the frosting before slicing. This helps keep the flag design sharp when cutting.
If your cake layers feel too crumbly, a quick tip is to chill them before slicing—makes cutting cleaner. Also, when spreading frosting, thin layers work better for the flag’s precision and prevent overwhelming sweetness.
Cooking Tips & Techniques
One thing I learned the hard way is not to rush cooling the cakes before frosting. Cream cheese frosting melts quickly on warm cake, turning your neat flag design into a messy swirl. Patience here is key.
When mixing the batter, keep the speed low after adding the wet ingredients. Overmixing develops gluten and can make your red velvet tough rather than tender.
To get that vibrant red color, I recommend gel food coloring over liquid—less runs the batter and more punch in the final look.
For frosting, make sure your cream cheese and butter are truly softened (but not melted). If too cold, lumps appear; too warm, frosting gets greasy.
When cutting the cake strips, use a serrated knife in a gentle sawing motion to avoid tearing the layers. And don’t hesitate to use a ruler or straight edge to keep lines clean if you want precision for the flag effect.
Multitasking tip: While the cakes bake, whip up your frosting and prep your pans. It saves time and keeps the workflow smooth.
Variations & Adaptations
This recipe is easy to customize depending on your occasion or dietary needs. Here are a few ways I’ve played around with it:
- Gluten-Free Version: Replace all-purpose flour with a 1:1 gluten-free baking blend. I’ve used Bob’s Red Mill with great success, adding a teaspoon of xanthan gum for structure.
- Vegan Adaptation: Swap eggs with flax eggs (1 tablespoon ground flaxseed + 3 tablespoons water per egg) and use dairy-free cream cheese and plant-based milk for buttermilk.
- Flavor Twist: Add a teaspoon of espresso powder to the batter to deepen the cocoa flavor subtly. It pairs wonderfully with the richness of the frosting.
- Seasonal Spin: For a summer picnic, layer fresh strawberries or blueberries between cake strips to add juicy bursts and a natural touch of sweetness.
- Decor Idea: Instead of piped frosting stars, try edible silver or gold pearls for a sparkly effect perfect for celebrations like New Year’s Eve.
I once tried swapping cream cheese frosting for a mascarpone-based version for a silkier texture, which was a hit but less stable for the flag design. So, I stick to cream cheese for that perfect balance of flavor and structure.
Serving & Storage Suggestions
This cake shines best served chilled or at room temperature. The cream cheese frosting softens slightly after sitting out, making each bite melt in your mouth.
For presentation, I like to serve it on a simple white platter to let the red and white flag pattern pop visually. A fresh cup of coffee or iced tea pairs beautifully with the cake’s rich flavors.
Store leftover cake tightly covered in the refrigerator for up to 4 days. The flavors actually develop more depth overnight, making next-day slices possibly even better.
If you want to freeze the cake, wrap individual slices in plastic wrap and place in an airtight container. Thaw in the fridge overnight before serving; avoid freezing the frosting-heavy cake whole to keep the texture intact.
When reheating, let the cake come to room temperature naturally rather than microwaving to prevent the frosting from separating.
Nutritional Information & Benefits
Each slice of this Show-Stopping Red Velvet Flag Cake with Cream Cheese Frosting contains roughly 350-400 calories, depending on portion size.
Key ingredients like cream cheese and buttermilk provide calcium and some protein, while the cake’s cocoa powder adds antioxidants. The recipe is not low-calorie but offers a satisfying treat that balances indulgence with real flavor.
For those watching carbs or gluten, the variations mentioned make it more accessible. Just note the cream cheese frosting contains dairy and sugar, so it’s best enjoyed in moderation.
In my experience, this cake is a perfect way to celebrate without overcomplicating ingredients or prep, making it a realistic option for festive meals that feel special but not overwhelming.
Conclusion
This Show-Stopping Red Velvet Flag Cake with Cream Cheese Frosting has become one of those recipes I reach for when I want something both fun and delicious on the table. It’s a crowd-pleaser that looks way more complicated than it really is.
Feel free to tweak the flavors or decorations to make it your own—this cake welcomes creativity. Whether you’re celebrating a holiday or just craving a slice of something sweet and impressive, this recipe won’t let you down.
From my kitchen to yours, I hope it brings as much joy and surprise as it has to me and my neighbors. I’d love to hear how your flag cake turns out, so don’t hesitate to share your experience or any fun twists you tried!
Here’s to sweet moments and tasty memories.
FAQs
- Can I make this cake ahead of time? Absolutely! You can bake the layers a day in advance and store them wrapped tightly in plastic wrap at room temperature. Frost and assemble the day you plan to serve for best freshness.
- What if I don’t have buttermilk? No worries. You can make a buttermilk substitute by adding 1 tablespoon of white vinegar or lemon juice to 1 cup of milk and letting it sit for 5 minutes before using.
- How do I get the flag design so clean? Patience with cooling and careful slicing are key. Using a serrated knife and chilling the cake before cutting helps maintain clean edges.
- Can I use homemade cream cheese for the frosting? Yes, but homemade cream cheese may have a different moisture content, which could affect frosting texture. Adjust powdered sugar to achieve the right consistency.
- Is it possible to make mini flag cakes or cupcakes? Definitely! For a similar effect in cupcake form, check out the individual flag cupcakes recipe, which uses the same color scheme and frosting technique.
Pin This Recipe!
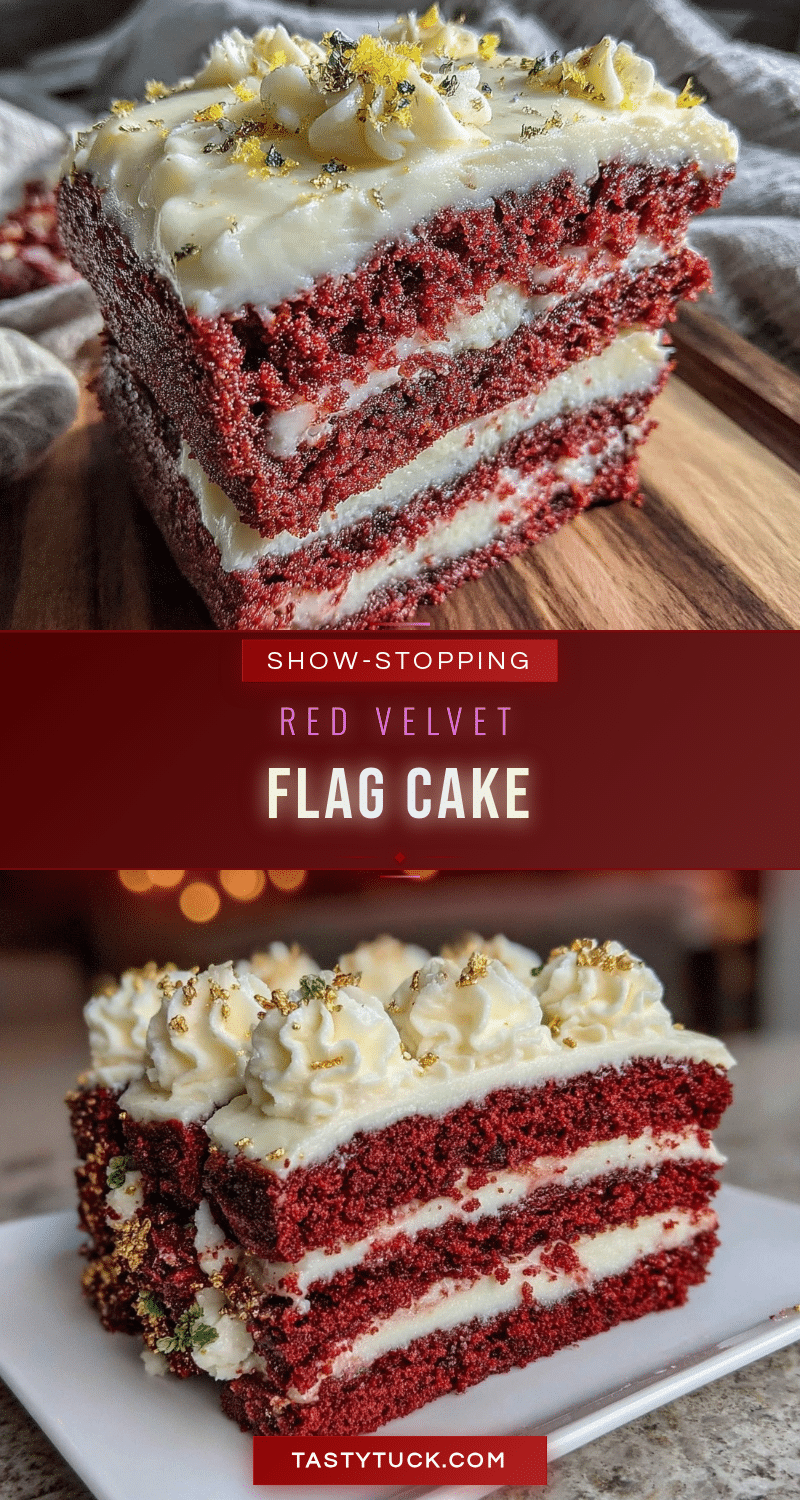
Show-Stopping Red Velvet Flag Cake Recipe with Easy Cream Cheese Frosting
A visually dramatic and delicious red velvet cake designed in a patriotic flag pattern, paired with a silky, tangy cream cheese frosting. Perfect for summer gatherings and festive occasions.
- Prep Time: 25 minutes
- Cook Time: 35 minutes
- Total Time: 1 hour 30 minutes
- Yield: 12 servings 1x
- Category: Dessert
- Cuisine: American
Ingredients
- 2 ½ cups all-purpose flour (312.5 g), sifted
- 2 cups granulated sugar (400 g)
- 1 tablespoon unsweetened cocoa powder (7.5 g)
- 1 teaspoon baking soda (5 g)
- ½ teaspoon salt (3 g)
- 1 cup buttermilk (240 ml), room temperature (or dairy-free milk + 1 tbsp vinegar)
- 1 cup vegetable oil (240 ml)
- 2 large eggs, room temperature
- 2 tablespoons red food coloring (liquid or gel)
- 1 teaspoon vanilla extract (5 ml)
- 1 teaspoon white vinegar (5 ml)
- 16 oz cream cheese (450 g), softened
- ½ cup unsalted butter (115 g), softened
- 4 cups powdered sugar (480 g), sifted
- 1 teaspoon vanilla extract (5 ml)
- Pinch of salt
Instructions
- Preheat oven to 350°F (175°C). Grease two 9×13-inch pans and line with parchment paper.
- In a large bowl, sift together flour, sugar, cocoa powder, baking soda, and salt.
- In another bowl, whisk buttermilk, vegetable oil, eggs, red food coloring, vanilla extract, and white vinegar until smooth.
- Slowly pour wet ingredients into dry ingredients while mixing on low speed until just combined. Batter should be smooth and bright red.
- Divide batter evenly between the two pans. Bake for 30-35 minutes or until a toothpick comes out mostly clean.
- Cool cakes in pans for 15 minutes, then transfer to cooling racks and cool completely (about 45 minutes).
- Beat cream cheese and butter until smooth and fluffy. Gradually add powdered sugar, beating from low to high speed until creamy. Mix in vanilla extract and salt.
- Slice each cooled cake horizontally into three equal strips.
- Arrange strips on a serving platter in a flag pattern, alternating cake strips and frosting-covered strips to mimic stripes. Use a piping bag or spoon to add frosting dots or stars in the top-left corner.
- Chill the assembled cake for 30 minutes to firm up frosting before slicing.
Notes
Use gel food coloring for a richer red color without adding extra liquid. Chill cake layers before slicing to reduce crumbling. Avoid overmixing batter to keep cake tender. Ensure cream cheese and butter are softened but not melted for smooth frosting. Use a serrated knife with gentle sawing motion for clean cuts. Chill assembled cake to firm frosting and maintain flag design.
Nutrition
- Serving Size: 1 slice (approximate
- Calories: 375
- Sugar: 35
- Sodium: 320
- Fat: 20
- Saturated Fat: 9
- Carbohydrates: 45
- Fiber: 1
- Protein: 5
Keywords: red velvet cake, cream cheese frosting, patriotic cake, flag cake, Fourth of July dessert, easy red velvet, summer dessert, layered cake


