I figured game day appetizers had to be either a messy pile of wings or a seven-layer dip that turns into a sad puddle by halftime. It took about one Super Bowl party where I watched guests awkwardly juggle plates, napkins, and drinks to realize that was all wrong. These mini football charcuterie cones are what happened when I finally admitted I needed something that looked fancy but actually required zero forks, zero plates, and zero stress.
The first batch I made, honestly, I just grabbed some waffle cones from the back of the pantry and started stuffing. My brother-in-law, who never compliments food, ate three before the kickoff. That’s when I knew I was onto something. They’re compact, they’re customizable, and they let people graze without committing to a full plate of anything. Plus, they look like little footballs on the snack table, which is just fun.
These cones work for the same reason a good crockpot hot dog recipe works for parties — they keep people moving, talking, and eating without any hassle. You get the salty, savory satisfaction of a charcuterie board, but in a handheld cone that won’t tip over or spill. It’s the kind of practical idea that makes you wonder why you didn’t think of it sooner.
Why You’ll Love This Recipe
Let me tell you why these little cones have become my go-to for every game day gathering. I’ve tested them at tailgates, living room watch parties, and even a backyard barbecue where the wind tried to ruin everything. They won every time.
- No Plates Needed: Each cone is its own serving vessel. Guests grab one and go. No balancing act, no lost dips, no mess on the couch cushions.
- Comes Together in 15 Minutes: Seriously. If you can slice cheese and roll prosciutto, you can make these. No cooking required, which means you’re not stuck in the kitchen during the big game.
- Simple Ingredients: You probably already have most of this stuff in your fridge. The fancy part is how you arrange it, not what you buy.
- Perfect for Game Day: These cones scream football season. They look like mini field goals on the table, and everyone will ask where you got the idea.
- Crowd-Pleaser: I’ve watched picky eaters devour these. Kids love the cone factor. Adults love that they can eat with one hand while holding a drink in the other.
- Unbelievably Customizable: You can swap out meats, cheeses, and fillings based on what your crowd likes. It’s a charcuterie board, but better because it’s already assembled for you.
What makes these different from every other appetizer out there? It’s the texture combo. You get the crunch from the cone, the saltiness from the cured meats, the creaminess from the cheese, and a little pop from pickled veggies. Every bite hits differently. It’s not just another dip or a sloppy slider — it’s a complete snack experience in a tidy little package.
Honestly, these cones make you look like you planned something elaborate, but the secret is they’re almost embarrassingly easy. That’s my favorite kind of recipe. The one that makes guests think you’re a culinary genius while you’re actually just chilling on the couch watching the game.
What Ingredients You Will Need
This recipe uses simple, deli-counter ingredients that come together fast. You don’t need anything rare or expensive — just good quality stuff that tastes great together. Here’s what you’ll grab:
- Mini waffle cones or sugar cones (12 cones) — Look for the small ones, about 3 inches tall. Waffle cones hold up better because they’re thicker. Sugar cones work too, but they’re more delicate.
- Salami (8 oz, thinly sliced) — I prefer Genoa salami for its peppery flavor. You can also use soppressata if you want more kick. I usually buy Boar’s Head or Columbus brand for consistent quality.
- Prosciutto (6 oz, thinly sliced) — Get it sliced fresh from the deli counter if you can. The pre-packaged stuff is fine, but fresh prosciutto has that silky texture that makes a difference.
- Pepperoni (4 oz, small slices) — Mini pepperoni rounds fit perfectly in the cones. Regular size works too, just fold them in half.
- Cheddar cheese (4 oz, cut into small cubes) — Sharp cheddar adds a nice tang. Cut the cubes small enough to fit easily into the cone without breaking it.
- Mozzarella pearls (4 oz) — These little cheese balls are perfect for cones. No slicing needed. If you can’t find pearls, cube a fresh mozzarella ball.
- Grapes (1 cup, halved) — Red or green, doesn’t matter. The sweetness balances the salty meats. Halve them so they fit nicely in the cone.
- Pickled vegetables (1/2 cup) — Cornichons, pickled red onions, or pickled peppers. I use a mix of cornichons and tiny pickled peppers for color and crunch.
- Olives (1/2 cup, pitted) — Castelvetrano or kalamata. Green olives are milder, black olives are earthier. Both work great.
- Almonds or Marcona almonds (1/4 cup) — Adds a nice crunch. Regular almonds are fine, but Marcona almonds are softer and saltier, which I prefer.
- Fresh rosemary sprigs (optional, for garnish) — Makes the cones look fancy. Also smells amazing.
Substitution guidance: If you’re avoiding pork, use turkey salami and beef pepperoni. For a vegetarian version, skip the meats and double up on cheese, olives, and grapes. You can also add marinated artichoke hearts or roasted red peppers for extra flavor. If you don’t have mini cones, you can use small paper cups or even ice cream cones cut in half, but the cone texture really adds something special.
Equipment Needed
You don’t need much for this recipe, which is part of the beauty. Here’s what you’ll want on hand:
- Small serving tray or platter — Something with a lip works best to keep the cones from tipping. I use a rectangular wooden board about 12 inches long.
- Sharp knife and cutting board — For cubing cheese and halving grapes. A serrated knife works best for cutting cheese without it sticking.
- Small bowls — For holding olives, pickles, and nuts before you assemble. I use little ramekins.
- Tongs — Helpful for arranging the cones without squishing them. Not essential, but nice.
- Parchment paper (optional) — Lining the tray makes cleanup a breeze. Also adds a rustic look.
If you don’t have a serving tray, a baking sheet lined with a clean kitchen towel works perfectly. I’ve used a cutting board in a pinch. The key is having a flat surface where the cones can stand upright without wobbling. Budget-friendly tip: Dollar stores often have small wooden boards that work great for this.
Preparation Method
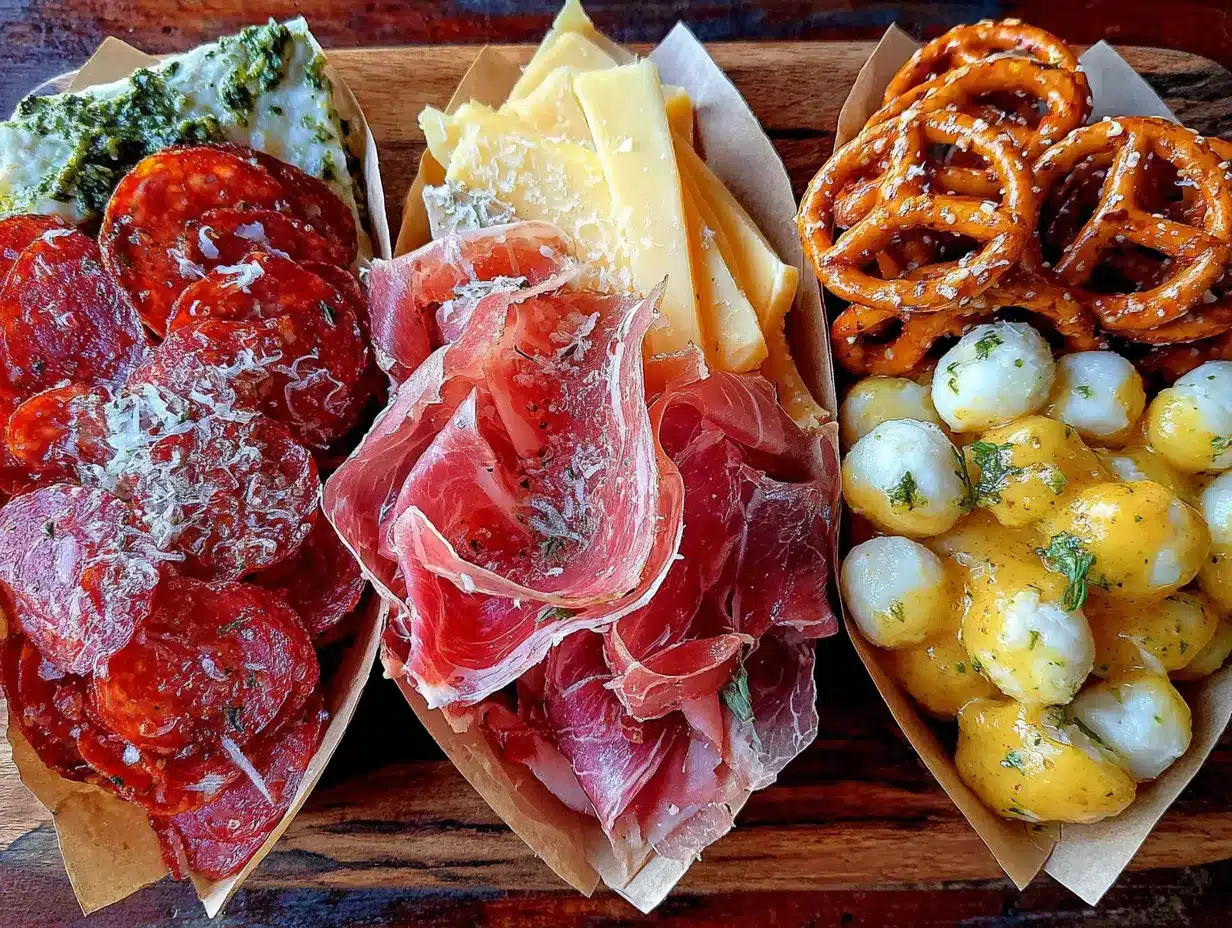
These cones come together in about 15 minutes, maybe 20 if you’re being fancy with the arrangement. Here’s how I do it:
- Prep your ingredients (5 minutes). Cube the cheddar cheese into small pieces, about 1/2 inch each. Halve the grapes. If your salami slices are large, cut them into quarters. Prosciutto slices can be left whole or torn in half — I prefer tearing them for a more rustic look. Set everything in small bowls so you can grab as you go.
- Set up your assembly station (2 minutes). Lay out your cones on the serving tray. I like to arrange them in rows, like little soldiers, so I can fill them systematically. Leave about an inch of space between each cone so you can work easily.
- Start with the base layer (3 minutes). Drop a few almonds or a small pile of pickled vegetables into the bottom of each cone. This prevents the heavier ingredients from settling too low and breaking the cone. It also adds a little surprise crunch at the end.
- Add the meats (3 minutes). Fold or roll a slice of salami and tuck it into the cone. Follow with a piece of prosciutto, letting a little bit peek out over the top for visual appeal. Add a slice of pepperoni on top. The meats should fill about halfway up the cone.
- Add the cheese and fruit (3 minutes). Place a cube of cheddar and a mozzarella pearl on top of the meats. Tuck in a grape half and an olive. The idea is to create layers of color and texture — you want each bite to have a little bit of everything.
- Top it off (2 minutes). Add a final small piece of salami or a folded pepperoni slice on top. Insert a small sprig of rosemary if you’re using it. This makes the cone look like a little bouquet of snack goodness.
- Repeat for all cones (5 minutes). Work through the remaining cones, distributing ingredients evenly. You want each cone to look generous but not overstuffed. Overstuffed cones tend to crack at the edges.
- Final check and serve (1 minute). Look over your cones and adjust any that look lopsided. Make sure none are leaning too far to one side. Serve immediately or refrigerate for up to an hour before serving.
A few things I’ve learned the hard way: Don’t overfill the cones. The cone itself is part of the eating experience, so you want to be able to bite into it without everything spilling out. Also, if you’re making these ahead, keep them in the fridge but let them sit at room temperature for about 10 minutes before serving. Cold cheese doesn’t taste as good, and the cone can get a little soggy if it sits too long in the fridge.
Cooking Tips & Techniques
After making these cones for about a dozen game days, I’ve picked up a few tricks that make a real difference. Here’s what I’ve learned:
Choose your cone wisely. Waffle cones are sturdier than sugar cones. They have a thicker wall and can hold more filling without cracking. If you can only find sugar cones, handle them gently and don’t overstuff. I once used cheap cones from a discount store, and they started crumbling as soon as I added the first ingredient. Not worth it.
Layer strategically. Always put something small and sturdy at the bottom — nuts, pickles, or even a piece of hard cheese. This creates a foundation that supports everything above. If you put soft ingredients like prosciutto at the bottom, it can make the cone soggy and cause the whole thing to collapse.
Don’t skip the rosemary. It’s not just for looks. The aroma of fresh rosemary adds a subtle herbal note that complements the salty meats and creamy cheese. Plus, it makes the cones look like something from a fancy catering menu. If you don’t have rosemary, fresh thyme or even a small basil leaf works.
Watch the timing. These cones are best served within an hour of assembly. If you make them too far ahead, the moisture from the grapes and cheese can soften the cone. I’ve made the mistake of assembling them the night before, and by game time, the cones were a little sad. Lesson learned.
My biggest failure? The time I tried to use large ice cream cones thinking they’d be more impressive. They were too big, and the filling just settled at the bottom. Guests ended up eating the filling with a fork and leaving the cone. Mini cones are non-negotiable. Stick with the small ones.
Variations & Adaptations
One of the best things about these cones is how easily you can change them up. Here are some variations I’ve tried and loved:
- Italian Twist: Swap the cheddar for provolone, add pepperoncini and cherry tomatoes, and use a mix of salami and capicola. Top with a small basil leaf. This version tastes like an Italian sub in cone form.
- Mediterranean Style: Use feta cheese cubes, kalamata olives, sun-dried tomatoes, and cucumber slices. Skip the meats or add grilled chicken for protein. A drizzle of balsamic glaze on top takes it over the top.
- Spicy Kick: Add sliced jalapeños, pepper jack cheese, and spicy salami. Include a few pickled red onions for tang. This one gets requests every time I bring it to a party.
- Sweet and Savory: Add a few dried cranberries or a drizzle of honey over the cheese. The sweetness pairs surprisingly well with the salty prosciutto and sharp cheddar. I tried this on a whim and it was a hit.
- Vegetarian Version: Skip the meats entirely. Load the cones with marinated artichoke hearts, roasted red peppers, fresh mozzarella, and basil. Add toasted pine nuts for crunch. It’s light, fresh, and totally satisfying.
If you’re serving a crowd with different dietary needs, make a few of each variation and label them. I use little toothpick flags with the names written on them. It adds a personal touch and helps guests find what they like.
Serving & Storage Suggestions
These cones are best served at room temperature, right after assembly. Here’s how to make them shine:
Serving temperature: Let the cones sit out for about 10 minutes after taking them out of the fridge. Cold cheese dulls the flavors. Room temperature brings out the creaminess of the mozzarella and the richness of the salami.
Presentation: Arrange the cones on a wooden board or slate platter. I like to cluster them in groups of three, with a small bowl of extra olives or pickles in the center for refills. Garnish with extra rosemary sprigs scattered around the board. It looks intentional and inviting.
Complementary dishes: These cones pair beautifully with a creamy vegetarian pasta salad or a loaded potato salad for a full spread. A bowl of marinated olives on the side never hurts either.
Storage: If you have leftovers (unlikely, but possible), store the cones in an airtight container in the refrigerator for up to 24 hours. The cones will soften slightly, but the flavors will still be good. Do not freeze them — the texture will be completely off.
Reheating: You don’t need to reheat these. Just let them sit at room temperature for 10 minutes before serving. If you want a warm version, you can briefly toast the cones in a 350°F oven for 2-3 minutes before filling, but I prefer them cold or room temp.
One thing I’ve noticed: the flavors actually meld together a bit if the cones sit for 30 minutes or so. The prosciutto softens slightly, the cheese gets a little creamier, and everything starts to taste like one cohesive snack rather than separate ingredients. It’s a happy accident.
Nutritional Information & Benefits
These cones are more balanced than you might think. Here’s a rough estimate per cone (based on one cone with the standard fillings):
- Calories: Approximately 180-220 per cone
- Protein: 10-12 grams (from meats and cheese)
- Fat: 12-15 grams (mostly healthy fats from nuts and olive oil in the meats)
- Carbohydrates: 8-10 grams (from the cone and grapes)
- Fiber: 1-2 grams (from almonds and pickled vegetables)
Health benefits: The almonds provide vitamin E and healthy monounsaturated fats. Grapes offer antioxidants like resveratrol. The pickled vegetables add probiotics for gut health. Cheese gives you calcium and protein. It’s not health food, but it’s far from junk food.
Dietary considerations: This recipe is naturally gluten-free if you use gluten-free cones (available at most health food stores). It’s also low-carb friendly — you can skip the cone and serve the fillings in lettuce cups instead. For dairy-free, use vegan cheese or skip the cheese entirely and add extra nuts and olives.
Potential allergens: Contains dairy (cheese), tree nuts (almonds), and gluten (waffle cones). If you’re serving a crowd, make a note of this on a small card next to the platter.
I like these cones because they let you indulge without going overboard. You get the satisfaction of a full charcuterie experience, but in a portion-controlled package. Three cones feels like a meal, not a binge.
Conclusion
These mini football charcuterie cones are the kind of recipe that makes game day hosting actually fun. You’re not slaving over a hot stove or worrying about dips running out. You’re just assembling little edible masterpieces that look impressive and taste even better. Honestly, they’ve become my signature party trick, and I’m not even a little embarrassed about it.
I love how adaptable they are. You can stick with the classic combo I shared here, or you can go wild with your own favorite ingredients. The cone is just the vessel — what you put inside is entirely up to you. That’s the beauty of this recipe. It’s a framework, not a rigid set of rules.
So go ahead, give these a try for your next game day gathering. Mix up the fillings, play with the flavors, and watch your guests light up when they see them. And when someone asks for the recipe (they will), just smile and tell them it’s your little secret. Or send them here. I won’t mind.
Drop a comment below and let me know what fillings you used. I’m always looking for new combinations to try. Happy game day, and happy snacking!
Frequently Asked Questions
Can I make these cones ahead of time?
Yes, you can assemble them up to 2 hours ahead. Store them in the refrigerator in a single layer, and let them sit at room temperature for 10 minutes before serving. Any longer than 2 hours and the cones may start to soften.
What if I can’t find mini waffle cones?
You can use mini sugar cones instead, or even small paper cups if you’re in a pinch. The texture won’t be the same, but the fillings will still taste great. Some stores sell mini cones in the ice cream aisle during summer months.
Can I make these vegetarian or vegan?
Absolutely. For vegetarian, skip the meats and load up on cheese, olives, grapes, and marinated vegetables. For vegan, use vegan cheese or skip the cheese entirely and add extra nuts, seeds, and roasted vegetables. They’re still delicious.
How many cones should I make per person?
I usually plan on 2-3 cones per person if serving as an appetizer. If these are the main snack for the party, go with 4-5 per person. It’s better to have a few extra than to run out early in the game.
Can I use different types of cheese?
Yes, any firm or semi-soft cheese works well. Try gouda, brie (cut into small pieces), manchego, or even blue cheese for a bolder flavor. Just make sure the cheese is firm enough to hold its shape in the cone.
Pin This Recipe!
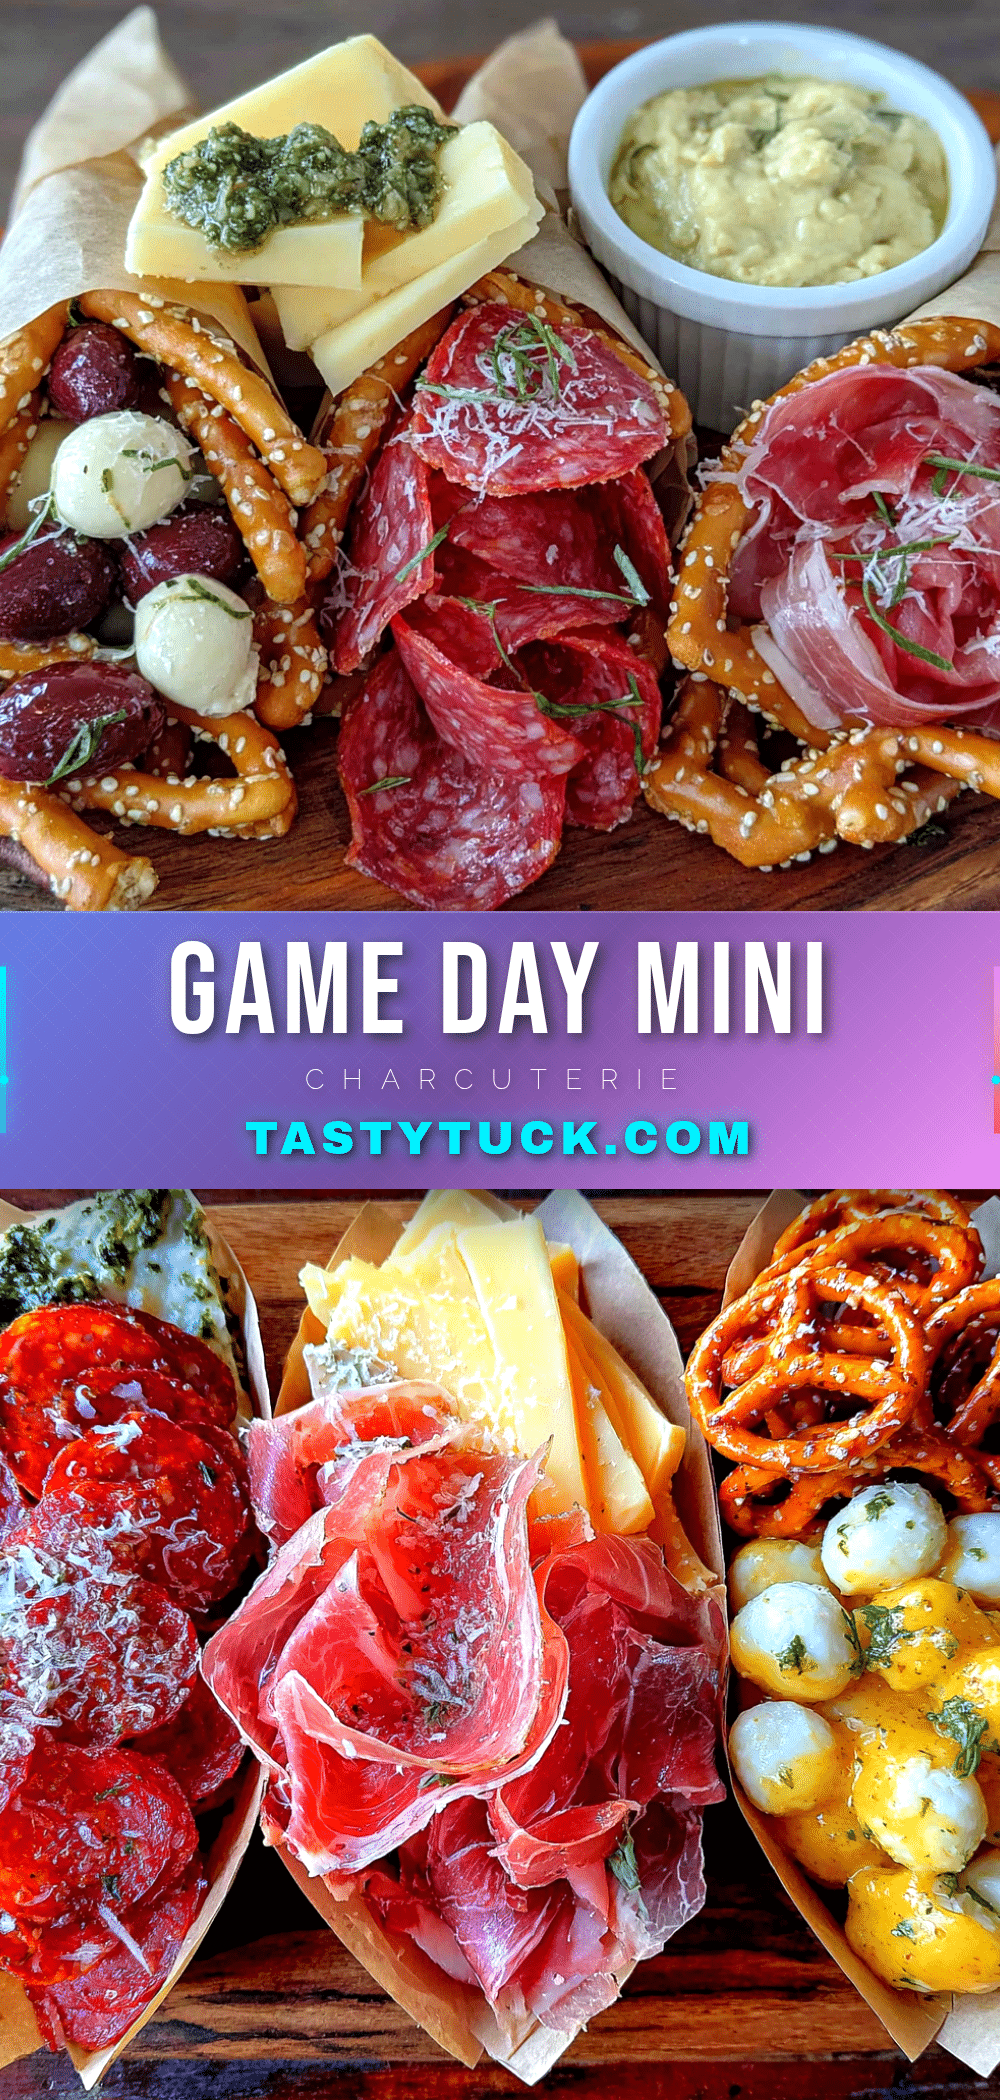
Easy Mini Football Charcuterie Cones: Best Game Day Appetizer
These mini football charcuterie cones are the perfect game day appetizer—no plates, no forks, and no stress. They combine salty meats, creamy cheese, and crunchy pickles in a handheld waffle cone that looks like a little football on the snack table.
- Prep Time: 15 minutes
- Cook Time: 0 minutes
- Total Time: 15 minutes
- Yield: 12 cones 1x
- Category: Appetizer
- Cuisine: American
Ingredients
- 12 mini waffle cones or sugar cones (about 3 inches tall)
- 8 oz salami, thinly sliced (Genoa or soppressata)
- 6 oz prosciutto, thinly sliced
- 4 oz pepperoni, small slices
- 4 oz sharp cheddar cheese, cut into small cubes
- 4 oz mozzarella pearls
- 1 cup grapes, halved (red or green)
- 1/2 cup pickled vegetables (cornichons, pickled red onions, or pickled peppers)
- 1/2 cup pitted olives (Castelvetrano or kalamata)
- 1/4 cup almonds or Marcona almonds
- Fresh rosemary sprigs (optional, for garnish)
Instructions
- Prep your ingredients (5 minutes): Cube the cheddar cheese into small pieces, about 1/2 inch each. Halve the grapes. If your salami slices are large, cut them into quarters. Prosciutto slices can be left whole or torn in half for a more rustic look. Set everything in small bowls.
- Set up your assembly station (2 minutes): Lay out your cones on the serving tray in rows, leaving about an inch of space between each cone.
- Start with the base layer (3 minutes): Drop a few almonds or a small pile of pickled vegetables into the bottom of each cone to prevent heavier ingredients from settling too low and breaking the cone.
- Add the meats (3 minutes): Fold or roll a slice of salami and tuck it into the cone. Follow with a piece of prosciutto, letting a little bit peek out over the top. Add a slice of pepperoni on top. The meats should fill about halfway up the cone.
- Add the cheese and fruit (3 minutes): Place a cube of cheddar and a mozzarella pearl on top of the meats. Tuck in a grape half and an olive.
- Top it off (2 minutes): Add a final small piece of salami or a folded pepperoni slice on top. Insert a small sprig of rosemary if using.
- Repeat for all cones (5 minutes): Work through the remaining cones, distributing ingredients evenly. Avoid overstuffing to prevent cracking.
- Final check and serve (1 minute): Adjust any lopsided cones. Serve immediately or refrigerate for up to an hour before serving.
Notes
Choose waffle cones over sugar cones for sturdiness. Layer strategically—put small, sturdy items at the bottom to prevent sogginess. Serve within an hour of assembly for best texture. If making ahead, refrigerate for up to 2 hours and let sit at room temperature for 10 minutes before serving. For a warm version, toast cones in a 350°F oven for 2-3 minutes before filling.
Nutrition
- Serving Size: 1 cone
- Calories: 200
- Sugar: 4
- Sodium: 480
- Fat: 14
- Saturated Fat: 5
- Carbohydrates: 9
- Fiber: 1.5
- Protein: 11
Keywords: game day appetizer, charcuterie cones, football party food, no-cook appetizer, handheld snack, mini cones, easy party food


