Lena wasn’t trying to impress anyone. I’d stopped by her place to grab a book I’d loaned her months ago, and the smell hit me before I even got through the front door. It was warm, sweet, and nutty, like someone had turned autumn into a perfume. I stood there in her entryway, holding a stack of mail, and just sniffed the air like a cartoon character floating toward a pie on a windowsill.
“What is that?” I asked, probably sounding a little too desperate.
She looked up from the couch, confused. “Oh, those? Just some pumpkin seeds. I was cleaning out the jack-o-lanterns from the porch.” Just some pumpkin seeds. Like she hadn’t just created the most addictive snack I’d ever smelled in my life. She handed me a warm bowl, and I ate them standing up in her kitchen, burning my fingers and not caring one bit. The cinnamon sugar coating was perfectly crunchy, the seeds were roasted all the way through, and I couldn’t stop eating them.
“You have to show me how you did this,” I said, my mouth half-full.
She shrugged. “It’s nothing, really.” But it wasn’t nothing. It was everything. And honestly, maybe you’ve been there, standing in someone else’s kitchen, realizing you just found your new go-to recipe for every gathering you’ll ever host. That bowl of seeds changed how I think about snacks. They’re not just something you pick at before dinner. They’re the thing people hover around, the bowl that keeps disappearing, the reason your friends text you asking for the recipe the next morning.
This is that recipe. And I promise, once you make them, you’ll understand why I couldn’t let it go.
Why You’ll Love This Recipe
Let me tell you why these cinnamon sugar baked pumpkin seeds are about to become your new secret weapon for hosting. I’ve tested this recipe more times than I can count, tweaking temperatures and ratios until every seed comes out perfectly crunchy, not chewy or burnt. It’s the kind of recipe that makes you look like you spent hours in the kitchen when really, it’s almost embarrassingly simple.
- Ready in Under 30 Minutes: From scooping to snacking, you’re looking at about 25 minutes total. That’s faster than ordering takeout, and way more impressive.
- Simple Pantry Ingredients: You probably already have cinnamon, sugar, butter, and salt in your kitchen right now. The only special thing is the pumpkin seeds themselves, and those come free with every jack-o-lantern.
- Perfect for Hosting: Set a bowl of these out before dinner, and watch your guests forget about the cheese platter. They’re ideal for potlucks, game nights, Thanksgiving appetizers, or just a Tuesday when you want to feel fancy.
- Always a Crowd-Pleaser: Kids love them, adults hoard them, and someone will definitely ask for the recipe before they leave. I’ve had guests literally take the bowl to the couch with them.
- Unbelievably Addictive: The combination of sweet cinnamon, salty crunch, and buttery richness is next-level. You’ve been warned.
What makes this version different from every other pumpkin seed recipe out there? It’s the double-coating technique. Most recipes just toss seeds with sugar and hope for the best. I use a butter-sugar slurry that bakes into a crispy shell around each seed, so every single one is evenly coated. No naked seeds. No burnt sugar patches. Just pure, consistent crunch in every handful. It’s comfort food reimagined as a snack, and it’s perfect for impressing guests without any stress.
What Ingredients You Will Need
This recipe uses simple, wholesome ingredients to deliver bold flavor and satisfying texture without any fuss. Most of these are probably already in your pantry, which makes this the kind of recipe you can whip up on a whim when company’s coming over.
- Fresh Pumpkin Seeds (1 ½ cups, rinsed and dried): You can use seeds from any pumpkin variety, but larger seeds from carving pumpkins work best. I prefer to use seeds from sugar pumpkins when I can find them, because they’re a bit meatier. Make sure you rinse off all the stringy pumpkin guts and pat them completely dry. Wet seeds won’t crisp up properly.
- Unsalted Butter (3 tablespoons, melted): This is the secret to the crispy coating. Unsalted butter lets you control the salt level yourself. I use Kerrygold for its rich flavor, but any good unsalted butter works. If you only have salted butter on hand, just reduce the added salt later.
- Granulated Sugar (¼ cup): Regular white sugar creates that signature crunchy shell. Don’t substitute with brown sugar here, it has too much moisture and will make the seeds sticky instead of crispy.
- Ground Cinnamon (1 ½ teaspoons): Use a fresh, high-quality cinnamon for the best flavor. I’ve tried this with Saigon cinnamon and it’s incredible, but regular supermarket cinnamon works great too. Save your fancy Ceylon cinnamon for baking, you want the bold punch here.
- Fine Sea Salt (½ teaspoon): Salt is non-negotiable. It balances the sweetness and makes the cinnamon flavor pop. I use fine sea salt because it dissolves evenly into the butter mixture. Kosher salt works too, just grind it finer with your fingers.
- Vanilla Extract (½ teaspoon, optional but recommended): This is my little secret. A splash of vanilla rounds out the sweetness and makes the cinnamon taste warmer somehow. You can skip it, but you’ll miss that little something that makes people go “what’s in these?”
That’s it. Six ingredients, and you’re on your way to the best snack at any party. I’ve tested this with coconut oil for a dairy-free version, and it works, but the butter really does give the best flavor and crunch. If you’re feeding a crowd, I’d suggest doubling the recipe. Trust me, a single batch disappears fast.
Equipment Needed
You don’t need any fancy gadgets for this recipe, which is part of the beauty. Here’s what you’ll need:
- Baking Sheet: A standard half-sheet pan works perfectly. Line it with parchment paper for easy cleanup. I’ve made these on unlined pans before, and the sugar can stick and burn. Parchment is your friend here.
- Mixing Bowls: One medium bowl for tossing the seeds, and a small bowl for melting the butter. Nothing fancy, just something that holds everything.
- Colander: For rinsing the seeds. A fine-mesh strainer works even better if you have one.
- Paper Towels or Clean Kitchen Towel: For drying the seeds thoroughly. This step matters more than you think.
- Spatula or Wooden Spoon: For spreading the seeds on the baking sheet. A silicone spatula is nice because it doesn’t scratch your pans.
- Measuring Spoons and Cups: Standard set, nothing special.
If you don’t have parchment paper, you can use a silicone baking mat instead. I wouldn’t recommend going without any liner, the sugar syrup can get sticky and create a mess. Also, a rimmed baking sheet is important here, not a flat cookie sheet. The rim keeps the seeds from rolling off when you stir them halfway through.
Preparation Method
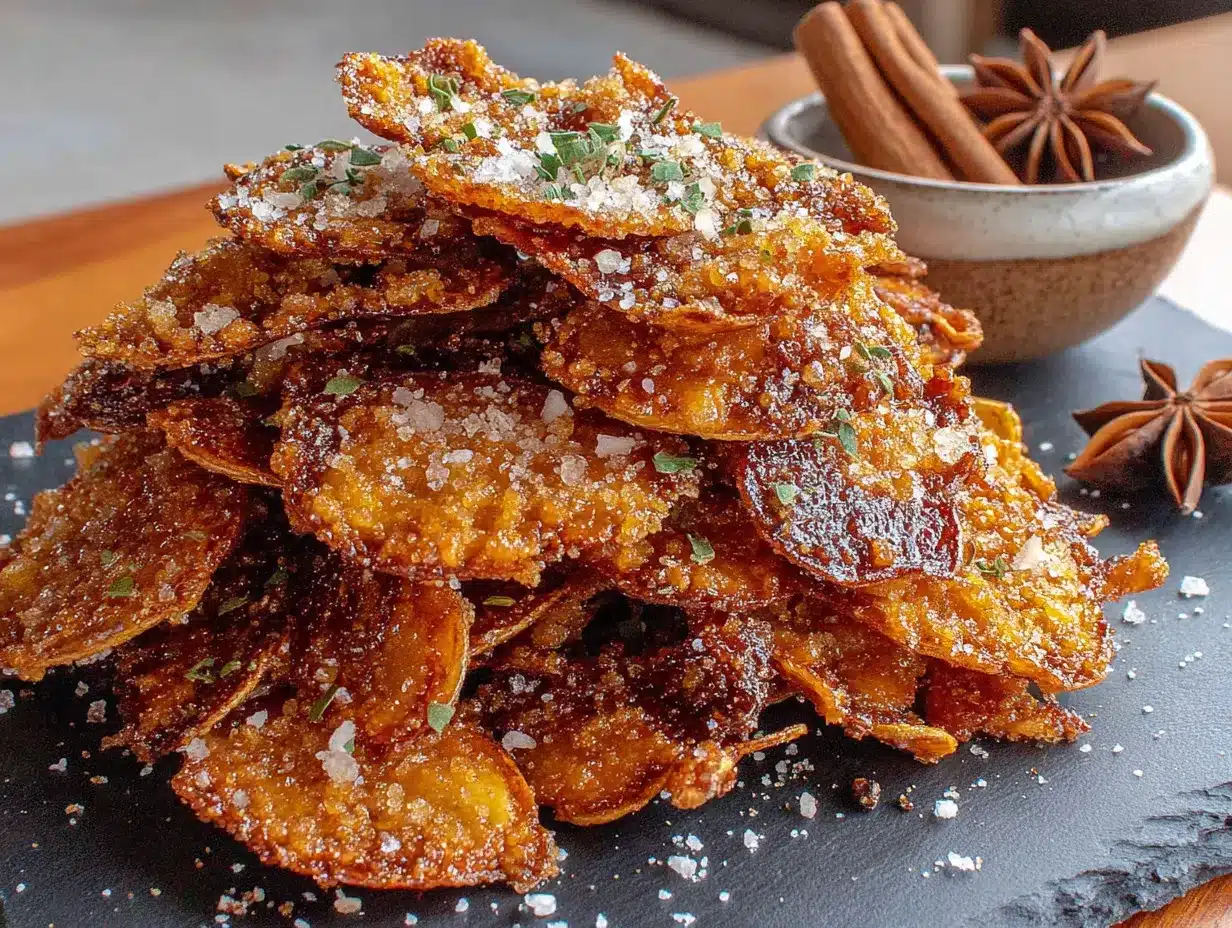
Alright, let’s get to the good part. Here’s exactly how to make these cinnamon sugar baked pumpkin seeds so they come out perfect every single time.
- Preheat your oven to 325°F (163°C). Line a rimmed baking sheet with parchment paper and set it aside. Getting the oven to the right temperature matters here, too hot and the sugar burns, too cool and the seeds turn chewy instead of crunchy.
- Clean your pumpkin seeds thoroughly. Place the seeds in a colander and rinse them under cool water. Use your fingers to gently rub off any remaining pumpkin pulp and strings. This takes a few minutes, but it’s worth doing right. Any leftover pulp will burn in the oven and taste bitter.
- Dry the seeds completely. Spread the rinsed seeds on a clean kitchen towel or paper towels. Pat them dry, then let them sit for about 5 minutes to air dry. This is the step most people rush, and it’s the one that makes the biggest difference. Wet seeds steam instead of roast, and you won’t get that crispy texture.
- Melt the butter. In a small microwave-safe bowl, melt the unsalted butter in 20-second intervals until fully liquid. Alternatively, melt it in a small saucepan over low heat. Let it cool for a minute so it doesn’t cook the cinnamon when you mix it.
- Mix the coating. In a medium bowl, whisk together the melted butter, granulated sugar, ground cinnamon, fine sea salt, and vanilla extract if using. Stir until the sugar is mostly dissolved and the mixture looks like a thick, grainy syrup. It won’t be perfectly smooth, and that’s okay.
- Coat the seeds. Add the dried pumpkin seeds to the bowl with the butter mixture. Stir with a spatula until every single seed is coated. Don’t rush this part. Take your time and make sure there are no dry patches. The seeds should look glossy and coated in a thick, sugary paste.
- Spread on the baking sheet. Pour the coated seeds onto the prepared baking sheet. Use the spatula to spread them into a single, even layer. Don’t let them pile up on top of each other, or they’ll steam instead of roast. Leave a little space between seeds if you can.
- Bake for 10 minutes. Place the baking sheet on the center rack of your preheated oven. Set a timer for 10 minutes. At this point, the seeds will start to puff up and the sugar will begin to bubble.
- Stir and rotate. After 10 minutes, remove the baking sheet from the oven. Use a spatula to stir the seeds, scraping up any sugary bits that have stuck to the parchment. Spread them back into a single layer. This ensures even baking and prevents burning.
- Bake for another 8-12 minutes. Return the sheet to the oven and bake for another 8 to 12 minutes. Start checking at 8 minutes. The seeds are done when they’re golden brown, fragrant, and the sugar coating looks dry and crackly. They’ll still feel slightly soft when hot, but they’ll crisp up as they cool.
- Cool completely. Remove the baking sheet from the oven and let the seeds cool right on the pan. Don’t touch them yet. As they cool, the sugar shell hardens and becomes that signature crispy coating. This takes about 15-20 minutes. I know it’s tempting, but patience pays off here.
- Break apart any clumps. Once completely cool, use your hands to gently break apart any clusters of seeds that stuck together. Some clumping is normal and actually nice for texture. Transfer to a serving bowl and try not to eat them all before your guests arrive.
Cooking Tips & Techniques
I’ve made this recipe more times than I can count, and I’ve learned a few things the hard way. Let me save you some trouble.
The biggest mistake people make is not drying the seeds enough. I once rushed through this step because I was in a hurry before a party, and the seeds came out chewy and sad. They never got that satisfying crunch. Now I pat them dry with paper towels, then let them sit on the counter for a full 10 minutes before coating them. It makes a real difference.
Watch your oven temperature like a hawk. Every oven runs a little differently. My old apartment oven ran hot, and I burned two batches before I figured it out. If your oven tends to run hot, check the seeds at the 8-minute mark in the second bake. If they look dark brown, pull them out immediately. Burnt sugar tastes bitter, and there’s no saving them.
Don’t skip the stir halfway through. I know it’s an extra step, but it’s what ensures every seed gets evenly roasted. The seeds on the edges of the pan cook faster than the ones in the middle. Giving them a stir halfway through evens everything out. Set a timer, don’t rely on memory. I’ve definitely forgotten and ended up with half-burnt, half-raw seeds.
Let them cool completely before serving. This is the hardest part, honestly. They smell incredible coming out of the oven, and you’ll want to grab a handful immediately. But the sugar coating is still soft at this point. If you eat them warm, they’ll be chewy instead of crunchy. Give them the full 20 minutes. I usually set them on the counter and walk away to set out the rest of my appetizers.
If you’re making these for a party, double the batch. I cannot stress this enough. A single batch makes about 1 ½ cups, which sounds like a lot until you realize how fast they disappear. I made one batch for a football party and they were gone in the first quarter. Now I always make at least two batches. They keep well, so leftovers aren’t a problem.
Variations & Adaptations
One of the best things about this recipe is how easy it is to switch up. Here are some variations I’ve tried and loved.
Spicy Cinnamon Pumpkin Seeds: Add ¼ teaspoon of cayenne pepper to the butter mixture along with the cinnamon. The heat sneaks up on you, and it pairs beautifully with the sweet coating. I made these for a Halloween party and they were the first thing to disappear. Just be careful not to add too much, a little heat goes a long way.
Maple Pecan Version: Replace the granulated sugar with 3 tablespoons of pure maple syrup and add ¼ cup of chopped pecans to the seeds before baking. The maple flavor gets concentrated as it bakes, and the pecans add extra crunch. This version is especially good in the fall, and it makes your kitchen smell like a candle shop.
Pumpkin Spice Seeds: Swap the cinnamon for 2 teaspoons of pumpkin pie spice blend. This version screams autumn and is perfect for Thanksgiving. I like to add an extra pinch of cinnamon on top after baking for visual appeal. It tastes like a pumpkin latte in snack form.
Dairy-Free Option: Substitute the butter with melted coconut oil or a plant-based butter. Coconut oil gives the seeds a subtle tropical note that actually works really well with the cinnamon. Just make sure you use refined coconut oil if you don’t want the coconut flavor, or embrace it if you do.
Less Sweet Version: Reduce the sugar to 2 tablespoons and add an extra pinch of salt. This version is still sweet, but it lets the natural nuttiness of the pumpkin seeds shine through. My husband actually prefers this version, he says the original is too sweet for him. To each their own.
Serving & Storage Suggestions
These seeds are best served at room temperature in a big bowl that everyone can reach. I like to put them out about 30 minutes before guests arrive, so they’re the first thing people grab when they walk in. They pair beautifully with a cheese board, especially sharp cheddar or aged gouda. The sweet crunch contrasts with the savory cheese in a way that feels intentional.
For drinks, these seeds go great with cider, both hot and cold. They’re also fantastic alongside a crisp white wine or a light beer. If you’re hosting a cocktail party, set them next to the bar. People will snack on them between sips, and they’ll keep everyone from drinking on an empty stomach.
Storage is simple: Let the seeds cool completely, then transfer them to an airtight container. They’ll stay fresh at room temperature for up to 2 weeks. I’ve kept them for longer, but they start to lose their crunch after about 10 days. If they do get a little soft, you can re-crisp them in a 300°F oven for 5 minutes.
Do not refrigerate them. The moisture in the fridge will make the sugar coating sticky. Freezing works if you need to keep them longer, just thaw them at room temperature and re-crisp in the oven. I’ve frozen them for up to 3 months with good results.
The flavors actually develop a bit over the first day or two. The cinnamon gets deeper and the sugar coating settles into that perfect crunch. So if you’re planning ahead, these are actually better made a day in advance. Just another reason they’re perfect for hosting.
Nutritional Information & Benefits
Per serving (about ¼ cup): Approximately 180 calories, 12g fat, 16g carbohydrates, 6g protein, 8g sugar, 3g fiber. These numbers are estimates and will vary based on exact ingredients and portion sizes.
Pumpkin seeds are actually a nutritional powerhouse. They’re packed with magnesium, zinc, and healthy fats. Magnesium is great for sleep and muscle recovery, while zinc supports your immune system. So while these are definitely a treat, you’re getting some real nutritional benefits with every handful.
They’re also naturally gluten-free and can be made dairy-free with a simple substitution. If you’re watching your sugar intake, the less-sweet variation I mentioned earlier works great. Just remember that the sugar is what creates that signature crunchy coating, so reducing it too much will change the texture.
From a wellness perspective, I love that these seeds satisfy that craving for something sweet and crunchy without being ultra-processed. You know exactly what’s in them, and you can feel good about serving them to your family and friends. It’s indulgence with a side of nutrition, and that’s a balance I can get behind.
Conclusion
These cinnamon sugar baked pumpkin seeds are more than just a snack. They’re the thing your guests will hover around, the bowl that keeps getting refilled, the recipe someone will text you about the next morning asking for details. They’re simple, they’re impressive, and they taste like you put way more effort into them than you actually did.
I love this recipe because it takes something that most people throw away and turns it into the star of the snack table. It’s resourceful, it’s delicious, and it always makes me feel like a genius host. Plus, the smell alone is worth the effort. Your kitchen will smell like a bakery and a fall festival all at once.
Try this recipe for your next gathering, and don’t be surprised when people ask for the recipe. Feel free to customize it with the variations I shared, or come up with your own twist. I’d love to hear how they turn out, so drop a comment below and let me know your favorite version. And if you really want to impress your friends, make a double batch. Trust me on that one.
Frequently Asked Questions
Can I use store-bought pumpkin seeds instead of fresh ones?
Yes, you can use raw, unsalted pepitas or whole pumpkin seeds from the store. Just skip the rinsing and drying steps, and proceed with the recipe as written. Store-bought seeds are usually drier than fresh, so they might bake a minute or two faster. Keep an eye on them.
Why did my pumpkin seeds turn out chewy instead of crunchy?
This usually happens for one of two reasons. Either the seeds weren’t dried thoroughly before coating, or they weren’t baked long enough. Make sure you pat them completely dry, and don’t pull them out of the oven until the coating looks dry and crackly. They’ll also firm up as they cool, so give them the full 20 minutes before judging.
Can I make these in an air fryer?
Absolutely. Preheat your air fryer to 300°F (150°C). Spread the coated seeds in a single layer in the air fryer basket. Cook for 8-10 minutes, shaking the basket halfway through. Check them at 8 minutes, air fryers run hot and can burn the sugar quickly. Let them cool completely before serving.
How do I prevent the sugar from burning?
The key is using the right oven temperature and checking early. Bake at 325°F, not higher. Stir the seeds halfway through to redistribute them. And start checking for doneness at the 8-minute mark of the second bake. If your oven runs hot, reduce the temperature to 300°F and add a few extra minutes.
Can I use brown sugar instead of granulated sugar?
I don’t recommend it. Brown sugar has more moisture than granulated sugar, which can make the seeds sticky instead of crispy. The molasses in brown sugar also burns more easily at baking temperatures. Stick with granulated sugar for the best crunchy texture. If you want a deeper flavor, add a tablespoon of brown sugar along with the granulated, but don’t replace it entirely.
Pin This Recipe!
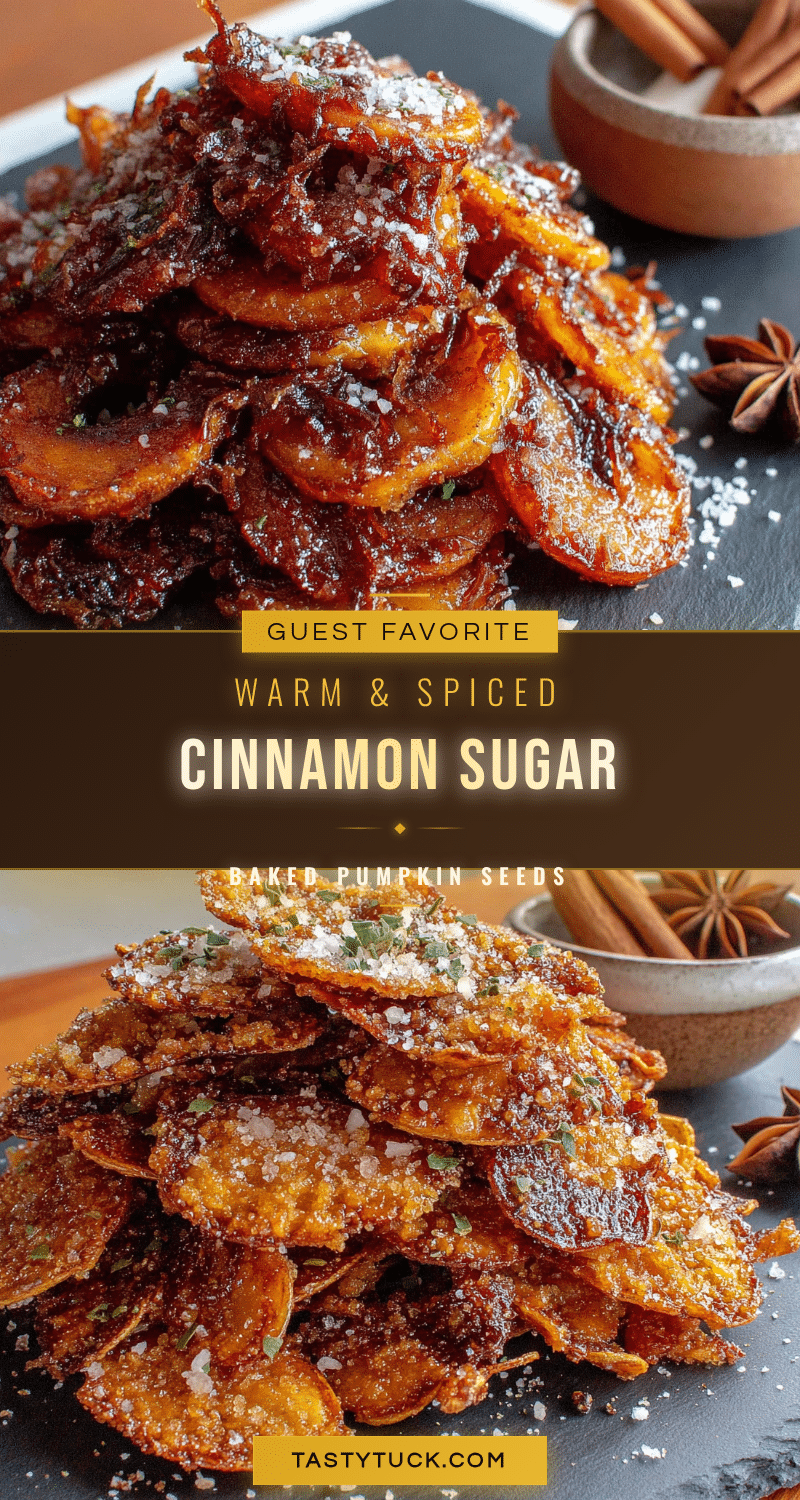
Best Baked Pumpkin Seeds with Cinnamon Sugar Recipe
These cinnamon sugar baked pumpkin seeds are perfectly crunchy, sweet, and salty, made with a double-coating technique for an irresistible snack. Ready in under 30 minutes, they’re the perfect crowd-pleaser for any gathering.
- Prep Time: 10 minutes
- Cook Time: 18-22 minutes
- Total Time: 28-32 minutes
- Yield: 4 servings 1x
- Category: Appetizer
- Cuisine: American
Ingredients
- 1 ½ cups fresh pumpkin seeds, rinsed and dried
- 3 tablespoons unsalted butter, melted
- ¼ cup granulated sugar
- 1 ½ teaspoons ground cinnamon
- ½ teaspoon fine sea salt
- ½ teaspoon vanilla extract (optional but recommended)
Instructions
- Preheat your oven to 325°F (163°C). Line a rimmed baking sheet with parchment paper and set aside.
- Clean your pumpkin seeds thoroughly. Place the seeds in a colander and rinse them under cool water, using your fingers to gently rub off any remaining pumpkin pulp and strings.
- Dry the seeds completely. Spread the rinsed seeds on a clean kitchen towel or paper towels. Pat them dry, then let them sit for about 5 minutes to air dry.
- Melt the butter. In a small microwave-safe bowl, melt the unsalted butter in 20-second intervals until fully liquid. Alternatively, melt it in a small saucepan over low heat. Let it cool for a minute.
- Mix the coating. In a medium bowl, whisk together the melted butter, granulated sugar, ground cinnamon, fine sea salt, and vanilla extract if using. Stir until the sugar is mostly dissolved and the mixture looks like a thick, grainy syrup.
- Coat the seeds. Add the dried pumpkin seeds to the bowl with the butter mixture. Stir with a spatula until every single seed is coated. The seeds should look glossy and coated in a thick, sugary paste.
- Spread on the baking sheet. Pour the coated seeds onto the prepared baking sheet. Use the spatula to spread them into a single, even layer, leaving a little space between seeds if possible.
- Bake for 10 minutes. Place the baking sheet on the center rack of your preheated oven. Set a timer for 10 minutes.
- Stir and rotate. After 10 minutes, remove the baking sheet from the oven. Use a spatula to stir the seeds, scraping up any sugary bits that have stuck to the parchment. Spread them back into a single layer.
- Bake for another 8-12 minutes. Return the sheet to the oven and bake for another 8 to 12 minutes. Start checking at 8 minutes. The seeds are done when they’re golden brown, fragrant, and the sugar coating looks dry and crackly.
- Cool completely. Remove the baking sheet from the oven and let the seeds cool right on the pan for about 15-20 minutes. The sugar shell will harden as they cool.
- Break apart any clumps. Once completely cool, use your hands to gently break apart any clusters of seeds that stuck together. Transfer to a serving bowl.
Notes
The biggest mistake is not drying the seeds enough; pat them dry and let them air dry for 5 minutes. Watch oven temperature closely as every oven runs differently. Don’t skip the stir halfway through for even roasting. Let seeds cool completely before serving for maximum crunch. For parties, double the batch as they disappear quickly. Store in an airtight container at room temperature for up to 2 weeks. Do not refrigerate. To re-crisp, bake at 300°F for 5 minutes.
Nutrition
- Serving Size: ¼ cup
- Calories: 180
- Sugar: 8
- Sodium: 150
- Fat: 12
- Saturated Fat: 5
- Carbohydrates: 16
- Fiber: 3
- Protein: 6
Keywords: pumpkin seeds, cinnamon sugar, baked snack, fall recipe, Halloween snack, easy appetizer, crunchy seeds


