My neighbor, Mrs. Kowalski, watched me struggling with a batch of black cocoa powder that had clumped into stubborn little rocks. I was trying to make a dark chocolate cake for a Halloween party, and honestly, I was about two seconds from throwing the whole thing in the trash. She didn’t say anything at first. Then she just opened her pantry door and handed me a jar of black cocoa powder she’d bought on a whim, along with a tiny bottle of orange extract. “For the frosting,” she said, with this little shrug. “It’s the color of a proper autumn sunset.”
That was three Halloweens ago, and I haven’t made a regular chocolate cupcake for the occasion since. The recipe she shared wasn’t really a recipe at all—it was more of a conversation. She told me about her grandmother in Kraków who made a dark, almost black poppy seed cake for All Souls’ Day, and how the color wasn’t spooky, but comforting. Like a warm blanket on a cold night. I took that idea and ran with it, swapping poppy seeds for cocoa and adding a tangy orange buttercream that tastes like a creamsicle had a cozy little baby with a chocolate truffle.
These Cozy Black Velvet Halloween Cupcakes with Orange Frosting are the result of that kitchen exchange. They’re not trying to be scary or gimmicky. They’re just deeply, richly chocolate—velvety and moist—topped with a swirl of bright, citrusy frosting that makes you feel like you’re eating a hug. I’ve made them for neighbors, for my kid’s classroom party, and for a friend who was having a rough October. Every single time, someone says, “Wait, these are for Halloween?” And I say, “Yep. But they’re for comfort, too.”
Why You’ll Love This Recipe
Let me tell you why these cupcakes have become my go-to for the spooky season—and honestly, for any season when I need a little pick-me-up.
- Rich, Not Overwhelming: The black cocoa gives a deep, almost Oreo-like chocolate flavor without being too sweet. It’s sophisticated enough for grown-ups but kid-friendly through and through.
- That Orange Frosting, Though: It’s not just colored orange for the holiday. The fresh orange zest and a splash of juice cut through the dark chocolate perfectly. It’s bright, creamy, and tastes like a creamsicle in the best way possible.
- Simple Ingredients: You probably have most of these in your pantry right now. No weird stabilizers or hard-to-find extracts—just butter, sugar, flour, cocoa, and a few pantry staples.
- Perfect for a Cozy Night In: These aren’t the kind of cupcakes you wolf down at a loud party. They’re the kind you eat slowly, with a cup of tea or a glass of milk, while watching a cheesy Halloween movie. They’re comfort food, plain and simple.
- Surprisingly Easy: The black velvet batter comes together in one bowl, and the frosting is a simple American buttercream. No complicated techniques, just a little patience for the butter to get fluffy.
What makes this recipe different from every other chocolate cupcake recipe out there? It’s the balance. The black cocoa is naturally less acidic than regular cocoa, so it needs a little help from buttermilk and a touch of vinegar to get that tender, velvety crumb. And the orange frosting isn’t just a gimmick—it’s a flavor pairing that works on a molecular level. The citrus oils brighten the chocolate, and the creamy butter rounds everything out. It’s not just a Halloween cupcake. It’s the cupcake you’ll crave in November, too.
What Ingredients You Will Need
This recipe uses simple, wholesome ingredients to deliver that deep, cozy chocolate flavor and a frosting that tastes like pure autumn sunshine. Let’s break down what you’ll need and why each ingredient matters.
For the Black Velvet Cupcakes
- All-Purpose Flour (1 ½ cups / 188g): The structural backbone. Spoon and level it into your measuring cup—don’t scoop directly, or you’ll end up with dry cupcakes.
- Black Cocoa Powder (½ cup / 50g): This is the star of the show. It’s what gives the cupcakes that dramatic dark color and a mellow, almost Oreo-like flavor. I prefer the brand Rodelle for its deep, consistent color. Regular Dutch-process cocoa will work in a pinch, but the color will be more of a dark brown than black.
- Granulated Sugar (1 cup / 200g): For sweetness and moisture. Don’t reduce it—sugar isn’t just for taste; it helps keep the crumb tender.
- Baking Soda (1 teaspoon): The leavening agent. It reacts with the acidic buttermilk and vinegar to create a light, fluffy texture.
- Salt (½ teaspoon): Balances the sweetness and enhances the chocolate flavor. Use fine sea salt for even distribution.
- Buttermilk (1 cup / 240ml): This is non-negotiable for a velvet texture. The acidity tenderizes the gluten and activates the baking soda. If you don’t have buttermilk, you can make a quick substitute by adding 1 tablespoon of lemon juice or white vinegar to 1 cup of milk and letting it sit for 5 minutes.
- Vegetable Oil (½ cup / 120ml): Keeps the cupcakes moist for days. I use a neutral oil like canola or avocado oil.
- Large Eggs (2): Room temperature is key. Cold eggs can seize the batter, so let them sit out for 30 minutes before you start.
- Vanilla Extract (1 teaspoon): Adds warmth and depth. Use pure vanilla extract, not imitation, for the best flavor.
- White Vinegar (1 teaspoon): Sounds weird, I know, but it reacts with the baking soda for extra lift. You won’t taste it at all.
- Hot Coffee or Water (½ cup / 120ml): This is my secret weapon. Hot liquid helps bloom the cocoa powder, intensifying the chocolate flavor. Coffee enhances the chocolate without tasting like coffee. Use decaf if you’re sensitive to caffeine.
For the Orange Buttercream Frosting
- Unsalted Butter (1 cup / 226g): Softened to room temperature. It should be cool to the touch but give slightly when you press it. If it’s too soft, your frosting will be runny.
- Powdered Sugar (3 ½ cups / 440g): Sifted to avoid lumps. I promise, sifting makes a difference in the final silky texture.
- Fresh Orange Zest (2 tablespoons): From about 2 large oranges. The zest contains the essential oils that give the frosting its bright, authentic orange flavor. Don’t skip this for bottled extract—it’s not the same.
- Fresh Orange Juice (3 tablespoons): Adds a little acidity and thins the frosting to the perfect piping consistency. Use juice from the same oranges you zested.
- Vanilla Extract (½ teaspoon): Rounds out the citrus and adds a cozy warmth.
- Salt (¼ teaspoon): A tiny pinch to balance the sweetness and make the orange flavor pop.
- Orange Gel Food Coloring (optional): I use a tiny drop of AmeriColor Orange to get that vibrant Halloween color. Gel is better than liquid because it doesn’t thin the frosting.
Equipment Needed
You don’t need a fancy bakery setup to make these cupcakes, but having the right tools makes the process smoother. Here’s what I use.
- Muffin Pan: A standard 12-cup pan is perfect. I prefer a non-stick one, but any pan will work if you use paper liners.
- Paper Cupcake Liners: Use white or black liners for the best contrast with the orange frosting. I love the ones with a slight metallic sheen for a festive touch.
- Mixing Bowls: One large bowl for the dry ingredients and another for the wet. I use glass or stainless steel.
- Whisk and Rubber Spatula: A whisk for combining dry ingredients, and a spatula for folding the batter together without overmixing.
- Electric Hand Mixer or Stand Mixer: For the frosting. You can mix it by hand with a wooden spoon, but your arm will get a workout. A hand mixer is your best friend here.
- Piping Bag and Star Tip: For that gorgeous swirl on top. If you don’t have a piping bag, you can snip the corner of a zip-top bag. I use a Wilton 1M tip for a classic rosette look.
- Cookie Scoop (2-tablespoon size): For evenly portioning the batter. This ensures all your cupcakes bake at the same rate.
- Cooling Rack: Absolutely necessary. If you let the cupcakes cool in the pan, they’ll get soggy bottoms. A wire rack allows air to circulate and keeps them perfectly textured.
- Microplane or Zester: For getting those fine strips of orange zest without any bitter white pith.
If you don’t have a piping bag, don’t stress. You can simply spread the frosting on with a small offset spatula and create little swoops for a rustic look. It’s just as delicious.
Preparation Method
Alright, let’s get baking. This recipe comes together in about 30 minutes of active time, plus 18 minutes of baking. The whole thing—from start to frosted cupcake—takes about an hour and a half, including cooling time.
Step 1: Preheat and Prep
Preheat your oven to 350°F (175°C). Line your muffin pan with 12 paper liners. This is a non-negotiable step—don’t grease the pan directly, or the black cocoa will leave a stubborn stain.
Step 2: Mix the Dry Ingredients
In a large mixing bowl, whisk together the all-purpose flour, black cocoa powder, granulated sugar, baking soda, and salt. Whisk for about 30 seconds to aerate everything and break up any clumps in the cocoa. You’ll see the mixture turn a beautiful, dark charcoal color.
Step 3: Combine the Wet Ingredients
In a separate bowl or a large liquid measuring cup, whisk together the buttermilk, vegetable oil, eggs, vanilla extract, and white vinegar. Make sure the eggs are fully incorporated—you don’t want any streaks of egg white floating around.
Step 4: Bring It Together
Pour the wet ingredients into the dry ingredients. Stir gently with a rubber spatula until just combined. It will look a little thick and lumpy—that’s okay. Now, pour in the hot coffee (or hot water) and stir again. The batter will thin out and become silky and smooth. Don’t overmix. A few tiny lumps are fine. Overmixing will make the cupcakes tough.
Step 5: Fill and Bake
Using your cookie scoop or a spoon, divide the batter evenly among the 12 liners. Fill each one about two-thirds full—about 3 tablespoons of batter per cupcake. Bake for 18 to 20 minutes, or until a toothpick inserted into the center of a cupcake comes out clean or with a few moist crumbs. The tops should spring back when you gently press them.
Step 6: Cool Completely
Let the cupcakes cool in the pan for 5 minutes. Then transfer them to a wire rack to cool completely. This is the hardest part—the waiting. But trust me, if you try to frost them while they’re still warm, the frosting will melt into a puddle. I’ve made that mistake, and it’s heartbreaking.
Step 7: Make the Frosting
While the cupcakes cool, make the frosting. In a large bowl, beat the softened butter with an electric mixer on medium speed for about 2 minutes, until it’s pale and fluffy. Scrape down the sides of the bowl. Add the sifted powdered sugar, one cup at a time, beating on low speed to avoid a sugar cloud. Add the orange zest, orange juice, vanilla extract, and salt. Beat on medium-high for another 2 to 3 minutes, until the frosting is light, airy, and spreadable. If you’re using food coloring, add a tiny drop of orange gel and beat until evenly distributed.
Step 8: Frost and Decorate
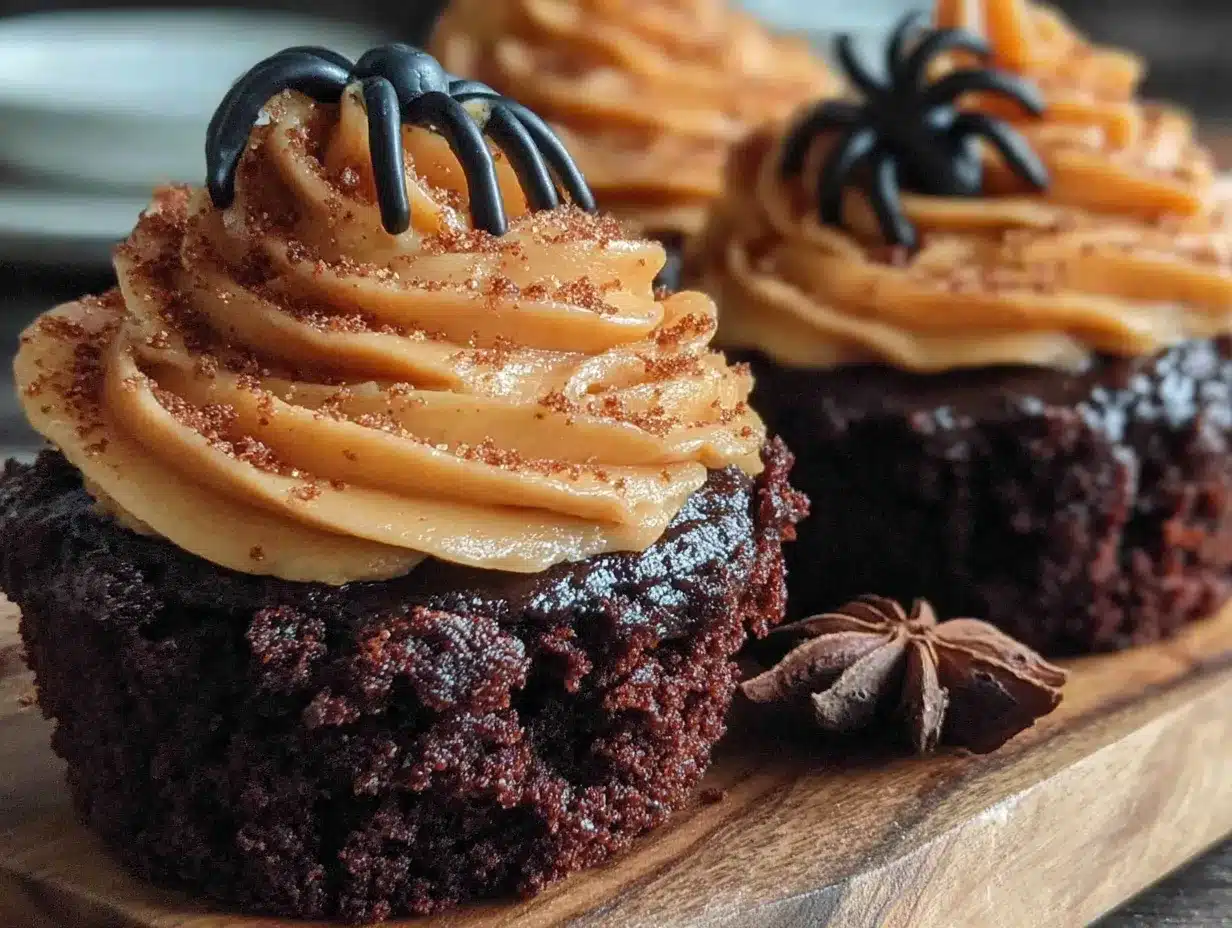
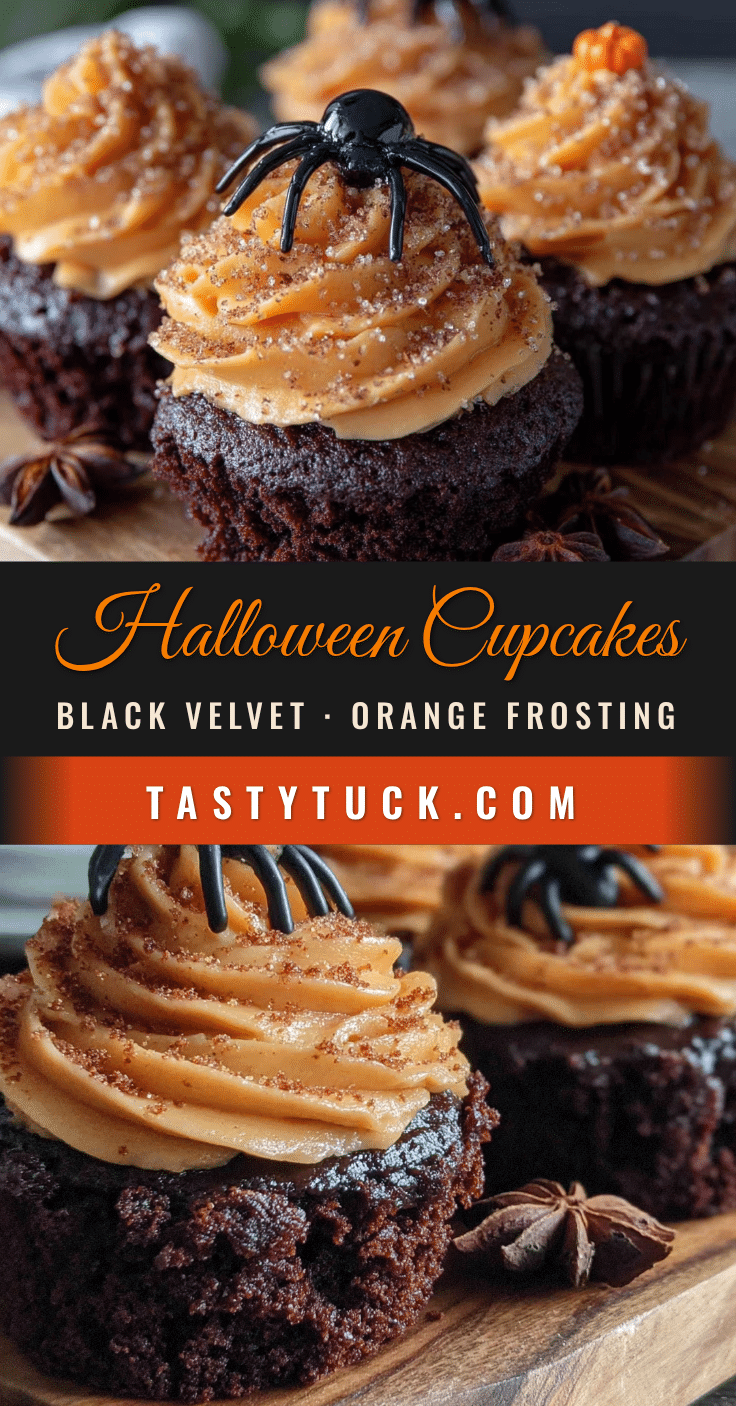
Fit your piping bag with the star tip and fill it with the orange frosting. Pipe a generous swirl onto each cooled cupcake. I like to start from the outside edge and work my way in, ending with a little peak in the center. For a final touch, you can add a few sprinkles of black sanding sugar or a tiny candy spider on top.
Cooking Tips & Techniques
I’ve made these cupcakes more times than I can count, and I’ve learned a few things the hard way. Here are my best tips for getting them perfect every time.
- Room Temperature Ingredients Matter: I know it’s tempting to use cold eggs and cold buttermilk straight from the fridge, but don’t. Cold ingredients don’t emulsify properly, which can lead to a dense, greasy crumb. Set everything out 30 minutes before you start. It makes a real difference.
- Don’t Overmix the Batter: Once you add the wet ingredients to the dry, stir only until you don’t see any more flour. Overmixing develops the gluten, and gluten makes cupcakes tough. We want them tender and velvety, not chewy.
- The Coffee Trick: If you’re nervous about using coffee, don’t be. It doesn’t make the cupcakes taste like coffee. The hot liquid helps the cocoa powder release its full flavor, and the coffee itself adds a subtle, roasted depth that makes the chocolate taste more chocolatey. I promise, even coffee-haters love these cupcakes.
- Check for Doneness Early: Ovens vary. Start checking your cupcakes at the 16-minute mark. A toothpick should come out with a few moist crumbs, not wet batter. Overbaking dries them out, and nobody wants a dry cupcake.
- Frosting Consistency: If your frosting looks too thick, add a splash more orange juice. If it looks too thin, add a little more sifted powdered sugar. The perfect consistency is thick enough to hold its shape when piped but soft enough to spread easily.
- My Biggest Failure: The first time I made these, I forgot the vinegar. The cupcakes baked up flat and dense, like little chocolate hockey pucks. The vinegar reacts with the baking soda to create lift—don’t skip it!
Variations & Adaptations
One of the best things about this recipe is how adaptable it is. Here are a few ways you can make it your own.
- Gluten-Free: Swap the all-purpose flour for a 1:1 gluten-free baking blend. I’ve had great success with Bob’s Red Mill. The texture will be slightly more delicate, but the flavor is still spot-on.
- Dairy-Free: Use a dairy-free buttermilk substitute (add 1 tablespoon of lemon juice to 1 cup of oat or almond milk) and replace the butter in the frosting with a high-quality vegan butter stick. Miyoko’s is my favorite for baking.
- Spice It Up: Add ½ teaspoon of cinnamon and a pinch of cayenne pepper to the dry ingredients for a Mexican hot chocolate twist. The warmth of the spice pairs beautifully with the orange frosting.
- Different Frostings: Not an orange fan? Try a cream cheese frosting with a splash of vanilla, or a simple dark chocolate ganache for a double-chocolate experience.
- Mini Cupcakes: Use a mini muffin pan and bake for 10 to 12 minutes. You’ll get about 36 mini cupcakes—perfect for parties or snacking without the commitment.
- My Personal Favorite Variation: I once added a teaspoon of espresso powder to the dry ingredients and topped the cupcakes with a salted caramel drizzle. It was absolutely ridiculous in the best way. The deep, dark chocolate, the bright orange, and the salty caramel? Perfection.
Serving & Storage Suggestions
These cupcakes are best served at room temperature, which is when the crumb is most tender and the frosting is perfectly creamy. If you’ve stored them in the fridge, let them sit out for about 20 minutes before serving.
For a cozy Halloween night, I love serving these with a warm mug of spiced apple cider or a tall glass of cold milk. The citrus in the frosting also pairs beautifully with a hot cup of Earl Grey tea—the bergamot notes in the tea echo the orange flavor in a really lovely way.
To store, place the frosted cupcakes in an airtight container. They’ll keep at room temperature for up to 2 days, or in the refrigerator for up to 5 days. If you’re stacking them, use a sheet of wax paper between the layers to protect the frosting.
You can also freeze the unfrosted cupcakes for up to 3 months. Wrap each one tightly in plastic wrap, then place them in a freezer-safe bag. When you’re ready to enjoy them, thaw them at room temperature and whip up a fresh batch of frosting. The flavor actually deepens after freezing—the black cocoa gets even more mellow and rich.
One thing I love about these cupcakes is that they taste even better the next day. The flavors have time to meld, and the crumb becomes even more moist. So if you can, make them a day ahead. Your future self will thank you.
Nutritional Information & Benefits
Let’s be real—these are cupcakes, not health food. But that doesn’t mean they can’t have a few redeeming qualities. Here’s a rough estimate per cupcake (based on 12 servings).
| Nutrient | Amount |
|---|---|
| Calories | 410 |
| Total Fat | 22g |
| Saturated Fat | 12g |
| Carbohydrates | 54g |
| Sugar | 42g |
| Protein | 4g |
| Fiber | 2g |
On the bright side, black cocoa powder is rich in antioxidants called flavonoids, which are good for heart health. The orange zest provides a small dose of vitamin C and immune-boosting properties. And hey, a little bit of comfort food is good for the soul, too. I firmly believe that food made with love and shared with people you care about is always a net positive for your well-being.
If you’re watching your sugar intake, you can reduce the sugar in the frosting by a quarter cup, but keep in mind it will affect the texture. For a lower-carb option, you could try a sugar substitute, but I haven’t tested that myself, so I can’t vouch for the results.
Conclusion
These Cozy Black Velvet Halloween Cupcakes with Orange Frosting are more than just a pretty face. They’re a little piece of comfort wrapped up in a paper liner, perfect for a chilly autumn evening when you need something warm and sweet. The deep, dark chocolate is soothing and rich, while the bright orange frosting feels like a little burst of sunshine on a gray day.
I love this recipe because it’s proof that Halloween treats don’t have to be scary or overly sugary. They can be cozy, comforting, and deeply satisfying. Whether you’re making them for a party, for your kids, or just for yourself on a quiet night in, I hope they bring you as much joy as they’ve brought me.
If you give these a try, I’d love to hear how they turned out. Did you add a twist? Did your kids love them? Share your thoughts in the comments below, and don’t forget to tag me on Pinterest if you post a photo. Happy baking, and have a wonderfully cozy Halloween!
Frequently Asked Questions
Can I use regular cocoa powder instead of black cocoa?
Yes, you can. The cupcakes will still be delicious, but they’ll be a dark brown color instead of black. The flavor will also be slightly more intense and acidic, since black cocoa is naturally milder. If you use regular cocoa, consider adding an extra tablespoon of sugar to balance the flavor.
How do I get the frosting to be a bright orange color?
The natural color from the orange zest and juice will give you a pale peachy shade. For a vibrant Halloween orange, you’ll need a tiny drop of orange gel food coloring. I like AmeriColor or Wilton brands. Add it a little at a time until you reach your desired color.
Can I make the batter ahead of time?
I don’t recommend it. The baking soda starts reacting with the buttermilk and vinegar as soon as they’re mixed, so the batter will lose its lift if it sits too long. You can, however, mix the dry ingredients and the wet ingredients separately and combine them right before baking.
Why did my cupcakes sink in the middle?
This usually happens for one of three reasons: the oven wasn’t hot enough, the batter was overmixed, or the cupcakes were underbaked. Make sure your oven is fully preheated, mix the batter gently, and check for doneness with a toothpick. Also, avoid opening the oven door during the first 12 minutes of baking.
Can I make these into a cake instead of cupcakes?
Absolutely! Pour the batter into two greased and floured 8-inch round cake pans. Bake at 350°F (175°C) for 25 to 30 minutes, or until a toothpick comes out clean. You’ll need to double the frosting recipe to have enough for layering and covering the cake.
Pin This Recipe!
Best Easy Black Velvet Halloween Cupcakes with Orange Frosting
Deeply chocolate, velvety black cocoa cupcakes topped with a bright, citrusy orange buttercream. Perfect for a cozy Halloween night or any time you need a comforting, delicious treat.
- Prep Time: 30 minutes
- Cook Time: 18 minutes
- Total Time: 1 hour 30 minutes (including cooling)
- Yield: 12 cupcakes 1x
- Category: Dessert
- Cuisine: American
Ingredients
- 1 ½ cups (188g) all-purpose flour
- ½ cup (50g) black cocoa powder
- 1 cup (200g) granulated sugar
- 1 teaspoon baking soda
- ½ teaspoon fine sea salt
- 1 cup (240ml) buttermilk, room temperature
- ½ cup (120ml) vegetable oil (canola or avocado)
- 2 large eggs, room temperature
- 1 teaspoon pure vanilla extract
- 1 teaspoon white vinegar
- ½ cup (120ml) hot coffee or hot water
- 1 cup (226g) unsalted butter, softened
- 3 ½ cups (440g) powdered sugar, sifted
- 2 tablespoons fresh orange zest (from about 2 large oranges)
- 3 tablespoons fresh orange juice
- ½ teaspoon pure vanilla extract
- ¼ teaspoon salt
- Orange gel food coloring (optional)
Instructions
- Preheat oven to 350°F (175°C). Line a 12-cup muffin pan with paper liners.
- In a large bowl, whisk together flour, black cocoa powder, sugar, baking soda, and salt for 30 seconds.
- In a separate bowl or liquid measuring cup, whisk together buttermilk, vegetable oil, eggs, vanilla extract, and white vinegar until well combined.
- Pour the wet ingredients into the dry ingredients and stir gently with a rubber spatula until just combined. The batter will be thick and lumpy.
- Pour in the hot coffee (or hot water) and stir until the batter is smooth and silky. Do not overmix; a few tiny lumps are fine.
- Divide the batter evenly among the 12 liners, filling each about two-thirds full (about 3 tablespoons per cupcake).
- Bake for 18-20 minutes, or until a toothpick inserted into the center comes out clean or with a few moist crumbs. The tops should spring back when gently pressed.
- Let the cupcakes cool in the pan for 5 minutes, then transfer to a wire rack to cool completely.
- While the cupcakes cool, make the frosting: In a large bowl, beat the softened butter with an electric mixer on medium speed for 2 minutes until pale and fluffy.
- Add the sifted powdered sugar, one cup at a time, beating on low speed to avoid a sugar cloud. Add orange zest, orange juice, vanilla extract, and salt. Beat on medium-high for 2-3 minutes until light, airy, and spreadable. If using, add a tiny drop of orange gel food coloring and beat until evenly distributed.
- Fit a piping bag with a star tip (e.g., Wilton 1M) and fill with frosting. Pipe a generous swirl onto each cooled cupcake, starting from the outside edge and working inward, ending with a peak in the center.
- Optionally, decorate with black sanding sugar or a candy spider.
Notes
Room temperature ingredients are crucial for proper emulsification. Do not overmix the batter. The hot coffee enhances the chocolate flavor without making the cupcakes taste like coffee. For a dairy-free version, use a dairy-free buttermilk substitute and vegan butter. Unfrosted cupcakes can be frozen for up to 3 months.
Nutrition
- Serving Size: 1 cupcake
- Calories: 410
- Sugar: 42
- Fat: 22
- Saturated Fat: 12
- Carbohydrates: 54
- Fiber: 2
- Protein: 4
Keywords: Halloween cupcakes, black velvet cupcakes, orange frosting, chocolate cupcakes, easy Halloween dessert, black cocoa cupcakes, orange buttercream


