My neighbor Raj watched me digging through my utensil drawer for my hand mixer one Tuesday afternoon, and he didn’t say anything at first. Then he just shook his head and handed me a wooden spoon from his own kitchen. “You don’t need that,” he said, nodding toward the drawer. “For cookies? Just your hands and a bowl. That’s all my grandmother ever used.”
I’ll admit, I was skeptical. I mean, I’d been making chocolate chip cookies for years, and I always used my mixer. But Raj’s grandmother made cookies for the whole neighborhood every Diwali, and people talked about them like they were legendary. So I put the mixer away, grabbed that wooden spoon, and let me tell you—the cookies that came out of that experiment were honestly better than anything I’d ever made before. There was something about the rhythm of mixing by hand, the way you could feel the dough coming together, that changed everything.
Now, I’ve taken that lesson and added my own twist—brown butter. Because if you’re going to make cookies the old-fashioned way, you might as well make them unforgettable. These quick no-mixer brown butter chocolate chip cookies come together in one bowl with just a whisk and a spatula. No electric mixer to clean, no attachments to wash, and the whole thing takes maybe 20 minutes of active work. Maybe you’ve been there—staring at your mixer, wondering if it’s worth the hassle for just one batch of cookies. I promise you, it is not. And these cookies prove it.
This recipe stayed with me because it taught me something important: sometimes the simplest tools make the best food. Every time I make these, I think of Raj standing in his doorway, holding out that spoon. And every time someone takes a bite and their eyes go wide, I remember that you don’t need fancy equipment to make something extraordinary.
Why You’ll Love This Recipe
Let me be real with you—I’ve tested a lot of cookie recipes over the years. Some were amazing but required a stand mixer and a whole afternoon. Others were quick but tasted, well, quick. These no-mixer brown butter chocolate chip cookies hit that sweet spot where convenience meets absolutely incredible flavor. Here’s why they work so well:
- No mixer required—You can make these in one bowl with a whisk and a rubber spatula. That means less cleanup and more time eating cookies.
- Brown butter magic—Toasting the butter takes about 5 minutes but adds a nutty, caramel-like depth that makes these taste like you spent hours on them. You didn’t. But nobody has to know.
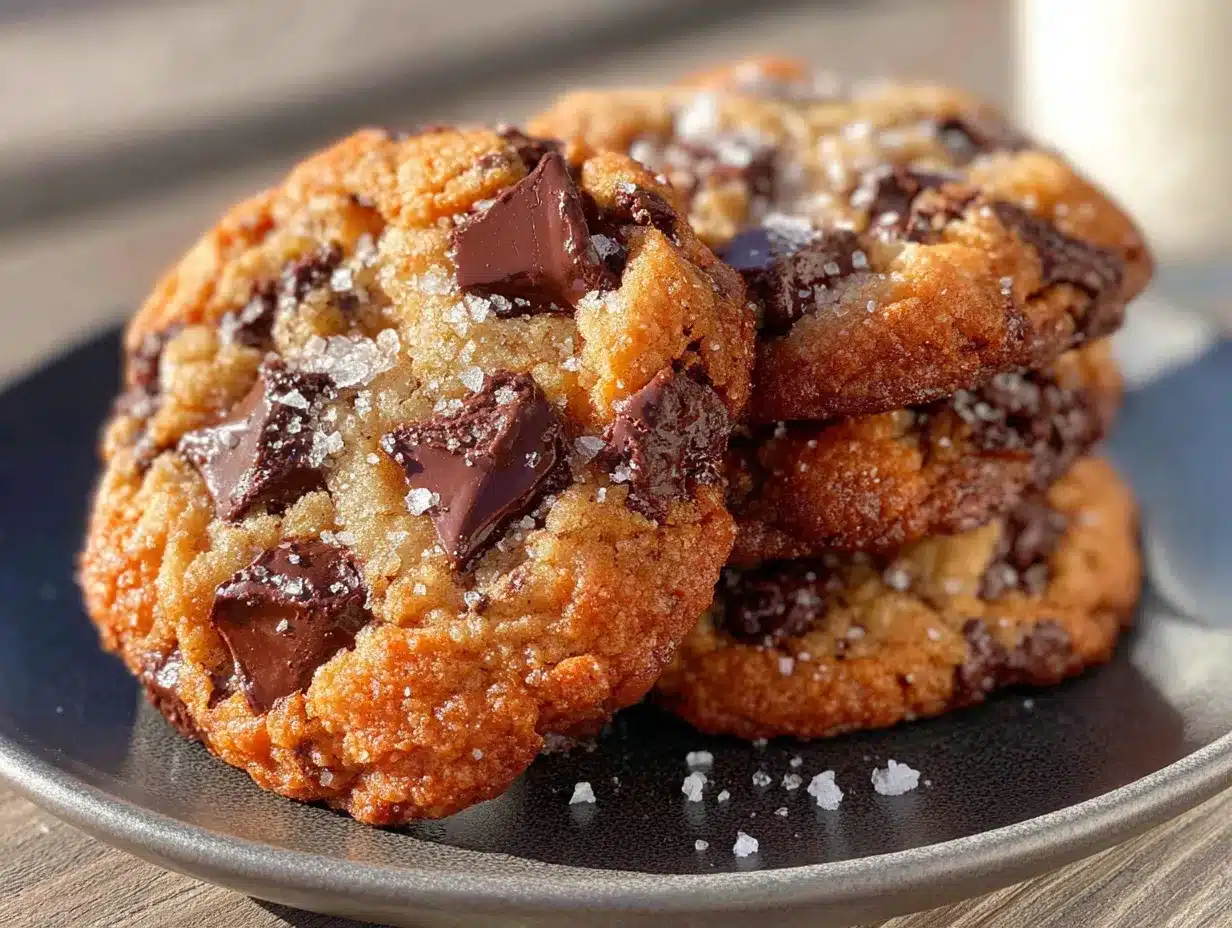
- Perfect texture—The edges get crispy and golden, while the centers stay soft and chewy. It’s that bakery-style cookie texture that everyone loves.
- Simple ingredients—Butter, sugar, eggs, flour, chocolate chips. If you bake at all, you probably have everything already. No weird specialty ingredients here.
- Ready in under 30 minutes—From start to finish, including chilling time, you can have warm cookies in your hands in about 25 minutes. That’s faster than ordering delivery.
- Weeknight approved—This is the kind of recipe you make on a Tuesday when you’re tired but really need a cookie. I’ve been there more times than I can count.
What makes these different from every other chocolate chip cookie recipe out there is the combination of brown butter and hand-mixing. Most recipes that use brown butter still require a mixer, but I figured out that if you cool the brown butter properly and whisk it by hand, you get an even better texture. The dough comes together more gently, which means the cookies spread just the right amount and stay tender in the middle. Plus, you avoid overmixing—which is the number one mistake people make with cookies anyway.
What Ingredients You Will Need
This recipe uses simple, everyday ingredients to create something that tastes anything but ordinary. The brown butter does most of the heavy lifting here, so you don’t need fancy extracts or specialty flours.
- 1 cup (226g) unsalted butter—This is the star of the show. I use Land O’Lakes or Kerrygold for the best flavor, but any good unsalted butter works. You’ll be browning it, so the quality matters. (Pro tip: If you only have salted butter, just reduce the added salt by 1/4 teaspoon.)
- 1 cup (200g) packed light brown sugar—Brown sugar adds moisture and that deep, molasses-y sweetness that pairs perfectly with brown butter. Dark brown sugar works too, but the cookies will be slightly darker and more caramel-forward.
- 1/2 cup (100g) granulated sugar—White sugar helps the cookies spread and gives those crispy edges. Don’t skip it—the combination of both sugars is key.
- 2 large eggs, room temperature—Room temperature eggs incorporate more easily into the butter mixture. If you forgot to take them out of the fridge, place them in a bowl of warm water for 5 minutes. I forget all the time, and this trick saves me constantly.
- 2 teaspoons vanilla extract—Use real vanilla if you can. The brown butter amplifies the vanilla flavor, so a good extract makes a noticeable difference. I like Nielsen-Massey for everyday baking.
- 2 cups (250g) all-purpose flour—Regular all-purpose flour works perfectly here. Spoon and level it into your measuring cup—don’t scoop directly, or you’ll pack too much flour in and end up with dry cookies.
- 1 teaspoon baking soda—This helps the cookies spread and gives them a nice lift. Make sure your baking soda is fresh—if it’s been sitting in your cabinet for two years, it might not work as well.
- 1/2 teaspoon salt—Salt balances the sweetness and enhances the brown butter flavor. I use fine sea salt for the dough and sometimes sprinkle a little flaky salt on top before baking.
- 1 1/2 cups (270g) chocolate chips or chopped chocolate—Use whatever you love. Semi-sweet is classic, but dark chocolate chips work beautifully with the nutty brown butter. I often use a mix of semi-sweet chips and chopped dark chocolate bar for those puddles of melted chocolate. Ghirardelli and Guittard are my go-to brands.
That’s it. Seven ingredients plus the butter, and you’re ready to go. No cornstarch, no pudding mix, no weird stabilizers. Just real ingredients that come together to make something truly special.
Equipment Needed
One of the best things about this recipe is how little equipment you need. Here’s what you’ll want to have ready:
- A medium saucepan—For browning the butter. A light-colored pan is ideal because you can see the butter change color, but any saucepan works.
- A large mixing bowl—Glass, ceramic, or metal all work. Just make sure it’s big enough to hold all the ingredients comfortably.
- A whisk—For mixing the butter and sugars together. A standard balloon whisk is perfect.
- A rubber spatula—For folding in the flour and chocolate chips. This is also great for scraping every last bit of brown butter out of the pan.
- A baking sheet—Standard half-sheet pans work great. Line them with parchment paper or a silicone baking mat for easy cleanup.
- A cookie scoop or two spoons—A #40 cookie scoop (about 1.5 tablespoons) gives you evenly sized cookies. If you don’t have one, two spoons work fine.
- A cooling rack—Optional but helpful for cooling the cookies evenly.
I’ve made these cookies with just a saucepan, a bowl, and a fork when I was camping once. They weren’t as pretty, but they still tasted amazing. Don’t let missing equipment stop you—improvise where you need to.
Preparation Method
- Brown the butter. Place the butter in a medium saucepan over medium heat. Let it melt completely, then continue cooking, swirling the pan occasionally. The butter will foam up, then the foam will subside, and you’ll see golden brown specks forming at the bottom. This takes about 5-7 minutes. The moment it smells nutty and looks amber-colored, remove it from the heat immediately. Pour it into your large mixing bowl to stop the cooking process. Don’t walk away during this step—brown butter can go from perfect to burnt in about 30 seconds. I learned this the hard way, and let me tell you, burnt butter smells like regret.
- Cool the butter. Let the brown butter cool for about 10 minutes. It should still be liquid but not hot. If you add the sugars while the butter is too hot, your cookies will spread too much and end up flat. If you’re in a hurry, you can place the bowl in the refrigerator for 3-4 minutes, stirring occasionally.
- Add the sugars. Once the butter has cooled, add both the brown sugar and granulated sugar to the bowl. Whisk vigorously for about 2 minutes. The mixture should look like wet sand and smell incredible. This step is important—you’re dissolving some of the sugar into the butter, which helps create that chewy texture.
- Add the eggs and vanilla. Crack the eggs into the bowl and add the vanilla extract. Whisk until everything is smooth and well combined, about 30 seconds. The mixture should be glossy and slightly thickened. If it looks separated or greasy, keep whisking—it will come together.
- Mix the dry ingredients. In a separate small bowl, whisk together the flour, baking soda, and salt. Yes, I know I said one bowl, but trust me on this one—mixing the dry ingredients separately ensures the baking soda and salt are evenly distributed. You can skip this if you’re really committed to the one-bowl thing, but your cookies might have pockets of salt. I’ve done it both ways, and the extra bowl is worth it.
- Combine wet and dry ingredients. Add the flour mixture to the wet ingredients. Fold gently with your rubber spatula until just combined. You should still see a few streaks of flour. This is where overmixing happens, so stop early rather than late.
- Add the chocolate chips. Pour in the chocolate chips and fold a few more times until they’re evenly distributed. The dough should be thick and slightly sticky. If it seems too soft, refrigerate it for 15 minutes before scooping.
- Scoop the cookies. Using your cookie scoop or two spoons, portion the dough into balls about 1.5 tablespoons each. Place them on the prepared baking sheet, leaving about 2 inches between each cookie. I usually fit 8-9 cookies on a standard half-sheet pan.
- Bake. Bake at 375°F (190°C) for 10-12 minutes. The edges should be golden brown and the centers should look slightly underdone and puffy. They will continue to cook on the hot baking sheet after you take them out, so don’t wait until they look fully done in the oven.
- Cool and enjoy. Let the cookies cool on the baking sheet for 5 minutes, then transfer them to a cooling rack. Or, let’s be honest, eat one right off the baking sheet. I won’t judge.
Cooking Tips & Techniques
After making these cookies probably fifty times, I’ve collected a few tips that make a real difference:
Don’t rush the brown butter. I know you’re in a hurry—this is a weeknight recipe, after all. But rushing the brown butter is the one step you shouldn’t skip. Watch for those little brown specks to appear, and trust your nose. When it smells nutty and toasty, it’s done. I once tried to speed this up by using high heat, and the butter burned before I even noticed. The cookies tasted bitter and sad. Learn from my mistakes.
Chill the dough if you have time. These cookies work great without chilling, but if you can spare 30 minutes, pop the scooped dough balls in the fridge. Chilled dough spreads less and gives you thicker, chewier cookies. I do this when I’m making cookies for company or when I just want them to look extra pretty.
Use a light-colored baking sheet. Dark baking sheets absorb more heat and can cause the bottoms of your cookies to burn before the tops are done. If you only have dark sheets, reduce the oven temperature by 25 degrees and keep an eye on the cookies.
Bang the pan. About halfway through baking, take the pan out of the oven and gently bang it on the counter a couple times. This deflates the puffy centers and creates those beautiful crinkly tops with crispy edges and soft centers. It sounds crazy, but it works.
Room temperature eggs matter. Cold eggs will seize up the brown butter and make the dough lumpy. If your eggs are cold, place them in a bowl of warm water for 5 minutes before using. I keep a bowl of warm water on the counter whenever I bake, just for this purpose.
Variations & Adaptations
One of the best things about this recipe is how flexible it is. Here are some variations I’ve tried and loved:
Gluten-free version. Substitute the all-purpose flour with a 1:1 gluten-free baking flour blend. I recommend King Arthur Measure for Measure or Bob’s Red Mill 1-to-1. Add an extra tablespoon of flour to compensate for the different absorption rates. The texture will be slightly more delicate, but they’re still delicious.
Double chocolate chip. Replace 1/4 cup of the all-purpose flour with 1/4 cup of unsweetened cocoa powder. Use white chocolate chips or chocolate chunks instead of regular chocolate chips. The brown butter and chocolate combo is next-level.
Add-ins galore. Fold in 1/2 cup of chopped toasted pecans or walnuts along with the chocolate chips. Or add 1/2 cup of dried cherries or cranberries for a tart contrast. I once added crushed pretzels and a sprinkle of sea salt on top, and it was the best thing I’d eaten in weeks.
Vegan adaptation. Use vegan butter (I like Miyoko’s or Earth Balance) and a flax egg (1 tablespoon ground flaxseed mixed with 3 tablespoons water, let sit for 5 minutes). The brown butter flavor won’t be quite as rich, but it’s still really good. Use dairy-free chocolate chips like Enjoy Life.
Small batch. Halve all the ingredients and bake just 6-8 cookies. This is perfect for when you’re craving cookies but don’t want a whole batch staring at you from the counter. I do this more often than I’d like to admit.
Serving & Storage Suggestions
These cookies are best served warm, about 5 minutes out of the oven. The chocolate is still melty, the edges are crispy, and the centers are soft and pillowy. That’s cookie perfection right there.
For a next-level experience, serve them with a glass of cold milk—obviously—or a scoop of vanilla ice cream sandwiched between two cookies for an ice cream sandwich. I’ve also crumbled them over yogurt for breakfast, and honestly, no regrets.
Storage: Keep the cookies in an airtight container at room temperature for up to 5 days. They’ll stay soft and chewy for the first 2-3 days, then start to get a little more crispy. If you want to keep them soft, add a slice of bread to the container—the cookies will absorb the moisture and stay tender.
Freezing: These freeze beautifully. You can freeze the baked cookies for up to 3 months, or freeze the raw dough balls for up to 3 months. For frozen dough, bake directly from frozen, adding 2-3 minutes to the baking time. I always keep a batch of dough balls in my freezer for emergency cookie situations. You never know when you’ll need a warm cookie at 10 PM on a Wednesday.
The flavors actually develop and deepen after a day or two. The brown butter flavor becomes more pronounced, and the cookies get even better. If you can resist eating them all immediately, that is.
Nutritional Information & Benefits
Let’s be honest—cookies are a treat, and these are indulgent. But here’s the nutritional breakdown per cookie (based on 24 cookies):
- Calories: 215
- Total Fat: 12g
- Saturated Fat: 7g
- Carbohydrates: 27g
- Sugar: 18g
- Protein: 3g
- Fiber: 1g
On the bright side, the brown butter adds a richness that means you’ll feel satisfied with just one or two cookies—not the entire batch. And if you use dark chocolate chips, you’ll get a nice dose of antioxidants from the cocoa. The eggs provide protein, and the butter contains vitamin A and healthy fats.
For those with dietary concerns, this recipe contains gluten, dairy, and eggs. For a gluten-free version, see the variations above. If you’re watching your sugar intake, you can reduce the granulated sugar by 2 tablespoons without significantly affecting the texture.
I’m not going to tell you these are health food—they’re cookies, and they’re meant to be enjoyed. But I believe in balance, and having a couple of these with a cup of tea feels like a perfectly reasonable way to treat yourself.
Conclusion
These quick no-mixer brown butter chocolate chip cookies have become my go-to recipe for so many reasons. They’re fast enough for a weeknight craving, simple enough for beginner bakers, and impressive enough to bring to a party. The brown butter adds a depth of flavor that makes these taste like you spent hours on them, when really, you just used one pan, one bowl, and a wooden spoon.
What I love most about this recipe is that it proves you don’t need fancy equipment or complicated techniques to make something truly special. Sometimes the best things come from the simplest methods—a lesson I learned from a neighbor who handed me a wooden spoon and changed the way I bake forever.
I’d love to hear how these turn out for you. Did you try any variations? Did you manage to resist eating the dough? (I never do, and I’m not sorry.) Drop a comment below and let me know, or tag me in your cookie photos. Happy baking, friends—you’ve got this.
Frequently Asked Questions
Can I make these cookies without browning the butter?
Yes, you can skip the browning step and just use melted butter. The cookies will still be good, but you’ll miss out on that nutty, caramel-like flavor that makes these cookies so special. If you’re short on time, melted butter works in a pinch.
Why did my cookies spread too much?
This usually happens for a few reasons: the butter was too warm when you added the sugars, the dough wasn’t chilled, or your baking soda is old. Make sure your brown butter has cooled for at least 10 minutes, and try chilling the scooped dough for 15-20 minutes before baking.
Can I use salted butter instead of unsalted?
Absolutely. Just reduce the added salt in the recipe to 1/4 teaspoon instead of 1/2 teaspoon. The cookies might have a slightly saltier edge, which some people actually prefer with the sweet brown butter flavor.
How do I know when the cookies are done baking?
Look for golden brown edges with centers that still look slightly underdone and puffy. The centers should be set but soft. Remember that cookies continue to bake on the hot pan after you take them out of the oven, so it’s better to underbake slightly than overbake.
Can I double this recipe?
Yes, this recipe doubles beautifully. Just make sure to brown the butter in batches—browning too much butter at once can lead to uneven cooking. I often double the batch and freeze half the dough for later.
Pin This Recipe!
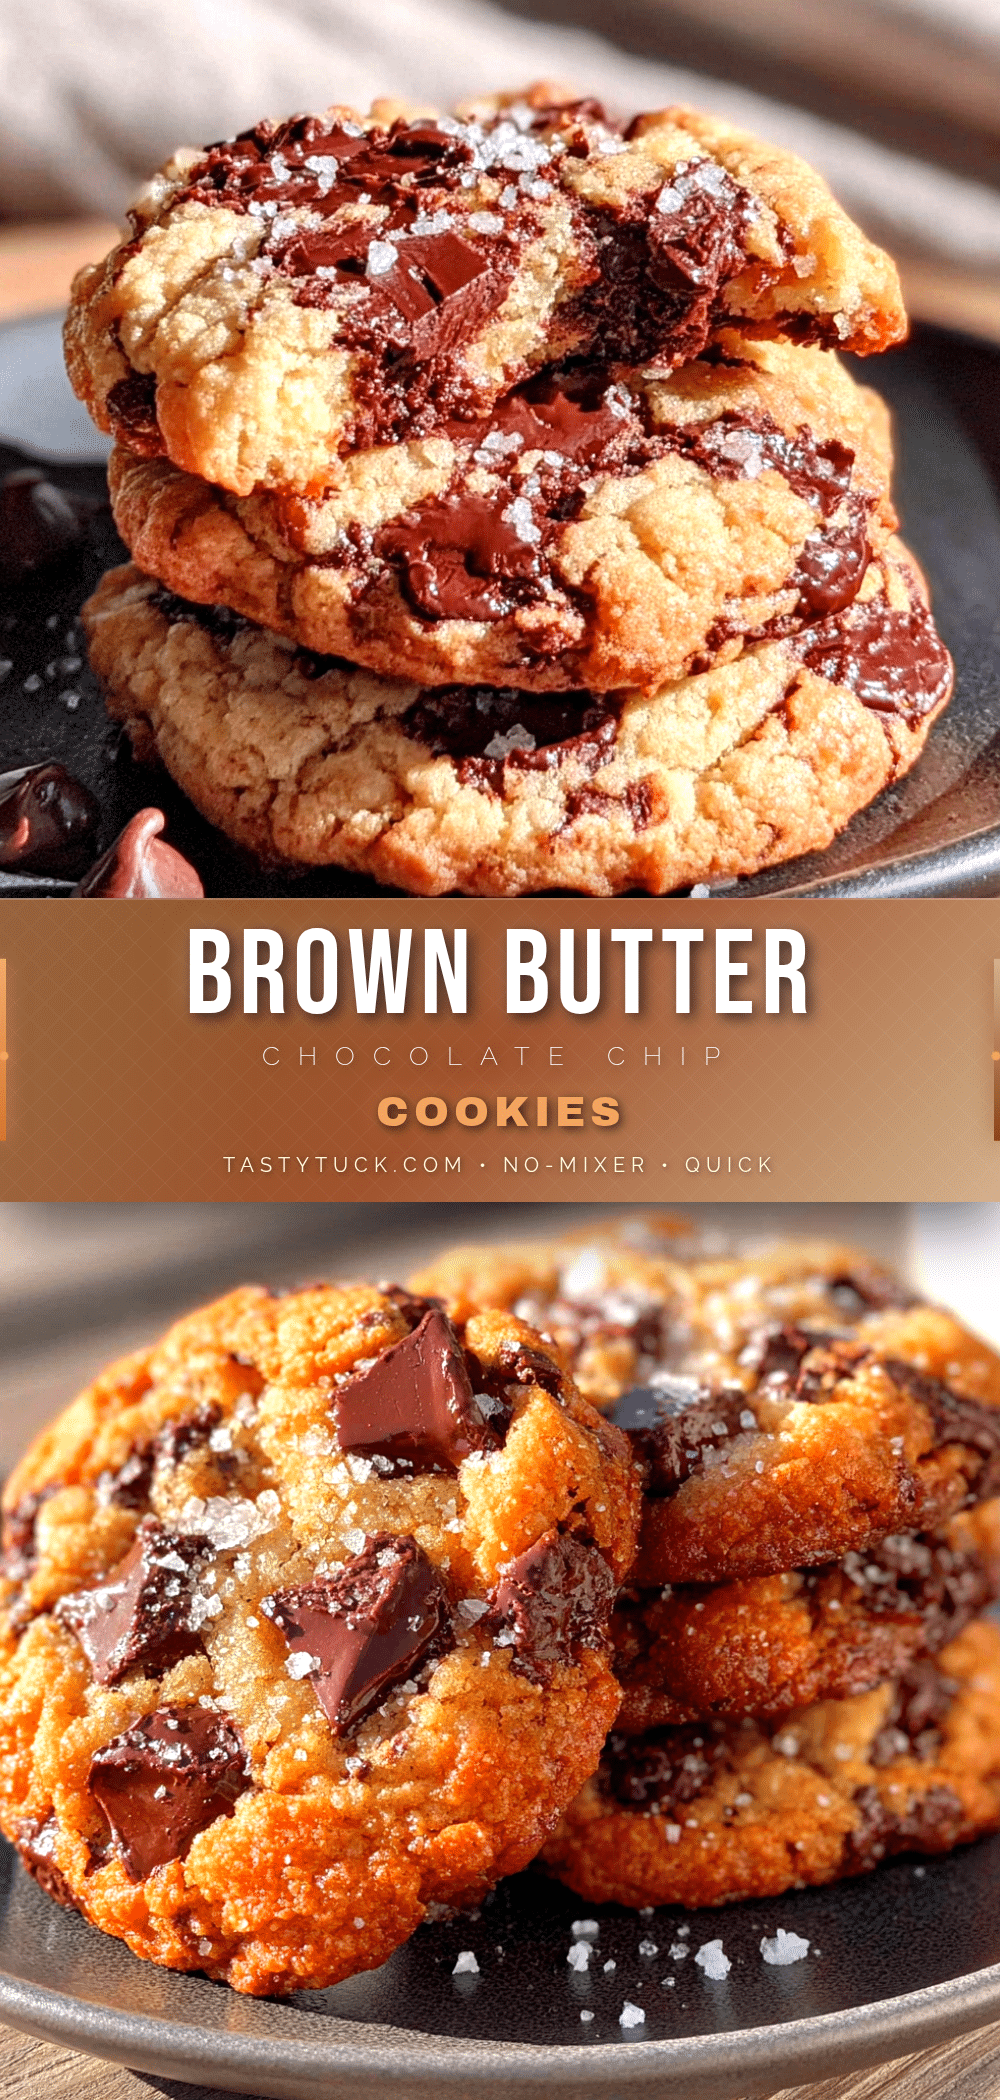
Best Easy No-Mixer Brown Butter Chocolate Chip Cookies
These quick no-mixer brown butter chocolate chip cookies come together in one bowl with just a whisk and a spatula. No electric mixer needed, and the brown butter adds a nutty, caramel-like depth that makes them taste like you spent hours on them.
- Prep Time: 20 minutes
- Cook Time: 10-12 minutes
- Total Time: 30 minutes
- Yield: 24 cookies 1x
- Category: Dessert
- Cuisine: American
Ingredients
- 1 cup (226g) unsalted butter
- 1 cup (200g) packed light brown sugar
- 1/2 cup (100g) granulated sugar
- 2 large eggs, room temperature
- 2 teaspoons vanilla extract
- 2 cups (250g) all-purpose flour
- 1 teaspoon baking soda
- 1/2 teaspoon salt
- 1 1/2 cups (270g) chocolate chips or chopped chocolate
Instructions
- Brown the butter: Place the butter in a medium saucepan over medium heat. Let it melt completely, then continue cooking, swirling the pan occasionally. The butter will foam up, then the foam will subside, and you’ll see golden brown specks forming at the bottom. This takes about 5-7 minutes. The moment it smells nutty and looks amber-colored, remove it from the heat immediately. Pour it into your large mixing bowl to stop the cooking process.
- Cool the butter: Let the brown butter cool for about 10 minutes. It should still be liquid but not hot. If you’re in a hurry, you can place the bowl in the refrigerator for 3-4 minutes, stirring occasionally.
- Add the sugars: Once the butter has cooled, add both the brown sugar and granulated sugar to the bowl. Whisk vigorously for about 2 minutes. The mixture should look like wet sand and smell incredible.
- Add the eggs and vanilla: Crack the eggs into the bowl and add the vanilla extract. Whisk until everything is smooth and well combined, about 30 seconds. The mixture should be glossy and slightly thickened.
- Mix the dry ingredients: In a separate small bowl, whisk together the flour, baking soda, and salt.
- Combine wet and dry ingredients: Add the flour mixture to the wet ingredients. Fold gently with your rubber spatula until just combined. You should still see a few streaks of flour.
- Add the chocolate chips: Pour in the chocolate chips and fold a few more times until they’re evenly distributed. The dough should be thick and slightly sticky. If it seems too soft, refrigerate it for 15 minutes before scooping.
- Scoop the cookies: Using your cookie scoop or two spoons, portion the dough into balls about 1.5 tablespoons each. Place them on the prepared baking sheet, leaving about 2 inches between each cookie.
- Bake: Bake at 375°F (190°C) for 10-12 minutes. The edges should be golden brown and the centers should look slightly underdone and puffy.
- Cool and enjoy: Let the cookies cool on the baking sheet for 5 minutes, then transfer them to a cooling rack.
Notes
Don’t rush the brown butter; watch for golden brown specks and a nutty aroma. Chill the dough for 30 minutes for thicker, chewier cookies. Use a light-colored baking sheet to prevent burning. Bang the pan halfway through baking for crinkly tops. Room temperature eggs are important to prevent the butter from seizing.
Nutrition
- Serving Size: 1 cookie
- Calories: 215
- Sugar: 18
- Sodium: 120
- Fat: 12
- Saturated Fat: 7
- Carbohydrates: 27
- Fiber: 1
- Protein: 3
Keywords: brown butter, chocolate chip cookies, no mixer, easy cookies, one bowl cookies, weeknight dessert


