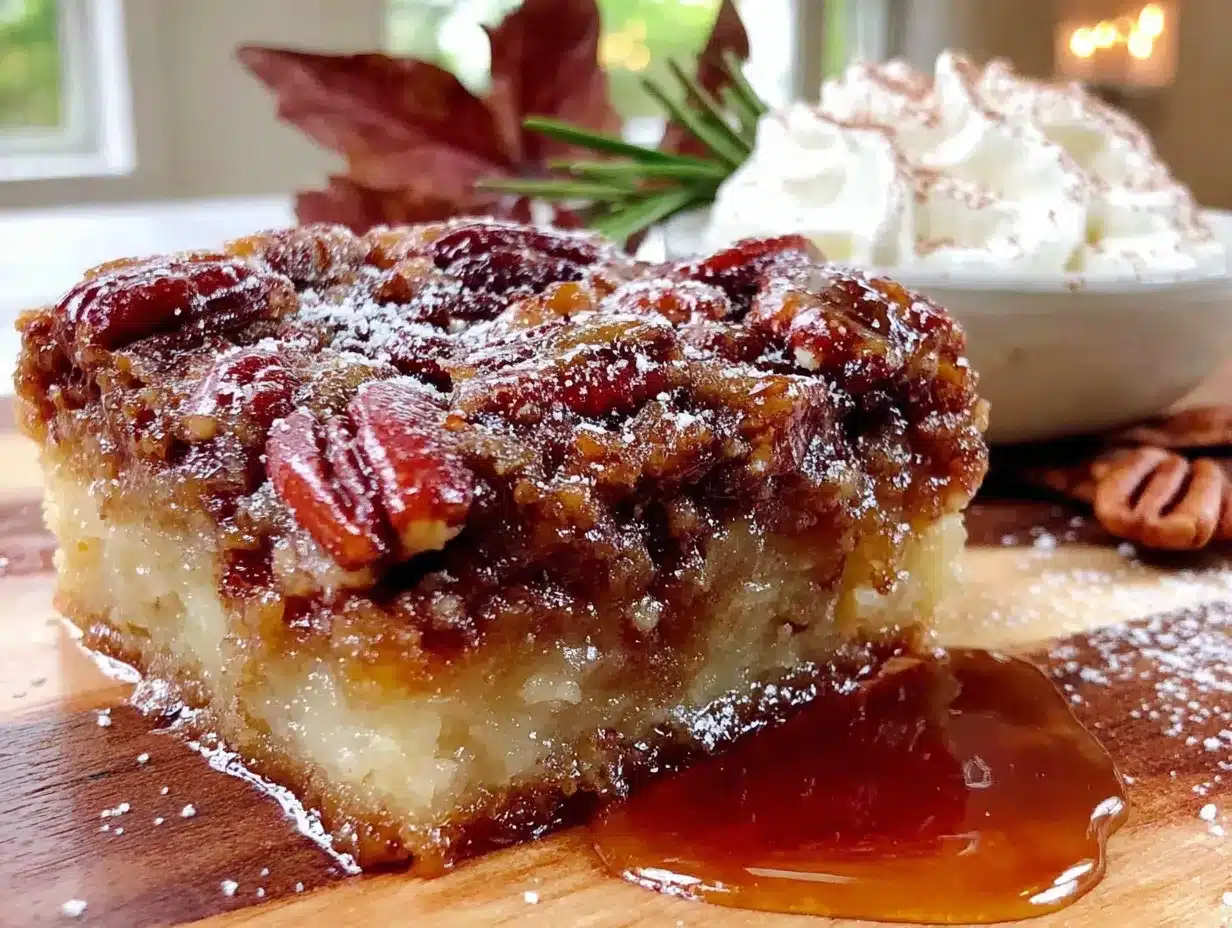
The third time I made these maple bourbon pecan pie bars in a single week, I started wondering if I had a problem. Or maybe I’d just finally cracked the code on something I’d been chasing for years—that perfect balance between a sturdy, buttery shortbread crust and a filling that actually sets up firm enough to cut into clean squares without turning into a sticky mess.
I’d been through the trial-and-error wringer with pecan pie bars before. Too many versions where the filling soaked through the crust, turning the bottom into a sad, soggy situation. Or worse, bars that looked gorgeous out of the oven but collapsed into a puddle of syrup the second you tried to slice them. Honestly, I was about to give up on the whole bar format entirely.
Then came the bourbon. And the maple syrup. And the realization that the crust needed a par-bake—not just a quick blind bake, but a real head-start in the oven. That one change, plus letting the bars cool completely (I know, the hardest part), changed everything. Now I make these every time I need a dessert that travels well, feeds a crowd, and makes people close their eyes on the first bite. They’re that good.
These aren’t your average pecan pie bars. They’re richer, deeper, and somehow both more sophisticated and more comforting. The bourbon doesn’t shout—it whispers. The maple syrup adds a woodsy sweetness that plain corn syrup just can’t touch. And that crust? Firm enough to hold everything together, tender enough to melt when you bite into it.
So whether you’re bringing dessert to Thanksgiving, need something impressive for a holiday cookie exchange, or just want to make your Tuesday night feel special—these bars deliver. No fuss, no fancy equipment, just pure pecan pie magic in bar form.
Why You’ll Love This Recipe
Let me tell you why these bars have become my go-to dessert for pretty much every occasion. I’ve tested this recipe more times than I care to admit, and each batch taught me something new.
- Quick & Easy : From start to finish, you’re looking at about 30 minutes of active work. The oven does the heavy lifting after that. Perfect for when you need a showstopper dessert without spending all day in the kitchen.
- Simple Ingredients : No weird specialty items here. Butter, flour, sugar, eggs, pecans—the kind of things you probably already have in your pantry. The maple syrup and bourbon are the only “extras,” and they’re worth keeping on hand.
- Perfect for Holidays and Gatherings : These bars travel like a dream. Stack them in a tin, and they won’t fall apart or get messy. I’ve brought them to Friendsgiving, Christmas parties, and summer barbecues—they disappear every single time.
- Crowd-Pleaser : Kids love the sweet, nutty flavor. Adults appreciate the subtle bourbon warmth. Even people who say they don’t like pecan pie end up reaching for seconds.
- Unbelievably Delicious : The texture is everything—crunchy pecans, chewy filling, and that buttery shortbread crust that holds it all together. It’s comfort food reimagined, and honestly, it’s my best version of this classic dessert.
What makes these bars different from every other recipe out there? It’s the combination of par-baking the crust and using real maple syrup instead of corn syrup. That extra step guarantees a crust that stays crisp, and the maple-bourbon filling has a depth of flavor that plain corn syrup just can’t match. I’ve had people tell me these are better than actual pecan pie, and honestly, I agree.
What Ingredients You Will Need
This recipe uses simple, wholesome ingredients to deliver bold flavor and satisfying texture without the fuss. Most of these are pantry staples, and the ones that aren’t are worth keeping around for future batches.
For the Shortbread Crust
- 1 ½ cups all-purpose flour (spooned and leveled—don’t scoop straight from the bag)
- ½ cup powdered sugar (adds tenderness and structure)
- ¾ cup cold unsalted butter, cut into small cubes (I prefer Kerrygold for the rich flavor, but any good quality butter works)
- ¼ teaspoon salt (balances the sweetness)
For the Maple Bourbon Filling
- ¾ cup pure maple syrup (not pancake syrup—real maple makes a huge difference here)
- ½ cup packed light brown sugar (dark brown works too, for a deeper molasses flavor)
- 3 large eggs, room temperature (cold eggs can seize the filling)
- 3 tablespoons unsalted butter, melted and slightly cooled
- 2 tablespoons bourbon (I use Maker’s Mark, but any good bourbon works—just don’t use the cheap stuff)
- 1 teaspoon vanilla extract
- ¼ teaspoon salt
- 2 cups pecan halves or chopped pecans (I like a mix of both for texture)
Ingredient Tips: For the best texture, make sure your pecans are fresh—stale nuts can ruin the whole batch. I usually buy mine from the bulk section at the grocery store and store them in the freezer. If you don’t have bourbon on hand, you can substitute with an equal amount of dark rum or even a splash of vanilla extract mixed with a tablespoon of water. Just know the flavor profile will shift slightly.
For a gluten-free version, swap the all-purpose flour with a good quality 1-to-1 gluten-free baking flour blend. I’ve tested this with Bob’s Red Mill, and it works beautifully. The crust might be slightly more crumbly, but the flavor is still spot-on.
Equipment Needed
You don’t need a fancy kitchen to make these bars. Here’s what you’ll actually use:
- 9×13-inch baking pan (metal pans work best for even baking; glass can work but may need slightly longer baking time)
- Parchment paper (non-negotiable—this makes lifting the bars out so much easier)
- Food processor or pastry cutter (for the crust—a food processor is faster, but a pastry cutter and some elbow grease work fine too)
- Large mixing bowls (one for the crust, one for the filling)
- Whisk (for combining the filling ingredients)
- Rubber spatula
- Cooling rack
- Sharp knife (for clean slices—serrated knives work well here)
If you don’t have a food processor, don’t worry. I’ve made the crust by hand more times than I can count. Just cut the cold butter into the flour mixture using a pastry cutter or even two forks until it looks like coarse meal. It takes a few extra minutes but works perfectly.
Preparation Method
Let’s get baking. I’ll walk you through every step so you can nail these bars on your first try.
Step 1: Prepare the Crust
Preheat your oven to 350°F (175°C). Line your 9×13-inch baking pan with parchment paper, leaving some overhang on two opposite sides—this creates handles for lifting the bars out later. In a food processor, pulse together the flour, powdered sugar, and salt until combined. Add the cold butter cubes and pulse until the mixture looks like coarse sand with some pea-sized butter pieces still visible. Don’t over-process—those little butter bits create flakiness.
Press the mixture evenly into the bottom of the prepared pan. Use the bottom of a measuring cup or a glass to really pack it down firmly. This is important—a loosely packed crust will crumble when you cut the bars.
Step 2: Par-Bake the Crust
Bake the crust for 15-18 minutes, until it’s lightly golden around the edges and set in the center. This par-bake step is non-negotiable. It prevents the filling from soaking into the crust and creating a soggy bottom. Let the crust cool for about 10 minutes while you make the filling. Keep the oven on.
Step 3: Make the Filling
In a large bowl, whisk together the maple syrup, brown sugar, eggs, melted butter, bourbon, vanilla extract, and salt. Whisk until everything is smooth and well combined—about 30 seconds. Don’t over-whisk, or you’ll incorporate too much air, which can cause the filling to puff up and then collapse.
Stir in the pecans. I like to reserve about ¼ cup of pecan halves to arrange on top for a prettier presentation, but that’s totally optional.
Step 4: Assemble and Bake
Pour the filling over the warm (not hot) crust. If you reserved some pecans for the top, arrange them now in an even pattern. Bake at 350°F (175°C) for 22-25 minutes. The filling should be set around the edges but still slightly jiggly in the center—it will continue to set as it cools. If the top is browning too quickly, tent loosely with foil for the last 5 minutes.
Sensory Cue: You’ll know the bars are done when the filling is bubbly around the edges and the center barely wobbles when you gently shake the pan. The kitchen will smell like heaven—buttery, nutty, and warmly spiced.
Step 5: Cool Completely
This is the hardest part, I know. Let the bars cool in the pan on a wire rack for at least 2 hours at room temperature, then refrigerate for another hour before slicing. I know it’s torture, but this step is crucial. Warm bars will fall apart when you cut them. Cold bars slice cleanly into perfect squares.
Once completely cooled and set, use the parchment handles to lift the entire slab out of the pan. Place it on a cutting board and slice into 24 bars using a sharp knife. Wipe the knife clean between cuts for the neatest edges.
Cooking Tips & Techniques
After making these bars more times than I can count, I’ve picked up a few tricks that make a real difference. Here’s what I wish someone had told me before my first batch.
Don’t skip the par-bake. I know it’s tempting to just press the crust in and pour the filling on top, but trust me—that extra 15 minutes in the oven is what separates good bars from great ones. A par-baked crust stays crisp and sturdy, while an unbaked one turns into a soggy mess.
Room temperature eggs matter. Cold eggs can cause the melted butter to seize up, creating lumps in your filling. Just let your eggs sit on the counter for 30 minutes before you start baking. If you forget, place them in a bowl of warm water for 5 minutes.
Watch the baking time closely. Every oven runs a little differently. My old oven took exactly 23 minutes; my new one needs 25. Start checking at 20 minutes—when the edges are set and the center is just slightly jiggly, you’re done. Overbaking leads to a dry, cracked filling.
Let them cool completely. I cannot stress this enough. The first time I made these, I was so eager to try them that I cut into a warm pan. Disaster. The filling oozed everywhere, and I ended up with a delicious but ugly mess. Patience pays off here.
Use a sharp knife. A dull blade will drag through the filling and ruin those clean edges. I use a long chef’s knife and wipe it clean between each cut. For extra clean slices, you can even run the knife under hot water and dry it before cutting.
Variations & Adaptations
One of the best things about this recipe is how easy it is to customize. Here are some of my favorite variations:
Bourbon-Free Version
Skip the bourbon and replace it with an extra tablespoon of maple syrup plus a teaspoon of vanilla extract. You’ll still get that deep, warm flavor without the alcohol. Perfect for kids or anyone who prefers not to cook with spirits.
Chocolate Maple Pecan Bars
Add ½ cup of semi-sweet chocolate chips to the filling along with the pecans. The chocolate melts into gooey pockets throughout the bars, and the combination of chocolate, maple, and bourbon is absolutely divine. I made this version for a gooey cast iron s’mores dip inspired party, and it was a hit.
Gluten-Free Adaptation
Substitute the all-purpose flour with a 1-to-1 gluten-free baking blend. I’ve had great results with Bob’s Red Mill. The crust will be slightly more delicate, so handle it gently when pressing into the pan. Everything else stays the same.
Spiced Pecan Variation
Add ½ teaspoon of cinnamon and ¼ teaspoon of nutmeg to the filling. This gives the bars a warm, cozy flavor that’s perfect for fall baking. I sometimes add a pinch of cayenne pepper too, for a subtle heat that catches you by surprise.
Saltier Version
If you’re a fan of sweet-salty combinations, sprinkle a little flaky sea salt over the top of the bars right after they come out of the oven. The salt crystals add a beautiful crunch and balance the sweetness perfectly. This is my go-to version for holiday cookie exchanges.
Serving & Storage Suggestions
These bars are incredibly versatile when it comes to serving. Here’s how I like to enjoy them:
Serving Temperature: I prefer these bars at room temperature—that’s when the filling is perfectly chewy and the crust is at its best texture. But they’re also delicious straight from the fridge on a warm day. For an extra treat, warm a bar in the microwave for 10 seconds and top with a scoop of vanilla ice cream.
Presentation Ideas: Arrange the bars on a platter and dust with powdered sugar for a pretty finish. Or drizzle with a simple glaze made from powdered sugar and a splash of bourbon. For holiday gatherings, I like to serve them alongside a creamy no-bake peanut butter pie for a dessert spread that covers all the bases.
Storage Instructions: Store the bars in an airtight container at room temperature for up to 3 days, or in the refrigerator for up to a week. Layer them between sheets of parchment paper to prevent sticking. These bars also freeze beautifully—just wrap them tightly in plastic wrap and then foil, and freeze for up to 3 months.
Reheating Tips: To bring frozen bars back to life, let them thaw at room temperature for about 30 minutes. If you want that just-baked warmth, pop them in a 300°F oven for 5-7 minutes. The microwave works in a pinch (15 seconds), but the crust won’t be as crisp.
Flavor Development: Here’s a secret—these bars actually taste better the next day. The flavors meld together overnight, and the filling firms up to the perfect texture. So if you’re making them for a party, bake them a day ahead. Your future self will thank you.
Nutritional Information & Benefits
While these bars are definitely a treat, they do have some redeeming qualities. Here’s a rough breakdown per bar (based on 24 servings):
| Nutrient | Amount Per Bar |
|---|---|
| Calories | 210 |
| Total Fat | 13g |
| Saturated Fat | 5g |
| Carbohydrates | 22g |
| Sugar | 16g |
| Protein | 3g |
| Fiber | 1g |
| Sodium | 95mg |
Health Benefits: Pecans are packed with healthy fats, fiber, and antioxidants. They’re one of the best nuts for heart health, and they add a nice dose of magnesium and zinc. The maple syrup provides trace minerals like zinc and manganese, though let’s be real—we’re not eating these bars for the health benefits. They’re a dessert, and that’s okay.
Dietary Considerations: This recipe is naturally vegetarian. For a gluten-free version, use a gluten-free flour blend. For a dairy-free version, substitute the butter with a high-quality vegan butter (I like Miyoko’s). The bars will still be rich and delicious.
Allergen Note: Contains tree nuts (pecans), dairy (butter), eggs, and gluten (flour). If you’re baking for someone with allergies, make sure to check all your ingredient labels carefully.
Conclusion
These maple bourbon pecan pie bars have become my signature dessert for a reason. They’re everything I want in a sweet treat—buttery, nutty, rich without being heavy, and just sophisticated enough to feel special without requiring a culinary degree to pull off.
What I love most about this recipe is how forgiving it is. Even if your crust isn’t perfectly even or your pecans are a little scattered, the end result is still gorgeous and delicious. These bars don’t demand perfection—they just deliver flavor.
I’d love to hear how yours turn out. Did you try a different bourbon? Add chocolate chips? Make them gluten-free? Drop a comment below and tell me about your version. And if you’re looking for another dessert that travels well and feeds a crowd, check out my easy one-bowl peach bars—they’re my go-to for summer gatherings.
Go ahead, preheat that oven. These bars are waiting to become your new favorite too.
Frequently Asked Questions
Can I use pancake syrup instead of maple syrup?
I wouldn’t recommend it. Pancake syrup is usually corn syrup-based with artificial maple flavoring, and it will change both the texture and taste of the filling. Real maple syrup has a thinner consistency and a more complex flavor that’s essential to this recipe.
Can I make these bars ahead of time?
Absolutely. In fact, I prefer making them a day ahead. The flavors meld together overnight, and the bars slice more cleanly after they’ve had time to fully set. Just store them in an airtight container at room temperature or in the fridge.
How do I get clean slices without the filling sticking to the knife?
Use a sharp knife and wipe it clean with a damp paper towel between each cut. For even cleaner slices, run the knife under hot water, dry it off, then cut. The heat helps the blade glide through the sticky filling without dragging.
Can I freeze these bars?
Yes. Wrap individual bars or the whole slab tightly in plastic wrap, then in foil, and freeze for up to 3 months. Thaw at room temperature for about 30 minutes before serving. They taste almost as good as fresh.
What if I don’t have bourbon?
No problem. You can substitute with dark rum, a splash of vanilla extract mixed with water, or just use an extra tablespoon of maple syrup. The flavor will be slightly different, but still delicious.
Pin This Recipe!
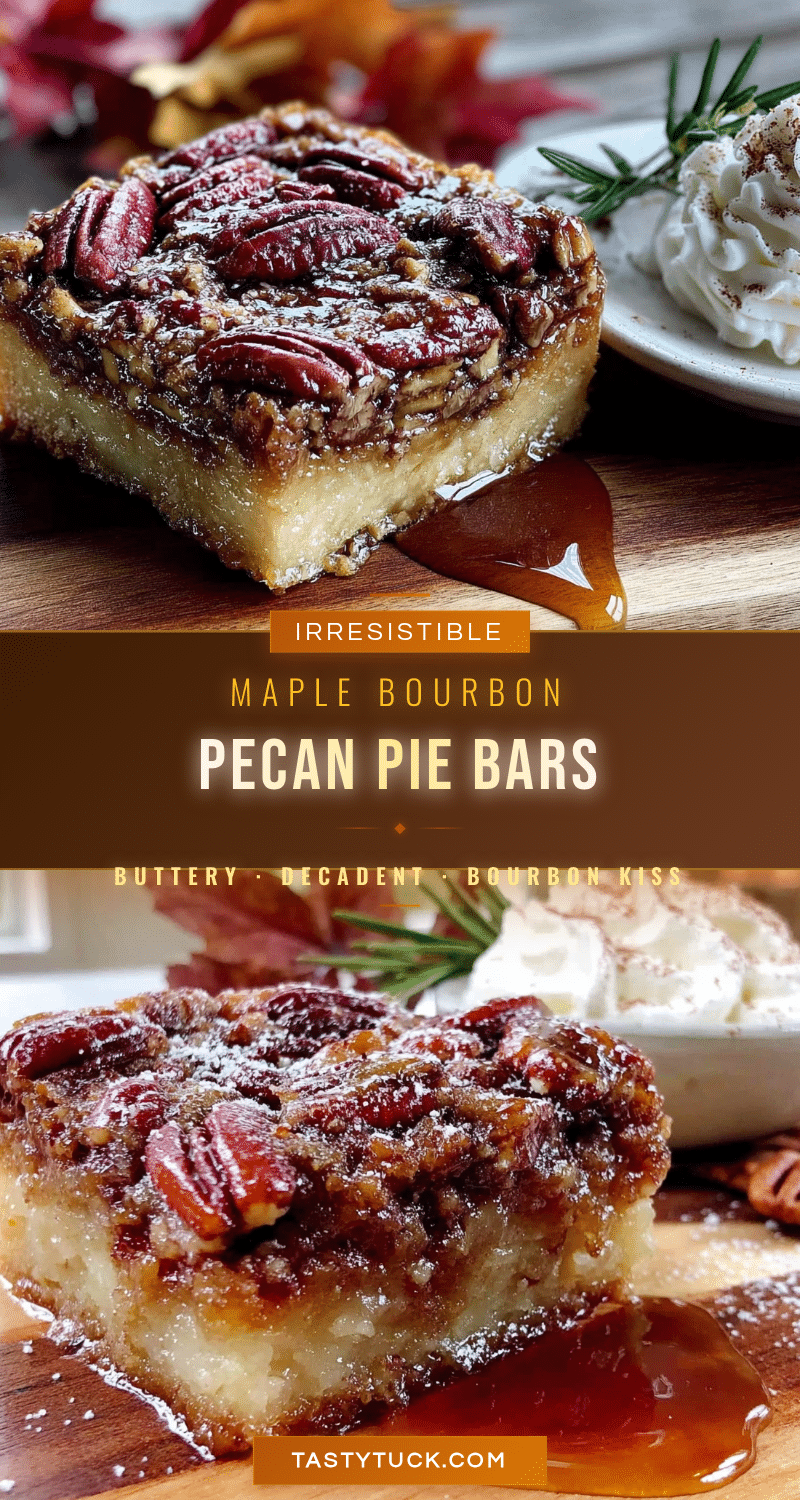
Best Maple Bourbon Pecan Pie Bars: Easy 30-Min Recipe
These maple bourbon pecan pie bars feature a buttery shortbread crust and a rich, chewy filling with real maple syrup and bourbon. They’re easy to make, perfect for holidays and gatherings, and slice into clean squares without turning into a sticky mess.
- Prep Time: 30 minutes
- Cook Time: 40 minutes
- Total Time: 3 hours 10 minutes (includes cooling and chilling)
- Yield: 24 bars 1x
- Category: Dessert
- Cuisine: American
Ingredients
- 1 ½ cups all-purpose flour (spooned and leveled)
- ½ cup powdered sugar
- ¾ cup cold unsalted butter, cut into small cubes
- ¼ teaspoon salt
- ¾ cup pure maple syrup
- ½ cup packed light brown sugar
- 3 large eggs, room temperature
- 3 tablespoons unsalted butter, melted and slightly cooled
- 2 tablespoons bourbon
- 1 teaspoon vanilla extract
- ¼ teaspoon salt
- 2 cups pecan halves or chopped pecans
Instructions
- Preheat oven to 350°F (175°C). Line a 9×13-inch baking pan with parchment paper, leaving overhang on two opposite sides.
- In a food processor, pulse together flour, powdered sugar, and salt. Add cold butter cubes and pulse until mixture resembles coarse sand with some pea-sized butter pieces.
- Press mixture evenly into the prepared pan, packing firmly. Bake for 15-18 minutes until lightly golden around the edges. Let cool for 10 minutes.
- In a large bowl, whisk together maple syrup, brown sugar, eggs, melted butter, bourbon, vanilla extract, and salt until smooth.
- Stir in pecans. Reserve about ¼ cup of pecan halves for topping if desired.
- Pour filling over warm crust. Arrange reserved pecans on top if using. Bake for 22-25 minutes until edges are set and center is slightly jiggly.
- Cool in pan on a wire rack for at least 2 hours at room temperature, then refrigerate for 1 hour before slicing.
- Use parchment handles to lift slab onto a cutting board. Slice into 24 bars with a sharp knife, wiping clean between cuts.
Notes
Don’t skip the par-bake—it prevents a soggy crust. Use room temperature eggs to avoid lumps. Cool completely before slicing for clean edges. Bars taste even better the next day. For gluten-free, use a 1-to-1 gluten-free flour blend. For dairy-free, use vegan butter.
Nutrition
- Serving Size: 1 bar
- Calories: 210
- Sugar: 16
- Sodium: 95
- Fat: 13
- Saturated Fat: 5
- Carbohydrates: 22
- Fiber: 1
- Protein: 3
Keywords: pecan pie bars, maple bourbon, shortbread crust, holiday dessert, easy bars, pecan bars, bourbon dessert


