It was 10:47 PM on a random Wednesday, and I was hit with the kind of craving that feels almost urgent—like, if I didn’t get something sweet and cold and full of fall flavors soon, the whole week would just be a wash. I wanted cheesecake. I wanted apples. I wanted caramel. But honestly? I did not have the patience for a water bath, a springform pan, or waiting hours for something to bake and cool. My kitchen was a mess from dinner, the dishwasher was running, and I had already changed into my comfiest sweatpants. There was no way I was turning on the oven.
So I stood there, staring into the fridge like it owed me answers. I had a block of cream cheese. Some graham crackers in the back of the pantry. A lonely apple in the fruit bowl. And then my eyes landed on a jar of caramel sauce I’d bought on a whim last weekend. That’s when the idea hit me—what if I just… didn’t bake it? What if I made a no-bake cheesecake bar, layered with apples and caramel, and called it dinner? I mean, dessert for dinner is a thing, right? Let me tell you, sometimes the best recipes come from being too tired to do things the “right” way. And these Quick No-Bake Caramel Apple Cheesecake Bars? They are proof that shortcuts can be genius.
I threw it together in about twenty minutes, crossed my fingers, and let the fridge do the heavy lifting overnight. The next morning, I cut into a perfect little square and honestly? I almost cried. That first bite was everything—creamy, crunchy, tart, sweet, and so ridiculously easy. I have made these bars at least a dozen times since that late-night experiment, and they never last more than a day in my house. Maybe you have been there too—wanting something amazing but having zero energy left to make it happen. This one is for you.
Why You’ll Love This Recipe
Let me be real with you—I have tested a lot of no-bake desserts in my time, and these Caramel Apple Cheesecake Bars are the ones I keep coming back to. Here is why they work so well for real life:
- Quick & Easy: You only need about 20 minutes of active prep time. No oven, no complicated steps, just mix, press, layer, and chill. Perfect for those nights when you need dessert but your energy is basically gone.
- Simple Ingredients: Cream cheese, graham crackers, butter, sugar, apples, and caramel sauce. That is it. No weird specialty items or expensive extracts. You probably already have most of this in your kitchen right now.
- Perfect for Weeknights: These bars are made for busy schedules. You can prep them after dinner, let them set overnight, and have a gorgeous dessert ready for the next day. No stress, no rush.
- Crowd-Pleaser: I have brought these to potlucks, family dinners, and casual get-togethers, and they disappear every single time. Kids love them. Adults love them. Even my picky neighbor who “doesn’t like cheesecake” asked for the recipe.
- Unbelievably Delicious: The texture is what gets me every time. The buttery graham cracker crust, the silky no-bake cheesecake filling, the tender apple layer, and that gooey caramel on top—it is comfort food in bar form.
What makes these bars different from other no-bake cheesecake recipes is the apple layer. Instead of just mixing apples into the filling, I cook them down with a little butter and cinnamon first. This softens them perfectly and concentrates their flavor, so you get real apple taste in every bite—not just watery chunks. Plus, the caramel sauce seeps into the cheesecake layer just enough to make it extra special without being overwhelming.
These bars have that magical quality where they feel fancy enough to serve to guests but are simple enough to make on a Tuesday night when you are tired and hungry. That first cold, creamy bite after a long day? Honestly, it is pure therapy.
What Ingredients You Will Need
This recipe uses simple, everyday ingredients to create something that tastes way more complicated than it is. Here is everything you need and a few notes on how to pick the best stuff:
For the Crust
- 2 cups graham cracker crumbs (about 16 full sheets, crushed finely) – You can buy pre-crushed crumbs to save time, but I like crushing my own in a zip-top bag with a rolling pin. It is oddly satisfying.
- 1/2 cup unsalted butter, melted – Salted butter works in a pinch, just skip the added salt in the crust. I use Land O’Lakes for consistent results.
- 2 tablespoons granulated sugar – Just enough to sweeten the crust without making it candy-like.
- 1/4 teaspoon salt – Balances the sweetness and makes the crust taste like a real pastry.
For the No-Bake Cheesecake Filling
- 16 ounces cream cheese, softened to room temperature – Full-fat is best here for that ultra-creamy texture. Philadelphia cream cheese is my go-to for consistent results. Let it sit out for at least 30 minutes before mixing.
- 1/2 cup granulated sugar – Adds just the right amount of sweetness.
- 1 teaspoon vanilla extract – Pure vanilla makes a difference here, but imitation works fine too.
- 1 cup heavy cream, cold – This is what makes the filling light and fluffy instead of dense. Make sure it is straight from the fridge.
For the Apple Layer
- 2 medium apples, peeled, cored, and diced small – I recommend Granny Smith for their tartness that balances the sweet caramel, but Honeycrisp or Fuji work great too. (adds nice texture and tang)
- 2 tablespoons unsalted butter – For cooking the apples down.
- 2 tablespoons brown sugar, packed – Adds a deeper, almost caramel-like sweetness to the apples.
- 1/2 teaspoon ground cinnamon – Warm spice that makes everything taste like fall.
- Pinch of salt – Brings out all the flavors.
For the Topping
- 1/2 cup caramel sauce, store-bought or homemade – I love using a good jarred caramel like Trader Joe’s or Ghirardelli for convenience. If you have homemade, even better.
- Optional: flaky sea salt for sprinkling – Do not skip this if you have it. It takes the bars to another level.
Equipment Needed
The beauty of this recipe is that you do not need a lot of fancy tools. Here is what you will need:
- 8×8-inch baking pan – This is the perfect size for these bars. A 9×9 works too, but the bars will be slightly thinner.
- Parchment paper – Absolutely essential for easy removal. Let some hang over the edges to create “handles.”
- Mixing bowls – One large bowl for the cheesecake filling, one medium for the crust, and one small for the apples.
- Hand mixer or stand mixer – You need this to whip the cream and cream cheese properly. A whisk and some serious elbow grease could work, but I do not recommend it.
- Small skillet or saucepan – For cooking the apples. A non-stick pan makes cleanup easier.
- Measuring cups and spoons – Precision matters in no-bake recipes since there is no oven to fix mistakes.
- Spatula – For spreading layers evenly. A rubber spatula is best.
- Sharp knife – For clean cuts after chilling. A chef’s knife or a long serrated knife works well.
If you do not have an 8×8 pan, you can use a loaf pan and make taller bars, or a 9×13 for thinner bars—just adjust the chilling time slightly. I have used a glass baking dish before and it worked fine, just be gentle when cutting so you do not scratch the glass.
Preparation Method
This is where the magic happens. Follow these steps, and you will have the most incredible no-bake dessert bars waiting for you in the fridge. I have added some notes from my own trial and error so you can skip the mistakes I made.
- Prep your pan. Line an 8×8-inch baking pan with parchment paper, leaving about 2 inches of overhang on two opposite sides. These will be your handles later. Lightly grease the parchment if you want extra insurance against sticking.
- Make the crust. In a medium bowl, combine 2 cups graham cracker crumbs, 2 tablespoons sugar, and 1/4 teaspoon salt. Pour in 1/2 cup melted butter and stir with a fork until every crumb is moistened. It should look like wet sand. Press this mixture firmly into the bottom of your prepared pan. I use the bottom of a measuring cup to get it really compact and even. Pop this in the fridge while you work on the filling.
- Cook the apples. In a small skillet over medium heat, melt 2 tablespoons butter. Add the diced apples, 2 tablespoons brown sugar, 1/2 teaspoon cinnamon, and a pinch of salt. Cook for 5-7 minutes, stirring occasionally, until the apples are softened but not mushy. You want them tender but still holding their shape. Set aside to cool completely—warm apples will mess up the cheesecake layer.
- Start the cheesecake filling. In a large mixing bowl, beat the softened cream cheese with a hand mixer on medium speed until it is completely smooth and fluffy. This takes about 2 minutes. Scrape down the sides of the bowl with a spatula halfway through. Add 1/2 cup sugar and 1 teaspoon vanilla, then beat again until everything is combined and silky.
- Whip the cream. In a separate bowl, pour in 1 cup cold heavy cream. Using clean beaters, whip the cream on medium-high speed until stiff peaks form. This takes about 3-4 minutes. You will know it is ready when you lift the beaters and the cream holds its shape without drooping. Be careful not to over-whip, or you will end up with butter.
- Fold it together. Gently fold the whipped cream into the cream cheese mixture using a rubber spatula. Do not stir—use a gentle cutting and folding motion. You want to keep as much air as possible. Fold until no white streaks remain, but stop as soon as it is combined. The mixture should be light, fluffy, and cloud-like.
- Layer the cheesecake. Spread half of the cheesecake filling evenly over the chilled crust. Use an offset spatula or the back of a spoon to get it smooth. Drop spoonfuls of the cooled cooked apples over the filling, then gently spread them around. Pour the remaining cheesecake filling on top and smooth it out carefully.
- Add the caramel swirl. Warm your caramel sauce slightly (about 10 seconds in the microwave) so it is pourable but not hot. Drizzle it over the top of the cheesecake layer. Use a toothpick or knife to swirl it gently into the filling—just a few figure-eight motions. Do not over-swirl or you will lose the distinct caramel pockets.
- Chill, chill, chill. Cover the pan with plastic wrap or foil and refrigerate for at least 6 hours, but overnight is truly best. I know it is hard to wait, but this step is non-negotiable. The bars need time to set properly so you can cut clean squares. If you try to cut them too early, you will get a delicious but messy situation.
- Slice and serve. When the bars are fully set, lift them out of the pan using the parchment handles. Place on a cutting board and use a sharp knife to cut into 9 or 16 squares, depending on how generous you are feeling. Wipe the knife clean between cuts for neat edges. For an extra touch, drizzle a little more caramel sauce on top and sprinkle with flaky sea salt.
Cooking Tips & Techniques
After making these bars more times than I care to count, I have picked up a few tricks that make the process smoother and the results better. Here is what I wish someone had told me the first time:
Room temperature cream cheese is not optional. I learned this the hard way when I tried to rush things with cold cream cheese. You end up with lumpy filling that never gets smooth, no matter how long you beat it. Leave the cream cheese on the counter for at least 30 minutes before starting. If you forgot, you can microwave it in 10-second bursts, but be careful—you want it soft, not melted.
Do not skip the apple cooking step. I know it adds a few extra minutes, but raw apples release water as they sit, and that liquid will make your cheesecake layer watery and sad. Cooking the apples with butter and sugar concentrates their flavor and removes excess moisture. Plus, the cinnamon infuses into the apples in a way that raw apples just cannot match.
Press the crust firmly. A loose crust will crumble when you try to cut the bars. Use the bottom of a measuring cup or a flat glass to really compact those graham cracker crumbs. I press down hard enough that I feel resistance, then go over the whole surface one more time. A tight crust holds everything together beautifully.
Patience with chilling is everything. I know, I know—waiting is the worst part. But I have made the mistake of cutting into these bars after only 4 hours, and they were a mess. The filling was still soft, the layers slid around, and the cuts looked terrible. Give them the full overnight chill, and you will be rewarded with perfect, clean squares that hold their shape. Your future self will thank you.
Use a hot knife for clean cuts. Run your knife under hot water, dry it off, then make your cut. Repeat this between each slice. It takes an extra minute, but the difference in presentation is huge. No more smeared cheesecake on the sides of your bars.
Variations & Adaptations
One of the best things about this recipe is how flexible it is. Here are some variations I have tried and loved:
Gluten-Free Version: Swap the graham crackers for gluten-free graham crackers or use crushed gluten-free shortbread cookies. I have done this for friends with celiac disease, and honestly, the shortbread version might be even better. Just make sure your caramel sauce is also gluten-free—most are, but check the label.
Dairy-Free Adaptation: Use dairy-free cream cheese (Kite Hill is my favorite) and coconut cream in place of heavy cream. Chill the can of coconut cream overnight, then scoop out the solid white part and whip it just like regular cream. The texture is slightly different but still delicious. Use a vegan butter for the crust and apple layer.
Seasonal Fruit Swaps: In summer, try fresh peaches or nectarines instead of apples. Cook them the same way with a little brown sugar and a pinch of nutmeg. In the fall, pears with ginger are incredible. I have even made a version with roasted strawberries and balsamic reduction—it was surprisingly amazing.
Crunchy Add-In: Sprinkle a layer of toasted pecans or walnuts over the crust before adding the cheesecake filling. The crunch contrasts beautifully with the creamy filling. I did this for Thanksgiving one year, and my cousin asked for the recipe three times.
Chocolate Twist: Drizzle melted dark chocolate over the top along with the caramel. Or mix a tablespoon of cocoa powder into the crust for a chocolate-graham base. Chocolate and apple is an underrated combo, honestly.
Serving & Storage Suggestions
These bars are best served cold, straight from the fridge. The texture is firm but creamy, and the flavors are clean and bright when chilled. If you let them sit out too long, the cheesecake layer softens and loses its structure. I usually take them out about 5 minutes before serving—just enough to take the chill off but not enough to get soft.
For presentation, I like to cut the bars into neat squares and arrange them on a white platter. A drizzle of extra caramel sauce and a pinch of flaky sea salt on top makes them look like they came from a fancy bakery. A few thin apple slices fanned out on the side of the plate adds a nice touch too.
These bars pair beautifully with a hot cup of coffee or a glass of cold milk. For a fancier dessert spread, serve them alongside vanilla ice cream or a dollop of whipped cream. I have also served them at brunch with a side of fresh fruit, and they were a hit.
Storage: Keep the bars in an airtight container in the refrigerator for up to 5 days. They actually get better after the first day as the flavors meld together. I have never had them last longer than that in my house, but they should hold up fine.
Freezing: These bars freeze beautifully. Place the cut bars on a baking sheet and freeze until solid, about 2 hours. Then transfer them to a freezer-safe container with parchment paper between layers. They will keep for up to 3 months. Thaw in the refrigerator overnight before serving. Do not thaw at room temperature—they get too soft.
Reheating Note: These are meant to be served cold, so no reheating needed. If you want a warm element, heat some extra caramel sauce and drizzle it over the cold bars right before serving. The contrast of warm caramel and cold cheesecake is next-level.
Nutritional Information & Benefits
While these bars are definitely a treat, they do have some redeeming qualities. Here is the estimated nutritional breakdown per bar (based on 9 servings):
- Calories: 410
- Fat: 28g
- Carbohydrates: 38g
- Protein: 5g
- Fiber: 1g
- Sugar: 28g
The apples provide a small amount of fiber and vitamin C, along with antioxidants like quercetin. Cream cheese and heavy cream offer calcium and vitamin A. The graham cracker crust contributes some whole grains if you use whole wheat graham crackers.
For those watching their sugar intake, you can reduce the sugar in the cheesecake filling to 1/3 cup without affecting the texture too much. Using a sugar-free caramel sauce also helps cut down on sweetness. This recipe is not low-carb by any stretch, but it is a more balanced dessert option compared to many baked cheesecakes.
Please note that these bars contain dairy, gluten, and eggs (if your cream cheese contains them). For allergen-friendly versions, check the variations section above.
Frequently Asked Questions
Can I make these bars vegan?
Yes, with some modifications. Use dairy-free cream cheese, coconut cream instead of heavy cream, and vegan butter for the crust and apples. Make sure your graham crackers and caramel sauce are vegan-friendly. The texture will be slightly different but still delicious.
How long do these bars need to chill?
At least 6 hours, but overnight is best. The longer they chill, the cleaner your slices will be. I know it is tempting to rush, but trust me on this one. The wait is worth it.
Can I use store-bought graham cracker crust?
You can, but I do not recommend it. Pre-made crusts are usually too thin and not as buttery. Homemade crust is so easy and tastes much better. It takes five minutes to make, and the difference in flavor and texture is noticeable.
My cheesecake filling turned out lumpy. What went wrong?
Your cream cheese was probably too cold. Make sure it is fully softened to room temperature before beating. If you do end up with lumps, you can try beating the mixture a little longer, but the best fix is to start with properly softened cream cheese.
Can I double this recipe for a larger crowd?
Absolutely. Double all the ingredients and use a 9×13-inch pan. You may need to increase the chilling time by an hour or two since the bars will be thicker. The cutting and serving instructions remain the same.
Conclusion
These Quick No-Bake Caramel Apple Cheesecake Bars are everything I want in a dessert—easy, impressive, and deeply satisfying. They came from a late-night moment of desperation, but they have become one of my most-requested recipes. There is something special about a dessert that looks like you spent hours on it but actually came together in twenty minutes with no oven required.
I love how forgiving this recipe is. You can swap fruits, change the crust, adjust the sweetness, and it still works. It is the kind of recipe that makes you feel like a genius in the kitchen, even on your most tired days. That first cold, creamy bite, with the caramel and apple and buttery crust all together—honestly, it never gets old.
I would love to hear how these turn out for you. Did you try a fun variation? Did your family devour them in five minutes? Drop a comment below and let me know. And if you share a photo on Pinterest, tag me—I love seeing your creations. Now go make some magic in your kitchen, no oven required.
Pin This Recipe!
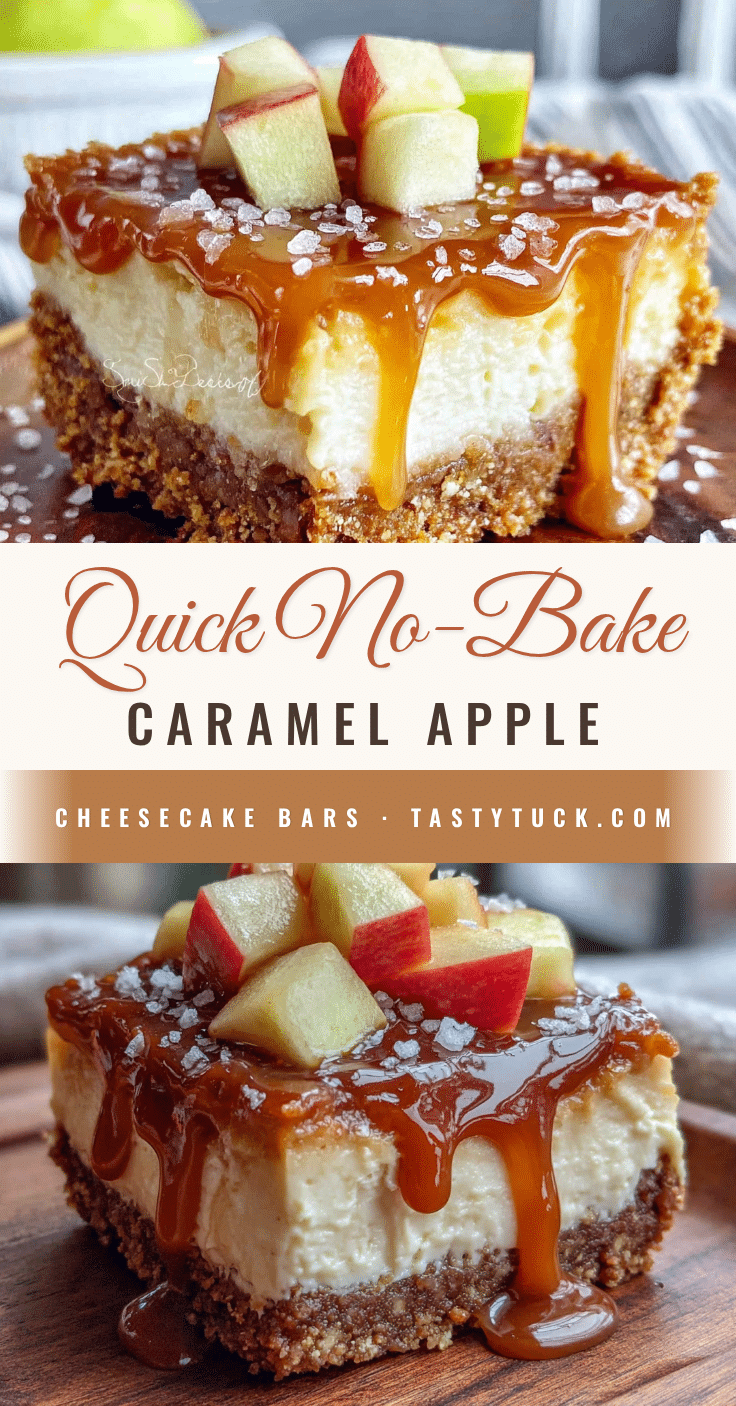
Best No-Bake Caramel Apple Cheesecake Bars Recipe
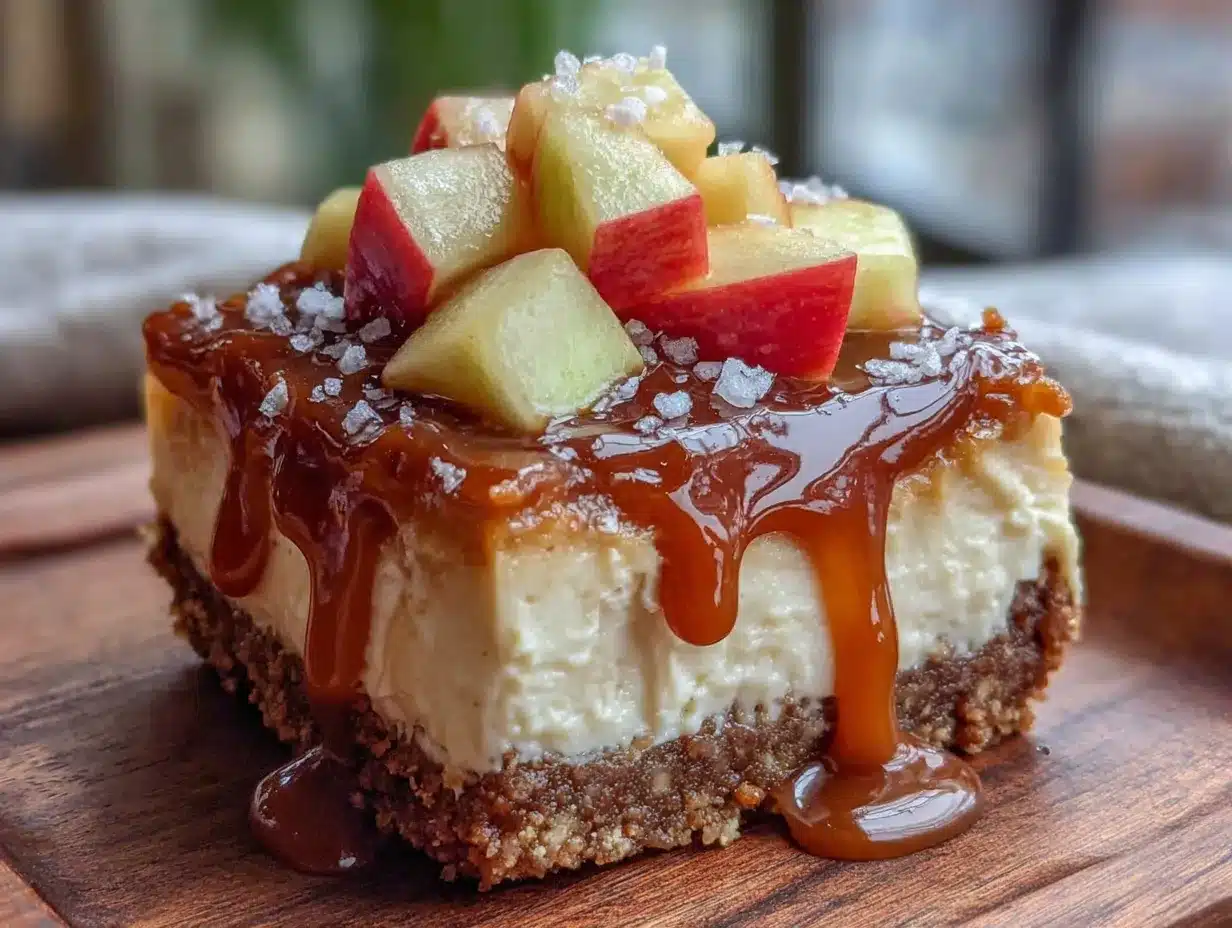
These Quick No-Bake Caramel Apple Cheesecake Bars are the perfect easy dessert for fall. With a buttery graham cracker crust, silky no-bake cheesecake filling, tender cinnamon apples, and gooey caramel, they come together in 20 minutes with no oven required.
- Prep Time: 20 minutes
- Cook Time: 7 minutes
- Total Time: 6 hours 27 minutes (includes chilling)
- Yield: 9 servings 1x
- Category: Dessert
- Cuisine: American
Ingredients
- 2 cups graham cracker crumbs (about 16 full sheets, crushed finely)
- 1/2 cup unsalted butter, melted
- 2 tablespoons granulated sugar
- 1/4 teaspoon salt
- 16 ounces cream cheese, softened to room temperature
- 1/2 cup granulated sugar
- 1 teaspoon vanilla extract
- 1 cup heavy cream, cold
- 2 medium apples, peeled, cored, and diced small (Granny Smith recommended)
- 2 tablespoons unsalted butter
- 2 tablespoons brown sugar, packed
- 1/2 teaspoon ground cinnamon
- Pinch of salt
- 1/2 cup caramel sauce, store-bought or homemade
- Optional: flaky sea salt for sprinkling
Instructions
- Prep your pan. Line an 8×8-inch baking pan with parchment paper, leaving about 2 inches of overhang on two opposite sides. Lightly grease the parchment if desired.
- Make the crust. In a medium bowl, combine 2 cups graham cracker crumbs, 2 tablespoons sugar, and 1/4 teaspoon salt. Pour in 1/2 cup melted butter and stir with a fork until every crumb is moistened. Press this mixture firmly into the bottom of your prepared pan using the bottom of a measuring cup. Refrigerate while you work on the filling.
- Cook the apples. In a small skillet over medium heat, melt 2 tablespoons butter. Add the diced apples, 2 tablespoons brown sugar, 1/2 teaspoon cinnamon, and a pinch of salt. Cook for 5-7 minutes, stirring occasionally, until the apples are softened but not mushy. Set aside to cool completely.
- Start the cheesecake filling. In a large mixing bowl, beat the softened cream cheese with a hand mixer on medium speed until completely smooth and fluffy, about 2 minutes. Scrape down the sides of the bowl. Add 1/2 cup sugar and 1 teaspoon vanilla, then beat again until combined and silky.
- Whip the cream. In a separate bowl, pour in 1 cup cold heavy cream. Using clean beaters, whip the cream on medium-high speed until stiff peaks form, about 3-4 minutes.
- Fold it together. Gently fold the whipped cream into the cream cheese mixture using a rubber spatula with a gentle cutting and folding motion until no white streaks remain.
- Layer the cheesecake. Spread half of the cheesecake filling evenly over the chilled crust. Drop spoonfuls of the cooled cooked apples over the filling, then gently spread them around. Pour the remaining cheesecake filling on top and smooth it out carefully.
- Add the caramel swirl. Warm your caramel sauce slightly (about 10 seconds in the microwave) so it is pourable but not hot. Drizzle it over the top of the cheesecake layer. Use a toothpick or knife to swirl it gently into the filling with a few figure-eight motions.
- Chill. Cover the pan with plastic wrap or foil and refrigerate for at least 6 hours, but overnight is best.
- Slice and serve. When the bars are fully set, lift them out of the pan using the parchment handles. Place on a cutting board and use a sharp knife to cut into 9 or 16 squares. Wipe the knife clean between cuts. For an extra touch, drizzle more caramel sauce on top and sprinkle with flaky sea salt.
Notes
Room temperature cream cheese is essential for a smooth filling. Do not skip cooking the apples as raw apples release water and make the cheesecake layer watery. Press the crust firmly for clean cuts. Chilling overnight is highly recommended for best results. Use a hot knife for clean slices.
Nutrition
- Serving Size: 1 bar
- Calories: 410
- Sugar: 28
- Sodium: 320
- Fat: 28
- Saturated Fat: 16
- Carbohydrates: 38
- Fiber: 1
- Protein: 5
Keywords: no-bake cheesecake, caramel apple, fall dessert, easy dessert, no-bake dessert, cheesecake bars, apple dessert


