I was standing in the frozen foods aisle of my local grocery store last November when the smell of burnt butter hit me. Not from the store, obviously — it was just in my head. But suddenly I was eight years old, standing on a step stool in my Aunt Carol’s tiny kitchen, watching her swirl butter in a cast iron pan until it turned the color of a brown paper bag. She’d always mutter “just a little further” under her breath, right at the edge of it going wrong. That memory hit me so hard I almost dropped my cart. I hadn’t thought about her brown butter sage sauce in twenty years. And I hadn’t seen a honeynut squash anywhere since she passed. But there they were, these adorable little striped things in a mesh bag, looking back at me like they knew something I didn’t. I bought three bags without even checking the price.
Let me tell you, I had no idea what I was doing that first night. I just hacked one open, threw some butter in a pan, and hoped for the best. The squash came out okay — a bit undercooked, honestly, and I forgot to salt it. But that brown butter with the crispy sage? That part was spot on. It was like my taste buds remembered something my brain couldn’t quite hold onto. I think that’s why I kept making it. Not because it was perfect, but because every time I got a little closer to that memory of her kitchen, with the steam fogging up the windows and the radio playing something twangy in the background. Maybe you’ve been there — chasing a feeling more than a recipe.
Now, after about fifteen attempts (and one slightly smoky kitchen incident), I’ve got it down. This cozy brown butter honeynut squash with crispy sage is the dish I make when the weather turns cold and I need something that feels like a hug on a plate. It’s simple enough for a Tuesday night but fancy enough that people will think you tried really hard. And honestly? That’s my favorite kind of recipe.
Why You’ll Love This Recipe
Look, I’ve tested this recipe more times than I care to admit. I’ve made it for picky kids who claimed they didn’t like squash. I’ve made it for dinner guests who asked for the recipe before they finished their first bite. I’ve even made it at 11 PM on a bad day when I just needed something warm and buttery to make the world feel right again.
- Quick & Easy: This comes together in about 35 minutes, most of which is hands-off oven time. Perfect for those nights when you want something special but don’t have the energy for a production.
- Simple Ingredients: You need exactly six main ingredients. Six! And you probably already have most of them in your kitchen right now.
- Perfect for Cozy Nights: This is the dish you want when the wind is howling outside and you’re wrapped in your favorite sweater. It’s comfort food that actually feels comforting.
- Crowd-Pleaser: I’ve watched confirmed squash skeptics go back for seconds. The brown butter does something magical — it makes everything taste like a warm hug.
- Unbelievably Delicious: The combination of sweet roasted honeynut squash, nutty brown butter, and crispy sage is honestly next level. It’s the kind of dish that makes you close your eyes after the first bite.
What makes this different from every other roasted squash recipe out there? It’s the technique. Most recipes just tell you to toss everything together and roast it. But browning the butter separately and drizzling it over the squash halfway through cooking? That’s the game changer. It lets the butter develop that deep, nutty flavor without burning in the oven, and the sage gets perfectly crispy on top instead of steaming into sad little leaves.
This isn’t just good. It’s the kind of good that makes you want to text someone a photo of your dinner plate. It’s comfort food that feels a little bit fancy but never fussy. And on those days when you need something to slow down and savor? This is it.
What Ingredients You Will Need
This recipe uses simple, wholesome ingredients that work together to create something genuinely special. Most of these are pantry staples, and the ones that aren’t are worth seeking out for the flavor payoff.
For the Squash
- 3 medium honeynut squash (about 2 pounds total) — Look for squash that feels heavy for its size with firm, unblemished skin. Honeynuts are smaller and sweeter than butternut, with thinner skin that doesn’t need peeling. If you can’t find them, small butternut squash works too, just peel them first.
- 2 tablespoons olive oil — A good quality extra virgin works fine here. You just need something to help the squash roast and brown.
- 1/2 teaspoon salt — I prefer kosher salt for its clean flavor and easy pinch-ability. Don’t skip it — salt is what makes the sweetness of the squash sing.
- 1/4 teaspoon black pepper — Freshly ground if you can. It makes a difference.
For the Brown Butter & Sage
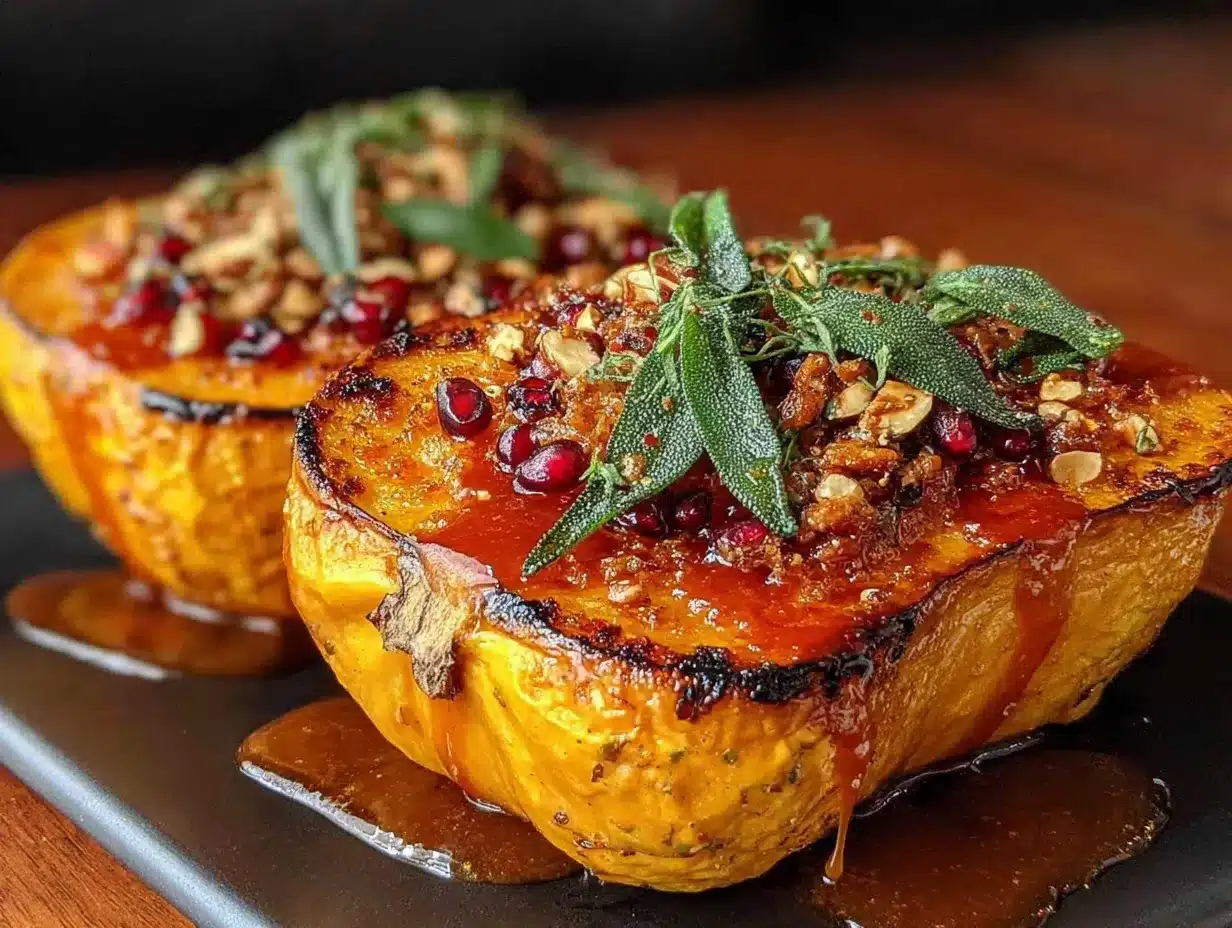
- 4 tablespoons unsalted butter — I recommend Kerrygold or another European-style butter for this. The higher butterfat content means it browns more evenly and develops a richer nutty flavor. Trust me on this one.
- 12-15 fresh sage leaves — Look for leaves that are vibrant green and not wilted. The fresher they are, the crispier they’ll get. If your grocery store only has dried sage, this is not the recipe for it — fresh is non-negotiable here.
- 1 tablespoon maple syrup (optional but recommended) — Just a tiny bit to enhance the natural sweetness of the squash. Use the real stuff, not pancake syrup.
- Flaky sea salt for finishing — Maldon or any other flaky salt. That little crunch on top makes everything better.
Ingredient Selection Tips
Honeynut squash have a short season — typically September through December. When they’re not available, I’ve had great results with delicata squash (also no peeling needed) or small sugar pumpkins. The cooking time might vary slightly, so just keep an eye on them.
For the butter, I really do recommend splurging on a good brand. I learned this the hard way after a disappointing batch with store-brand butter that just wouldn’t brown properly. It’s not that it doesn’t work — it just doesn’t get that same deep, nutty flavor that makes this dish special.
If you’re dairy-free, you can substitute the butter with a high-quality vegan butter or even coconut oil, but honestly, it won’t be quite the same. The browning reaction is unique to dairy butter. Just something to keep in mind.
Equipment Needed
You don’t need much for this recipe, which is part of what makes it so great. Here’s what you’ll want to have on hand:
- Large baking sheet — A half-sheet pan works perfectly. Make sure it’s rimmed so the brown butter doesn’t run off when you drizzle it over the squash.
- Small saucepan — For browning the butter. I prefer a light-colored pan so I can see the butter change color. Dark pans make it harder to tell when it’s done.
- Sharp chef’s knife — Honeynut squash are small but dense. A sharp knife makes cutting them in half much safer and easier.
- Metal spoon or scoop — For scraping out the seeds. A regular spoon works fine, but a grapefruit spoon with the serrated edge is oddly satisfying for this task.
- Parchment paper or silicone baking mat — Not strictly necessary, but it makes cleanup so much easier. The brown butter can caramelize onto the pan and be a pain to scrub off.
If you don’t have a baking sheet, a large cast iron skillet works beautifully. You can even do the whole recipe in one pan — roast the squash in the skillet, then make the brown butter right in the same pan after the squash comes out. Less dishes, more flavor.
I’ve been using the same Nordic Ware half-sheet pan for years and it’s never let me down. It’s about $20 and worth every penny. For the saucepan, any small pot will do — just make sure it’s clean so you can see the butter change color clearly.
Preparation Method
Let me walk you through this step by step. I’ve made this enough times to know where things can go wrong, so I’ll point those out along the way.
- Preheat your oven to 400°F (200°C). Give it a good 15-20 minutes to come to temperature. A properly hot oven is key for getting those nice caramelized edges on the squash.
- Prepare the squash. Wash the honeynut squash well — the skin is edible, so you want it clean. Using a sharp chef’s knife, carefully cut each squash in half lengthwise. This can be a bit tricky because they’re dense. If you’re struggling, try microwaving them for 30 seconds to slightly soften them. I learned this trick after a close call with my finger, and honestly, it’s a game changer. Scoop out the seeds and stringy bits with a metal spoon. Don’t worry about getting every last strand — a few leftover bits are fine and will crisp up in the oven.
- Season the squash. Place the squash halves cut-side up on your baking sheet. Drizzle with the olive oil and use your hands to rub it all over the flesh and skin. Sprinkle with the salt and pepper. Flip them cut-side down — this is important. Roasting them cut-side down first lets the flesh caramelize directly on the hot pan surface, giving you those gorgeous brown spots.
- First roast. Roast the squash for 15 minutes with the cut side down. The squash should be starting to soften but not fully tender yet. The edges might be just beginning to brown.
- Make the brown butter. While the squash is roasting, start your brown butter. Cut the butter into even pieces so it melts uniformly. Place it in your small saucepan over medium heat. Let it melt completely, then continue cooking, swirling the pan occasionally. The butter will go through stages: first it’ll foam up, then the foam will subside, and you’ll see little brown specks forming at the bottom of the pan. This whole process takes about 4-6 minutes. Watch it carefully — it can go from perfect to burnt in about 15 seconds. When it smells nutty and the specks are a warm amber color, it’s done. Immediately remove it from the heat and add the sage leaves. They’ll sizzle and crisp up in the hot butter. Let them sit for about 30 seconds, then use a slotted spoon to transfer them to a paper towel. Don’t throw away the butter!
- Flip and finish. After the first 15 minutes, remove the squash from the oven. Carefully flip each piece cut-side up using tongs. Drizzle the brown butter evenly over the squash halves. If you’re using the maple syrup, drizzle that over too. Return to the oven and roast for another 15-20 minutes, until the squash is fork-tender and the edges are caramelized and golden brown. The flesh should yield easily when pierced with a fork.
- Finish and serve. Remove from the oven and let rest for 2-3 minutes. Transfer to a serving platter, sprinkle with the crispy sage leaves, and finish with a pinch of flaky sea salt. Serve warm.
A few things I’ve learned the hard way: Don’t crowd the pan. If your squash halves are touching, they’ll steam instead of roast. Give them space. And whatever you do, don’t skip the resting time at the end. It lets the flavors settle and makes the squash even more tender.
Cooking Tips & Techniques
I’ve burned more butter than I care to admit. Honestly, the first few times I tried this recipe, I was convinced brown butter was some kind of culinary myth that only professional chefs could achieve. But here’s what I’ve figured out:
The key to perfect brown butter is patience. Use medium heat, not high. I know it’s tempting to crank it up and get it done faster, but that’s how you end up with black specks and a bitter taste. Medium heat gives you control. Swirl the pan constantly and watch for the moment when the foam clears and you can see the bottom of the pan clearly. That’s when things start happening fast.
For the sage, dry the leaves completely before adding them to the butter. Any moisture will make them sputter and steam instead of crisping. I pat mine between paper towels and let them sit for a few minutes. Also, don’t overcrowd them in the pan — they need space to crisp evenly.
Here’s a mistake I made more than once: I’d forget to flip the squash halfway through. You get one side beautifully caramelized and the other side pale and sad. Set a timer. Your future self will thank you.
For consistent results, try to get squash that are similar in size. If one is much larger than the others, it’ll take longer to cook through. I’ve had to pull out a smaller piece early while waiting for its bigger sibling to catch up. Not a disaster, but annoying.
Multitasking tip: Start the brown butter when you flip the squash. That way everything finishes around the same time and you can serve it hot. Cold brown butter is just sad butter.
Variations & Adaptations
One of the best things about this recipe is how adaptable it is. Here are some variations I’ve tried and loved:
Maple-Cinnamon Version
Add 1/2 teaspoon of cinnamon to the brown butter along with an extra tablespoon of maple syrup. The warm spice pairs beautifully with the nutty butter and sweet squash. I made this for Thanksgiving last year and it disappeared faster than the mashed potatoes.
Spicy-Sweet Twist
Add a pinch of red pepper flakes or a drizzle of hot honey along with the maple syrup. The heat cuts through the richness and adds a nice little kick. My neighbor tried this version and now makes it every week.
Herb Variation
If you can’t find fresh sage (or just don’t like it), try fresh thyme or rosemary instead. Rosemary is especially good — just strip the leaves off the stem and add them to the brown butter the same way you would the sage. They won’t get quite as crispy, but the flavor is lovely.
Dairy-Free Adaptation
Use a high-quality vegan butter for the browning step. It won’t brown exactly the same way, but it’ll still be delicious. Alternatively, use coconut oil and add a splash of coconut milk at the end for richness. It changes the flavor profile but is still really good.
Different Squash Options
As I mentioned earlier, delicata squash is my favorite substitute because the skin is also edible. Butternut works too but needs to be peeled. Acorn squash is another option, though it’s a bit more fibrous. Adjust cooking times as needed — smaller pieces cook faster.
Serving & Storage Suggestions
This dish is best served warm, right after it comes out of the oven. The contrast between the tender squash and the crispy sage is at its peak. I like to serve it on a large platter with the crispy sage scattered on top and a generous pinch of flaky salt.
What to serve with it: This squash pairs beautifully with roasted chicken, pork chops, or even a simple grain bowl with farro and arugula. For a vegetarian main, serve it over creamy polenta or with a side of lentils. It’s also fantastic alongside a Thanksgiving spread — it’s become a staple at my Friendsgiving dinner.
For drinks, a dry white wine like Sauvignon Blanc or a light red like Pinot Noir works well. In the fall, I love it with a hot apple cider or a spiced chai latte.
Storage: Leftover squash keeps in an airtight container in the refrigerator for up to 4 days. The crispy sage will lose its crunch, unfortunately, but the flavor is still there. To reheat, place the squash in a 350°F oven for 5-7 minutes, or until warmed through. The microwave works in a pinch but will make the squash a bit mushy.
Freezing: You can freeze the roasted squash for up to 3 months. Let it cool completely, then place in a freezer-safe bag or container. Thaw in the refrigerator overnight and reheat in the oven. I’d recommend making fresh sage for serving after freezing — the crispy texture doesn’t survive the freezer well.
One thing I’ve noticed: the flavors actually deepen after a day in the fridge. The brown butter soaks into the squash and makes it even more flavorful. So don’t be sad about leftovers — they’re almost better the next day.
Nutritional Information & Benefits
While this is definitely a comfort food dish, it’s got some surprising health benefits too. Honeynut squash is packed with vitamin A (one serving provides over 100% of your daily needs), vitamin C, and fiber. The skin is edible and contains additional nutrients and antioxidants.
The brown butter adds richness, but in moderation, it’s fine. Butter contains conjugated linoleic acid and butyrate, which have been linked to various health benefits. And the sage? It’s actually a medicinal herb with anti-inflammatory properties.
Estimated nutrition per serving (1 squash half):
- Calories: 185
- Fat: 12g
- Carbohydrates: 20g
- Fiber: 4g
- Protein: 2g
- Vitamin A: 150% DV
- Vitamin C: 25% DV
Dietary considerations: This recipe is naturally gluten-free and vegetarian. For a vegan version, use the substitutions mentioned above. It’s also relatively low in sugar — the sweetness comes mostly from the squash itself, with just a touch of maple syrup.
Potential allergens: Dairy (butter). If you’re lactose intolerant, the browning process actually breaks down some of the lactose, but it’s not completely lactose-free. Use the dairy-free option if needed.
FAQs
Can I use butternut squash instead of honeynut?
Yes, absolutely. Just peel the butternut squash first and cut it into similar-sized pieces. The cooking time might be slightly longer, so check for doneness with a fork.
Why did my brown butter burn?
It happens to the best of us. The most common cause is heat that’s too high. Use medium heat and watch it carefully. Once you see brown specks forming, remove it from the heat immediately — it continues cooking in the hot pan.
Can I make this ahead of time?
You can roast the squash and make the brown butter separately up to a day ahead. Reheat the squash in the oven, then drizzle with reheated brown butter and add fresh crispy sage before serving. The sage doesn’t hold up well, so make that fresh.
My sage didn’t get crispy. What went wrong?
Two possible issues: the leaves were too wet, or the butter wasn’t hot enough. Make sure your sage leaves are completely dry before adding them to the butter. And make sure the butter is hot — it should sizzle when the leaves hit the pan.
Can I skip the maple syrup?
Absolutely. Honeynut squash is naturally very sweet, so the maple syrup is optional. If you’re watching your sugar intake, feel free to leave it out. The brown butter and sage are plenty flavorful on their own.
Conclusion
This cozy brown butter honeynut squash with crispy sage has become my go-to dish for those nights when I need something that feels like more than just food. It’s the recipe I make when I want to slow down, when I want to taste something that connects me to a memory, when I want to share a little bit of warmth with the people I love.
I hope you’ll try it and make it your own. Maybe you’ll add a little more maple syrup, or swap in rosemary for the sage, or serve it over something completely unexpected. That’s the beauty of a simple recipe — there’s room to play. And if you burn the butter the first time? Don’t worry. I’ve done it more times than I can count. Just try again. It’s worth it.
I’d love to hear how it goes. Drop a comment below and let me know if you tried any variations, or tag me in your photos if you share them online. There’s something special about knowing this little recipe is making its way into kitchens and warming up dinners all over the place. Happy cooking, friends.
Pin This Recipe!
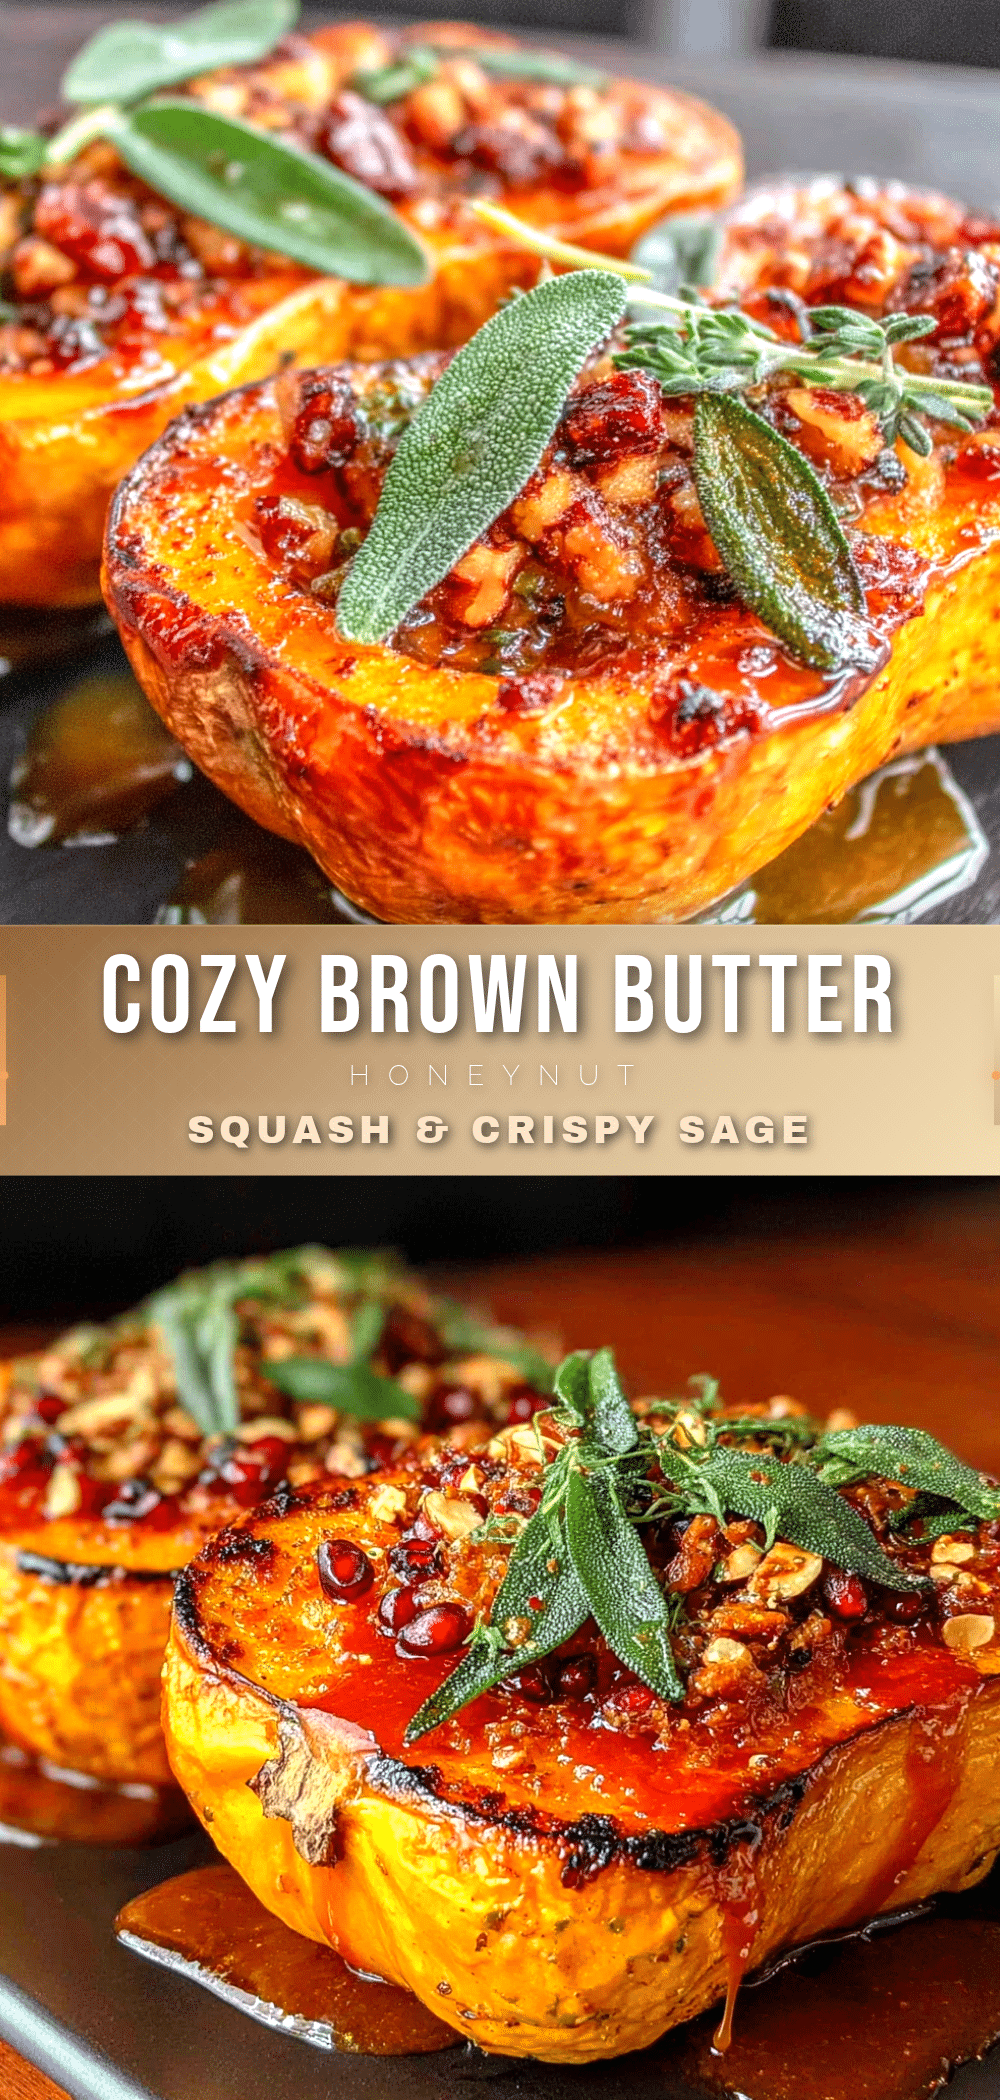
Cozy Brown Butter Honeynut Squash with Crispy Sage

A simple yet elegant side dish featuring roasted honeynut squash drizzled with nutty brown butter and topped with crispy sage leaves. Perfect for cozy nights and holiday gatherings.
- Prep Time: 10 minutes
- Cook Time: 30 minutes
- Total Time: 40 minutes
- Yield: 6 servings 1x
- Category: Side Dish
- Cuisine: American
Ingredients
- 3 medium honeynut squash (about 2 pounds total)
- 2 tablespoons olive oil
- 1/2 teaspoon kosher salt
- 1/4 teaspoon black pepper, freshly ground
- 4 tablespoons unsalted butter (preferably European-style)
- 12–15 fresh sage leaves
- 1 tablespoon maple syrup (optional but recommended)
- Flaky sea salt for finishing (e.g., Maldon)
Instructions
- Preheat your oven to 400°F (200°C).
- Wash the honeynut squash well. Using a sharp chef’s knife, carefully cut each squash in half lengthwise. Scoop out the seeds and stringy bits with a metal spoon.
- Place the squash halves cut-side up on a large baking sheet. Drizzle with olive oil and rub all over the flesh and skin. Sprinkle with salt and pepper. Flip them cut-side down.
- Roast the squash cut-side down for 15 minutes.
- While the squash is roasting, make the brown butter: Cut the butter into even pieces and place in a small saucepan over medium heat. Let it melt completely, then continue cooking, swirling occasionally, until it foams, the foam subsides, and brown specks form at the bottom (about 4-6 minutes). Immediately remove from heat and add the sage leaves; they will sizzle and crisp. After 30 seconds, transfer sage to a paper towel using a slotted spoon. Reserve the brown butter.
- After the first 15 minutes, remove the squash from the oven. Carefully flip each piece cut-side up using tongs. Drizzle the brown butter evenly over the squash halves. If using maple syrup, drizzle that over too.
- Return to the oven and roast for another 15-20 minutes, until the squash is fork-tender and the edges are caramelized and golden brown.
- Remove from the oven and let rest for 2-3 minutes. Transfer to a serving platter, sprinkle with the crispy sage leaves, and finish with a pinch of flaky sea salt. Serve warm.
Notes
Honeynut squash are in season from September to December. If unavailable, substitute with delicata squash (no peeling needed) or small butternut squash (peeled). For best results, use European-style butter for richer browning. The sage must be fresh and completely dry before adding to the butter to ensure crispiness. Leftover squash keeps in an airtight container in the refrigerator for up to 4 days; reheat in a 350°F oven for 5-7 minutes.
Nutrition
- Serving Size: 1 squash half
- Calories: 185
- Sugar: 8
- Sodium: 300
- Fat: 12
- Saturated Fat: 6
- Carbohydrates: 20
- Fiber: 4
- Protein: 2
Keywords: honeynut squash, brown butter, crispy sage, roasted squash, fall recipe, Thanksgiving side, vegetarian, gluten-free


