It was late September, and I had a bag of apples, a few sad-looking bananas, and a sudden, stubborn craving for a cake that tasted like autumn but looked like a party. Not a pumpkin spice situation, not a heavy, spiced loaf. I wanted something that felt celebratory but cozy, the kind of cake you could serve at a Thanksgiving table or a random Tuesday night when you just needed a win. For a while, I accepted that a layered cake with that kind of visual punch meant artificial colors and flavors, or a whole lot of fuss. I didn’t want either.
The idea came from a chocolate, vanilla, and strawberry Neapolitan ice cream carton in my freezer. That classic trio of flavors—everyone loves it, right? But I wanted a fall version. Something that swapped the strawberry for something warmer, more seasonal. I started thinking about roasted apples, a rich chocolate layer, and a light, fluffy vanilla. It took a few tries (one cake that was a little too dry, another that fell apart when I tried to slice it), but I finally landed on something that works. It’s not a perfect replica of the ice cream, but honestly, it’s better.
This cake is the answer to that craving I couldn’t name. It’s a conversation starter that doesn’t require a lot of explaining. You just put it on the table, and people get it. It feels like a little bit of fall magic, and I think you’ll see what I mean the first time you cut into it.
Why You’ll Love This Recipe
This isn’t just another layer cake recipe. It’s the result of a few kitchen experiments where I learned exactly what not to do, so you don’t have to. Here’s why this one is different:
- Three Distinct Flavors, One Bowl Batter: You don’t need three separate cake recipes. The base batter is the same for all three layers, which saves you time and a sink full of dishes. You just divide it and add the flavorings.
- Roasted Apple Layer (Not Strawberry): This is the fall twist that makes it special. Roasting the apples concentrates their sweetness and adds a deep, almost caramelized flavor that you just can’t get from raw fruit. It’s the star of the show.
- Perfectly Moist and Tender: I tested this with oil and butter, and I found that a combination of both gives you the tenderness of oil and the rich flavor of butter. The cake stays moist for days, if it lasts that long.
- Simple, Crowd-Pleasing Flavors: No one is going to turn down a slice of chocolate, vanilla, and apple cake. It’s familiar enough to be comforting but unique enough to be memorable. It’s the kind of dessert that gets rave reviews from kids and adults alike.
- Impressive Without the Stress: It looks like you spent all day in the kitchen, but the process is actually pretty straightforward. The layers are forgiving, and the frosting covers a multitude of sins. It’s a great recipe for building confidence with layer cakes.
What Ingredients You Will Need
This recipe uses simple, wholesome ingredients to build big flavor. Most of these are probably in your pantry right now, which is exactly how I like to bake. Let’s break down what you need for each component.
For the Roasted Apple Layer
- 2 medium apples (such as Honeycrisp or Gala), peeled and diced: You want a firm apple that holds its shape during roasting. Honeycrisp is my go-to for its sweet-tart balance. Don’t use mealy apples like Red Delicious, they’ll turn to mush.
- 1 tablespoon unsalted butter, melted: This helps the apples caramelize in the oven. I use salted butter in a pinch, just skip the added salt in the recipe.
- 1 tablespoon brown sugar: Adds a touch of molasses flavor that pairs perfectly with the apples. Light or dark brown sugar both work here.
- ½ teaspoon ground cinnamon: The quintessential fall spice. Freshly ground is wonderful, but pre-ground is perfectly fine.
For the Vanilla Cake Batter (Base for All Layers)
- 2 ½ cups (315g) all-purpose flour: Spoon and level it for the most accurate measurement. Scooping directly from the bag can pack in too much flour and make the cake dry.
- 2 teaspoons baking powder: Make sure it’s fresh! Old baking powder won’t give you the rise you need.
- ½ teaspoon baking soda: Helps with browning and tenderness.
- ½ teaspoon salt: Balances the sweetness and enhances the other flavors. I use fine sea salt.
- 1 cup (226g) unsalted butter, softened: Room temperature is key. If you forget to take it out of the fridge, cut it into small cubes and let it sit for 15 minutes.
- 1 ½ cups (300g) granulated sugar: Provides sweetness and structure.
- 3 large eggs, room temperature: Cold eggs can seize the batter. Place them in a bowl of warm water for 5 minutes to bring them to room temperature quickly.
- 1 tablespoon vanilla extract: Use pure vanilla extract if you can. It makes a real difference in the vanilla layer.
- 1 cup (240ml) buttermilk, room temperature: Adds moisture and a slight tang that tenderizes the crumb. No buttermilk? Add 1 tablespoon of lemon juice or white vinegar to a measuring cup, then fill with milk to the 1-cup line. Let it sit for 5 minutes.
For the Chocolate Layer
- ¼ cup (60ml) hot coffee or water: Coffee enhances the chocolate flavor without making the cake taste like coffee. Trust me on this one. If you’re sensitive to caffeine, use hot water.
- 3 tablespoons unsweetened cocoa powder: I use natural cocoa powder for this recipe. Dutch-process will work too, but the color will be darker and the flavor a bit milder.
For the Cream Cheese Frosting
- 8 ounces (226g) cream cheese, softened: Full-fat is best for a stable, creamy frosting. Low-fat can make it too runny.
- ½ cup (113g) unsalted butter, softened: Adds richness and helps the frosting hold its shape.
- 3-4 cups (360-480g) powdered sugar: Start with 3 cups and add more if you want a stiffer frosting for piping.
- 1 teaspoon vanilla extract: A must for any cream cheese frosting.
- Pinch of salt: Balances the sweetness.
Equipment Needed
You don’t need a professional bakery setup for this cake. Here’s what you’ll want to have on hand:
- Three 8-inch round cake pans: If you only have two, you can bake the layers in batches. Just let the batter sit at room temperature while the first batch bakes. I prefer light-colored metal pans for even baking. Dark pans can cause the edges to brown too quickly.
- Electric hand mixer or stand mixer: A stand mixer makes creaming the butter and sugar a breeze, but a hand mixer works just fine. You can even do it by hand with a whisk and some elbow grease.
- Baking sheet: For roasting the apples. A rimmed baking sheet is best to catch any juices.
- Parchment paper: Line the bottom of your cake pans for guaranteed non-stick removal. It’s worth the tiny bit of extra effort.
- Cooling rack: Essential for letting the cake layers cool completely before frosting. If you try to frost a warm cake, you’ll end up with a melty mess.
- Offset spatula: Makes frosting the cake so much easier and gives you a smooth, professional finish. A butter knife will work in a pinch.
- Rotating cake stand (optional but helpful): Makes frosting and decorating much easier. If you don’t have one, just set the cake on a plate and turn it as you work.
Preparation Method
Let’s get to the fun part. Follow these steps, and you’ll have a beautiful three-layer cake that tastes as good as it looks.
- Roast the Apples (Do This First): Preheat your oven to 400°F (200°C). Toss the diced apples with the melted butter, brown sugar, and cinnamon on a baking sheet. Spread them in a single layer. Roast for 15-20 minutes, stirring halfway through, until they are tender and the edges are starting to caramelize. Let them cool completely on the baking sheet. You want them cool so they don’t melt the butter in your cake batter.
- Preheat and Prep the Pans: Lower the oven temperature to 350°F (175°C). Grease three 8-inch round cake pans with butter or non-stick spray. Line the bottoms with circles of parchment paper and grease the paper too. This is my non-negotiable step for perfect layers.
- Make the Vanilla Cake Batter: In a medium bowl, whisk together the flour, baking powder, baking soda, and salt. Set aside. In a large bowl (or the bowl of your stand mixer), beat the softened butter and granulated sugar together on medium speed until light and fluffy, about 3-5 minutes. Scrape down the sides of the bowl as needed.
- Add the Eggs and Vanilla: Add the eggs one at a time, beating well after each addition. Beat in the vanilla extract. The mixture should look smooth and glossy at this point.
- Alternate Dry and Wet Ingredients: With the mixer on low speed, add the flour mixture in three additions, alternating with the buttermilk, starting and ending with the flour. Mix just until combined after each addition. Overmixing at this stage will develop the gluten and make your cake tough. You want a smooth, thick batter.
- Divide and Flavor the Batter: Divide the batter evenly into three bowls. You should have about 1 ½ cups of batter per bowl. To the first bowl (vanilla layer), leave it as is. To the second bowl (chocolate layer), whisk together the hot coffee and cocoa powder in a small bowl until smooth, then fold it into the batter until it’s a uniform chocolate color. To the third bowl (apple layer), gently fold in the cooled roasted apples.
- Bake the Layers: Pour each batter into a prepared pan. Bake for 22-28 minutes, or until a toothpick inserted into the center comes out clean or with a few moist crumbs. The chocolate layer might take a minute or two longer. Let the cakes cool in the pans for 10 minutes, then turn them out onto a cooling rack to cool completely. Do not skip this cooling step. If the cake is even slightly warm, your frosting will slide right off.
- Make the Cream Cheese Frosting: While the cakes are cooling, make the frosting. In a large bowl, beat the softened cream cheese and butter together until smooth and creamy, about 2 minutes. Beat in the vanilla extract and salt. Gradually add the powdered sugar, one cup at a time, beating on low speed until incorporated. Once all the sugar is added, beat on medium-high speed for 1-2 minutes until the frosting is light and fluffy. If it’s too soft, pop it in the fridge for 15 minutes to firm up.
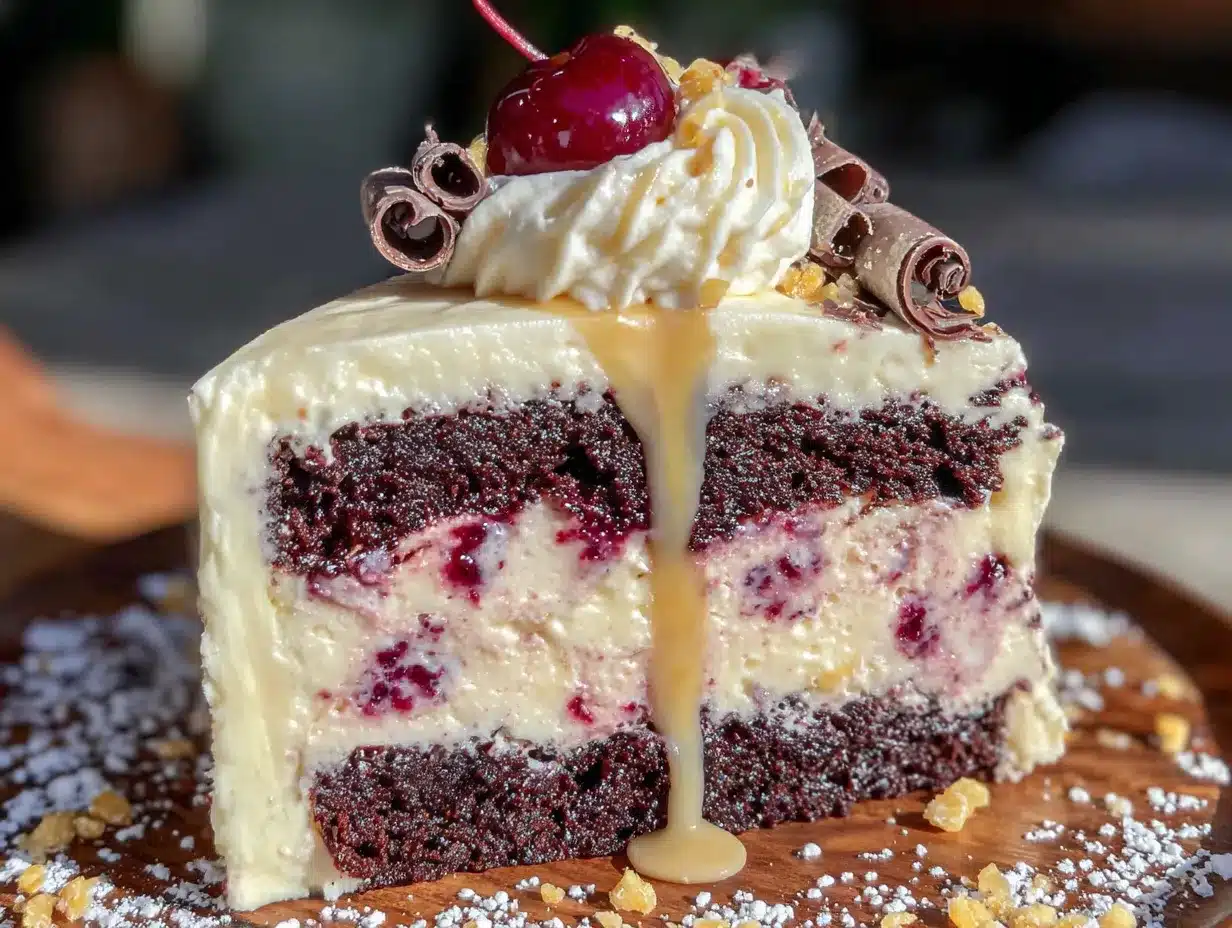
- Assemble the Cake: Place one cooled cake layer (I usually start with the chocolate layer) on your serving plate or cake stand. Spread a generous layer of frosting (about ½ cup) evenly over the top. Place the second layer (vanilla) on top and repeat with another layer of frosting. Top with the third layer (apple).
- Frost the Outside: Apply a thin layer of frosting all over the top and sides of the cake. This is called a crumb coat. It traps any loose crumbs so your final layer is clean. Refrigerate the cake for 20-30 minutes to set the crumb coat. Then, apply the remaining frosting in a thicker, even layer. Use your offset spatula to create swirls or a smooth finish.
- Chill and Serve: Refrigerate the cake for at least 1 hour before slicing. This helps the layers set and makes for cleaner slices. Let it sit at room temperature for 15 minutes before serving for the best flavor and texture.
Cooking Tips & Techniques
I’ve made this cake enough times to know where things can go sideways. Here are a few things I’ve learned the hard way.
- Room Temperature is Non-Negotiable: I know it’s a pain, but letting your butter, eggs, and buttermilk come to room temperature is the single most important step for a tender, evenly baked cake. Cold ingredients don’t emulsify properly, and you end up with a dense, greasy crumb. Set them out an hour before you start baking.
- Don’t Overmix the Batter: Once you add the flour, mix just until you don’t see any more streaks of white. Overmixing develops gluten, which gives you a tough, rubbery cake. It’s better to have a few small lumps than to overmix. I speak from experience after making a hockey puck of a chocolate cake once.
- Use Parchment Paper: I used to just grease and flour my pans, and I’d say about half the time, the cake would stick. Parchment paper is cheap and it guarantees your layers will come out perfectly every time. Cut a circle of parchment for the bottom of the pan, and your cake will release without a fight.
- Level Your Cake Layers: Even if you think you spread the batter evenly, the cakes will dome slightly in the center. Use a serrated knife to carefully slice off the domed tops so you have flat, even layers. This makes stacking and frosting so much easier. I save the scraps for snacking or making cake pops.
- Chill the Crumb Coat: Don’t skip the refrigerator step after the crumb coat. It sets the frosting and creates a stable base for your final layer. If you skip it, you’ll end up with crumbs all through your pretty white frosting. Trust me, it’s worth the 20-minute wait.
Variations & Adaptations
This recipe is a great starting point. Here are a few ways to make it your own.
- Gluten-Free Version: Substitute the all-purpose flour with a good quality 1:1 gluten-free baking flour blend. I’ve had great results with the one from King Arthur Flour. Make sure your blend contains xanthan gum for structure. The texture will be slightly more tender, but it’s still delicious.
- Dairy-Free Adaptation: Use vegan butter and a dairy-free cream cheese alternative for the frosting. For the cake, use a plant-based milk mixed with a teaspoon of apple cider vinegar to mimic buttermilk. The roasted apples are naturally dairy-free if you use a plant-based butter.
- Spiced Apple Layer: For an even more fall-forward flavor, add ½ teaspoon of ground ginger and ¼ teaspoon of ground cloves to the apple mixture before roasting. It adds a warmth that pairs beautifully with the chocolate and vanilla.
- Different Fruit Options: Not an apple fan? Roasted pears or even diced butternut squash (yes, really!) work beautifully in place of the apples. The roasting process concentrates the sugars and gives you that same soft, jammy texture. If you try this with a cast iron apple pie skillet, you’ll see what I mean about the magic of roasted fruit.
- Nutty Crunch: Add a layer of chopped toasted pecans or walnuts between the cake layers for a lovely textural contrast. Just sprinkle them over the frosting before adding the next layer. I did this once on a whim, and it was a huge hit.
Serving & Storage Suggestions
This cake is best served at room temperature, which lets the flavors really sing. Here’s how to handle it from the kitchen to the table.
- Serving Temperature: Take the cake out of the refrigerator about 20-30 minutes before you plan to serve it. The frosting will soften slightly, and the cake layers will become more tender. A cold cake can taste a bit dense.
- Presentation: For a rustic fall look, I like to garnish the top of the cake with a few thin slices of fresh apple, a sprinkle of cinnamon, and some toasted pecans. It adds a pop of color and a hint of what’s inside. A dusting of powdered sugar also looks lovely.
- What to Serve With It: A dollop of lightly sweetened whipped cream or a scoop of vanilla bean ice cream is a perfect pairing. For a cozy fall drink, serve it alongside a warm mug of spiced cider or a hot cup of coffee. If you’re feeling festive, this cake also pairs beautifully with a squash casserole for a truly over-the-top dessert table.
- Storage: Store the cake in an airtight container in the refrigerator for up to 5 days. The cream cheese frosting needs to be kept cold. Let slices come to room temperature before serving for the best flavor.
- Freezing: You can freeze the unfrosted cake layers for up to 3 months. Wrap each cooled layer tightly in plastic wrap, then place them in a freezer-safe bag. When you’re ready to assemble, thaw them in the refrigerator overnight. The frosted cake can also be frozen for up to 2 months. Thaw it in the refrigerator overnight before serving.
Nutritional Information & Benefits
Let’s be honest, this is a celebration cake, not a health food. But that doesn’t mean it’s without its redeeming qualities. Here’s a general breakdown per slice (assuming 12 servings).
- Estimated Calories: ~450-550 calories per slice, depending on the frosting amount.
- Fat: ~25-30g (mostly from butter and cream cheese, which provide fat-soluble vitamins).
- Carbohydrates: ~60-70g (a treat, not an everyday snack).
- Protein: ~5-7g (thanks to the eggs and dairy).
- Fiber: ~2g (from the apples, which also provide a small amount of vitamin C).
The apples in the roasted layer actually provide some dietary fiber and antioxidants, which is more than you can say for most cakes. It’s a small comfort, but it’s there. If you’re looking for a lighter option, you could try a strawberry poppyseed salad for a sweet but less indulgent treat. This cake is about joy and celebration, and that has its own nutritional value.
Conclusion
This Cozy Fall Neapolitan Layer Cake is more than just a dessert. It’s a project that feels rewarding, a showstopper that doesn’t require a pastry degree, and a way to celebrate the season with something a little different. The combination of rich chocolate, tender vanilla, and sweet roasted apples is genuinely surprising in the best way. It’s the kind of cake that makes people at the table lean in and ask for the recipe.
I love that it takes a classic, nostalgic idea and gives it a warm, autumnal hug. It’s perfect for Thanksgiving, a fall birthday, or just a weekend when you want to bake something that feels special. Don’t be afraid to play with the flavors or the frosting. Make it your own. The best recipes are the ones that get passed around and adapted.
I’d love to hear how yours turns out! Leave a comment below and let me know if you tried any fun variations. And if you share a photo on Pinterest, tag me so I can see your beautiful creation. Happy baking, friends!
Frequently Asked Questions
Can I use a different fruit in place of the apples?
Absolutely! Roasted pears or even diced butternut squash work wonderfully. The key is to roast them first to concentrate their sweetness. Just make sure they are cool before folding them into the batter.
Do I have to use coffee in the chocolate layer?
Not at all. The coffee is there to enhance the chocolate flavor, not to make the cake taste like coffee. You can substitute it with an equal amount of hot water if you prefer to avoid caffeine entirely.
My cake layers domed a lot. What did I do wrong?
A slight dome is normal, but a large dome usually means the oven temperature is too high or the batter was overmixed. Try using an oven thermometer to check your oven’s accuracy. Also, make sure you’re not overmixing the batter once the flour is added.
Can I make this cake a day ahead?
Yes! This cake actually tastes better the next day. The flavors have time to meld together. Bake and assemble the cake, then store it in the refrigerator overnight. Let it sit at room temperature for 20-30 minutes before serving.
How do I get clean slices when cutting the cake?
Use a long, sharp serrated knife. Run the knife under hot water and dry it off before each cut. This helps the knife glide through the frosting and cake without dragging or tearing. Wipe the blade clean between slices for the best results.
Pin This Recipe!
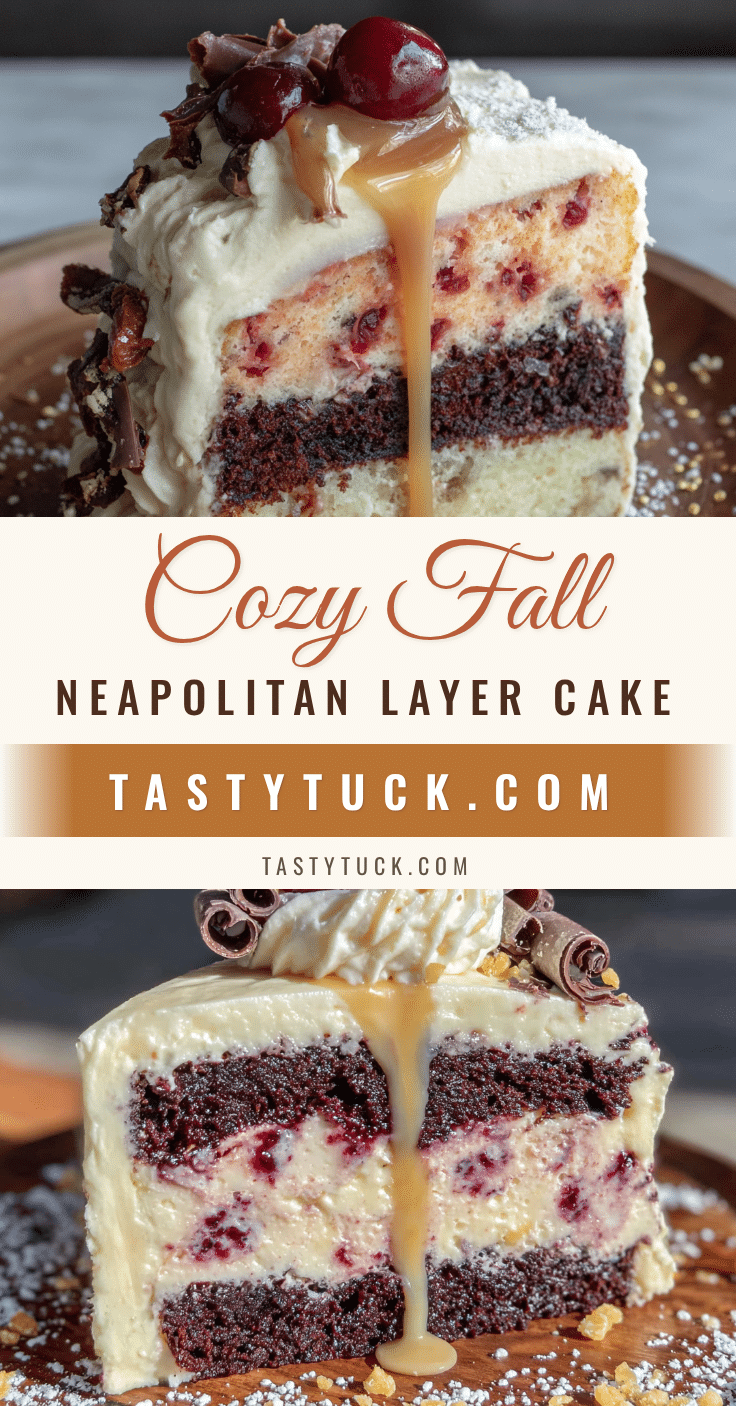
Cozy Fall Neapolitan Layer Cake: Easy Homemade Recipe
A stunning three-layer cake featuring rich chocolate, tender vanilla, and sweet roasted apples, all wrapped in a creamy cream cheese frosting. It’s the perfect fall dessert that looks like a party but tastes like autumn.
- Prep Time: 30 minutes
- Cook Time: 40 minutes
- Total Time: 1 hour 10 minutes
- Yield: 12 servings 1x
- Category: Dessert
- Cuisine: American
Ingredients
- 2 medium apples (such as Honeycrisp or Gala), peeled and diced
- 1 tablespoon unsalted butter, melted
- 1 tablespoon brown sugar
- ½ teaspoon ground cinnamon
- 2 ½ cups (315g) all-purpose flour
- 2 teaspoons baking powder
- ½ teaspoon baking soda
- ½ teaspoon salt
- 1 cup (226g) unsalted butter, softened
- 1 ½ cups (300g) granulated sugar
- 3 large eggs, room temperature
- 1 tablespoon vanilla extract
- 1 cup (240ml) buttermilk, room temperature
- ¼ cup (60ml) hot coffee or water
- 3 tablespoons unsweetened cocoa powder
- 8 ounces (226g) cream cheese, softened
- ½ cup (113g) unsalted butter, softened
- 3–4 cups (360-480g) powdered sugar
- 1 teaspoon vanilla extract
- Pinch of salt
Instructions
- Roast the Apples: Preheat oven to 400°F (200°C). Toss diced apples with melted butter, brown sugar, and cinnamon on a baking sheet. Spread in a single layer. Roast for 15-20 minutes, stirring halfway, until tender and edges caramelize. Let cool completely.
- Preheat and Prep Pans: Lower oven to 350°F (175°C). Grease three 8-inch round cake pans. Line bottoms with parchment paper and grease the paper.
- Make Vanilla Cake Batter: In a medium bowl, whisk together flour, baking powder, baking soda, and salt. Set aside. In a large bowl, beat softened butter and granulated sugar on medium speed until light and fluffy, about 3-5 minutes. Scrape down sides as needed.
- Add Eggs and Vanilla: Add eggs one at a time, beating well after each. Beat in vanilla extract until smooth and glossy.
- Alternate Dry and Wet Ingredients: With mixer on low, add flour mixture in three additions, alternating with buttermilk, starting and ending with flour. Mix just until combined. Do not overmix.
- Divide and Flavor Batter: Divide batter evenly into three bowls (about 1 ½ cups each). Leave first bowl plain (vanilla). For second bowl (chocolate), whisk hot coffee and cocoa powder until smooth, then fold into batter. For third bowl (apple), gently fold in cooled roasted apples.
- Bake Layers: Pour each batter into prepared pans. Bake for 22-28 minutes, until a toothpick inserted in center comes out clean or with a few moist crumbs. Cool in pans for 10 minutes, then turn out onto a cooling rack to cool completely.
- Make Cream Cheese Frosting: In a large bowl, beat softened cream cheese and butter until smooth and creamy, about 2 minutes. Beat in vanilla and salt. Gradually add powdered sugar, one cup at a time, beating on low. Once all added, beat on medium-high for 1-2 minutes until light and fluffy. If too soft, refrigerate for 15 minutes.
- Assemble Cake: Place one cooled cake layer (e.g., chocolate) on serving plate. Spread about ½ cup frosting evenly over top. Add second layer (vanilla) and repeat. Top with third layer (apple).
- Frost Outside: Apply a thin layer of frosting all over top and sides (crumb coat). Refrigerate for 20-30 minutes to set. Then apply remaining frosting in a thicker, even layer. Use offset spatula to create swirls or smooth finish.
- Chill and Serve: Refrigerate cake for at least 1 hour before slicing. Let sit at room temperature for 15 minutes before serving.
Notes
Room temperature ingredients are crucial for a tender cake. Don’t overmix the batter. Use parchment paper for easy release. Chill the crumb coat to prevent crumbs in the final frosting layer. For clean slices, use a hot, dry serrated knife.
Nutrition
- Serving Size: 1 slice
- Calories: 500
- Sugar: 45
- Sodium: 320
- Fat: 28
- Saturated Fat: 17
- Carbohydrates: 65
- Fiber: 2
- Protein: 6
Keywords: fall cake, Neapolitan cake, layer cake, apple cake, chocolate cake, vanilla cake, cream cheese frosting, autumn dessert


