My neighbor’s kid asked why I couldn’t just crush the Oreos in the bag with my hands instead of dirtying a food processor. I started to explain why that wouldn’t work—something about even crumbs and professional presentation. Then I stopped. Honestly, I had no good reason. I handed her the bag of cookies, and she went to town, squeezing and smashing until the bag looked like a science experiment gone wrong. The crumbs were uneven, a little chunky, and absolutely perfect for dirt.
That moment changed how I make these Cozy Halloween Dirt Cups forever. I mean, I’d spent years pulsing cookies into a fine dust, wiping down counters, and washing that stupid processor bowl. Here was a seven-year-old showing me a better way. The crumbs had texture. They looked like real soil, not some factory-made topping. And the best part? She felt like a genius. I felt like a fool, but the kind of fool who learns something valuable.
Let me tell you, that Tuesday afternoon in late September, with chocolate pudding smeared on her cheek and gummy worms poking out of a plastic cup, we made something special. The power didn’t go out, nobody cried, and the kitchen was a disaster zone. But those little cups of chocolate, cream, and crushed cookies were the coziest thing I’d tasted in ages. Maybe you’ve been there—overthinking a simple recipe until someone reminds you that joy lives in the mess. That’s exactly what these dirt cups are about.
This recipe stayed with me because it taught me to let go. Halloween can be stressful enough without stressing over perfect crumbs. These Cozy Halloween Dirt Cups are forgiving, fun, and ridiculously easy. They taste like childhood, but they’re made for anyone who needs a little comfort on a chilly October evening.
Why You’ll Love This Recipe
I’ve tested this recipe about twelve times now—yes, twelve—and every batch disappeared faster than the last. Here’s why these Cozy Halloween Dirt Cups have earned a permanent spot in my fall rotation:
- Quick & Easy: You can throw these together in under 15 minutes. No baking, no fuss, no complicated techniques. Perfect for a last-minute Halloween treat or a cozy night in.
- Simple Ingredients: Oreos, instant pudding, milk, cream cheese, butter, and gummy worms. That’s it. You probably have most of these in your pantry right now.
- Perfect for Halloween: Whether it’s a classroom party, a spooky movie night, or just a Tuesday that needs some fun, these cups deliver. They’re festive without being over-the-top.
- Crowd-Pleaser: I’ve served these to kids, adults, and picky eaters. Every single person goes quiet for a second after the first bite. Then they reach for another cup.
- Unbelievably Delicious: The combination of creamy pudding, tangy cream cheese, and crunchy Oreo crumbs is pure magic. It’s comfort food in a cup—silly, nostalgic, and deeply satisfying.
What makes this version different from the rest? It’s the texture. By crushing the Oreos by hand (yes, in the bag), you get these lovely irregular crumbs that mimic real dirt. No food processor needed. The cream cheese in the pudding layer adds a subtle tang that balances the sweetness. It’s not just another dirt cup—it’s the dirt cup that tastes like a cozy hug on a cold night.
This recipe isn’t just good—it’s the kind that makes you close your eyes after the first bite. It’s comfort food reimagined: faster, simpler, but with the same soul-soothing satisfaction. Perfect for impressing your kids without stress, or turning a simple evening into something memorable.
What Ingredients You Will Need
This recipe uses simple, pantry-friendly ingredients to create something that feels special. Every component plays a role in building that rich, creamy, crunchy texture you crave. Here’s what you’ll need:
- Oreo cookies: 1 standard package (about 36 cookies). You’ll crush these into crumbs for the “dirt.” I prefer the classic Oreo, but Double Stuf works too—just expect slightly sweeter crumbs. (Pro tip: keep the filling in; it helps the crumbs stick together.)
- Instant chocolate pudding mix: 1 box (3.9 ounces or 113 grams). Use the cook-and-serve kind if you prefer, but instant is faster and yields a silky texture. I recommend Jell-O brand for consistency.
- Cold milk: 2 cups (480 ml). Whole milk gives the richest pudding, but 2% works fine. For a dairy-free version, use oat milk or almond milk—just note the pudding may set slightly softer.
- Cream cheese: 8 ounces (226 grams), softened to room temperature. This is the secret ingredient. It adds a tangy richness that elevates the pudding from kid-stuff to genuinely delicious. Use full-fat for best results.
- Unsalted butter: ¼ cup (½ stick or 57 grams), softened. The butter blends with the cream cheese to create a luscious base. Don’t skip it—it adds that silky mouthfeel.
- Powdered sugar: 1 cup (120 grams). This sweetens the cream cheese layer without making it grainy. Sift it if you have the patience; if not, just whisk well.
- Vanilla extract: 1 teaspoon. Pure vanilla is best, but imitation works in a pinch. It rounds out the flavors beautifully.
- Gummy worms: About 1 cup (roughly 20-25 worms). Use the classic sour kind for a tangy contrast, or go with regular gummy worms for pure sweetness. I like the bright green and orange ones for Halloween vibes.
- Optional toppings: Extra crushed Oreos, a few gummy worms for decoration, and maybe some candy pumpkins or sprinkles. Make it your own.
That’s it—eight ingredients, most of which you probably already have. The beauty of this recipe is its simplicity. No weird extracts, no obscure baking supplies. Just honest, comforting ingredients that come together in minutes.
Equipment Needed
You don’t need a fancy kitchen to make these Cozy Halloween Dirt Cups. Here’s what I use:
- Mixing bowls: One large bowl for the pudding, one medium bowl for the cream cheese mixture. Glass or stainless steel works best.
- Electric hand mixer or stand mixer: Not strictly necessary, but it makes the cream cheese layer silky smooth. You can whisk by hand if you’re feeling strong.
- Measuring cups and spoons: For accuracy. Eyeballing works for some things, but pudding is particular about liquid ratios.
- Spatula: For scraping every last bit of goodness. A silicone spatula is my favorite—it gets into corners.
- Small cups or glasses: 6 to 8 cups, depending on size. I use 6-ounce plastic cups for parties, but mason jars or small glass tumblers work beautifully. Clear cups let you see the layers—ideal for the Halloween effect.
- Ziplock bag: For crushing Oreos. This is non-negotiable now. A gallon-sized bag gives you room to work.
- Rolling pin or heavy pan: To smash the cookies. A rolling pin is classic, but a cast iron skillet works in a pinch. I’ve used a wine bottle before—no judgment.
- Whisk: For the pudding. A balloon whisk incorporates air better than a flat whisk.
I’ve made these cups with nothing but a fork, a bowl, and my hands. The equipment is flexible. Don’t let a missing tool stop you—improvisation is part of the fun.
Preparation Method
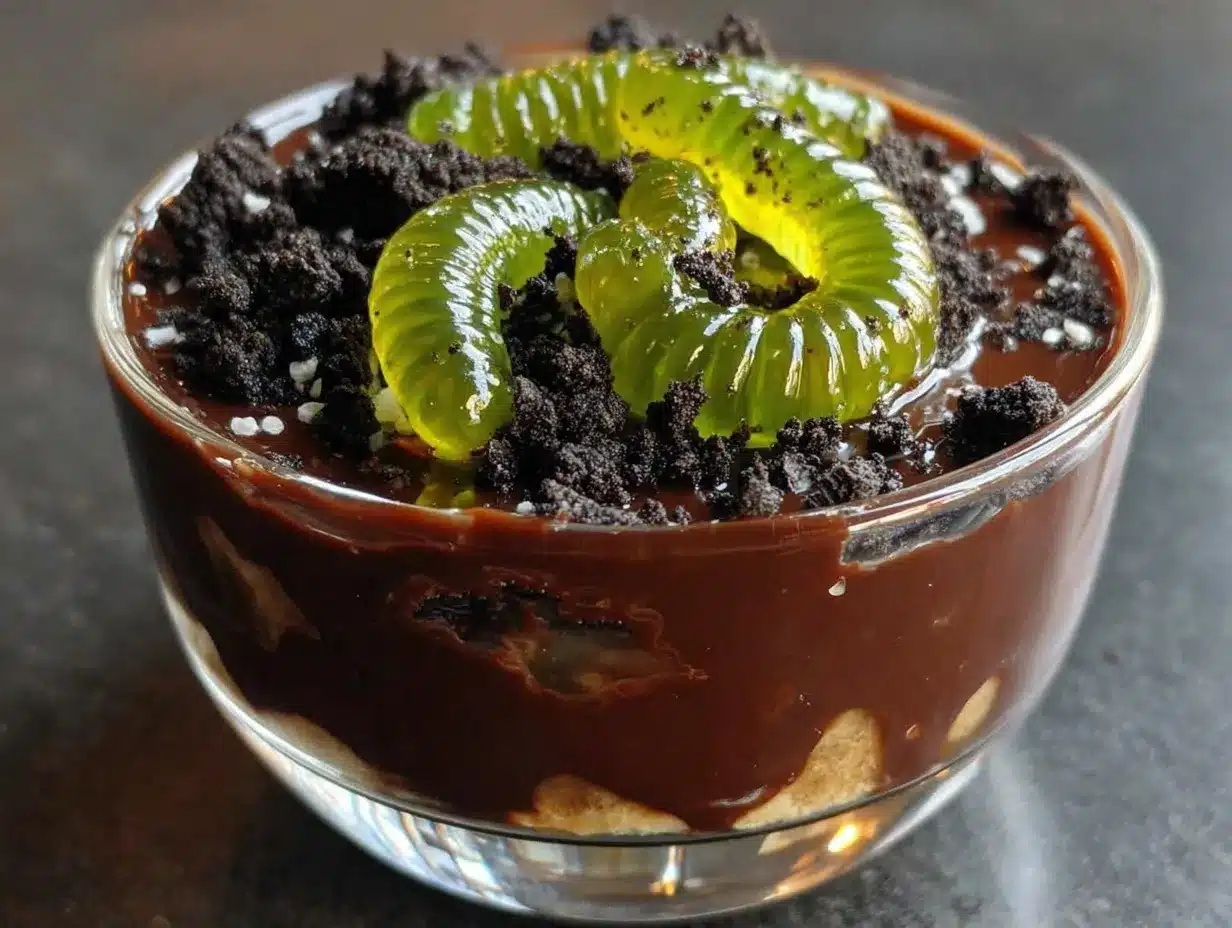
Let’s get to the good part. Follow these steps, and you’ll have a batch of Cozy Halloween Dirt Cups ready in no time.
- Crush the Oreos: Place the entire package of Oreos (filling included) in a large Ziplock bag. Seal it tight, pushing out excess air. Now go to town—use your hands, a rolling pin, or the bottom of a heavy pan. Crush until you have a mix of fine crumbs and small chunks. You want texture, not dust. Set aside. This takes about 3 minutes and is surprisingly satisfying.
- Make the pudding: In a large bowl, whisk together the instant chocolate pudding mix and 2 cups of cold milk. Whisk vigorously for 2 minutes until the mixture thickens. It should look glossy and hold soft peaks. Pop it in the fridge to set while you work on the cream cheese layer—about 5 minutes.
- Prepare the cream cheese mixture: In a medium bowl, beat the softened cream cheese and butter together until smooth and fluffy. About 2 minutes with an electric mixer on medium speed. Scrape down the sides once. Add the powdered sugar and vanilla extract, then beat again until fully combined. The mixture should be light, creamy, and slightly tangy.
- Combine the layers: Take the pudding out of the fridge. Gently fold the cream cheese mixture into the pudding using a spatula. Don’t overmix—you want ribbons of cream cheese running through the chocolate. This creates a beautiful marbled effect and adds complexity to every bite.
- Assemble the cups: Spoon about 2 tablespoons of crushed Oreos into the bottom of each cup. Press down lightly to form a base layer. Next, add a generous layer of the pudding-cream cheese mixture—about ¼ cup per serving. Repeat with another layer of Oreo crumbs, then another layer of pudding mixture. End with a thick topping of Oreo crumbs. You want the “dirt” to cover the pudding completely.
- Add the gummy worms: Gently poke 2-3 gummy worms into each cup, letting some peek out of the “dirt” as if they’re crawling out. This is the fun part. Arrange them however you like—some buried, some surfacing. For extra Halloween flair, add a few candy pumpkins or eyeballs on top.
- Chill before serving: Refrigerate the cups for at least 30 minutes before serving. This allows the layers to set and the flavors to meld. The longer they sit, the better they taste—overnight is ideal if you can wait.
- Serve and enjoy: Pull the cups out of the fridge, add any final decorations, and serve immediately. Watch the smiles appear. These are best enjoyed cold, straight from the fridge.
A few notes from my kitchen: If the pudding seems too thin after 2 minutes, let it sit for another minute—it will thicken. Don’t skip the cream cheese step; it’s what makes these cups taste grown-up. And if you’re short on time, you can skip the chilling step, but the texture won’t be as firm. Trust me, the wait is worth it.
Cooking Tips & Techniques
I’ve made these Cozy Halloween Dirt Cups more times than I care to count. Here’s what I’ve learned the hard way so you don’t have to.
Don’t overcrush the Oreos. I made this mistake my first time—I pulverized them into powder. The result was a dry, dusty texture that didn’t feel like dirt at all. You want visible chunks. Think of real soil: it has pebbles and varied textures. Your Oreo crumbs should too. Aim for a mix of fine crumbs and small pieces no bigger than a pea.
Soften your cream cheese properly. Cold cream cheese creates lumps that never fully disappear. Leave it on the counter for 30 minutes before you start. If you forget, microwave it in 10-second bursts until it’s soft but not melted. Trust me, lumpy cream cheese ruins the silky texture you’re after.
Let the pudding set fully. I’m impatient, so I’ve tried to rush this step. Bad idea. If the pudding hasn’t set, your layers will bleed together, and you’ll end up with a muddy mess. Give it the full 5 minutes in the fridge. Better yet, make the pudding first, then prep your other ingredients. By the time you’re done, the pudding will be ready.
Layer strategically. Press the bottom Oreo layer down firmly—this creates a stable base. The middle layers should be gentler. And the top layer? Pile it high. That’s where the visual drama lives. I like to save a few extra crumbs for a final sprinkle right before serving.
Use room temperature butter. Same logic as the cream cheese. Cold butter won’t incorporate properly. Leave it out alongside the cream cheese. If you’re in a hurry, grate cold butter into the bowl—it softens faster.
Make it ahead. These cups actually improve overnight. The Oreo crumbs soften slightly, the pudding firms up, and the flavors meld into something deeply satisfying. Assemble them the day before your Halloween party, and you’ll thank yourself later.
Variations & Adaptations
One of the best things about this recipe is how flexible it is. Here are some variations I’ve tried and loved:
Gluten-Free Version
Swap the regular Oreos for gluten-free chocolate sandwich cookies. Most brands work well—just check the label. The texture is slightly different, but the flavor is spot-on. I’ve used Glutino brand with great results.
Dairy-Free Adaptation
Use dairy-free cream cheese (like Kite Hill or Violife), vegan butter, and a plant-based milk like oat or coconut. The pudding mix itself is usually dairy-free, but double-check the label. The texture will be slightly less rich, but still delicious. My vegan friend swore she couldn’t tell the difference.
Peanut Butter Dirt Cups
Add ¼ cup of creamy peanut butter to the cream cheese mixture. Beat it in with the butter and cream cheese. The peanut butter adds a savory note that pairs beautifully with the chocolate. Top with chopped peanuts for extra crunch.
Mint Chocolate Version
Use mint-flavored Oreos (the green ones are perfect for Halloween) and add ½ teaspoon of peppermint extract to the pudding. The cool mint against the rich chocolate is heavenly. Garnish with a candy cane or mint leaf if you’re feeling fancy.
Pumpkin Spice Dirt Cups
For a fall twist, replace the chocolate pudding with vanilla pudding and add ½ cup of pumpkin puree and 1 teaspoon of pumpkin pie spice to the cream cheese mixture. Top with crushed graham crackers instead of Oreos. It’s like pumpkin pie in a cup—cozy and seasonal.
I’ve tried the peanut butter version at a Halloween potluck, and it disappeared in minutes. Don’t be afraid to experiment—this recipe is forgiving and rewards creativity.
Serving & Storage Suggestions
These Cozy Halloween Dirt Cups are best served cold, straight from the fridge. The contrast between the chilled pudding and the crunchy Oreo topping is what makes them special. Here’s how to make the most of them:
Serving temperature: Pull them out of the fridge just before serving. If they sit at room temperature too long, the pudding softens and the layers start to blend. Aim for 30 minutes max outside the fridge.
Presentation ideas: Use clear cups so the layers show. I love using small mason jars or plastic cups with Halloween-themed labels. Add a plastic spider ring on the rim or a gummy worm dangling over the edge. For a party, set up a “dirt cup bar” with extra toppings—sprinkles, candy corn, crushed cookies—and let guests customize their own.
Complementary dishes: These cups pair beautifully with warm apple cider, hot chocolate, or a cozy pumpkin latte. For a full Halloween spread, serve them alongside spider web dip with pretzels or mummy hot dogs for a savory balance.
Storage instructions: Store assembled cups in the refrigerator, covered, for up to 3 days. The Oreo crumbs will soften over time, but the flavor actually improves. If you’re prepping ahead, wait to add the gummy worms until just before serving—they can get soggy. I’ve kept them for 4 days once, and they were still good, though the texture was softer.
Freezing: You can freeze the cups for up to 1 month. Wrap each cup tightly in plastic wrap, then place in a freezer bag. Thaw overnight in the fridge before serving. The texture will be slightly icier, but still delicious. I don’t recommend freezing if you’ve already added gummy worms—they become chewy and weird.
Reheating: Don’t. These are meant to be eaten cold. If you want a warm dessert, try my chocolate lava cake instead.
One more thing: the flavors meld beautifully overnight. If you can, make these a day ahead. The pudding firms up, the Oreo crumbs soften just a touch, and every bite tastes more cohesive. It’s like the recipe gets better while you sleep.
Nutritional Information & Benefits
Let’s be honest—these Cozy Halloween Dirt Cups are a treat, not a health food. But that doesn’t mean they can’t fit into a balanced lifestyle. Here’s the breakdown per serving (based on 8 servings):
- Calories: Approximately 380
- Fat: 18 grams
- Carbohydrates: 48 grams
- Protein: 5 grams
- Sugar: 34 grams
- Fiber: 2 grams
Now, let’s talk about what’s actually in here that’s not terrible. The cream cheese adds a small amount of protein and calcium. The milk provides vitamin D and more calcium. And those Oreos? Well, they’re made from real cocoa, which contains antioxidants. I’m reaching, I know—but every little bit counts.
If you’re watching your sugar intake, use sugar-free pudding mix and reduce the powdered sugar to ½ cup. The texture will be slightly less creamy, but the flavor holds up. For a lower-fat version, use reduced-fat cream cheese and 2% milk. I’ve tried both, and honestly, the full-fat version is worth the splurge for special occasions.
Potential allergens: This recipe contains dairy, gluten, and soy. For a dairy-free version, see the variations section above. For gluten-free, use certified gluten-free sandwich cookies. Always check labels on gummy worms—some contain wheat starch.
My personal take? Food is about joy, connection, and comfort. One batch of these cups won’t derail your health goals. But it might make a kid—or a grown-up—feel loved. That’s worth every calorie.
Conclusion
These Cozy Halloween Dirt Cups are more than just a dessert—they’re a moment. A chance to slow down, get your hands dirty (literally), and create something that makes people smile. From that first crunch of Oreo to the last slither of gummy worm, every bite is pure nostalgia.
I love this recipe because it reminds me that cooking doesn’t have to be complicated. Sometimes the best dishes come from letting go—of perfection, of rules, of the food processor. My neighbor’s kid taught me that, and now I’m passing it on to you. Crush those cookies in the bag. Pile on the worms. Laugh at the mess.
I’d love to see your creations. Tag me in your photos, leave a comment below with your favorite variation, or share this recipe with someone who needs a little Halloween cheer. And if you try the peanut butter version, tell me how it goes—I’m always looking for new ideas.
Go make some dirt. It’s the coziest thing you’ll do all season.
Frequently Asked Questions
Can I make these dirt cups ahead of time?
Absolutely! These are perfect for making a day in advance. Assemble the cups, cover them, and refrigerate. Wait to add the gummy worms until just before serving to keep them from getting soggy. The flavors actually improve overnight.
Can I use homemade pudding instead of instant?
Yes, you can. Use your favorite homemade chocolate pudding recipe, but make sure it’s fully cooled and thickened before layering. Instant pudding is faster and more consistent, but homemade adds a lovely from-scratch touch.
How do I keep the gummy worms from sinking?
Insert them gently after the top layer of Oreo crumbs is in place. If you push them too deep, they’ll disappear into the pudding. Aim for a gentle poke so they sit halfway in the crumbs, with the rest sticking out like they’re crawling out of the dirt.
Can I use other cookies instead of Oreos?
Sure! Chocolate wafer cookies, gluten-free sandwich cookies, or even crushed graham crackers work. The flavor will change, but the concept stays the same. I’ve used chocolate chip cookies in a pinch—just crush them finely so they mimic dirt.
Are these safe for kids to make?
Absolutely—with supervision for younger children. Crushing the Oreos in the bag is a great activity for little hands. Mixing the pudding and assembling the cups are easy for kids to help with. Just watch out for the electric mixer if you’re using one. It’s a fun, low-stress recipe for family baking time.
Pin This Recipe!
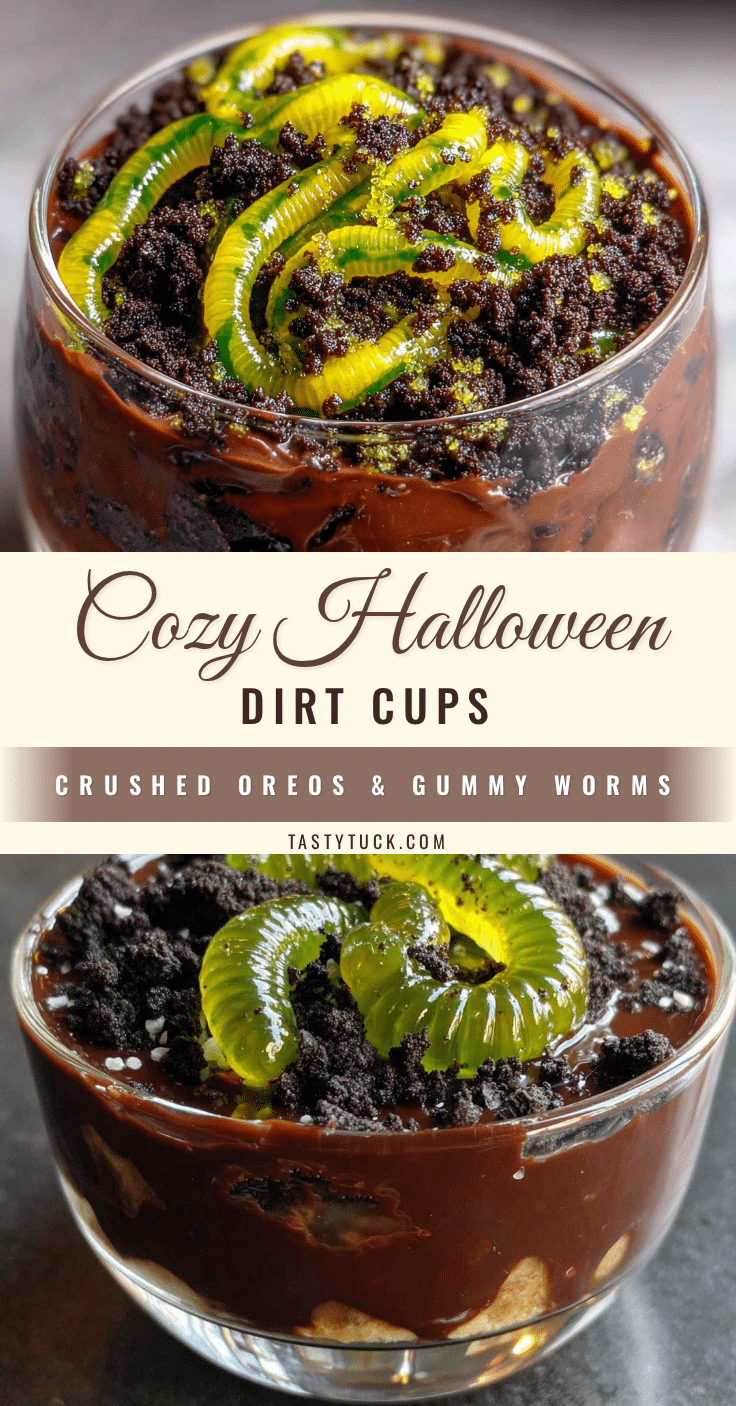
Cozy Halloween Dirt Cups: Easy Oreo & Gummy Worm Dessert
These Cozy Halloween Dirt Cups are a quick, no-bake dessert featuring layers of creamy chocolate pudding, tangy cream cheese, and crunchy Oreo crumbs, topped with gummy worms. Perfect for Halloween parties or a cozy night in.
- Prep Time: 15 minutes
- Cook Time: 0 minutes
- Total Time: 45 minutes (includes chilling)
- Yield: 8 servings 1x
- Category: Dessert
- Cuisine: American
Ingredients
- 1 standard package Oreo cookies (about 36 cookies)
- 1 box (3.9 ounces or 113 grams) instant chocolate pudding mix
- 2 cups (480 ml) cold milk
- 8 ounces (226 grams) cream cheese, softened
- 1/4 cup (1/2 stick or 57 grams) unsalted butter, softened
- 1 cup (120 grams) powdered sugar
- 1 teaspoon vanilla extract
- About 1 cup (20-25) gummy worms
- Optional toppings: extra crushed Oreos, candy pumpkins, sprinkles
Instructions
- Crush the Oreos: Place the entire package of Oreos (filling included) in a large Ziplock bag. Seal tight, pushing out excess air. Crush using your hands, a rolling pin, or a heavy pan until you have a mix of fine crumbs and small chunks. Set aside.
- Make the pudding: In a large bowl, whisk together the instant chocolate pudding mix and 2 cups of cold milk. Whisk vigorously for 2 minutes until thickened. Refrigerate for about 5 minutes to set.
- Prepare the cream cheese mixture: In a medium bowl, beat the softened cream cheese and butter together until smooth and fluffy (about 2 minutes with an electric mixer on medium speed). Add powdered sugar and vanilla extract, then beat until fully combined.
- Combine the layers: Gently fold the cream cheese mixture into the pudding using a spatula. Do not overmix; leave ribbons of cream cheese for a marbled effect.
- Assemble the cups: Spoon about 2 tablespoons of crushed Oreos into the bottom of each cup. Press down lightly. Add a generous layer (about 1/4 cup) of the pudding-cream cheese mixture. Repeat with another layer of Oreo crumbs and another layer of pudding mixture. End with a thick topping of Oreo crumbs.
- Add the gummy worms: Gently poke 2-3 gummy worms into each cup, letting some peek out of the ‘dirt’.
- Chill before serving: Refrigerate the cups for at least 30 minutes (overnight is ideal) before serving.
- Serve and enjoy: Serve cold, straight from the fridge.
Notes
Crush Oreos by hand in a bag for uneven, soil-like texture. Soften cream cheese and butter to room temperature for a smooth mixture. Let pudding set fully before layering to prevent bleeding. These cups improve overnight; assemble a day ahead for best flavor. Add gummy worms just before serving to keep them from getting soggy.
Nutrition
- Serving Size: 1 cup (6 ounces)
- Calories: 380
- Sugar: 34
- Sodium: 320
- Fat: 18
- Saturated Fat: 10
- Carbohydrates: 48
- Fiber: 2
- Protein: 5
Keywords: Halloween dirt cups, Oreo dessert, gummy worm, no-bake, easy dessert, Halloween treat, chocolate pudding, cream cheese


