My neighbor Sarah wasn’t trying to impress me. I’d stopped by to return her tupperware—the one she’d sent me home with after a block party last summer—and the smell hit me before I even got my foot past her screen door. It was that kind of warm, buttery, garlicky aroma that makes you forget why you came over in the first place. She was standing at her stove in sweatpants, flipping chicken thighs in a single pan like it was the most ordinary thing in the world.
“Oh, that’s just dinner,” she said when I asked what smelled so incredible. Just dinner. Meanwhile I was practically drooling on her kitchen floor. She didn’t have a fancy recipe written down—she was just tossing things in a pan the way her grandmother used to. A pat of butter here, a handful of garlic cloves there, some chicken thighs she’d grabbed on sale. That’s it. No fuss, no measuring cups, no stress.
I stood there for twenty minutes watching her work, and honestly, I felt a little embarrassed by how complicated I’d been making my own weeknight dinners. Sarah didn’t even use a meat thermometer. She just knew when the chicken was ready by how it looked and smelled. I mean, maybe you’ve been there—standing in someone else’s kitchen realizing you’ve been overthinking everything.
I went home that night with my empty tupperware and a head full of questions. How did she get that golden-brown crust without burning the butter? Why did her garlic taste sweet instead of bitter? And why had I never thought to cook chicken thighs in one single pan before? I spent the next week testing and tweaking until I got it right. This cozy one-pan garlic butter chicken thighs recipe is what came out of that obsession. It’s the kind of fall dinner that makes your whole house smell like Sunday, even on a random Tuesday.
Why You’ll Love This Recipe
Let me tell you why this one-pan garlic butter chicken thighs recipe has earned a permanent spot in my fall dinner rotation. I’ve tested this dish at least a dozen times, tweaking the butter-to-garlic ratio and experimenting with different pan temperatures until everything clicked. What I landed on is something truly special.
- Quick & Easy: This whole meal comes together in about 35 minutes, start to finish. Perfect for those busy weeknights when you want something cozy without spending hours in the kitchen.
- Simple Ingredients: You probably already have garlic, butter, and chicken thighs in your kitchen right now. No fancy grocery trips required—I promise.
- Perfect for Fall: There’s something about the combination of garlic, butter, and golden-brown chicken that just screams autumn. It’s the kind of meal you want when the air gets crisp and the leaves start turning.
- Crowd-Pleaser: I’ve served this to picky kids, skeptical in-laws, and foodie friends, and every single person has asked for the recipe. It’s that good.
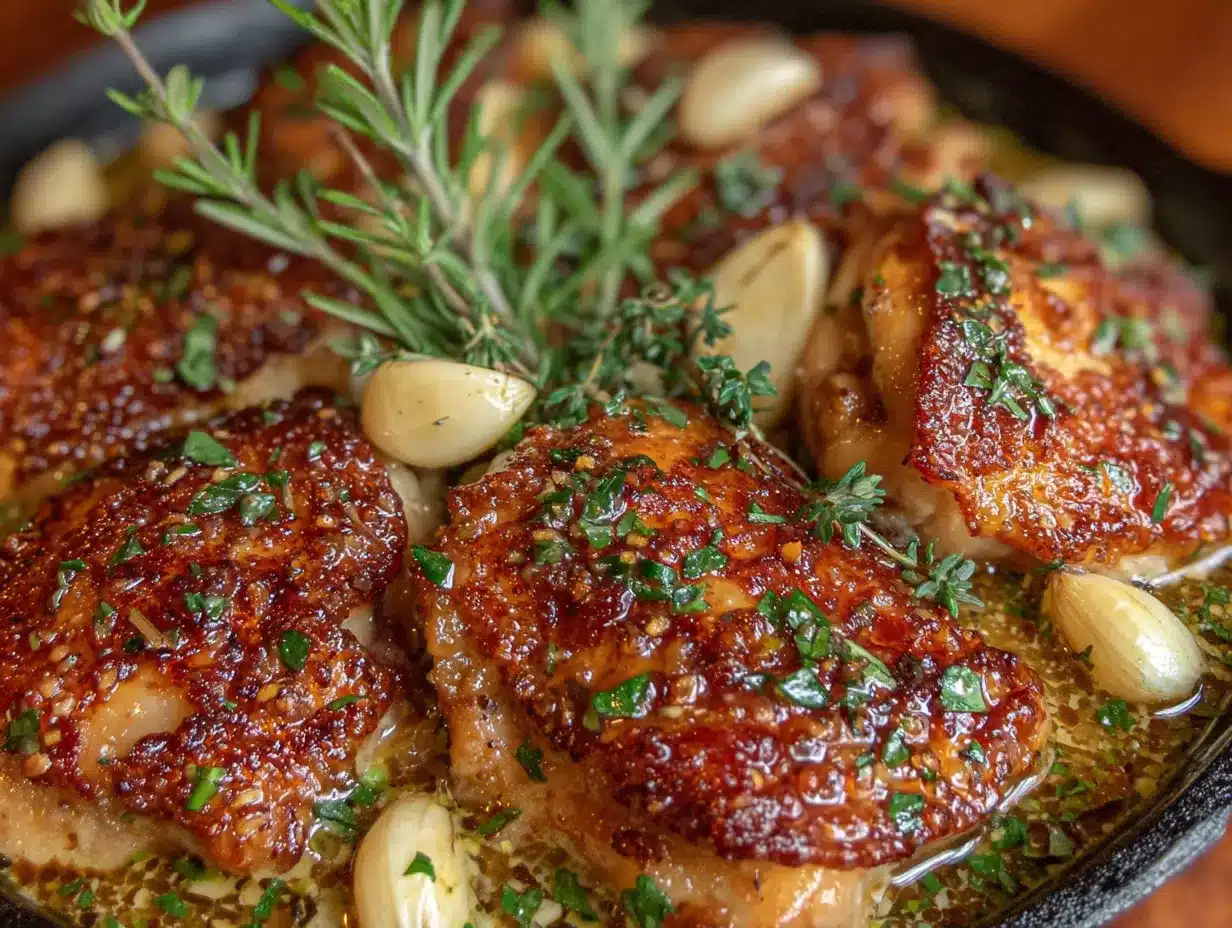
- Unbelievably Delicious: The texture is what gets me every time—crispy, golden skin on the outside, juicy tender meat on the inside, all bathed in that rich garlic butter sauce.
What makes this version different from all the other garlic butter chicken recipes out there? It’s the technique. Instead of burning the butter or ending up with bitter garlic, I’ve figured out the exact timing and temperature to get everything perfect. The garlic gets sweet and mellow instead of harsh. The chicken skin turns crackling-crisp. And the sauce—oh, that sauce—coats every bite with buttery, garlicky goodness.
This isn’t just another chicken dinner. It’s the kind that makes you close your eyes after the first bite. It’s comfort food reimagined—simpler, faster, but with the same soul-soothing satisfaction that fall cooking should bring. Perfect for impressing guests without stress, or turning a simple Tuesday into something memorable.
What Ingredients You Will Need
This recipe uses simple, wholesome ingredients to deliver bold flavor and satisfying texture without the fuss. Most of these are pantry staples you probably already have on hand, especially if you cook regularly during the fall season.
- Bone-in, skin-on chicken thighs (6 thighs, about 2 pounds total) — I prefer bone-in for maximum flavor and juiciness. The skin is essential for that crispy texture. If you can only find boneless, adjust cooking time down by about 5-7 minutes.
- Unsalted butter (4 tablespoons, divided) — Using unsalted lets you control the salt level. I recommend Kerrygold or any European-style butter for richer flavor, but regular store-brand works fine too. You’ll use some for searing and some for the sauce.
- Fresh garlic cloves (8-10 cloves, smashed but not minced) — Smashing them gently with the side of your knife releases their oils without making them burn. Fresh garlic is non-negotiable here—don’t use the jarred stuff.
- Chicken broth (1/2 cup, low-sodium) — This deglazes the pan and forms the base of your sauce. Low-sodium gives you better control over the final salt level.
- Fresh thyme sprigs (4-5 sprigs) — The earthy, slightly floral flavor of thyme pairs beautifully with garlic butter. If you only have dried, use 1 teaspoon.
- Fresh rosemary (1 small sprig) — Just a little goes a long way. It adds that woodsy, almost pine-like aroma that screams fall comfort food.
- Salt and black pepper (to taste) — I use kosher salt for better seasoning coverage. Freshly cracked black pepper makes a noticeable difference here.
- Optional: Red pepper flakes (1/4 teaspoon) — If you like a little heat, this adds a subtle warmth without overpowering the dish. I add it about half the time, depending on my mood.
- Fresh parsley (2 tablespoons, chopped) — For garnish and a fresh finish. It brightens up the rich, buttery sauce nicely.
A quick note on ingredient selection: Look for chicken thighs that have even coloring and smell fresh. The skin should be intact without any tears. For the garlic, choose firm cloves without any green sprouts in the center—those can taste bitter. And please, please use fresh herbs if you can. Dried works in a pinch, but fresh thyme and rosemary really make this dish sing.
Equipment Needed
One of the best things about this recipe is how little equipment you need. Here’s what you’ll want to have handy:
- Large oven-safe skillet (12-inch cast iron or stainless steel) — Cast iron is my first choice because it holds heat so evenly and gives you that gorgeous golden crust. A good stainless steel pan works too. Avoid nonstick if possible—you won’t get the same browning.
- Tongs — For flipping the chicken without piercing the skin. Piercing lets the juices run out, and nobody wants dry chicken.
- Meat thermometer — While Sarah didn’t use one, I recommend it for consistency. Chicken thighs should reach 175°F (80°C) internally for the juiciest results.
- Cutting board and chef’s knife — For smashing garlic and chopping herbs.
- Small bowl — For holding your smashed garlic and herbs before they go in the pan.
If you don’t have an oven-safe skillet, you can sear the chicken on the stovetop and transfer everything to a baking dish to finish in the oven. I’ve done it that way when my cast iron was already in use, and it works perfectly fine.
Preparation Method
- Preheat your oven to 400°F (200°C). Position the rack in the center of the oven. While it’s heating, take your chicken thighs out of the fridge and let them sit at room temperature for about 15 minutes. This helps them cook more evenly.
- Pat the chicken thighs completely dry with paper towels. This is crucial—I cannot stress this enough. Moisture is the enemy of crispy skin. Really get in there and make sure every surface is dry. Season both sides generously with salt and black pepper. Don’t be shy with the salt; it’s your main seasoning.
- Place your large oven-safe skillet over medium-high heat. Add 2 tablespoons of the unsalted butter. Let it melt and foam—you want it sizzling but not browning. The butter should be hot enough that it shimmers when you swirl the pan.
- Place the chicken thighs skin-side down in the hot skillet. You should hear a satisfying sizzle immediately. If you don’t, the pan isn’t hot enough. Let them cook undisturbed for 5-6 minutes. I know it’s tempting to peek or move them around, but leave them alone. That’s how you develop that beautiful golden crust.
- Flip the chicken thighs using your tongs. The skin should be deep golden brown and crispy. Cook the other side for 4-5 minutes. Remove the chicken to a plate and set aside. Don’t wipe out the skillet—all those brown bits are flavor gold.
- Reduce the heat to medium. Add the remaining 2 tablespoons of butter to the skillet. Once it melts, add the smashed garlic cloves. Cook for 1-2 minutes, stirring frequently, until the garlic is fragrant and just starting to turn golden. Be careful—garlic can go from perfect to burnt in seconds. If it starts browning too fast, remove the pan from heat temporarily.
- Pour in the chicken broth and use a wooden spoon to scrape up all those browned bits from the bottom of the pan. This is called deglazing, and it’s where so much flavor lives. Let the broth simmer for about 1 minute, then add the fresh thyme and rosemary sprigs.
- Return the chicken thighs to the skillet, skin-side up, nestling them into the garlic butter sauce. Spoon some of the sauce over the tops of the chicken. If you’re using red pepper flakes, sprinkle them over everything now.
- Transfer the skillet to the preheated oven. Roast for 15-18 minutes, or until the chicken reaches an internal temperature of 175°F (80°C) when tested with a meat thermometer inserted into the thickest part without touching bone. The skin should be extra crispy and the sauce should be bubbling.
- Remove from the oven and let rest for 5 minutes. This resting time is important—it lets the juices redistribute throughout the meat. Sprinkle with fresh chopped parsley before serving. Spoon the garlic butter sauce over each piece of chicken as you plate it.
Here’s a little tip I learned the hard way: if your garlic cloves are on the smaller side, add them later in the cooking process. I once added tiny garlic cloves at the same time as larger ones, and the small ones burned while the big ones were still perfect. Now I sort them by size and add the smaller ones about 30 seconds after the larger ones.
Cooking Tips & Techniques
After making this recipe more times than I can count, I’ve picked up a few tricks that make a real difference. Let me share what I’ve learned—including the mistakes I made so you don’t have to repeat them.
Get that pan screaming hot before adding the chicken. I cannot tell you how many times I’ve rushed this step and ended up with pale, sad chicken skin. The pan needs to be hot enough that a drop of water sizzles and evaporates instantly. Medium-high heat on most stoves should do it, but if your stove runs cool, crank it up a notch.
Don’t crowd the pan. If your skillet is too small and the chicken thighs are touching each other, they’ll steam instead of sear. You want space between each piece so the heat can circulate. If you need to cook more than 6 thighs, do it in two batches.
Let the chicken rest after searing. I know it’s tempting to put it straight in the oven, but giving it those few minutes on the plate allows the juices to settle. Plus, it gives you time to build the sauce without rushing.
Watch your garlic like a hawk. This is where I’ve failed most often. Burnt garlic tastes bitter and acrid, and it can ruin the whole dish. The moment it starts turning golden, add the broth immediately. That liquid stops the cooking process and saves your garlic.
Use a meat thermometer for consistency. I know Sarah didn’t use one, but she’s been cooking for forty years. For the rest of us, a good instant-read thermometer takes the guesswork out. Chicken thighs are forgiving, but 175°F (80°C) is the sweet spot for juicy, tender meat.
Make extra sauce. Honestly, you might want to double the butter and broth. The sauce is the best part, and you’ll want plenty to spoon over rice, mashed potatoes, or crusty bread. I’ve started making extra every time because my family fights over the last drops.
Variations & Adaptations
One of the things I love about this recipe is how flexible it is. Here are some variations I’ve tried and loved:
Lemon Garlic Version: Add the juice of half a lemon and a few lemon slices to the pan when you add the broth. The acidity cuts through the richness of the butter beautifully. I made this version last spring when I had lemons coming out of my ears from my neighbor’s tree, and it was fantastic.
Herb Swap: Not a fan of thyme and rosemary? Try sage and marjoram instead. Sage has that earthy, almost peppery flavor that works wonderfully with chicken. Use about 4-5 fresh sage leaves and 1 teaspoon of dried marjoram.
Spicy Honey Garlic: Add 1 tablespoon of honey and an extra 1/2 teaspoon of red pepper flakes to the sauce. The sweet-heat combination is addictive. My brother-in-law requests this version every time he comes for dinner.
Dairy-Free Adaptation: Substitute the butter with a high-quality vegan butter or ghee (if you can tolerate dairy proteins but not lactose). I’ve used Miyoko’s European-style cultured vegan butter with excellent results. The flavor is slightly different but still delicious.
One-Pan Vegetable Addition: Add halved Brussels sprouts or chunks of butternut squash to the pan during the last 10 minutes of roasting. They’ll soak up all that garlic butter goodness and become a complete meal in one pan. I do this all the time during peak fall season.
Serving & Storage Suggestions
This cozy one-pan garlic butter chicken thighs recipe is incredibly versatile when it comes to serving. Here’s how I like to enjoy it:
Serving Temperature: Serve hot, straight from the oven. The garlic butter sauce should be bubbling and the chicken skin should be at its crispiest. Let it rest for those 5 minutes first, though—patience pays off.
What to Serve With It: I love this chicken over creamy mashed potatoes or soft polenta that soaks up all that garlic butter sauce. A simple side of roasted green beans or a crisp fall salad with apple slices and walnuts balances the richness perfectly. Crusty bread is non-negotiable in my house—we use it to wipe every last drop of sauce from our plates.
Storage: Leftover chicken keeps beautifully in an airtight container in the refrigerator for up to 4 days. The flavors actually meld together even more overnight, making the leftovers almost better than the original. I’ve been known to make extra on purpose just for next-day lunches.
Reheating: The best way to reheat is in a 350°F (175°C) oven for about 10-12 minutes. This helps the skin crisp back up. The microwave works in a pinch, but the skin will be soft rather than crispy. If you’re in a hurry, reheat in a skillet over medium heat with a splash of chicken broth to refresh the sauce.
Freezing: You can freeze the cooked chicken in its sauce for up to 3 months. Thaw overnight in the refrigerator and reheat as directed above. The texture holds up remarkably well, though the skin won’t be quite as crispy as fresh.
Flavor Development: Here’s something interesting—the garlic flavor actually mellows and becomes sweeter after a day in the fridge. If you’re someone who finds raw garlic too intense, you might actually prefer the leftovers.
Nutritional Information & Benefits
While this is definitely a comfort food dish, it does offer some nutritional benefits worth noting. Here’s the breakdown per serving (one chicken thigh with sauce):
| Nutrient | Amount |
|---|---|
| Calories | 385 |
| Protein | 32g |
| Fat | 27g |
| Saturated Fat | 11g |
| Carbohydrates | 3g |
| Fiber | 0g |
| Sugar | 1g |
| Sodium | 480mg |
Chicken thighs are an excellent source of protein, iron, and B vitamins, particularly B12 and niacin. The dark meat contains more iron and zinc than chicken breast, which is great for energy and immune health. Garlic has been studied for its potential cardiovascular benefits and antimicrobial properties. And while butter gets a bad rap, it does provide fat-soluble vitamins A, D, E, and K, plus butyrate which supports gut health.
This recipe is naturally low-carb and keto-friendly, with only 3g of carbohydrates per serving. If you’re watching your saturated fat intake, you can reduce the butter to 3 tablespoons total—just use 1.5 tablespoons for searing and 1.5 for the sauce. The flavor will be slightly less rich, but still delicious.
Conclusion
This cozy one-pan garlic butter chicken thighs recipe has become my go-to fall dinner for good reason. It’s simple enough for a Tuesday night but impressive enough for company. The combination of crispy, golden skin and tender, juicy meat bathed in that fragrant garlic butter sauce is honestly hard to beat.
I love that this recipe doesn’t require any fancy techniques or hard-to-find ingredients. It’s the kind of cooking that feels intuitive once you’ve made it a few times—the way Sarah made it look that day in her kitchen. You’ll develop your own rhythm with it, your own little tweaks and preferences.
I’d love to hear how yours turns out! Did you try one of the variations? Did you add your own twist? Drop a comment below and let me know—I read every single one and I’m always looking for new ideas to try. And if you share a photo on Pinterest, tag me so I can see your beautiful creation. Happy fall cooking, friends!
Frequently Asked Questions
Can I use chicken breasts instead of thighs?
You can, but I don’t recommend it for this recipe. Chicken breasts cook faster and dry out more easily, especially with the oven roasting time. If you must use breasts, choose bone-in, skin-on and reduce the oven time to 12-15 minutes. Check the internal temperature at 160°F (71°C) and let it rest to reach 165°F (74°C).
Why is my garlic butter sauce separating?
This usually happens if the pan is too hot when you add the broth, or if you’re using cold broth straight from the fridge. Let your broth come to room temperature before adding it, and keep the heat at medium rather than high. If your sauce does separate, whisk in a teaspoon of cold butter off the heat to bring it back together.
Can I make this recipe ahead of time?
Absolutely. You can sear the chicken and prepare the sauce up to a day in advance. Store everything separately in the refrigerator, then combine and roast when you’re ready to serve. Add about 5 extra minutes to the oven time since you’re starting from cold. The garlic flavor will be even more developed this way.
How do I know when the chicken is fully cooked without a thermometer?
If you don’t have a meat thermometer, look for these signs: the juices should run clear when you pierce the thickest part of the thigh with a knife, the meat should pull away easily from the bone, and the internal texture should be firm but not hard. When in doubt, cut into the thickest part and check that there’s no pink remaining.
What’s the best way to get extra crispy skin?
Three things matter most: dry the chicken thoroughly before seasoning, don’t move it while it’s searing, and make sure your pan is hot enough. If you want even crispier skin, after roasting, you can broil the chicken for 1-2 minutes. Watch it carefully—it can go from perfect to burnt very quickly under the broiler.
Pin This Recipe!
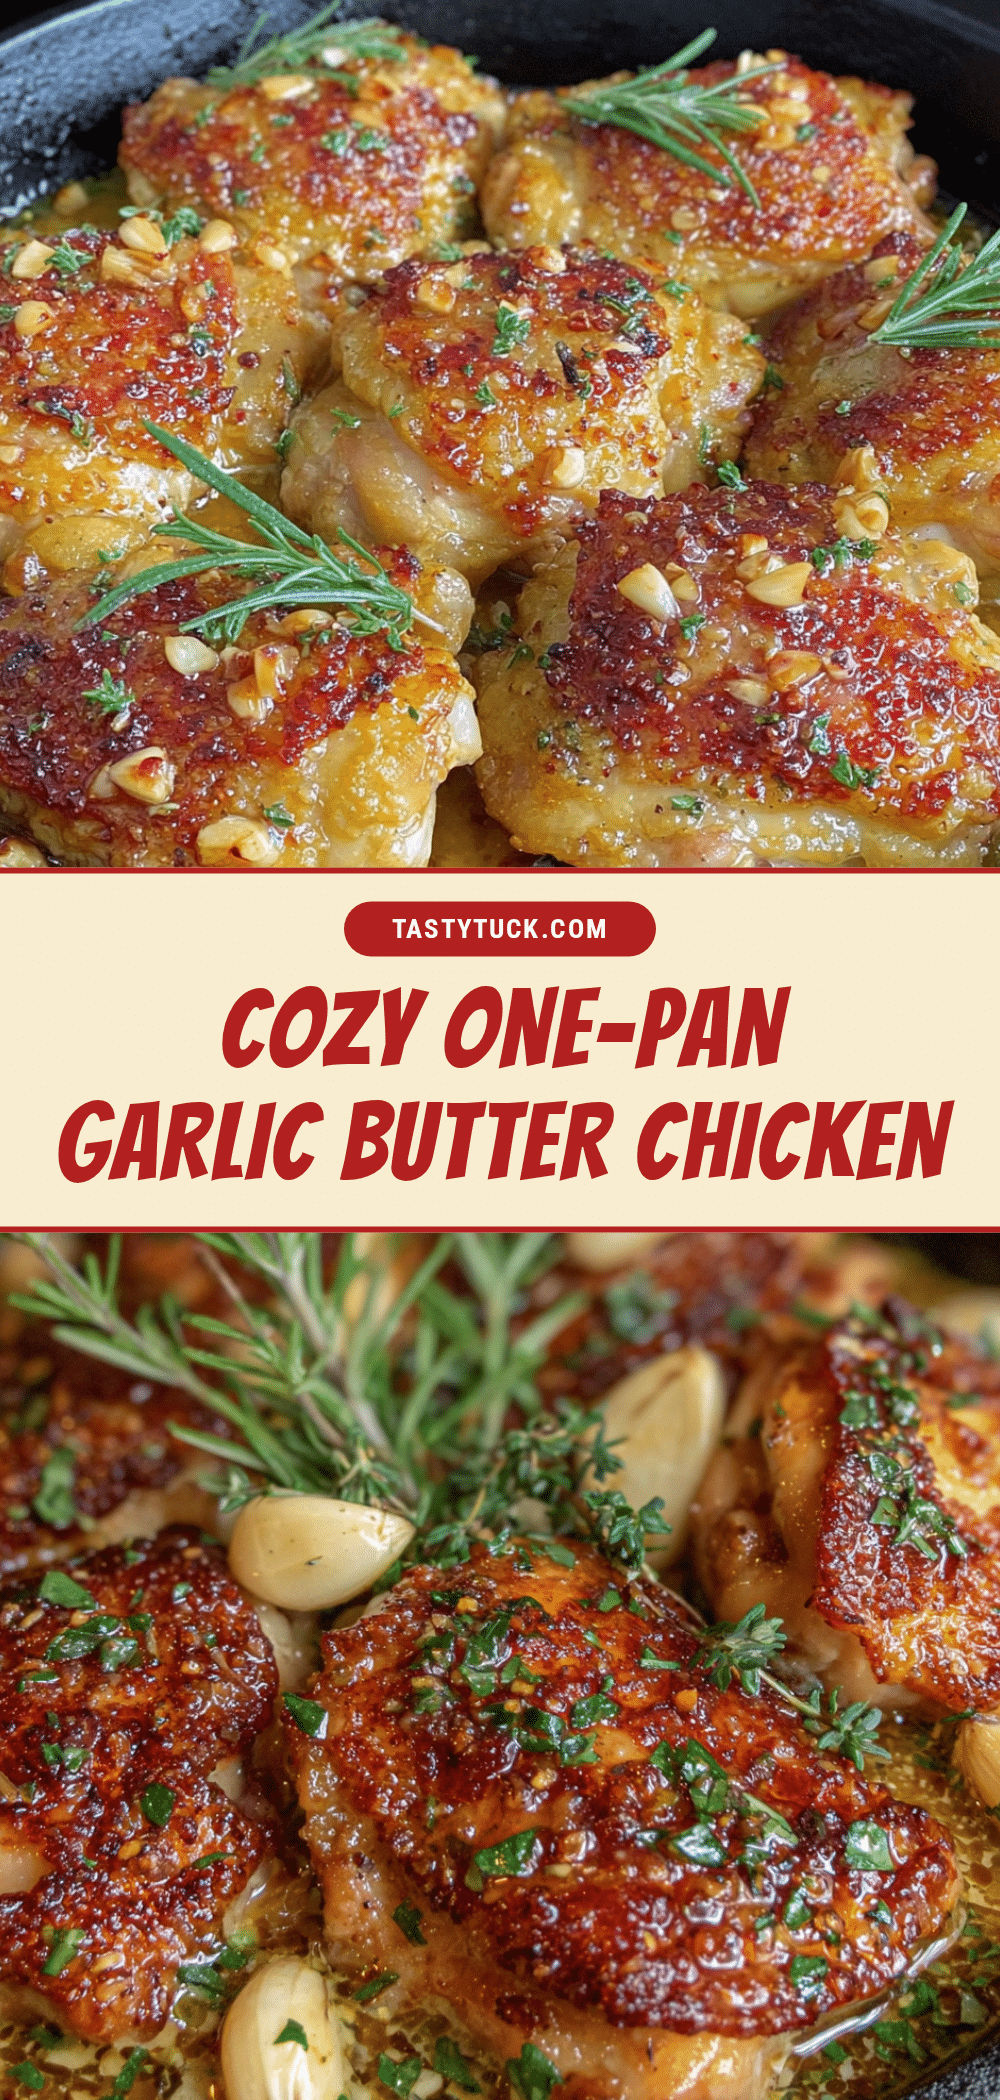
Cozy One-Pan Garlic Butter Chicken Thighs – Easy Fall Dinner

This cozy one-pan garlic butter chicken thighs recipe is a quick and easy fall dinner with crispy, golden skin and tender, juicy meat bathed in a fragrant garlic butter sauce. Perfect for busy weeknights, it uses simple ingredients and comes together in about 35 minutes.
- Prep Time: 15 minutes
- Cook Time: 20 minutes
- Total Time: 35 minutes
- Yield: 6 servings 1x
- Category: Main Course
- Cuisine: American
Ingredients
- 6 bone-in, skin-on chicken thighs (about 2 pounds total)
- 4 tablespoons unsalted butter, divided
- 8–10 fresh garlic cloves, smashed
- 1/2 cup low-sodium chicken broth
- 4–5 fresh thyme sprigs
- 1 small sprig fresh rosemary
- Salt and black pepper to taste
- 1/4 teaspoon red pepper flakes (optional)
- 2 tablespoons fresh parsley, chopped
Instructions
- Preheat your oven to 400°F (200°C). Position the rack in the center of the oven. While it’s heating, take your chicken thighs out of the fridge and let them sit at room temperature for about 15 minutes.
- Pat the chicken thighs completely dry with paper towels. Season both sides generously with salt and black pepper.
- Place your large oven-safe skillet over medium-high heat. Add 2 tablespoons of the unsalted butter. Let it melt and foam until sizzling but not browning.
- Place the chicken thighs skin-side down in the hot skillet. Cook undisturbed for 5-6 minutes until deep golden brown.
- Flip the chicken thighs using tongs. Cook the other side for 4-5 minutes. Remove the chicken to a plate and set aside. Do not wipe out the skillet.
- Reduce the heat to medium. Add the remaining 2 tablespoons of butter to the skillet. Once melted, add the smashed garlic cloves. Cook for 1-2 minutes, stirring frequently, until fragrant and just starting to turn golden.
- Pour in the chicken broth and use a wooden spoon to scrape up the browned bits from the bottom of the pan. Let the broth simmer for about 1 minute, then add the fresh thyme and rosemary sprigs.
- Return the chicken thighs to the skillet, skin-side up, nestling them into the garlic butter sauce. Spoon some of the sauce over the tops. If using red pepper flakes, sprinkle them over everything now.
- Transfer the skillet to the preheated oven. Roast for 15-18 minutes, or until the chicken reaches an internal temperature of 175°F (80°C) when tested with a meat thermometer inserted into the thickest part without touching bone.
- Remove from the oven and let rest for 5 minutes. Sprinkle with fresh chopped parsley before serving. Spoon the garlic butter sauce over each piece of chicken as you plate it.
Notes
For extra crispy skin, dry the chicken thoroughly before seasoning, don’t move it while searing, and ensure the pan is hot enough. If garlic cloves are small, add them later to prevent burning. Make extra sauce by doubling the butter and broth if desired.
Nutrition
- Serving Size: 1 chicken thigh with
- Calories: 385
- Sugar: 1
- Sodium: 480
- Fat: 27
- Saturated Fat: 11
- Carbohydrates: 3
- Protein: 32
Keywords: garlic butter chicken thighs, one-pan chicken, fall dinner, easy chicken recipe, crispy chicken thighs


