Introduction
My neighbor Karen wasn’t trying to impress anyone that Tuesday afternoon. I’d stopped by to borrow a ladder—ours had mysteriously vanished after the garage sale—and the smell hit me before I even knocked. Cinnamon, nutmeg, something warm and almost caramel-like, drifting right through her screen door. It was 2 PM on a random weekday, and she was just… baking. Like it was nothing.
“Oh, those?” she said when I asked, waving a flour-dusted hand. “Just some cookies I threw together. The pumpkin was sitting on my counter looking sad.” She went back to wiping down her counter, completely nonchalant, while I stood there practically drooling. I mean, honestly. Who “throws together” cookies that smell like a hug from your grandmother?
She handed me one still warm from the baking sheet, and let me tell you—that first bite stopped me mid-sentence. It was soft. Like, cloud-soft. The cinnamon-sugar coating cracked slightly under my teeth, and the pumpkin flavor was there but not shouting, you know? It was cozy. It was the taste of October afternoons and thick sweaters and not having to be anywhere important.
I asked for the recipe, and she shrugged and scribbled it on a sticky note. No measurements, just “some pumpkin, some butter, the usual suspects.” It took me three tries to get it right, but now? This is my fall cookie. The one I make when the air gets crisp and I need something to slow me down. Maybe you’ve been there—standing in someone’s kitchen, eating something so good it feels like a secret, and thinking, I need to learn how to make this.
Well, here it is. My version of Karen’s throw-together cookies, perfected through trial, error, and way too many taste tests.
Why You’ll Love This Recipe
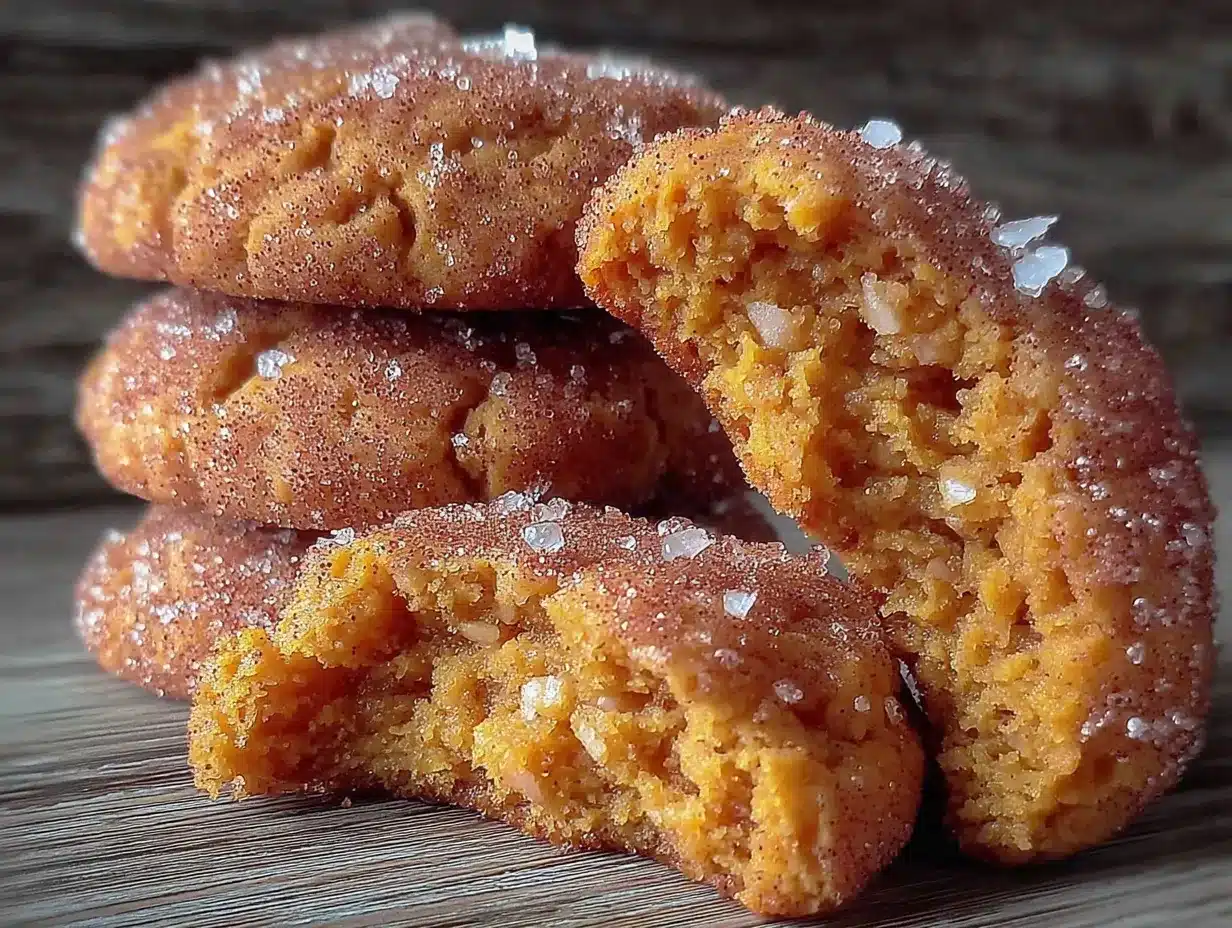
Let me be real with you—I’ve tested a lot of pumpkin cookie recipes. Some turn out flat and sad. Others are so cakey they fall apart in your hand. These? These are the Goldilocks of pumpkin cookies. Soft, tender, with just the right chew, and that classic snickerdoodle cinnamon-sugar coating that crackles when you bite in.
- Quick & Easy: From start to finish, you’re looking at about 25 minutes. No chilling required, no fancy techniques. Just mix, scoop, roll, bake, and try not to eat the entire batch before they cool.
- Simple Ingredients: You probably have most of this in your pantry right now. Canned pumpkin, butter, sugar, flour, cinnamon—nothing that requires a special trip to a specialty store.
- Perfect for Fall Gatherings: These are the cookies you bring to a Friendsgiving, a cozy book club, or just a Tuesday that needs fixing. They disappear fast, I promise.
- Crowd-Pleaser: Kids love them. Adults love them. Even people who swear they don’t like pumpkin desserts have been converted at my kitchen table.
- Unbelievably Delicious: The texture is what gets you. Soft without being mushy, tender without being crumbly. And that cinnamon-sugar coating? Chef’s kiss.
What makes these different from every other pumpkin cookie recipe out there? It’s the technique. Instead of using oil or all butter, I use a combination that keeps the cookies soft for days—not just the first hour out of the oven. The pumpkin adds moisture without making them gummy, and the cream of tartar gives that classic snickerdoodle tang that balances the sweet cinnamon sugar.
This isn’t just another pumpkin cookie. This is the one you’ll make every single fall, the one your family will start asking for in September, the one that makes people close their eyes after the first bite and go, “Oh, wow.”
What Ingredients You Will Need
This recipe uses simple, wholesome ingredients that work together to create something truly special. Most of these are pantry staples, which means you can whip up a batch whenever the craving hits—no last-minute grocery runs required.
For the Cookies
- 1/2 cup (113g) unsalted butter, softened (I use Land O’Lakes for consistent results—the butter quality really matters here)
- 1 cup (200g) granulated sugar (adds sweetness and helps create that soft texture)
- 1/2 cup (100g) packed light brown sugar (adds moisture and a hint of molasses flavor)
- 3/4 cup (170g) canned pumpkin puree (not pumpkin pie filling—make sure it’s 100% pumpkin. Libby’s is my go-to)
- 1 large egg, room temperature (helps bind everything together)
- 1 teaspoon vanilla extract (pure, not imitation, if you can swing it)
- 2 1/2 cups (312g) all-purpose flour (spoon and level it—don’t scoop straight from the bag)
- 1 teaspoon cream of tartar (this is the secret to that classic snickerdoodle tang)
- 1/2 teaspoon baking soda (helps them puff up just right)
- 1/2 teaspoon salt (balances the sweetness and enhances the pumpkin flavor)
- 1 teaspoon ground cinnamon (the backbone of fall baking)
- 1/2 teaspoon ground nutmeg (freshly grated if you have it—it makes a difference)
- 1/4 teaspoon ground ginger (adds warmth without being spicy)
- 1/4 teaspoon ground cloves (just a pinch—it’s potent stuff)
For the Cinnamon-Sugar Coating
- 1/4 cup (50g) granulated sugar
- 2 teaspoons ground cinnamon
- Pinch of nutmeg (optional, but I love the extra warmth)
Ingredient Tips: If you’re using a different brand of canned pumpkin, check the consistency. Some brands are more watery than others, which can affect the texture. If your pumpkin looks thin, blot it with a paper towel before adding it to the batter. And please, please, don’t use pumpkin pie filling—it has added sugar and spices that will throw off the whole recipe.
Substitution Guidance: Need a dairy-free option? Use vegan butter sticks (not tub margarine) and make sure it’s softened. For a gluten-free version, swap the all-purpose flour with a 1:1 gluten-free baking flour blend that contains xanthan gum. I’ve tested this with Bob’s Red Mill 1:1, and it works beautifully. The texture is slightly more tender, but still delicious.
Equipment Needed
You don’t need a fancy kitchen to make these cookies. Here’s what you’ll need:
- Large mixing bowls (one for wet ingredients, one for dry—I use glass or stainless steel)
- Electric hand mixer or stand mixer (a hand mixer works perfectly; I’ve made these with a whisk and some elbow grease too, but a mixer makes it easier)
- Rubber spatula (for scraping down the bowl and folding in the dry ingredients)
- Measuring cups and spoons (dry measuring cups for flour, liquid measuring cup for pumpkin)
- Baking sheets (I recommend light-colored metal sheets—dark ones can cause the bottoms to brown too fast)
- Parchment paper or silicone baking mats (parchment is cheaper and works great; silicone mats are reusable and give consistent results)
- Small bowl (for the cinnamon-sugar coating)
- Cookie scoop or tablespoon (a #40 scoop is perfect—about 1.5 tablespoons)
- Cooling rack (helps the cookies cool evenly without getting soggy on the bottom)
Budget-Friendly Tip: If you don’t have a cookie scoop, use two spoons—one to scoop, one to scrape. It’s not as neat, but the cookies will taste just as good. And honestly? Imperfect cookies have more personality.
Preparation Method
Alright, let’s get baking. Preheat your oven to 350°F (175°C) and line two baking sheets with parchment paper. This is the boring part, but trust me—doing it now means you won’t be scrambling later.
- Cream the butter and sugars. In a large mixing bowl, beat the softened butter, granulated sugar, and brown sugar together until light and fluffy—about 2-3 minutes with a hand mixer on medium speed. You want it to look pale and almost pillowy. Scrape down the sides of the bowl with your spatula. (I once forgot to scrape and ended up with butter chunks in my cookies. Learn from my mistakes.)
- Add the wet ingredients. Beat in the pumpkin puree, egg, and vanilla extract until everything is well combined. The mixture might look a little curdled at this point—that’s totally normal. Don’t panic. It’ll come together once you add the flour.
- Whisk the dry ingredients. In a separate bowl, whisk together the flour, cream of tartar, baking soda, salt, cinnamon, nutmeg, ginger, and cloves. Whisking ensures everything is evenly distributed—no one wants a pocket of baking soda in their cookie.
- Combine wet and dry. Gradually add the dry ingredients to the wet mixture, mixing on low speed or folding with your spatula. Mix just until the flour disappears—overmixing will make the cookies tough. The dough will be soft and slightly sticky, but that’s exactly what we want. (If it feels too sticky to handle, pop it in the fridge for 10 minutes.)
- Make the cinnamon-sugar coating. In a small bowl, stir together the 1/4 cup granulated sugar, 2 teaspoons cinnamon, and pinch of nutmeg. Set it next to your baking sheets.
- Scoop and roll. Using your cookie scoop or a tablespoon, scoop out rounded balls of dough—about 1.5 tablespoons each. Roll each ball between your palms to make it smooth, then roll it in the cinnamon-sugar mixture until fully coated. Place them on the prepared baking sheets, spacing them about 2 inches apart. (I usually fit 12 per sheet.)
- Bake. Bake for 10-12 minutes, or until the edges are set and the tops look slightly cracked. The centers will still look soft and puffy—that’s good. They’ll continue to set as they cool. For softer cookies, bake for 10 minutes. For slightly firmer cookies, go to 12. (My oven runs hot, so I check at 9 minutes. Know your oven!)
- Cool. Let the cookies cool on the baking sheet for 5 minutes. This is crucial—they’re too delicate to move right away. After 5 minutes, transfer them to a wire rack to cool completely. Or, you know, eat one warm. I won’t tell.
Sensory Cue: When they’re done, your kitchen should smell like a fall candle exploded—in the best way. The cookies will be puffed up, lightly golden on the bottom, and the cinnamon-sugar coating will have formed a delicate, crackly crust.
Cooking Tips & Techniques
I’ve made these cookies probably twenty times now, and I’ve learned a few things the hard way. Here’s what I wish someone had told me:
Don’t overmix the dough. I know I said this already, but it bears repeating. The more you mix, the more gluten develops, and the tougher your cookies get. Mix until the flour just disappears, then stop. Even if there’s a tiny streak of flour left, fold it in gently with your spatula.
Use room temperature ingredients. Cold butter won’t cream properly, and a cold egg can seize up the mixture. Let your butter and egg sit out for about 30 minutes before you start. If you forgot to plan ahead (been there), place the egg in a bowl of warm water for 5 minutes, and microwave the butter for 5-10 seconds—just until it’s soft, not melted.
Check your pumpkin. Like I mentioned earlier, some canned pumpkins are watery. If your pumpkin puree looks like it has liquid pooling on top, spoon it onto a paper towel-lined plate and blot it gently. Too much water = flat, gummy cookies.
Space them out. These cookies spread a bit, so give them room to breathe. I usually bake 6 per sheet if I’m using standard baking sheets, 12 if I’m using half-sheets. Crowding them leads to cookies that merge into one giant blob—which, okay, is still delicious, but not as pretty.
Rotate your pans halfway through. About the 5-minute mark, swap the top rack and bottom rack pans. Ovens have hot spots, and this ensures even baking. I learned this after burning the bottoms of two batches in a row. Oops.
Let them cool on the sheet. I know it’s tempting to move them immediately, but they’re fragile when hot. Five minutes on the sheet gives them time to set. If you try to move them too soon, they’ll fall apart—and you’ll be eating crumbly cookie pieces over the sink. Not that I’ve done that.
Variations & Adaptations
One of the best things about this recipe is how adaptable it is. Here are a few ways to make it your own:
1. Gluten-Free Version: Swap the all-purpose flour with a 1:1 gluten-free baking blend that contains xanthan gum. I’ve tested this with Bob’s Red Mill 1:1, and the texture is slightly more tender but still delicious. Add an extra tablespoon of flour if the dough feels too sticky.
2. Dairy-Free Version: Use vegan butter sticks (I like Earth Balance) and make sure it’s softened. The cookies will be a tiny bit less rich, but still soft and flavorful. Avoid tub margarine—it has too much water and will make the cookies spread too much.
3. Extra Spicy: If you’re a spice lover (like me), add 1/4 teaspoon of cardamom and a pinch of white pepper to the dry ingredients. It gives the cookies a warm, slightly floral kick that pairs beautifully with the pumpkin.
4. Chocolate Chip Twist: Fold in 1/2 cup of semi-sweet chocolate chips or white chocolate chips after you’ve mixed the dough. The chocolate melts into the soft cookie and creates these little pockets of gooey goodness. I made this version for a potluck and it was gone in 10 minutes.
5. Maple Glaze: For an extra-special treat, whisk together 1 cup powdered sugar, 2 tablespoons maple syrup, and 1 tablespoon milk (or dairy-free milk). Drizzle it over the cooled cookies and let it set. It adds a beautiful shine and a sweet maple flavor that screams “fall.”
6. Pumpkin Seed Topping: Before baking, press a few pepitas (pumpkin seeds) into the top of each cookie. It adds a nice crunch and makes them look gorgeous for holiday cookie exchanges.
7. Low-Sugar Option: Reduce the granulated sugar to 3/4 cup and the brown sugar to 1/3 cup. The cookies will be less sweet but still flavorful. You can also use a sugar substitute like monk fruit sweetener, but the texture might be slightly different.
My Personal Variation: I once added a teaspoon of orange zest to the dough, and oh my goodness—the orange and pumpkin combo is heavenly. It brightens up the flavor and makes the cookies taste almost like a pumpkin scone. Highly recommend.
Serving & Storage Suggestions
These cookies are best served warm, obviously. But they’re also pretty amazing at room temperature, straight from the cookie jar, or even cold from the fridge (don’t judge me).
Serving Temperature: Warm is ideal—pop them in the microwave for 10 seconds if they’ve cooled down. Serve them with a cold glass of milk, a hot cup of coffee, or a mug of spiced apple cider. For a real treat, sandwich a scoop of vanilla ice cream between two cookies and make an ice cream sandwich. You’re welcome.
Presentation: Arrange them on a rustic wooden board or a simple white platter. Sprinkle a little extra cinnamon-sugar on top for visual appeal. They also look beautiful stacked in a clear glass jar with a ribbon tied around the lid—perfect for gift-giving.
Storage: Store the cookies in an airtight container at room temperature for up to 5 days. Place a slice of bread in the container to keep them soft—the bread absorbs excess air and releases moisture. Replace the bread slice every other day. Seriously, this trick works like magic.
Freezer Instructions: These cookies freeze beautifully. Place the cooled cookies in a single layer on a baking sheet and freeze for 1 hour, then transfer them to a freezer-safe bag or container. They’ll keep for up to 3 months. To thaw, leave them at room temperature for about 30 minutes, or pop them in the microwave for 15 seconds.
Freezing the Dough: You can also freeze the unbaked dough. Scoop the dough balls, roll them in the cinnamon-sugar, and place them on a parchment-lined baking sheet. Freeze until solid, then transfer to a freezer bag. When you’re ready to bake, place the frozen dough balls on a baking sheet and add 2-3 minutes to the baking time. Fresh cookies in 15 minutes—yes, please.
Flavor Development: Honestly, these cookies taste even better the next day. The flavors meld together overnight, and the texture becomes even softer. If you can resist eating them all on day one, you’re in for a treat on day two.
Nutritional Information & Benefits
Let’s be real—cookies aren’t health food. But these do have some redeeming qualities, thanks to the pumpkin.
Estimated Nutritional Values (per cookie, based on 24 cookies):
- Calories: 145
- Total Fat: 6g
- Saturated Fat: 3.5g
- Cholesterol: 25mg
- Sodium: 95mg
- Total Carbohydrates: 22g
- Dietary Fiber: 1g
- Sugars: 13g
- Protein: 2g
Health Benefits: Pumpkin is packed with vitamin A (good for your eyes and immune system) and fiber (good for digestion). The cinnamon and nutmeg have anti-inflammatory properties, and the ginger can help with digestion. So, you know, these cookies are basically a multivitamin. (Okay, not really. But every little bit helps!)
Dietary Considerations: This recipe contains gluten, dairy, and eggs. For gluten-free and dairy-free options, see the Variations section above. These cookies are nut-free as written, making them a safe option for school bake sales or nut-free households.
My Wellness Perspective: I believe in balance. These cookies are a treat, and treats are meant to be enjoyed without guilt. Eat one (or three) with a cup of tea, savor every bite, and don’t stress about the calories. Life is too short for bad cookies and food guilt.
Conclusion
So there you have it—my neighbor Karen’s throw-together pumpkin cookies, perfected and ready for your kitchen. These are the cookies that make people stop mid-sentence and ask for the recipe. They’re the cookies that turn a random Tuesday into something special. They’re the cookies that taste like fall in every single bite.
I love this recipe because it’s forgiving. It doesn’t demand perfection. You can overmix a little, underbake a little, forget the ginger—and they’ll still be delicious. It’s the kind of recipe that builds confidence in the kitchen, the kind you’ll pass down to your kids or your friends or anyone who needs a little comfort.
Now it’s your turn. Make a batch. Share them with someone you love. Or hoard them all for yourself—I won’t judge. And when you do, come back and let me know how they turned out. Did you add chocolate chips? Did you try the maple glaze? Did you eat three before they cooled? I want to hear all about it.
Drop a comment below, tag me in your photos, and let’s spread the cozy fall vibes. Happy baking, friend. You’ve got this.
Frequently Asked Questions
Can I use fresh pumpkin instead of canned?
You can, but you’ll need to roast and puree it first, then strain it to remove excess water. Fresh pumpkin has more water than canned, so your cookies might spread more. If you’re using fresh pumpkin, reduce it to 2/3 cup and blot it with a paper towel before adding it to the batter.
Why are my cookies flat?
Flat cookies usually mean one of three things: your butter was too soft or melted, your pumpkin was too watery, or you overmixed the dough. Make sure your butter is softened but not melted, blot your pumpkin if it looks watery, and mix just until the flour disappears.
Can I make these cookies ahead of time?
Absolutely! You can bake them up to 3 days in advance and store them in an airtight container. Or freeze the baked cookies for up to 3 months. For the freshest cookies, freeze the unbaked dough balls and bake them on demand—just add 2-3 minutes to the baking time.
Can I skip the cream of tartar?
You can, but the cookies won’t have that classic snickerdoodle tang, and the texture might be slightly different. If you don’t have cream of tartar, substitute it with 1 teaspoon of lemon juice or white vinegar mixed into the wet ingredients. It won’t be quite the same, but it’ll work in a pinch.
How do I make these cookies vegan?
Use vegan butter sticks (softened) and replace the egg with a flax egg (1 tablespoon ground flaxseed mixed with 3 tablespoons water, let sit for 5 minutes). The cookies will be slightly denser but still delicious. Make sure your sugar is vegan-friendly (most granulated sugar is, but some brands use bone char).
Pin This Recipe!
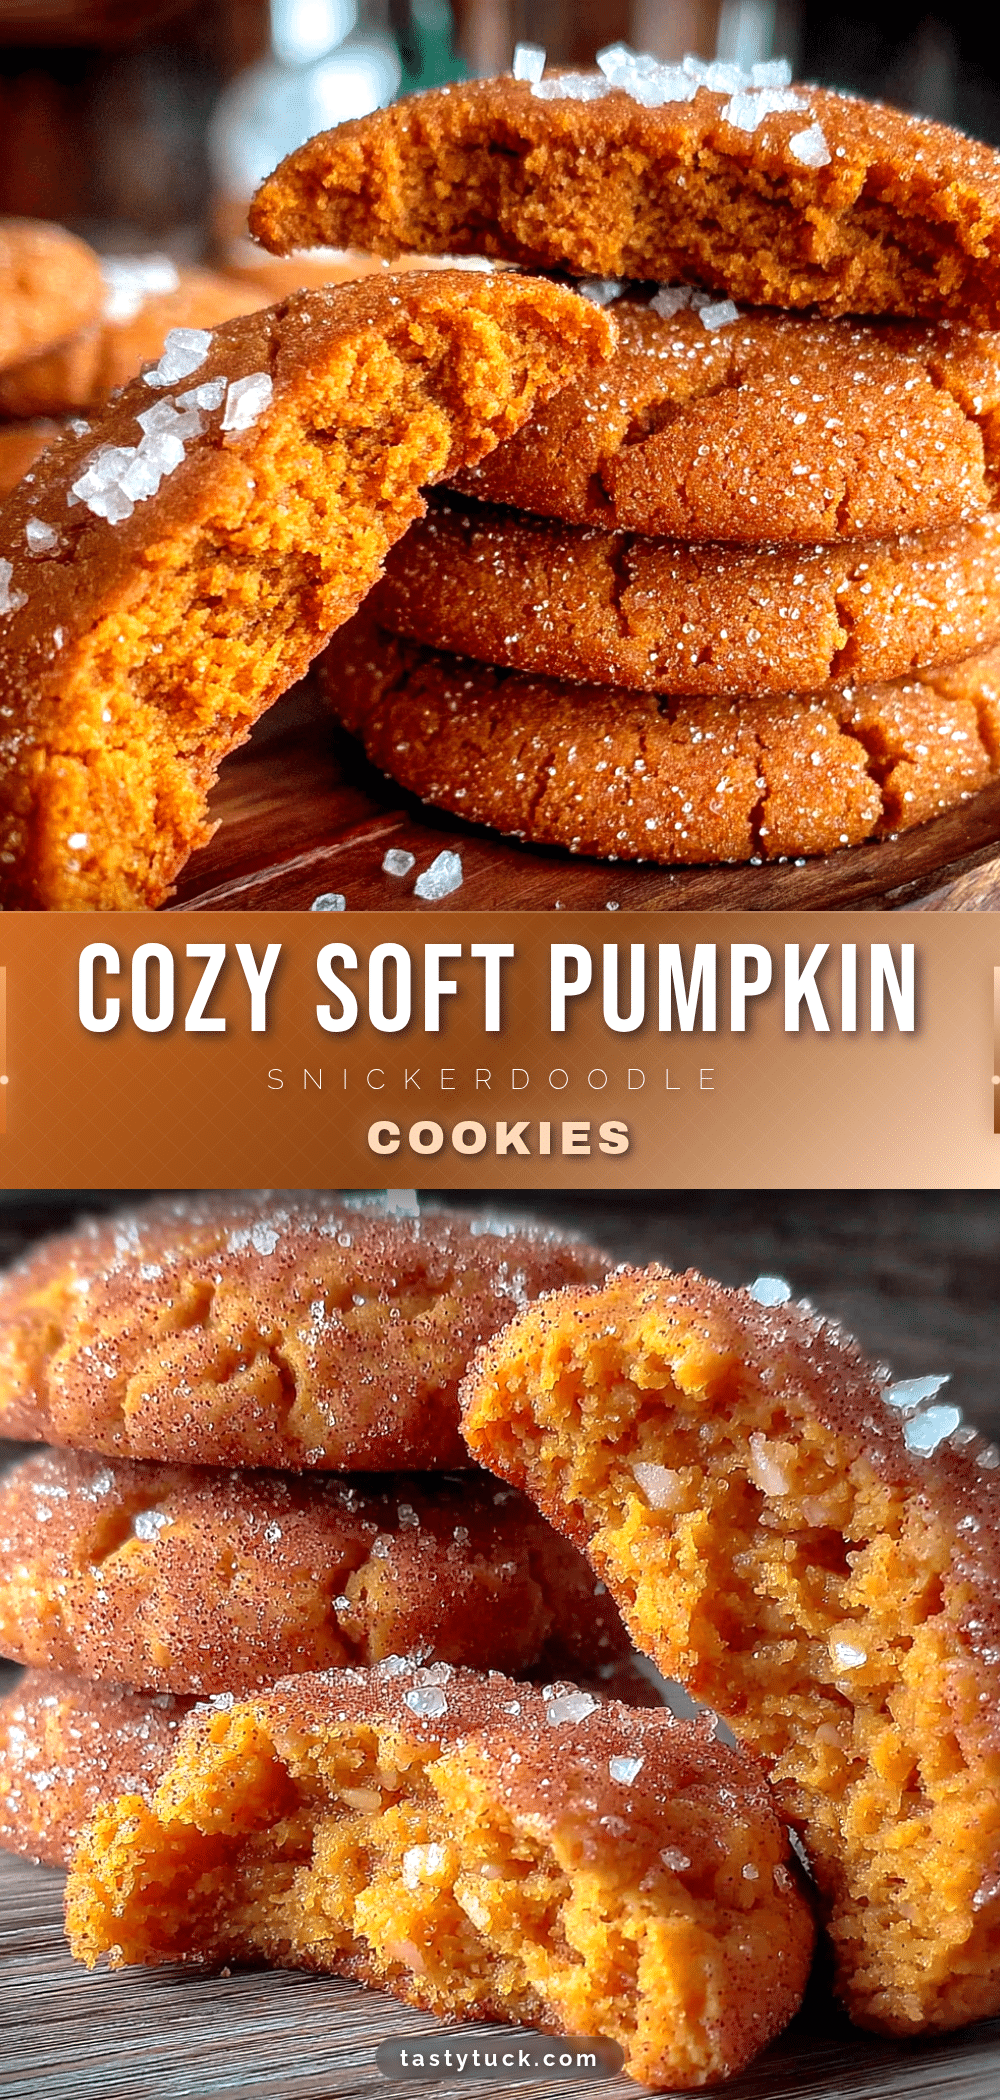
Cozy Soft Pumpkin Snickerdoodle Cookies
Soft, tender pumpkin snickerdoodle cookies with a classic cinnamon-sugar coating that crackles when you bite in. Perfect for fall gatherings, these easy cookies come together in about 25 minutes with simple pantry ingredients.
- Prep Time: 15 minutes
- Cook Time: 10-12 minutes
- Total Time: 25 minutes
- Yield: 24 cookies 1x
- Category: Dessert
- Cuisine: American
Ingredients
- 1/2 cup (113g) unsalted butter, softened
- 1 cup (200g) granulated sugar
- 1/2 cup (100g) packed light brown sugar
- 3/4 cup (170g) canned pumpkin puree (not pumpkin pie filling)
- 1 large egg, room temperature
- 1 teaspoon vanilla extract
- 2 1/2 cups (312g) all-purpose flour
- 1 teaspoon cream of tartar
- 1/2 teaspoon baking soda
- 1/2 teaspoon salt
- 1 teaspoon ground cinnamon
- 1/2 teaspoon ground nutmeg
- 1/4 teaspoon ground ginger
- 1/4 teaspoon ground cloves
- 1/4 cup (50g) granulated sugar (for coating)
- 2 teaspoons ground cinnamon (for coating)
- Pinch of nutmeg (for coating, optional)
Instructions
- Preheat oven to 350°F (175°C). Line two baking sheets with parchment paper.
- In a large mixing bowl, beat softened butter, granulated sugar, and brown sugar together until light and fluffy, about 2-3 minutes with a hand mixer on medium speed. Scrape down sides of bowl.
- Beat in pumpkin puree, egg, and vanilla extract until well combined. Mixture may look slightly curdled.
- In a separate bowl, whisk together flour, cream of tartar, baking soda, salt, cinnamon, nutmeg, ginger, and cloves.
- Gradually add dry ingredients to wet mixture, mixing on low speed or folding with a spatula just until flour disappears. Dough will be soft and slightly sticky.
- In a small bowl, stir together 1/4 cup granulated sugar, 2 teaspoons cinnamon, and pinch of nutmeg for the coating.
- Using a cookie scoop or tablespoon, scoop rounded balls of dough (about 1.5 tablespoons each). Roll each ball between palms to smooth, then roll in cinnamon-sugar mixture until fully coated.
- Place coated dough balls on prepared baking sheets, spacing about 2 inches apart.
- Bake for 10-12 minutes, until edges are set and tops look slightly cracked. Centers will still be soft and puffy.
- Let cookies cool on baking sheet for 5 minutes, then transfer to a wire rack to cool completely.
Notes
For softer cookies, bake for 10 minutes. For firmer cookies, bake for 12 minutes. If pumpkin puree looks watery, blot with a paper towel before adding. Dough can be refrigerated for 10 minutes if too sticky. Cookies taste even better the next day as flavors meld.
Nutrition
- Serving Size: 1 cookie
- Calories: 145
- Sugar: 13
- Sodium: 95
- Fat: 6
- Saturated Fat: 3.5
- Carbohydrates: 22
- Fiber: 1
- Protein: 2
Keywords: pumpkin snickerdoodle cookies, soft pumpkin cookies, fall cookies, easy pumpkin recipe, snickerdoodle recipe, pumpkin dessert, cinnamon sugar cookies


