This was supposed to be a batch of classic Rice Krispie treats for my neighbor’s annual Halloween block party. I had the butter melting, the marshmallows ready, and then my phone rang—my sister, panicking about her costume. By the time I hung up, the marshmallows had gone from fluffy to a stiff, stretchy mess. I’d completely forgotten to add the cereal. I stood there, staring at this sticky, congealed blob, thinking I’d have to order pizza and show up empty-handed.
But I’m not great at admitting defeat. So I grabbed a bag of candy corn from my pantry—leftover from a decorating fail—and threw a handful into the pot. Then another handful. Then some yellow food coloring I found behind the baking soda. I poured in the Rice Krispies, crossed my fingers, and pressed it into the pan. Honestly, I expected a weird, sugary brick that nobody would touch.
What came out was nothing like the plan—and better. The candy corn melted into the marshmallow base, creating this incredible, creamy sweetness with little pockets of chewy candy. The colors layered into perfect Halloween stripes without me even trying. I cut them into triangles, arranged them on a platter, and brought them to the party feeling like a fraud. You know that feeling when you’re sure someone’s about to call you out?
Well, the platter was empty in twenty minutes. Three people asked for the recipe. My neighbor’s kid said they were “better than the real candy.” And I stood there, holding an empty plate, realizing that my distracted, messy mistake had accidentally become the hit of the party. I’ve made them every Halloween since—and for Thanksgiving, Christmas, and random Tuesday game nights. They’re just that good. Let me tell you, there’s something quietly vindicating about a kitchen disaster that turns into your most-requested recipe.
Why You’ll Love This Recipe
These Easy Candy Corn Rice Krispie Treats aren’t just another dessert—they’re the kind of thing that makes you look like a party-planning genius with almost zero effort. I’ve tested this recipe about a dozen times across different gatherings, and it never fails to get that “wait, these are homemade?” reaction.
- Quick & Easy: From start to finish, you’re looking at about 15 minutes of active work. No baking, no complicated steps, no fancy equipment. Just a pot, a spatula, and a pan.
- Simple Ingredients: You need butter, marshmallows, Rice Krispies cereal, candy corn, and a drop of food coloring. That’s it. No weird extracts or specialty store trips.
- Perfect for Parties: These are tailor-made for Halloween gatherings, fall potlucks, or any occasion where you want something festive without spending hours in the kitchen. They travel well, they’re easy to serve, and they look impressive on a platter.
- Crowd-Pleaser: Kids love the candy corn crunch, adults love the nostalgic Rice Krispie texture, and everyone loves that they’re not overly sweet—despite the candy. I’ve seen people grab three at a time.
- Unbelievably Delicious: The candy corn melts slightly into the marshmallow, creating these little pockets of creamy, chewy sweetness that you don’t get from regular Rice Krispie treats. It’s a texture and flavor upgrade you didn’t know you needed.
What makes this recipe different from every other version? It’s the way the candy corn integrates into the marshmallow base. Most recipes just sprinkle candy corn on top as decoration—but here, it becomes part of the treat itself. The colors naturally separate into orange, yellow, and white layers as you stir, giving you those perfect Halloween stripes without any fuss. I’ve had friends who “don’t like Rice Krispie treats” ask for seconds. That’s when you know you’ve got something special.
This is the recipe you make when you want to impress your guests without the stress. It’s comfort food with a festive twist—faster, easier, and more memorable than you’d expect. Honestly, it’s the kind of dessert that makes you close your eyes after the first bite, not because it’s fancy, but because it’s just so unexpectedly good.
Ingredients Needed
This recipe uses simple, everyday ingredients to deliver that perfect balance of crispy, chewy, and sweet. Most of these are probably already in your pantry—which is exactly what you want when you’re prepping for a party and don’t have time for a grocery run.
For the Base
- 3 tablespoons unsalted butter (salted butter works too, just skip the extra salt)
- 1 package (10 ounces) mini marshmallows (I prefer Jet-Puffed for consistent melting)
- 6 cups Rice Krispies cereal (or any crisp rice cereal—store brands work fine)
- 1/4 teaspoon vanilla extract (optional, but adds a nice warmth)
- Pinch of salt (balances the sweetness)
For the Candy Corn Twist
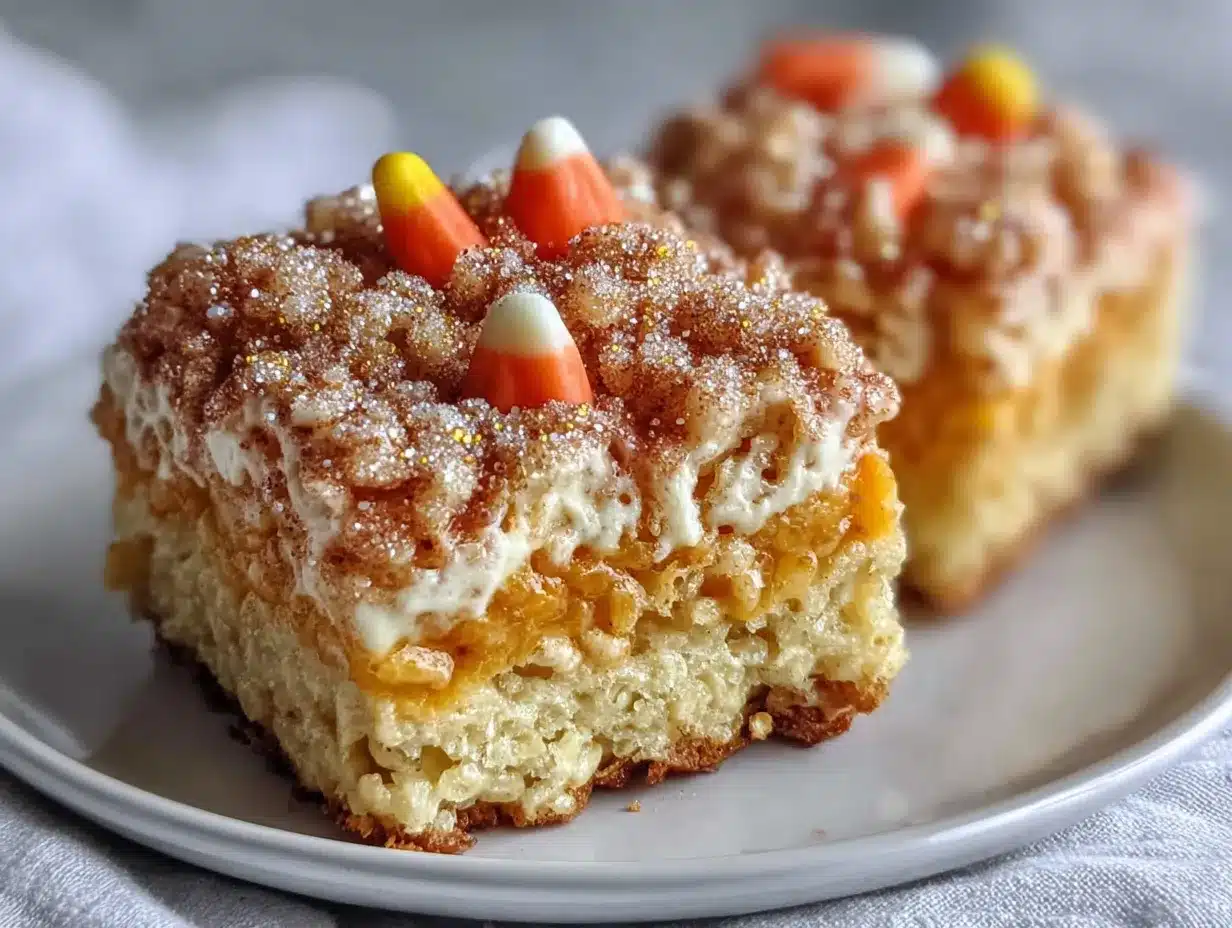
- 1 cup candy corn (about 6 ounces—Bracha’s is my go-to for that classic flavor)
- Yellow and orange food coloring (gel works best; liquid is fine if that’s what you have)
Ingredient Tips & Substitutions
Butter: Unsalted gives you more control over saltiness. If you only have salted, just skip the extra pinch of salt. I’ve used both and honestly can’t tell the difference in the final treat.
Marshmallows: Mini marshmallows melt faster and more evenly than the big ones. If all you have are jumbo marshmallows, cut them into quarters before melting. And please—don’t use stale marshmallows. They get weird and grainy. Fresh bag all the way.
Rice Krispies: The name brand gives that classic snap, but generic crisp rice cereal works perfectly fine. I’ve even used puffed brown rice cereal for a slightly nuttier flavor—it’s a nice twist if you’re feeling adventurous.
Candy Corn: This is the star of the show. Don’t use stale, hard candy corn—it won’t melt properly. Fresh candy corn should be soft and slightly chewy. If your bag feels rock hard, get a new one. I learned this the hard way when I ended up with crunchy, unpleasant bits in my treats.
Food Coloring: Gel food coloring gives you vibrant colors without thinning the marshmallow mixture. Liquid food coloring works, but you’ll need more drops, and it can make the treats slightly stickier. I use AmeriColor gel—one drop of yellow and one drop of orange is plenty.
Equipment Needed
- Large pot or Dutch oven (at least 5-quart—you need room to stir without making a mess)
- 9×13-inch baking pan (glass or metal both work; line it with parchment paper for easy removal)
- Silicone spatula (wooden spoon works, but the marshmallow sticks less to silicone)
- Parchment paper (or wax paper—parchment is less likely to stick)
- Measuring cups and spoons
- Sharp knife (for cutting clean squares)
- Small bowls (for separating colored mixtures)
You don’t need anything fancy here. I’ve made these in my mom’s old battered pot with a wooden spoon and they turned out great. The one thing I wouldn’t skip is the parchment paper—it makes lifting the whole block out of the pan so much easier. If you don’t have parchment, greasing the pan with butter works, but you’ll have to work harder to get the first piece out.
Preparation Method
Total time: 20 minutes | Active time: 15 minutes | Yields: 24 treats
- Prep your pan. Line a 9×13-inch baking pan with parchment paper, leaving a few inches of overhang on two sides. Lightly grease the parchment with butter or non-stick spray. This makes lifting the treats out a breeze—trust me, you don’t want to be scraping marshmallow off the pan.
- Melt the butter. Place your large pot over medium-low heat. Add the 3 tablespoons of unsalted butter and let it melt slowly. Don’t rush this—high heat can burn the butter, and burnt butter will ruin the whole batch. I once tried to speed this up and ended up with a smoky kitchen and dark, bitter treats. Not fun.
- Add the marshmallows. Once the butter is fully melted, pour in the entire 10-ounce bag of mini marshmallows. Stir constantly with your silicone spatula until the marshmallows are about 75% melted. You want some small lumps remaining—they’ll continue melting when you add the cereal. Remove the pot from heat.
- Stir in vanilla and salt. Add the 1/4 teaspoon vanilla extract and pinch of salt. Stir until combined. The mixture should be smooth, glossy, and slightly stretchy when you lift the spatula.
- Divide the mixture. This is where the magic happens. Pour about one-third of the marshmallow mixture into a separate bowl and set aside. Keep the remaining two-thirds in the pot.
- Color the first batch. To the larger portion in the pot, add 1 drop of yellow food coloring and 1 drop of orange food coloring. Stir vigorously until the color is evenly distributed. You’re aiming for a warm, pumpkin-orange shade. If it looks too pale, add another tiny drop—but go slow. You can always add more, but you can’t take it out.
- Add cereal to orange mixture. Pour 4 cups of Rice Krispies cereal into the orange-tinted marshmallow mixture. Fold gently until the cereal is evenly coated. Don’t overmix or the cereal will get crushed. Work quickly—the mixture sets fast.
- Press the orange layer. Transfer the orange cereal mixture into your prepared pan. Using a piece of parchment paper or a greased spatula, press it into an even layer. Don’t press too hard—you want the treats to stay light and airy, not dense and hard.
- Color the remaining mixture. Take the reserved one-third of plain marshmallow mixture and add 1 drop of yellow food coloring. Stir until you get a bright, sunny yellow. If you want a more intense yellow, add half a drop more—but honestly, a soft yellow looks more natural and appetizing.
- Add cereal to yellow mixture. Pour the remaining 2 cups of Rice Krispies into the yellow marshmallow mixture. Fold gently to combine.
- Add the candy corn. Sprinkle 1 cup of candy corn over the yellow cereal mixture and fold a few times to distribute. You want the candy corn scattered throughout, not all clumped together.
- Press the yellow layer. Spoon the yellow candy corn mixture over the orange layer in the pan. Gently press it into an even layer using your parchment paper or spatula. Don’t press too firmly—you want the layers to stay distinct.
- Cool and set. Let the treats cool at room temperature for at least 30 minutes. Don’t rush this by putting them in the fridge—they’ll get too hard and lose that perfect chewy texture. Patience, my friend.
- Cut and serve. Once fully set, lift the entire block out using the parchment overhang. Place on a cutting board and use a sharp knife to cut into squares or triangles. For Halloween parties, I cut them into triangles to look like candy corn pieces—it’s a fun visual that always gets a laugh.
Cooking Tips & Techniques
I’ve made these treats more times than I care to count, and I’ve picked up a few tricks along the way. Here’s what I wish someone had told me the first time.
Low heat is your friend. I cannot stress this enough. Medium-low heat for melting butter and marshmallows gives you a smooth, consistent base. High heat will scorch the marshmallows and leave you with a grainy, burnt mess. I learned this when I was rushing to make a batch before guests arrived—the marshmallows turned brown and bitter, and I had to start over. Not my finest moment.
Work fast but don’t panic. The marshmallow mixture starts setting the moment you add the cereal. You have about 2-3 minutes to get everything mixed and pressed into the pan. Have all your ingredients measured and ready before you start. I keep my cereal measured in a bowl and my candy corn in a cup so I can just dump and stir.
Grease your hands. If you need to press the mixture down and the parchment paper isn’t cutting it, lightly grease your hands with butter or cooking spray. The marshmallow won’t stick, and you can press firmly without making a mess. Just don’t forget to wash your hands first—I’ve had to explain that one to my kids more than once.
Check your candy corn freshness. Stale candy corn is hard and doesn’t melt properly. If your candy corn cracks when you bend it, it’s too old. Fresh candy corn should bend slightly before breaking. I buy mine no more than a week before I plan to use them.
Don’t overmix the cereal. Folding the cereal in gently keeps the treats light and crispy. If you stir too aggressively, you’ll crush the cereal and end up with dense, hard treats. Think of it like folding whipped cream into a batter—gentle, sweeping motions.
Let them cool completely. I know it’s tempting to cut into them right away, but warm treats are sticky and fall apart. Give them a full 30 minutes at room temperature. The texture improves dramatically—they become chewy but firm, with that satisfying snap when you bite into them.
Variations & Adaptations
One of the best things about this recipe is how easily it adapts. Here are some variations I’ve tried and loved.
Chocolate Drizzle: After the treats have cooled, melt 1/2 cup of semi-sweet chocolate chips with 1 teaspoon of coconut oil and drizzle over the top. The chocolate adds a rich contrast to the sweet candy corn. I did this for a Thanksgiving party and the platter was empty in ten minutes.
Peanut Butter Swirl: Melt 1/4 cup of creamy peanut butter with the butter and marshmallows. It adds a savory, nutty depth that balances the sweetness. My husband, who claims he doesn’t like candy corn, ate half the batch before I could stop him.
Spiced Autumn Version: Add 1/2 teaspoon of pumpkin pie spice to the marshmallow mixture along with the vanilla. The cinnamon, nutmeg, and ginger flavors pair beautifully with the candy corn. This is my go-to for fall gatherings—it feels cozy and seasonal without being overwhelming.
Gluten-Free Option: Rice Krispies are naturally gluten-free, but check the label to make sure your brand is certified gluten-free if that’s a concern. The rest of the ingredients are naturally gluten-free, so this recipe works for most dietary needs without any substitutions.
Vegan Adaptation: Use vegan butter and vegan marshmallows (Dandies brand works great). The texture is slightly different—a bit denser—but the flavor is still fantastic. I made these for a vegan friend’s Halloween party and got requests for the recipe from non-vegans too.
Halloween Shapes: Instead of cutting squares, use Halloween-themed cookie cutters—pumpkins, ghosts, bats. Press the mixture into a larger pan, let it set, then cut out shapes. You’ll have some scraps, but the shapes are adorable on a party platter.
Serving & Storage Suggestions
Serving: These treats are best served at room temperature. Arrange them on a festive platter—I like using a black or orange plate for Halloween—and watch them disappear. For parties, I cut them into small squares (about 2 inches) so guests can grab one easily without committing to a huge dessert.
What to serve alongside: These pair wonderfully with warm apple cider, hot chocolate, or a pumpkin spice latte. For a dessert spread, I put them next to caramel apples and pumpkin cookies—the combination of textures and flavors is always a hit. If you’re doing a candy-themed party, set them out with bowls of popcorn balls and chocolate-covered pretzels.
Storage: Store leftover treats in an airtight container at room temperature. They’ll stay fresh for up to 5 days—if they last that long. I’ve kept them for a week and they were still soft and chewy, though the candy corn does get slightly harder over time.
Freezing: These treats freeze beautifully. Wrap individual squares in plastic wrap, then place them in a freezer-safe bag. They’ll keep for up to 3 months. To thaw, just leave them at room temperature for about 30 minutes. The texture remains surprisingly good—I’ve pulled these out for last-minute guests more times than I can count.
Reheating: If your treats have gotten a bit stale or hard, pop one in the microwave for 5-7 seconds. It softens the marshmallow and brings back that fresh-made texture. Just don’t overdo it—10 seconds and they’ll turn into a puddle.
Flavor development: Honestly, these treats taste even better the next day. The flavors meld together overnight, and the candy corn softens into the marshmallow base. If you’re making them for a party, I recommend preparing them the day before. Your future self will thank you.
Nutritional Information & Benefits
Let’s be real—these are a treat, not a health food. But here’s the breakdown if you’re curious.
Per serving (1 square, based on 24 servings):
- Calories: 145
- Total Fat: 3g
- Saturated Fat: 2g
- Carbohydrates: 30g
- Sugar: 18g
- Protein: 1g
- Sodium: 95mg
Health highlights: The butter provides a small amount of vitamin A, and the Rice Krispies are fortified with iron and B vitamins. The candy corn? Well, it’s mostly sugar—but it brings joy, and that counts for something, right?
Dietary considerations: This recipe is naturally nut-free (check your candy corn label to be sure), egg-free, and can be made vegan and gluten-free with simple substitutions. It’s not low-carb or keto-friendly, but for an occasional party treat, it’s a crowd-pleaser that accommodates many dietary needs.
My perspective: I believe in balance. These treats are for celebrations—Halloween, birthday parties, game nights. They’re not an everyday snack, and that’s okay. When you’re hosting and want something that brings people together, a little sugar is perfectly fine. I’d rather serve these than a sad, “healthy” dessert that nobody actually enjoys.
Conclusion
These Easy Candy Corn Rice Krispie Treats are proof that sometimes the best recipes come from the biggest mistakes. What started as a distracted, panicked kitchen failure turned into my most-requested party dessert—and I think that’s pretty beautiful.
I love this recipe because it’s forgiving. You can mess up the timing, forget an ingredient, and still end up with something that makes people smile. It’s the kind of dessert that doesn’t take itself too seriously, which is exactly what you want when you’re hosting a gathering. Your guests don’t need a perfect, complicated dessert—they need something delicious that feels special without the stress.
So go ahead and make these for your next party. Customize them with chocolate, peanut butter, or fall spices. Cut them into triangles or use cookie cutters. Serve them with cider and watch your guests light up. And if something goes wrong along the way? That’s okay. Sometimes the happy accidents are the ones worth sharing.
I’d love to hear how yours turn out! Drop a comment below and tell me your favorite variation, or share a photo of your treats on social media. Don’t forget to pin this recipe for later—your future party-hosting self will be so glad you did. Happy cooking, friend!
Frequently Asked Questions
Can I use regular-sized marshmallows instead of mini marshmallows?
Yes, but cut them into smaller pieces first so they melt evenly. Mini marshmallows are preferred because they melt faster and more consistently. If using jumbo marshmallows, quarter them before adding to the butter.
Why did my treats turn out hard and dense?
You likely pressed the mixture too firmly into the pan or overheated the marshmallows. Press gently—just enough to create an even layer. Overheating the marshmallows can also cause them to become hard as they cool. Keep the heat on low and remove the pot from the burner as soon as the marshmallows are mostly melted.
Can I make these treats ahead of time for a party?
Absolutely! In fact, they taste even better the next day. Make them up to 2 days in advance and store them in an airtight container at room temperature. If you’re making them more than 2 days ahead, freeze them instead.
My candy corn didn’t melt—what went wrong?
Your candy corn was probably stale. Fresh candy corn should be soft and slightly pliable. If it’s hard and cracks when you bend it, it won’t melt properly. Always check the freshness before using. Also, make sure you add the candy corn to the warm marshmallow mixture immediately—if the mixture has started cooling, the candy corn won’t incorporate as well.
Can I use other candies instead of candy corn?
Yes! Try chopped candy pumpkins, M&M’s, or even Reese’s Pieces for a different flavor profile. Keep in mind that different candies melt differently—harder candies won’t soften as much. If you’re using chocolate candies, add them after the mixture has cooled slightly to prevent them from melting completely.
Pin This Recipe!
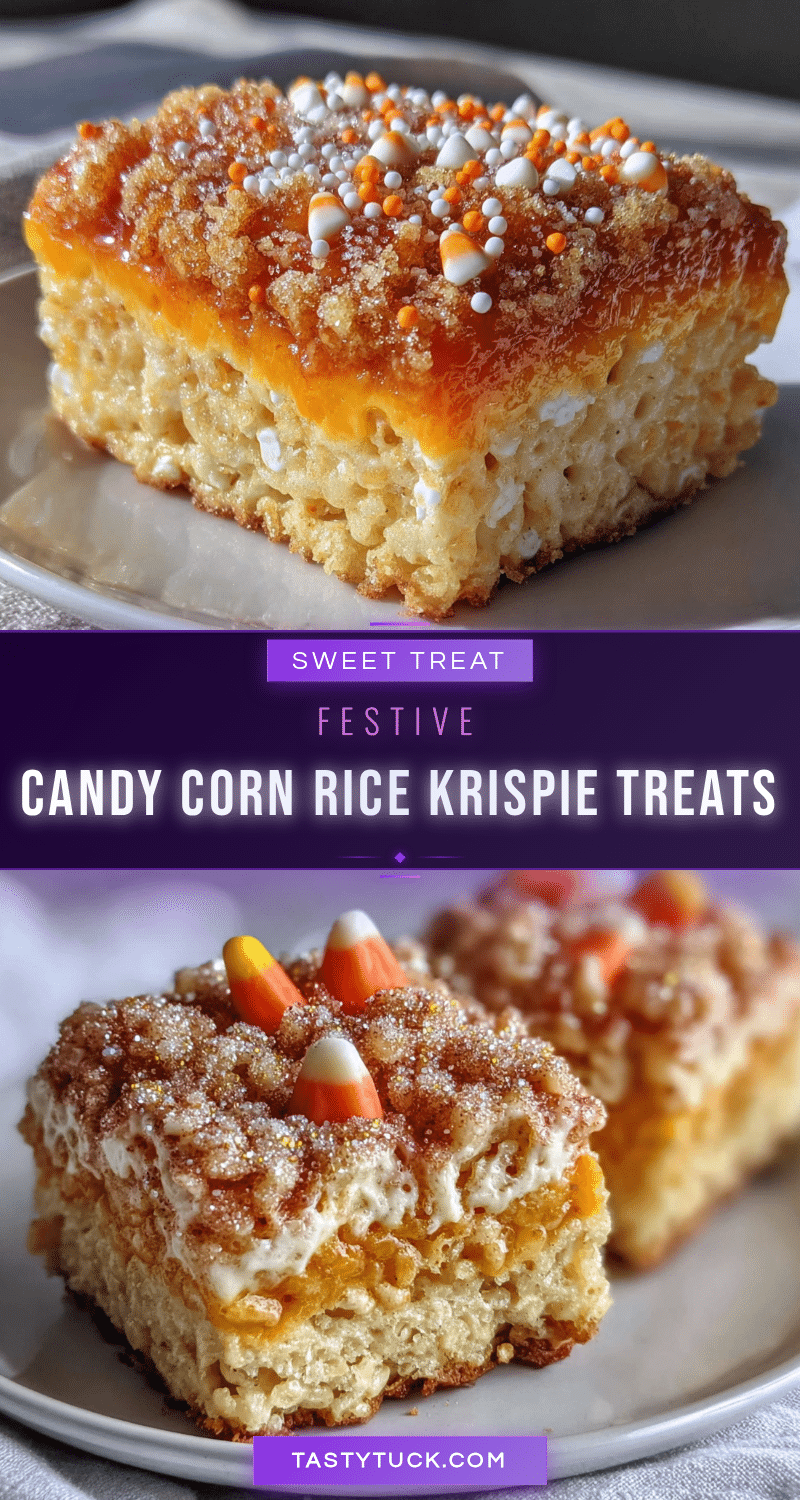
Easy Candy Corn Rice Krispie Treats: Best Party Dessert
These Easy Candy Corn Rice Krispie Treats are a festive, no-bake dessert perfect for Halloween parties. With a creamy marshmallow base, colorful layers, and pockets of chewy candy corn, they’re a crowd-pleasing twist on a classic treat.
- Prep Time: 15 minutes
- Cook Time: 5 minutes
- Total Time: 20 minutes
- Yield: 24 treats 1x
- Category: Dessert
- Cuisine: American
Ingredients
- 3 tablespoons unsalted butter
- 1 package (10 ounces) mini marshmallows
- 6 cups Rice Krispies cereal
- 1/4 teaspoon vanilla extract
- Pinch of salt
- 1 cup candy corn (about 6 ounces)
- Yellow and orange food coloring (gel preferred)
Instructions
- Line a 9×13-inch baking pan with parchment paper, leaving overhang on two sides. Lightly grease with butter or non-stick spray.
- Place a large pot over medium-low heat. Melt 3 tablespoons unsalted butter slowly.
- Add the entire 10-ounce bag of mini marshmallows. Stir constantly until about 75% melted. Remove from heat.
- Stir in 1/4 teaspoon vanilla extract and a pinch of salt until smooth and glossy.
- Pour about one-third of the marshmallow mixture into a separate bowl and set aside. Keep the remaining two-thirds in the pot.
- To the larger portion in the pot, add 1 drop yellow and 1 drop orange food coloring. Stir until evenly distributed (warm pumpkin-orange shade).
- Pour 4 cups Rice Krispies cereal into the orange-tinted mixture. Fold gently until evenly coated.
- Transfer the orange cereal mixture into the prepared pan. Press into an even layer using parchment paper or a greased spatula. Do not press too hard.
- To the reserved one-third of plain marshmallow mixture, add 1 drop yellow food coloring. Stir until bright yellow.
- Pour the remaining 2 cups Rice Krispies into the yellow mixture. Fold gently to combine.
- Sprinkle 1 cup candy corn over the yellow cereal mixture and fold a few times to distribute.
- Spoon the yellow candy corn mixture over the orange layer in the pan. Gently press into an even layer.
- Let the treats cool at room temperature for at least 30 minutes.
- Once set, lift the block out using parchment overhang. Cut into squares or triangles with a sharp knife.
Notes
Use fresh, soft candy corn for best melting. Work quickly once cereal is added. Let treats cool completely before cutting. For Halloween, cut into triangles to resemble candy corn. Store in an airtight container at room temperature for up to 5 days. Freeze for up to 3 months.
Nutrition
- Serving Size: 1 square
- Calories: 145
- Sugar: 18
- Sodium: 95
- Fat: 3
- Saturated Fat: 2
- Carbohydrates: 30
- Protein: 1
Keywords: candy corn, Rice Krispie treats, Halloween dessert, no-bake, party dessert, easy dessert


