My sister swore she hated Halloween baking. For years. “Too much fuss,” she’d say, waving a hand at my piping bags and themed sprinkles. “All that cutting and rolling for cookies that get eaten in two seconds.” I believed her, honestly. She was the queen of no-fuss dinners, the kind of person who’d rather roast a whole chicken than assemble a complicated casserole. So when I showed up at her place last October with a pan of these Easy Halloween Sugar Cookie Bars with Orange Frosting, I fully expected a polite “thanks” and maybe a crumb or two eaten out of obligation.
But then I caught her. It was a Tuesday night, around nine o’clock. I’d left the pan on her counter with a note, and I swung back by to grab my Tupperware. The kitchen light was on, and there she was—standing at the counter in her pajamas, cutting herself a second square. A second one. She didn’t even hear me come in. She just stood there, licking orange frosting off her finger, looking guilty and delighted all at once. “It’s not a cookie,” she mumbled, almost defensively. “It’s a bar. That’s different.” And you know what? She was right. It is different. It’s everything you love about a soft, buttery sugar cookie, but without the rolling pin, the chilling time, or the stress of perfectly even circles. You just press the dough into a pan, bake, frost, and sprinkle. That’s it. I’ve been making these for years now, and honestly, they’ve become my secret weapon for every Halloween party, classroom treat, and lazy October afternoon. They’re the recipe that proves you don’t need to be a pastry chef to make something that looks (and tastes) like you spent hours on it.
Why You’ll Love This Recipe
Let me tell you why these Easy Halloween Sugar Cookie Bars with Orange Frosting have become my most-requested fall recipe. I’ve tested this dough at least a dozen times—once with melted butter (too greasy), once with all-purpose flour only (a bit dense), and finally landed on this version that’s just… perfect. It’s the kind of recipe that makes you look like a baking hero with almost zero effort.
- Quick & Easy: From start to finish, you’re looking at about 30 minutes of active time. No chilling, no rolling, no cookie cutters. Just mix, press, and bake.
- Simple Ingredients: You probably have everything in your pantry right now. Butter, sugar, eggs, flour, baking powder, and a little orange extract. No weird specialty items.
- Perfect for Halloween Parties: These bars are sturdy enough to transport, easy to cut into squares, and the orange frosting makes them instantly festive. Great for potlucks, classroom celebrations, or a spooky movie night.
- Crowd-Pleaser: I’ve brought these to gatherings where half the people claimed they “don’t do sweets,” and they still disappeared. The soft, chewy texture is addictive.
- Unbelievably Delicious: The combination of a tender, buttery cookie base with a tangy, citrusy orange frosting is next-level. It’s not just a sugar cookie—it’s a sugar cookie that tastes like a creamsicle in bar form.
What makes this recipe different from every other sugar cookie bar out there? It’s the texture, honestly. I use a combination of butter and a tiny bit of cream cheese in the dough. It sounds weird, I know, but it gives the bars this incredible softness that stays for days. And the frosting? It’s not just colored orange for the holiday—it actually tastes like real oranges, thanks to a mix of fresh zest and a touch of orange extract. This isn’t just another Halloween dessert; it’s the one that makes people close their eyes after the first bite and say, “Okay, I get it now.”
What Ingredients You Will Need
This recipe uses simple, wholesome ingredients to deliver that classic sugar cookie flavor with a bright, citrusy twist. Most of these are pantry staples, which is exactly what you want for a last-minute Halloween treat.
For the Cookie Bars
- 1 cup (226g) unsalted butter, softened — I always use unsalted so I can control the salt level. Let it sit out for about an hour before starting.
- 4 oz (113g) cream cheese, softened — This is my secret ingredient for extra-soft bars. It sounds odd, but trust me on this one.
- 1 ½ cups (300g) granulated sugar — Regular white sugar gives the bars that classic sweet cookie flavor.
- 2 large eggs, room temperature — Cold eggs can seize up your butter mixture. If you forgot to set them out, place them in a bowl of warm water for 5 minutes.
- 2 teaspoons vanilla extract — Pure vanilla is best, but imitation works in a pinch.
- 3 cups (375g) all-purpose flour — Spoon and level your flour; don’t scoop directly from the bag or you’ll end up with dense bars.
- 1 teaspoon baking powder — Make sure it’s fresh. If it doesn’t fizz when you drop a bit in water, toss it.
- ½ teaspoon salt — Just fine table salt. It balances the sweetness.
For the Orange Frosting
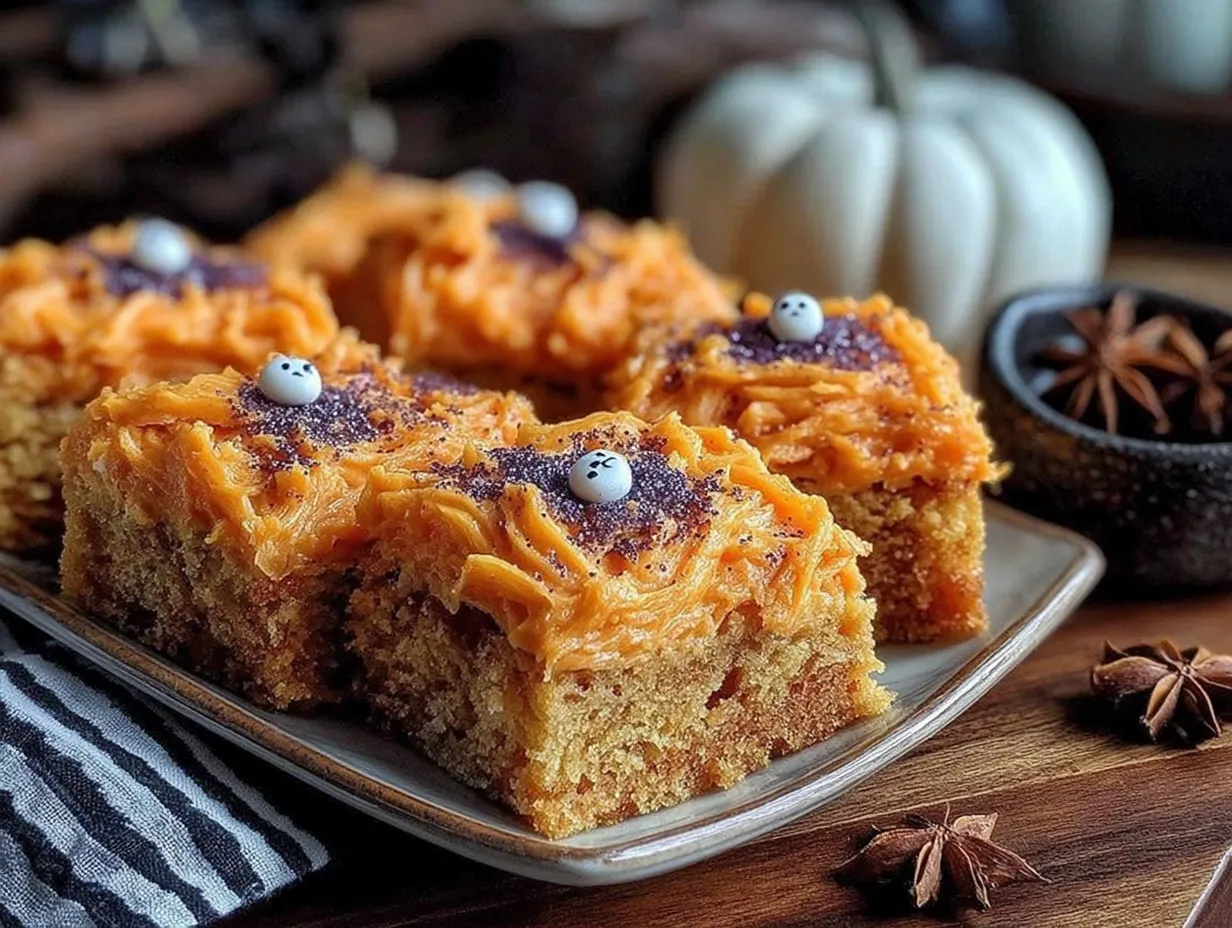
- ½ cup (113g) unsalted butter, softened — Again, room temperature is key for a smooth, creamy frosting.
- 3 cups (360g) powdered sugar — Sift it if you want an extra-smooth texture, but I’m usually too impatient.
- 2 tablespoons fresh orange juice — From about half a large orange. Fresh makes a huge difference here.
- 1 tablespoon orange zest — Zest the orange before you juice it. It’s a pain to zest a squishy orange.
- ½ teaspoon orange extract — This boosts the orange flavor without making the frosting too thin. I recommend the brand McCormick for consistent quality.
- Pinch of salt — Just a tiny one, to cut the sweetness.
- Orange food coloring (optional) — I use gel coloring for a vibrant shade. A few drops of yellow with a drop of red also works if you don’t have orange.
- Halloween sprinkles — For topping. Go wild with ghosts, pumpkins, or just classic orange and black jimmies.
Equipment Needed
You don’t need a fancy bakery setup for these Easy Halloween Sugar Cookie Bars with Orange Frosting. Here’s what you’ll want to have on hand:
- 9×13-inch baking pan — This is the standard size. If you use an 8×8 pan, your bars will be much thicker and need longer baking time.
- Electric hand mixer or stand mixer — You can mix the dough by hand with a wooden spoon, but it’s a workout. A mixer makes it effortless.
- Mixing bowls — One large, one medium.
- Rubber spatula — For scraping down the bowl and spreading the dough.
- Parchment paper — Lining the pan with parchment makes lifting the bars out a breeze. I’ve used foil in a pinch, but parchment is better.
- Cooling rack — Lets the bars cool evenly so the frosting doesn’t melt into a puddle.
- Offset spatula or butter knife — For spreading the frosting. An offset spatula gives you that smooth, bakery-style finish.
- Zester or microplane — For getting that fresh orange zest. A box grater works too, but a microplane is easier.
If you don’t have a 9×13 pan, you can use a half-sheet pan (about 13×18 inches), but your bars will be much thinner. Just reduce the baking time to about 12-15 minutes and keep an eye on them.
Preparation Method
Alright, let’s get baking. I’ve made these Easy Halloween Sugar Cookie Bars with Orange Frosting about twenty times now, so I’ve got the process down to a science. Follow these steps, and you’ll have a pan of perfect bars every time.
- Preheat your oven to 350°F (175°C). Line your 9×13-inch baking pan with parchment paper, leaving a little overhang on the long sides. This creates “handles” for lifting the bars out later. Lightly grease the parchment with non-stick spray.
- Cream the butter and cream cheese. In a large mixing bowl, beat the softened butter and cream cheese together on medium speed until smooth and fluffy, about 2 minutes. Scrape down the sides of the bowl with your spatula. This step is important—if the cream cheese is lumpy, your dough will be lumpy.
- Add the sugar and beat. Add the granulated sugar and beat on medium-high for another 2-3 minutes, until the mixture looks light and almost like a thick paste. It should be pale yellow and fluffy.
- Add the eggs and vanilla. Crack in the eggs one at a time, beating well after each addition. Add the vanilla extract and beat until combined. The mixture might look a little curdled at this point—don’t panic, that’s normal. It’ll come together when you add the flour.
- Whisk the dry ingredients. In a separate medium bowl, whisk together the flour, baking powder, and salt. This ensures the baking powder is evenly distributed. If you skip this step, you might end up with a pocket of baking powder in one bite—trust me, it’s not pleasant.
- Combine wet and dry. Gradually add the flour mixture to the butter mixture, mixing on low speed. Add it in three additions, mixing just until the flour disappears after each one. Overmixing will make your bars tough. The dough will be thick and slightly sticky—that’s exactly what you want.
- Press the dough into the pan. Transfer the dough to your prepared pan. Use your hands or a rubber spatula to press it into an even layer. Here’s a trick: lightly wet your fingers with water, and the dough won’t stick to you. Make sure it reaches all the corners evenly.
- Bake for 18-22 minutes. Place the pan in the preheated oven. Bake until the edges are lightly golden and the center looks set—it shouldn’t jiggle when you gently shake the pan. A toothpick inserted into the center should come out with a few moist crumbs, not wet batter. My oven runs hot, so I always check at 18 minutes. If the edges are browning too fast, tent the pan loosely with foil.
- Cool completely. This is the hardest part. Let the bars cool in the pan on a wire rack for at least 1 hour. Don’t rush this. If you frost them while they’re warm, the frosting will melt into a sticky mess. I’ve learned this the hard way, twice.
- Make the frosting. While the bars are cooling, make the frosting. In a medium bowl, beat the softened butter on medium speed until creamy, about 1 minute. Gradually add the powdered sugar, one cup at a time, beating on low speed. Add the orange juice, orange zest, orange extract, and a pinch of salt. Beat on medium-high for 2-3 minutes until light and fluffy. If the frosting is too thick, add another teaspoon of orange juice. If it’s too thin, add a little more powdered sugar. Add a drop or two of orange food coloring if desired, and beat until the color is even.
- Frost and decorate. Once the bars are completely cool, use your offset spatula to spread the frosting evenly over the top. Don’t worry about making it perfect—a rustic, swirly look is charming. Immediately sprinkle with Halloween sprinkles while the frosting is still soft, so they stick.
- Cut and serve. Use the parchment handles to lift the entire block of bars out of the pan. Place it on a cutting board. Use a sharp knife to cut into squares. I usually do 24 bars (4 rows by 6 rows), but you can cut them larger or smaller depending on your crowd. For clean cuts, wipe the knife clean between each slice.
Cooking Tips & Techniques
After making these Easy Halloween Sugar Cookie Bars with Orange Frosting more times than I can count, I’ve picked up a few tricks that make a real difference. Let me share the ones that saved my bacon more than once.
Don’t overbake. This is the number one mistake people make with cookie bars. They look underdone when they’re actually perfect. The edges should be just barely golden, and the center should look slightly soft. They’ll continue to set as they cool. Overbaked bars are dry and crumbly, and nobody wants that.
Use room temperature ingredients. I know, I know, everyone says this. But it really matters here. Cold cream cheese won’t cream properly with the butter, leaving you with lumpy dough. Cold eggs can cause the butter mixture to seize up. Set everything out 30-60 minutes before you start. I put my eggs in a bowl of warm water for 5 minutes if I forget.
Press the dough evenly. If your dough is thicker in the middle and thinner at the edges, the edges will burn before the center is done. Take an extra 30 seconds to really press it into an even layer. I use a small offset spatula or the bottom of a measuring cup to smooth it out.
Let the bars cool completely. I cannot stress this enough. I once frosted a pan of bars after only 30 minutes of cooling, thinking “it’ll be fine.” It was not fine. The frosting melted into a greasy, sugary puddle that slid right off the bars. Patience, my friend. Give them the full hour.
Zest before you juice. This is such a small thing, but it makes a big difference. Zesting a juicy, squishy orange is a nightmare. Always zest the orange first, then cut it and juice it. Your fingers will thank you.
My biggest failure? The time I accidentally used salted butter and added the full amount of salt. The bars were so salty they were almost inedible. I salvaged them by making a double batch of frosting (unsalted, obviously) and spreading it on thick. The extra sweetness balanced the salt, and honestly? They were still pretty good. Lesson learned: always taste your dough before baking. Just a tiny pinch.
Variations & Adaptations
One of the best things about this recipe is how easy it is to tweak. Here are some variations I’ve tried and loved:
Gluten-Free Version: Swap the all-purpose flour for a 1:1 gluten-free baking flour blend. I’ve had good luck with King Arthur Measure for Measure. The texture will be slightly more tender, but still delicious. Add an extra tablespoon of flour if the dough seems too sticky.
Dairy-Free Version: Use vegan butter sticks (not the spreadable kind in a tub) and a dairy-free cream cheese alternative. Miyoko’s and Violife work well. The texture might be a tiny bit less tender, but the flavor is still spot on.
Lemon Frosting Variation: Replace the orange juice, zest, and extract with lemon juice, lemon zest, and a teaspoon of lemon extract. It gives these bars a bright, tart flavor that’s perfect for spring or summer. I’ve made these for Easter and they were a hit.
Chocolate Chip Version: Fold in 1 cup of mini chocolate chips into the dough before pressing it into the pan. The chocolate pairs beautifully with the orange frosting—it’s like a chocolate orange creamsicle bar. Use mini chips so they distribute evenly without sinking to the bottom.
Spooky Swirl Version: Reserve about ¼ cup of the dough. Mix it with a few drops of black food coloring. Drop small pieces of the black dough on top of the plain dough before baking, and swirl it gently with a knife. It creates a marbled effect that looks super Halloween-y even before the frosting goes on.
No-Frosting Option: If you’re short on time or just not in a frosting mood, these bars are still fantastic on their own. Before baking, press a few extra Halloween sprinkles into the top of the dough. Bake as directed, and you’ve got a simpler, less messy treat.
Serving & Storage Suggestions
These Easy Halloween Sugar Cookie Bars with Orange Frosting are best served at room temperature. The texture is soft and tender, and the frosting is perfectly creamy. I like to cut them into squares and arrange them on a platter with a few extra sprinkles scattered around for visual appeal.
For a Halloween party, pair them with a glass of cold milk or a warm mug of apple cider. They also go great with a scoop of vanilla ice cream—the cold creaminess against the soft cookie bar is a dream. If you’re serving them at a kids’ party, set out a bowl of extra sprinkles and let the kids decorate their own squares. It’s messy, but it’s fun.
Storage: Store the bars in an airtight container at room temperature for up to 4 days. Place a sheet of wax paper between layers if you need to stack them, to prevent the frosting from sticking. Do not refrigerate them—the fridge will dry out the bars and make the frosting hard and grainy.
Freezing: These bars freeze beautifully. Freeze the unfrosted bars in a single layer on a baking sheet until solid, then wrap them tightly in plastic wrap and place them in a freezer bag. They’ll keep for up to 3 months. When you’re ready to serve, thaw them at room temperature, then make the frosting and decorate. Alternatively, you can freeze the frosted bars in a single layer in an airtight container for up to 1 month. Thaw in the refrigerator overnight, then bring to room temperature before serving.
Flavor development: Honestly, these bars taste even better the day after you make them. The flavors meld together, and the texture softens just a little more. So if you can, make them a day ahead. Your future self will thank you.
Nutritional Information & Benefits
Let’s be real: these are a treat, not a health food. But I’ve made a few tweaks over the years to make them a little more balanced without sacrificing flavor.
Estimated nutritional values per bar (based on 24 servings):
| Nutrient | Amount |
|---|---|
| Calories | 245 |
| Total Fat | 12g |
| Saturated Fat | 7g |
| Cholesterol | 45mg |
| Sodium | 95mg |
| Total Carbohydrates | 33g |
| Sugars | 22g |
| Protein | 3g |
Health benefits: Okay, so these aren’t exactly a superfood. But the cream cheese adds a small amount of calcium and protein. The orange zest provides a tiny dose of vitamin C and antioxidants. And honestly? The mental health benefit of enjoying a delicious homemade treat with people you love is real. I’m not a nutritionist, but I believe that food made with care is good for the soul.
Dietary considerations: This recipe contains gluten, dairy, and eggs. For a gluten-free version, see the variations section above. For a dairy-free version, use vegan butter and dairy-free cream cheese. I haven’t tested an egg-free version, but a flax egg (1 tablespoon ground flaxseed mixed with 3 tablespoons water) might work in a pinch.
Conclusion
These Easy Halloween Sugar Cookie Bars with Orange Frosting are the kind of recipe that makes you wonder why you ever bothered with cut-out cookies. They’re soft, they’re buttery, they’re topped with a tangy, citrusy frosting that’s absolutely addictive, and they come together in a fraction of the time. Honestly, they’ve become my go-to for every fall gathering, from pumpkin carving nights to Halloween parties to just a quiet afternoon when I want something sweet.
I love that this recipe is forgiving enough for a beginner baker but impressive enough to serve to company. I love that I can make it ahead of time and not stress about last-minute decorating. But mostly, I love the look on someone’s face when they take that first bite and realize that a simple bar cookie can taste this good.
So go ahead—make a batch. Customize the frosting color to match your party theme, pile on the sprinkles, and don’t be afraid to cut yourself a corner piece (those are the best ones, with the extra frosting). And when you do, come back and tell me about it. Leave a comment below, share a photo on Pinterest, or tag me on Instagram. I’d love to see how yours turn out. Happy Halloween, and happy baking!
Frequently Asked Questions
Can I use store-bought frosting instead of making my own?
You can, but I really don’t recommend it. Homemade orange frosting is what makes these bars special. Store-bought frosting is too thick and sweet, and it won’t have that fresh citrus flavor. If you’re in a real pinch, buy a can of vanilla frosting and stir in some orange zest and a splash of orange extract. It won’t be the same, but it’ll be better than plain.
Why did my cookie bars turn out dry?
Most likely, you overbaked them. Cookie bars continue to cook from the residual heat of the pan even after you take them out of the oven. Pull them out when the center still looks slightly underdone. Another possibility: you measured your flour incorrectly. Spoon the flour into your measuring cup and level it off with a knife. Scooping directly from the bag packs in too much flour, which leads to dry, dense bars.
Can I make these bars ahead of time?
Absolutely. In fact, I prefer to make them a day ahead. The bars stay soft and the flavors meld together beautifully. Bake and cool the bars, then cover the pan tightly with foil and store at room temperature. Make the frosting and decorate the next day. If you’ve already frosted them, they’ll keep in an airtight container at room temperature for up to 4 days.
Can I freeze these cookie bars?
Yes! Freeze the unfrosted bars for best results. Cool them completely, then wrap the entire block (still in the pan) in plastic wrap, then foil. Freeze for up to 3 months. Thaw at room temperature, then frost and decorate. You can also freeze frosted bars in a single layer in an airtight container for up to 1 month.
How do I get clean cuts without the frosting smearing?
Use a sharp chef’s knife, not a butter knife. Wipe the blade clean with a damp paper towel between each cut. For the cleanest cuts, you can chill the frosted bars in the refrigerator for about 15 minutes before slicing. The frosting will be slightly firmer and less likely to smear. Just remember to let them come back to room temperature before serving for the best texture.
Pin This Recipe!
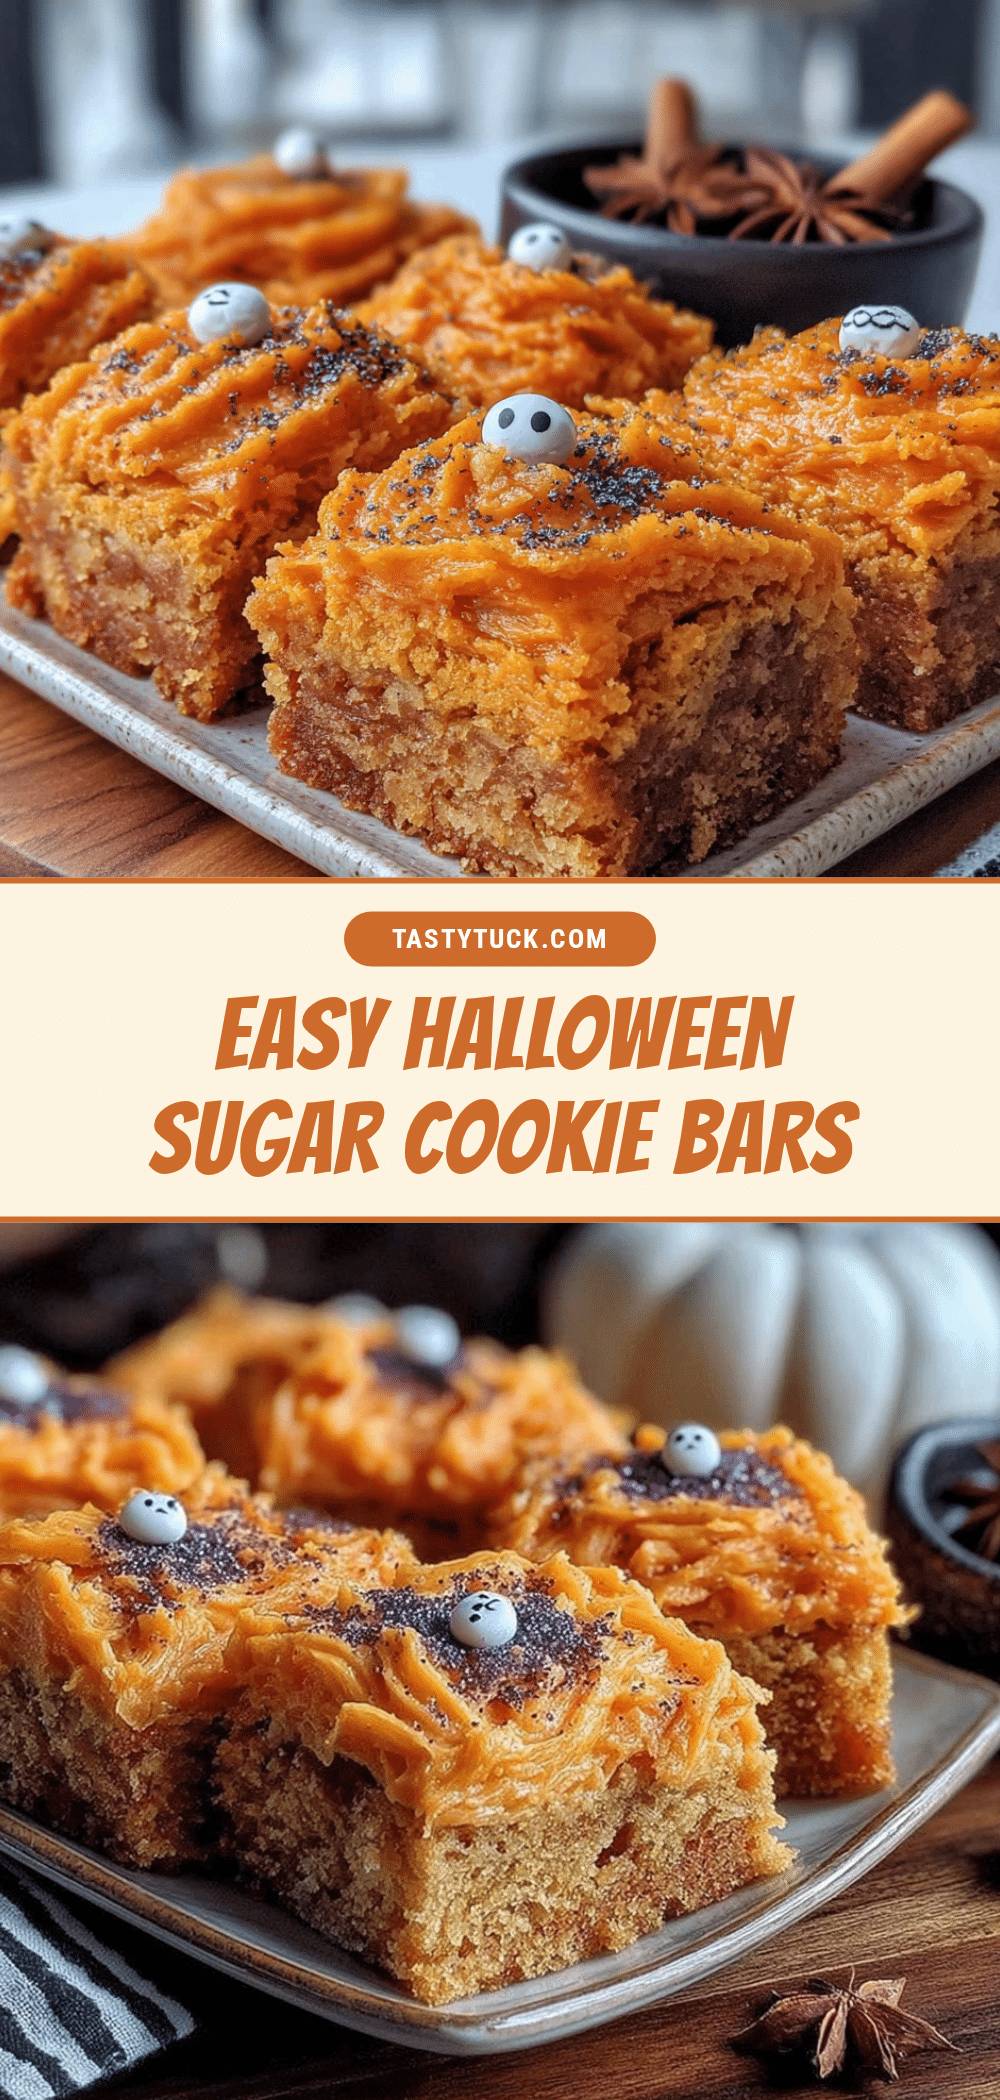
Easy Halloween Sugar Cookie Bars with Orange Frosting
Soft, buttery sugar cookie bars topped with a tangy orange frosting, perfect for Halloween parties and easy enough for beginner bakers.
- Prep Time: 30 minutes
- Cook Time: 20 minutes
- Total Time: 1 hour 50 minutes
- Yield: 24 servings 1x
- Category: Dessert
- Cuisine: American
Ingredients
- 1 cup (226g) unsalted butter, softened
- 4 oz (113g) cream cheese, softened
- 1 ½ cups (300g) granulated sugar
- 2 large eggs, room temperature
- 2 teaspoons vanilla extract
- 3 cups (375g) all-purpose flour
- 1 teaspoon baking powder
- ½ teaspoon salt
- ½ cup (113g) unsalted butter, softened (for frosting)
- 3 cups (360g) powdered sugar
- 2 tablespoons fresh orange juice
- 1 tablespoon orange zest
- ½ teaspoon orange extract
- Pinch of salt
- Orange food coloring (optional)
- Halloween sprinkles
Instructions
- Preheat your oven to 350°F (175°C). Line a 9×13-inch baking pan with parchment paper, leaving overhang on the long sides. Lightly grease the parchment.
- In a large mixing bowl, beat the softened butter and cream cheese together on medium speed until smooth and fluffy, about 2 minutes.
- Add the granulated sugar and beat on medium-high for 2-3 minutes until light and fluffy.
- Add the eggs one at a time, beating well after each addition. Add the vanilla extract and beat until combined.
- In a separate medium bowl, whisk together the flour, baking powder, and salt.
- Gradually add the flour mixture to the butter mixture, mixing on low speed in three additions, just until combined. The dough will be thick and slightly sticky.
- Transfer the dough to the prepared pan and press it into an even layer using your hands or a rubber spatula.
- Bake for 18-22 minutes, until the edges are lightly golden and the center is set. Cool completely in the pan on a wire rack for at least 1 hour.
- While the bars cool, make the frosting: In a medium bowl, beat the softened butter on medium speed until creamy. Gradually add the powdered sugar, then add the orange juice, orange zest, orange extract, and a pinch of salt. Beat on medium-high for 2-3 minutes until light and fluffy. Add food coloring if desired.
- Once the bars are completely cool, spread the frosting evenly over the top. Immediately sprinkle with Halloween sprinkles.
- Use the parchment handles to lift the bars out of the pan. Cut into squares and serve.
Notes
Don’t overbake; bars continue to set as they cool. Use room temperature ingredients for best results. Let bars cool completely before frosting to prevent melting. For clean cuts, wipe knife between slices.
Nutrition
- Serving Size: 1 bar
- Calories: 245
- Sugar: 22
- Sodium: 95
- Fat: 12
- Saturated Fat: 7
- Carbohydrates: 33
- Protein: 3
Keywords: Halloween, sugar cookie bars, orange frosting, easy, fall, party dessert


